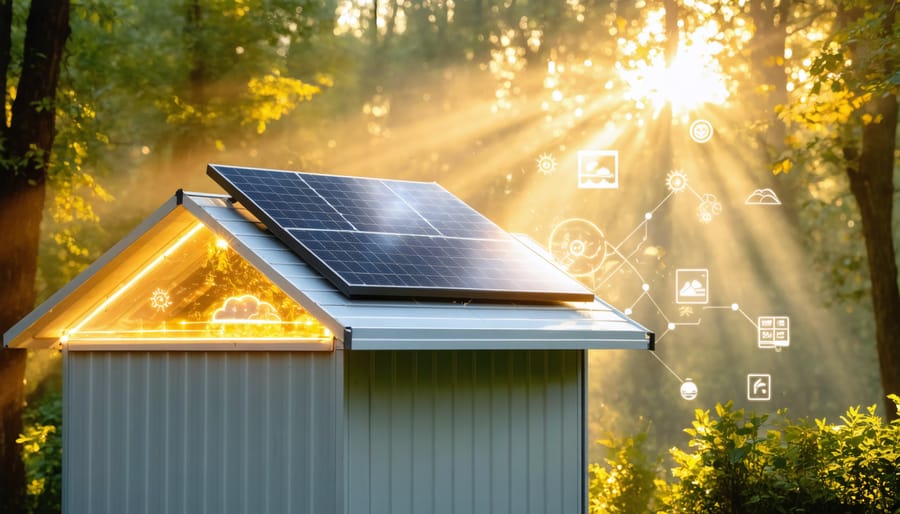
Transform your shed’s environment with a solar-powered vent fan – the smart solution that tackles excess heat, moisture, and air quality without adding a penny to your energy bill. This ingenious device harnesses the sun’s power precisely when you need it most, automatically expelling hot air during peak daylight hours while maintaining optimal airflow to protect your stored belongings. Whether you’re safeguarding valuable tools, preventing mold growth, or creating a more comfortable workspace, a solar vent fan offers year-round protection while demonstrating your commitment to sustainable home improvement. Recent studies show that proper ventilation can reduce internal shed temperatures by up to 15 degrees Fahrenheit and significantly decrease moisture-related damage, making these solar-powered units a practical investment for any shed owner. The best part? With no wiring required and straightforward installation options, you can upgrade your shed’s ventilation system in just a few hours, creating a healthier storage environment that works silently and efficiently for years to come.

Proper ventilation through solar vent fans plays a crucial role in climate control in storage sheds, protecting both your stored items and creating a more comfortable environment. During hot summer months, excessive heat can damage sensitive equipment, warp wood, and create uncomfortable working conditions. High temperatures combined with humidity can lead to mold growth, rust on tools, and deterioration of stored materials like garden chemicals or paint.
A solar-powered vent fan helps maintain optimal temperature levels by continuously exchanging hot air for cooler outside air. This natural circulation prevents heat buildup and reduces moisture accumulation, which is especially important for protecting power tools, electronics, and wooden furniture. Many shed owners report that installing a solar vent fan has helped maintain temperatures up to 15-20 degrees cooler than outside air, making their storage space more functional year-round. Additionally, regulated temperatures help preserve the structural integrity of the shed itself, potentially extending its lifespan and protecting your investment.
Proper airflow is crucial in preventing moisture-related problems that can wreak havoc in your shed. When warm, humid air becomes trapped, it creates the perfect environment for mold growth and rust formation on your valuable tools and equipment. A solar vent fan works continuously during daylight hours to maintain healthy air circulation, effectively reducing humidity levels and preventing condensation from forming on walls and surfaces.
By creating a consistent flow of fresh air, these fans help regulate temperature and moisture levels, protecting your stored items from damage. The constant exchange of stale, humid air with fresh, dry air helps maintain a balanced environment that discourages mold spores from taking hold and prevents metal tools from developing rust spots. This proactive approach to moisture control can significantly extend the life of both your shed structure and its contents, saving you money on repairs and replacement costs in the long run.
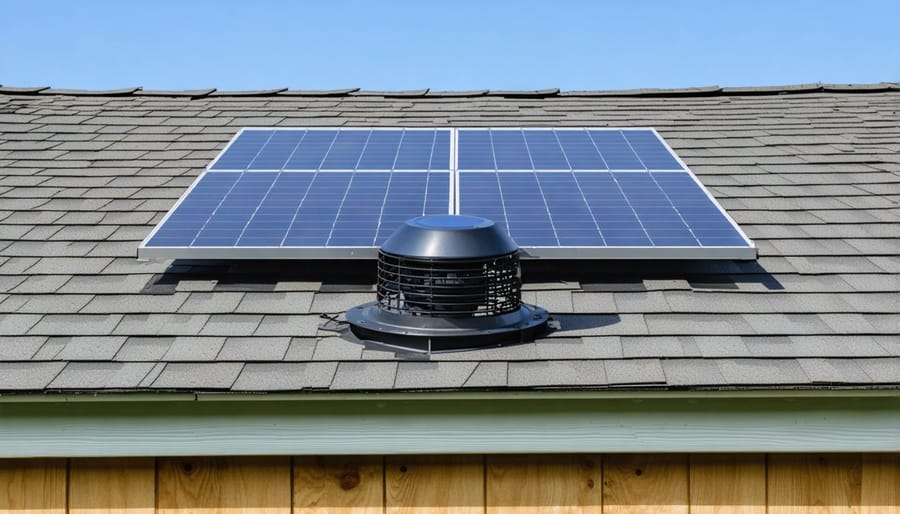
The heart of any solar-powered solutions for sheds lies in their solar panel components. A typical shed solar vent fan system includes a compact photovoltaic panel, usually ranging from 10 to 30 watts, designed to capture sunlight efficiently even in partly cloudy conditions. These panels are built with durable, weather-resistant materials, typically featuring tempered glass covering that protects the silicon cells underneath.
The panel connects to the fan through a simple wiring system that includes a voltage regulator to ensure steady power flow. Most modern units come with built-in rechargeable batteries, allowing the fan to continue operating during cloudy periods or after sunset. The battery storage capacity usually provides 24-48 hours of operation without direct sunlight.
For maximum efficiency, these panels are designed with an optimal tilt angle that helps capture the most sunlight throughout the day. Many models include adjustable mounting brackets, letting you position the panel to face south and adjust the angle seasonally for best performance. The compact size of these panels, typically around 12×12 inches, makes them unobtrusive while still providing sufficient power for reliable ventilation.
Solar vent fans operate through a simple yet effective system that harnesses the sun’s energy to keep your shed cool and dry. When sunlight hits the solar panel mounted on your shed’s roof, it converts this energy into electricity to power the fan motor. The fan then draws warm, humid air from inside your shed and expels it outside, creating a natural circulation that brings in fresher air through lower vents.
Most solar shed fans begin operating automatically when there’s sufficient sunlight, typically around mid-morning, and continue until sunset. This timing actually works perfectly, as peak temperatures usually occur during daylight hours when the fan is most active. On particularly sunny days, the fan runs at maximum efficiency, providing more powerful ventilation when it’s needed most.
The system works without any batteries in basic models, though some advanced units include battery backup for operation during cloudy periods or at night. Many modern solar vent fans also feature adjustable thermostats or humidity sensors, automatically adjusting fan speed based on your shed’s conditions. This smart operation ensures optimal ventilation while maximizing energy efficiency.
To install your shed solar vent fan, you’ll need the following tools and materials:
Essential Tools:
– Drill with various drill bits
– Screwdriver set (Phillips and flathead)
– Measuring tape
– Pencil for marking
– Utility knife
– Safety glasses
– Work gloves
– Ladder or sturdy step stool
Required Materials:
– Solar-powered vent fan kit (includes fan, solar panel, and mounting hardware)
– Weatherproof sealant or caulk
– Roofing screws
– Wire clips or cable ties (if needed for wire management)
– Plywood or shims (for creating a level mounting surface if needed)
– Vent cover or rain guard (if not included in kit)
Optional but Recommended:
– Level
– Wire strippers
– Dust mask
– Additional weatherstripping
Make sure to check your fan kit’s manual, as specific requirements may vary by manufacturer.
Installing a solar vent fan in your shed is a straightforward process that most DIY enthusiasts can complete in about an hour. Begin by choosing the ideal location for your fan, typically near the peak of your shed’s roof where hot air naturally collects. Ensure this spot receives adequate sunlight throughout the day for optimal performance.
Start by marking your installation spot and drilling a pilot hole from inside the shed. Using your hole saw, carefully cut the required opening according to your fan’s specifications. Clean the edges of the cut and remove any debris. If your shed has shingles, gently lift them around the installation area and apply roofing sealant around the hole.
Next, place the fan unit from the outside, ensuring the solar panel faces south for maximum sun exposure. Most units come with pre-drilled mounting holes – use these to secure the fan to your shed’s roof with weather-resistant screws. Apply additional weatherproof sealant around the edges of the mounting bracket to prevent water infiltration.
From inside the shed, install the interior grille if your model includes one. Double-check that all connections are secure and that the fan spins freely. Test the unit by temporarily covering the solar panel – the fan should stop when covered and restart when exposed to light.
Finally, clean up any excess sealant and ensure all lifted shingles are properly repositioned and secured. Your solar vent fan should now be ready to help maintain optimal air circulation in your shed.
Proper positioning of your solar vent fan is crucial for optimal performance. Install the fan on the south-facing side of your shed’s roof whenever possible, as this location receives the most direct sunlight throughout the day. Place the fan near the roof peak or ridge line, where hot air naturally collects. For maximum airflow, position intake vents low on the opposite wall to create a natural cross-ventilation effect.
If your shed has multiple rooms or divided spaces, center the fan above the area that generates the most heat or moisture. Avoid installing the fan under trees or overhanging structures that could block sunlight. For gable-style sheds, consider mounting the fan on the gable end instead of the roof for easier installation and maintenance. Remember to account for your local climate – in particularly hot regions, you might benefit from installing two fans for enhanced ventilation.
To keep your shed solar vent fan running efficiently, follow a simple quarterly cleaning schedule. Start by gently wiping the solar panel with a soft, damp cloth to remove dust, pollen, and bird droppings. Avoid using harsh chemicals or abrasive materials that could scratch the panel’s surface.
Inside the shed, carefully dust the fan blades and housing using a long-handled duster or soft brush. For stubborn dirt, use a slightly damp microfiber cloth. Pay special attention to the corners where debris tends to accumulate. Check that the fan spins freely and listen for any unusual noises that might indicate a problem.
During winter months, clear any snow or ice from the solar panel to maintain optimal performance. If your area experiences heavy leaf fall, consider checking the fan more frequently during autumn to prevent leaf buildup. A well-maintained solar vent fan can provide years of reliable service with minimal effort.
Remember to inspect the seals and mounting hardware during each cleaning session to ensure everything remains secure and weathertight.
Even the best solar vent fans can encounter occasional issues, but most are easily resolved. If your fan isn’t spinning, first check for debris blocking the blades or motor. A gentle cleaning with a soft brush often solves this problem. When the fan runs slowly or inconsistently, ensure the solar panel is free from dirt, leaves, or bird droppings that might block sunlight. Also, verify the panel faces the optimal direction for maximum sun exposure.
If the fan stops working on partly cloudy days, you might need to adjust the panel angle or consider a model with a backup battery. Strange noises typically indicate loose mounting hardware or misaligned components – tighten all screws and ensure proper installation. For fans with humidity sensors, incorrect readings usually mean the sensor needs cleaning or recalibration.
Remember that most solar vent fans have a lifespan of 5-10 years. If problems persist after basic troubleshooting, it might be time for a replacement or professional assessment.
Installing a solar vent fan in your shed is one of the smartest energy-efficient shed improvements you can make to protect your valuable belongings and create a more comfortable space. These innovative devices offer a perfect blend of sustainability and practicality, working tirelessly to maintain optimal conditions in your storage space without adding to your energy bills.
By harnessing free solar power and requiring minimal maintenance, these fans provide year-round benefits that far outweigh their initial investment. They effectively combat moisture build-up, prevent mold growth, and regulate temperature – all while operating completely independently of your home’s power supply.
Whether you’re storing garden tools, workshop equipment, or seasonal items, a solar vent fan helps create the ideal environment to preserve your investments. The installation process is straightforward, making it an achievable weekend project for most homeowners. Take this simple step toward improving your shed’s longevity and functionality, and enjoy the peace of mind that comes with knowing your storage space is properly ventilated through an eco-friendly solution.