


Make Your Shed Last Forever: Proven Plywood Waterproofing Methods That Work
Transform ordinary plywood into a weather-resistant powerhouse by applying marine-grade sealant with a foam roller, ensuring complete coverage of all edges and joints. Prevent rot and extend your outdoor project’s lifespan by pre-treating the wood with copper naphthenate, particularly crucial when you need to keep water out of your shed. Double your protection by combining a penetrating epoxy sealer with exterior paint, creating a moisture-blocking barrier that maintains the wood’s natural flexibility. Professional builders trust this three-step approach because it delivers superior waterproofing while remaining cost-effective for DIY enthusiasts.
By properly waterproofing your plywood, you’re not just protecting wood – you’re safeguarding your investment and ensuring years of reliable outdoor performance. Whether you’re building a storage shed, outdoor furniture, or any exposed wooden structure, these proven techniques provide commercial-grade protection against rain, snow, and ground moisture. The key lies in thorough preparation and using the right combination of products, transforming vulnerable plywood into a weather-resistant material that stands up to years of outdoor exposure.
Why Standard Plywood Isn’t Enough for Your Shed
Signs Your Shed’s Plywood Needs Waterproofing
Don’t wait until water damage becomes severe before taking action. Being proactive with your shed’s maintenance and implementing proper weatherproofing techniques can save you significant repair costs down the line. Here are clear signs your shed’s plywood needs immediate waterproofing attention:
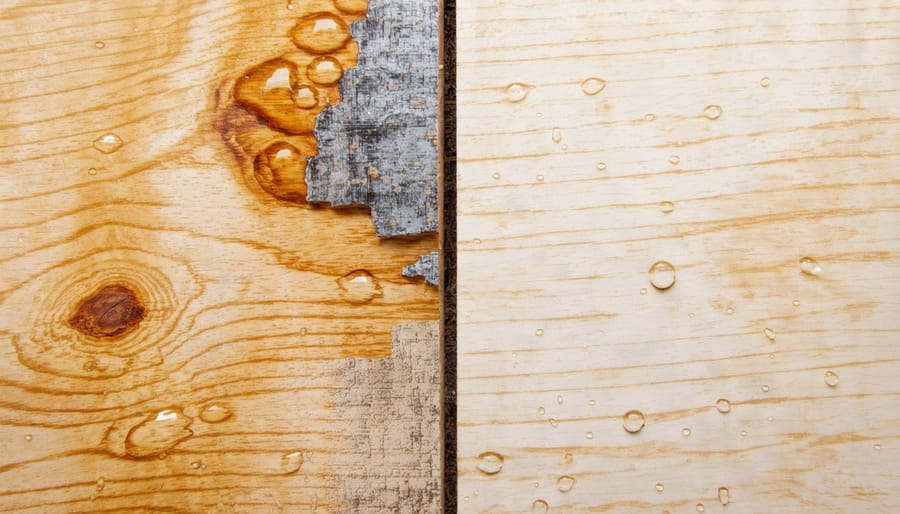
Look for dark spots or discoloration on your plywood surfaces, especially near joints and corners. These areas often indicate moisture absorption and potential rot. Watch out for a musty smell inside your shed – this typically signals the presence of mold or mildew. If you notice the plywood feeling soft or spongy when pressed, that’s a red flag for water damage.
Check your shed’s exterior after rainfall. If water doesn’t bead up and roll off the surface, your current waterproofing has likely worn off. Pay special attention to areas where different materials meet, such as around windows or door frames, as these spots are particularly vulnerable to water infiltration.
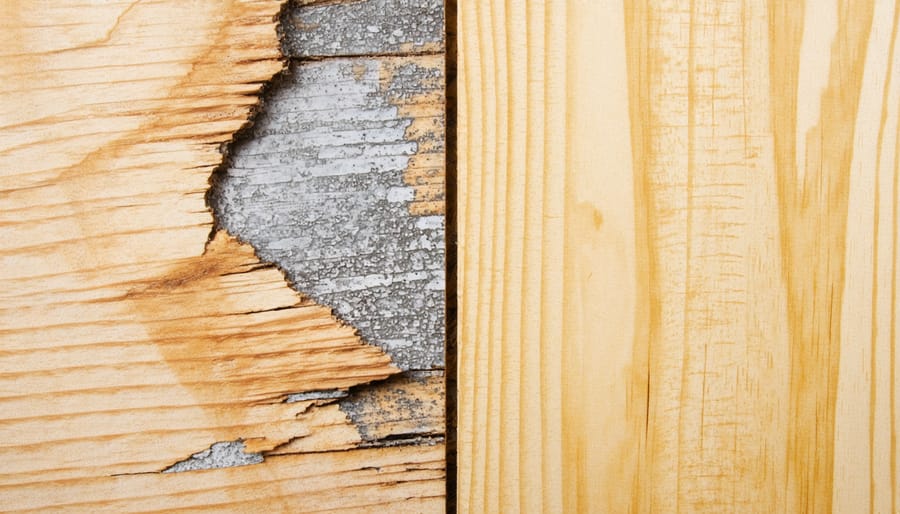
Take immediate action if you spot warping, splitting, or delamination of the plywood sheets. These signs indicate advanced moisture damage that requires prompt attention to prevent further deterioration.
Preparing Your Plywood for Waterproofing
Surface Cleaning and Repair
Before applying any waterproofing treatment, proper surface preparation is essential for long-lasting results. Start by thoroughly cleaning the plywood surface using a stiff brush to remove dirt, debris, and loose wood fibers. For stubborn stains or mold, use a mixture of warm water and mild detergent, scrubbing gently to avoid damaging the wood.
If your plywood has minor damage, address these issues immediately. Fill small holes and cracks with exterior-grade wood filler, making sure to smooth it level with the surface. For larger damaged areas, you might need to cut out and replace the affected section with new plywood. Sand down any rough spots or splinters using medium-grit sandpaper, followed by fine-grit for a smooth finish.
Look for signs of rot, especially around edges and joints. If you find soft, discolored areas, remove all compromised wood until you reach solid material. Let the plywood dry completely before proceeding with repairs or waterproofing – moisture trapped inside the wood can lead to future problems. A moisture meter can help ensure the wood is adequately dry, ideally showing a reading below 15%.
Creating the Perfect Working Environment
Before starting your waterproofing project, it’s essential to create the right working environment. Choose a dry, calm day with temperatures between 50-80°F (10-27°C) and humidity levels below 65%. Just as you’d want ideal conditions for your shed, you need optimal conditions for waterproofing. Work in a well-ventilated area, preferably outdoors or in a spacious garage with doors open. Avoid working in direct sunlight, as this can cause the waterproofing product to dry too quickly. Clear your workspace of debris and dust, and ensure you have enough room to move freely around your plywood pieces. Having good lighting is crucial for spotting any missed spots or imperfections during application.
Best Waterproofing Methods for Shed Plywood
Sealants and Coatings
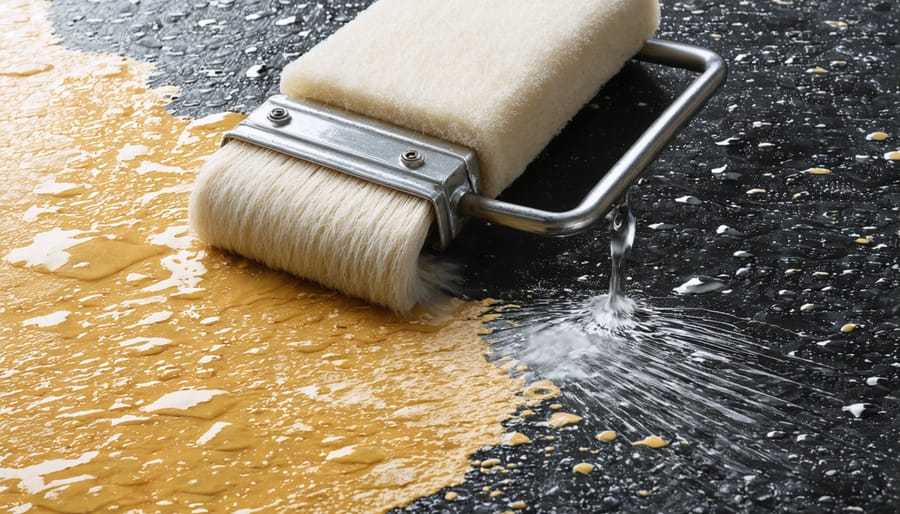
When it comes to protecting your plywood from moisture, choosing the right sealant or coating is crucial. For outdoor structures like sheds, marine-grade polyurethane is a top choice, offering excellent water resistance and UV protection. Apply it in thin, even coats using a foam brush or roller, allowing each layer to dry completely before adding the next.
Epoxy-based sealants provide outstanding water resistance and durability, making them perfect for areas exposed to heavy rainfall. While slightly more expensive, their long-lasting protection makes them a worthwhile investment for your outdoor projects.
Oil-based exterior primers and paints offer another effective solution. Start with a quality primer specifically designed for exterior wood, followed by two coats of exterior paint. This combination not only waterproofs but also allows you to customize the look of your structure.
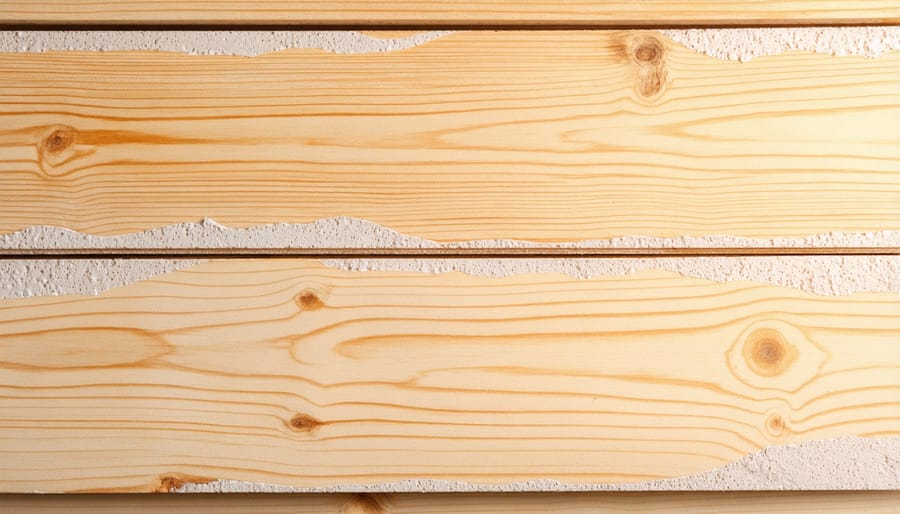
For a more natural approach, penetrating wood sealers soak deep into the plywood, creating a protective barrier while maintaining the wood’s natural appearance. These are particularly good for visible exterior walls where you want to showcase the wood grain.
Remember to pay special attention to edges and joints, as these areas are most vulnerable to water penetration. Apply extra coats to these spots, and consider using specialized edge sealers for maximum protection. Whichever product you choose, always follow the manufacturer’s instructions for best results and optimal protection.
Application Techniques
To effectively waterproof your plywood, follow these straightforward steps. First, ensure you’re working in a well-ventilated area on a dry, mild day. Begin by applying a thin, even coat of marine-grade sealant using a roller or brush, working in the direction of the wood grain. Pay special attention to the edges and any cut areas, as these are most vulnerable to water damage.
Allow the first coat to dry completely according to the manufacturer’s instructions (typically 2-4 hours). Lightly sand the surface with fine-grit sandpaper, then wipe away any dust with a clean, dry cloth. Apply a second coat, ensuring complete coverage and watching for any missed spots or thin areas.
For maximum protection, consider applying a third coat after the second has dried. Don’t forget to treat both sides of the plywood and all edges. Once the final coat has dried, test the waterproofing by sprinkling water on the surface – it should bead up rather than soak in.
For optimal results, reapply the waterproofing treatment every 2-3 years or when you notice water starting to absorb into the wood rather than beading on the surface.
Maintaining Your Waterproofed Plywood
Regular maintenance of your waterproofed plywood is essential for extending its lifespan and protecting your investment. Start by inspecting the surface every six months for signs of wear, especially after severe weather. Look for peeling sealant, water stains, or any changes in the wood’s texture.
Keep the surface clean by gently washing it with mild soap and water twice a year. Avoid using pressure washers, as they can damage the waterproof coating. Remove any debris, leaves, or dirt that could trap moisture against the wood.
Maintaining proper ventilation is crucial to prevent moisture buildup, which can compromise even the best waterproofing treatment. If you notice any damage to the sealant, address it promptly by reapplying a thin coat to the affected area.
For optimal protection, plan to reapply your chosen waterproofing treatment every 2-3 years, or sooner if you live in an area with harsh weather conditions. Remember to sand lightly between applications for better adhesion. By following these simple maintenance steps, your waterproofed plywood can maintain its protective qualities for many years to come.
Protecting your plywood from water damage doesn’t have to be complicated. By following the proper preparation steps, choosing the right waterproofing products, and applying them correctly, you can significantly extend the life of your outdoor wooden structures. Remember to clean and sand your plywood thoroughly, apply multiple coats of waterproofing solution, and maintain regular inspections to catch any issues early. Whether you’re building a new shed or protecting existing structures, these waterproofing techniques will help safeguard your investment against moisture damage. Take action today to protect your plywood – a few hours of preparation and application now can save you considerable time and money in future repairs.