


Perfect Your Shed Foundation: Professional Waterproofing That Actually Works
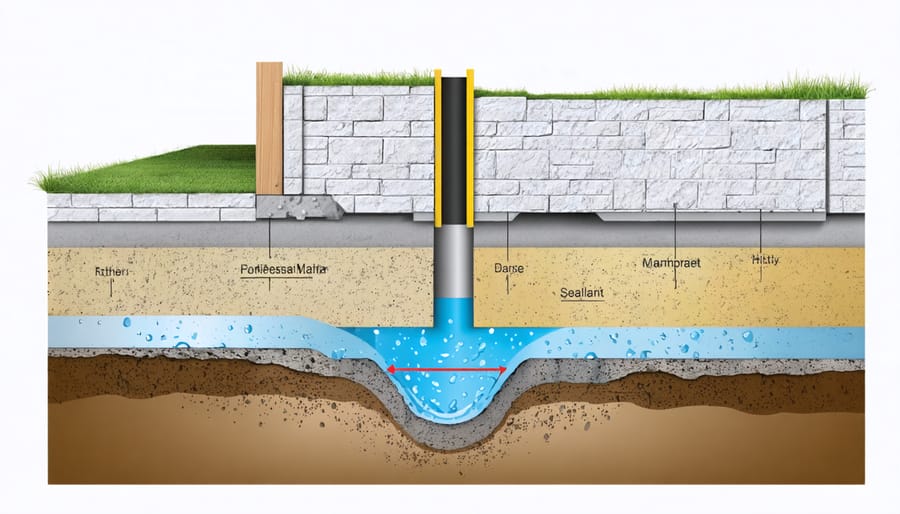
Waterproof your foundation correctly the first time to keep water out of your shed and protect your investment for decades. Foundation waterproofing requires precise attention to detail, starting with a properly graded surface and high-quality waterproofing membrane. Apply a continuous layer of waterproofing material from the footings to at least 6 inches above grade level, ensuring complete coverage of all joints, corners, and penetrations. Install a foundation drainage system with clean gravel and filter fabric to direct water away from the structure. Common oversights like improper membrane application or inadequate drainage can lead to costly repairs, making professional-grade materials and careful installation essential for long-term protection.
The right waterproofing approach combines multiple defensive layers – from proper site preparation to quality materials and careful installation techniques. This comprehensive system works together to create an impenetrable barrier against moisture intrusion while protecting your foundation from water damage, mold growth, and structural deterioration. Understanding these critical details helps ensure your waterproofing project succeeds from day one.
Essential Foundation Waterproofing Materials
Waterproof Membranes and Barriers
Several effective weather-resistant waterproofing techniques are available for protecting your shed’s foundation. Sheet membranes, which come in rolls of modified bitumen or rubberized asphalt, offer excellent protection against moisture. These flexible barriers adhere directly to the foundation surface, creating a seamless waterproof layer.
Liquid-applied membranes are another popular option, particularly for DIY applications. These brush-on or spray-on solutions form a rubber-like coating that’s perfect for irregular surfaces and tight corners. They’re especially effective for concrete foundations and can fill small cracks while providing complete coverage.
For added protection, dimpled drainage membranes create an air gap between the soil and foundation wall, allowing water to drain downward instead of pressing against the structure. These sturdy plastic sheets are easy to install and work well with other waterproofing systems.
Remember to choose membranes rated for below-grade use and consider your local climate conditions when selecting materials. The best systems often combine multiple barrier types for maximum effectiveness.
Sealants and Coatings
Selecting the right sealants and coatings is crucial for effective foundation waterproofing. For concrete foundations, elastomeric coatings provide excellent protection by creating a flexible, waterproof barrier that can bridge small cracks and adapt to temperature changes. These coatings come in both water-based and solvent-based options, with water-based varieties being more user-friendly and environmentally conscious.
Bituminous coatings, commonly known as foundation tar, offer robust protection against moisture and are particularly effective for below-grade applications. They create a thick, durable barrier that resists water penetration and soil chemicals. For added protection, consider polyurethane sealants for joints and corners, as they maintain flexibility while providing superior adhesion.
For optimal results, apply a primer before the main coating, especially on porous surfaces. This ensures better adhesion and longevity of the waterproofing system. Remember to choose products specifically rated for foundation use, as regular exterior sealants may not provide adequate protection against ground moisture and hydrostatic pressure. Always apply multiple thin coats rather than one thick layer for the best coverage and durability.
Step-by-Step Waterproofing Process
Surface Preparation
Proper surface preparation is crucial for effective foundation waterproofing. Start by thoroughly cleaning the foundation surface using a wire brush to remove loose debris, dirt, and any existing coatings. Pay special attention to corners and joints where debris tends to accumulate.
Next, inspect the entire surface for cracks, holes, or other damage. Mark these areas clearly with chalk or tape for easy reference. Fill any cracks larger than 1/8 inch with hydraulic cement, allowing it to cure completely according to the manufacturer’s instructions. For smaller cracks, use a quality concrete patching compound.
Use a pressure washer to clean the entire surface, working from top to bottom in overlapping stripes. This removes any remaining dirt and provides a clean canvas for waterproofing application. Allow the surface to dry completely – typically 24-48 hours, depending on weather conditions.
Check for any protruding concrete, nails, or other sharp objects that could damage the waterproofing membrane. Remove or grind these down flush with the surface. If there are any holes from form ties, fill these with hydraulic cement as well.
Finally, apply a primer if recommended by your waterproofing product manufacturer. This creates an optimal bonding surface and ensures maximum effectiveness of the waterproofing system. The surface should feel rough but be free from loose particles when you run your hand over it.
Membrane Application
The success of your foundation waterproofing largely depends on proper membrane application. Start by thoroughly cleaning the foundation surface, removing any debris, loose materials, or sharp protrusions that could damage the membrane. Fill any visible cracks or holes with hydraulic cement and allow it to cure completely.
Apply a primer coat using a roller or brush, ensuring even coverage across the entire surface. Let the primer dry according to the manufacturer’s instructions – usually about 30 minutes to an hour in favorable weather conditions. When working with self-adhering membranes, carefully peel back the protective backing while pressing the membrane firmly against the primed surface.
Work in manageable sections, smoothing out air bubbles as you go using a rubber roller or squeegee. Overlap seams by at least 6 inches, ensuring proper adhesion at these critical junctions. Pay special attention to corners and transitions, using pre-formed corner boots or cutting and folding the membrane to maintain continuous coverage.
For liquid-applied membranes, use a roller or sprayer to apply even coats, maintaining the recommended thickness. Multiple coats may be necessary – always allow each layer to dry completely before applying the next. Remember to extend the membrane at least 6 inches above grade level and terminate it properly with a termination bar or approved sealant to prevent water infiltration from above.
Sealing and Protection
The final stage of foundation waterproofing involves carefully sealing and protecting your waterproofing system to ensure long-lasting performance. Start by inspecting all seams and joints in your waterproofing membrane, applying additional sealant to any potential weak points. Pay special attention to areas where pipes or utilities penetrate the foundation, using appropriate flashing and waterproof sealants designed specifically for these transitions.
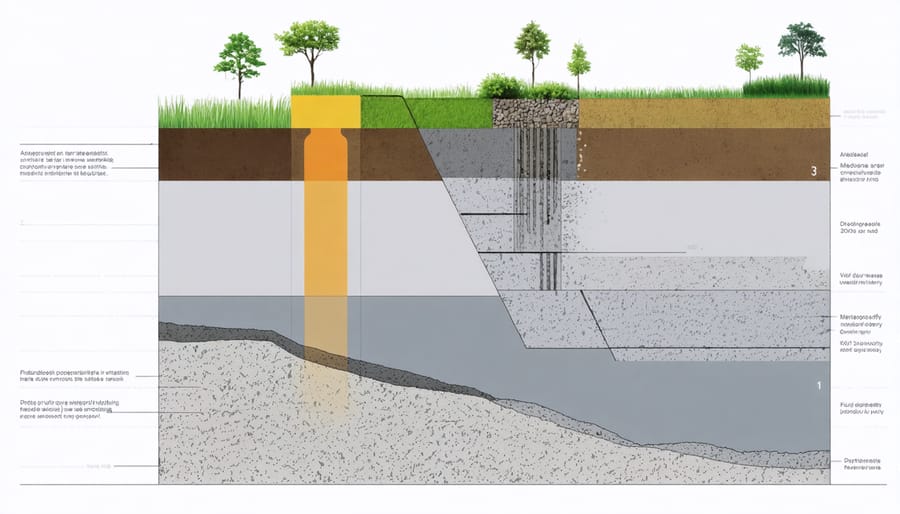
Install a protection board or dimpled drainage mat against the waterproofing membrane to shield it from damage during backfilling and settlement. This protective layer works alongside proper foundation drainage to create a complete system that guards against water intrusion. For added protection, consider installing root barriers if you plan to have nearby landscaping.
Before backfilling, double-check that all termination bars and flashings are properly secured and sealed. When backfilling, use clean fill material and avoid sharp rocks or debris that could damage the waterproofing system. Work in layers, carefully compacting each 6-8 inch layer to prevent settling while being careful not to damage the protection board.
Finally, establish a proper grade around your foundation, ensuring the soil slopes away from the structure at a rate of about 1 inch per foot for at least 6 feet. This helps direct surface water away from your foundation, providing an additional layer of protection for your waterproofing system.
Critical Detail Areas
Corner and Joint Treatment
Corners and joints are the most vulnerable points in your shed’s foundation waterproofing system and require special attention during installation. These areas are particularly susceptible to water infiltration due to their complex geometry and the natural stress points that form where different surfaces meet.
To properly protect corners, start by applying an extra layer of waterproofing membrane, extending at least 6 inches in both directions from the corner. Use reinforcing fabric or corner boots specifically designed for waterproofing applications to provide additional protection. These specialized materials help bridge any potential gaps and ensure continuous coverage around these critical areas.
For joints, whether they’re between different foundation sections or where the foundation meets other structural elements, begin by cleaning the area thoroughly and removing any loose debris. Apply a high-quality joint sealant compatible with your waterproofing system, ensuring it penetrates deeply into the joint. Once the sealant has cured, cover the area with waterproofing membrane, creating an overlap of at least 4 inches on either side of the joint.
Remember to pay special attention to any pipe penetrations or other obstacles that create joints in your foundation. These areas should be sealed with appropriate collars or boots before applying the main waterproofing layer. Take your time with these details – rushing through corner and joint treatments is often where waterproofing failures begin.

Penetration Points
One of the most vulnerable areas in your shed’s foundation waterproofing system is where pipes, conduits, or utilities penetrate the concrete. These penetration points require special attention to prevent water from seeping in around the openings. Start by ensuring all pipes have at least 2 inches of clearance around them for proper sealing. Use high-quality waterproof sealant specifically designed for concrete applications, applying it generously around each penetration point.
Install rubber or neoprene pipe boots around utility lines, making sure they fit snugly and are properly sealed to both the pipe and the foundation surface. These boots act as a flexible barrier that can accommodate minor movement while maintaining a watertight seal. For electrical conduits, use waterproof cord grips or cable glands designed for below-grade applications.
Consider installing a water stop collar or waterstop ring around each penetration before pouring the concrete. These devices create a physical barrier that prevents water from traveling along the outside of pipes into your shed. After installation, regularly inspect these areas for signs of deterioration or gaps in the sealant.
For added protection, create a slight slope in the concrete around penetration points to direct water away from these vulnerable areas. Remember that proper installation at these critical junctions is essential for maintaining your shed’s long-term waterproof integrity.
Maintenance and Long-Term Protection
Maintaining your foundation’s waterproofing system is crucial for ensuring its long-term effectiveness and protecting your investment. Regular long-term waterproofing maintenance can prevent costly repairs and extend the life of your foundation’s protective barriers.
Start with seasonal inspections of your foundation’s exterior, particularly after heavy rains or snow melts. Look for signs of wear, cracks, or peeling in the waterproofing membrane. Small issues can quickly become major problems if left unaddressed. Keep detailed records of your inspections and any repairs made to track changes over time.
Maintain proper drainage around your foundation by regularly cleaning gutters and downspouts. Ensure downspout extensions direct water at least 6 feet away from the foundation walls. Grade the soil around your foundation to slope away from the building, maintaining a drop of about 6 inches over the first 10 feet.
Keep foundation vents clear of debris and vegetation. Trim bushes and trees near the foundation to prevent root systems from compromising the waterproofing barrier. Remove any climbing vines that might damage the waterproofing membrane.
Check interior walls for signs of moisture intrusion, such as dampness, mold, or efflorescence (white, powdery mineral deposits). These indicators suggest your waterproofing system might need attention. Use a dehumidifier in basement areas to help control moisture levels.
Schedule professional inspections every 2-3 years to assess the condition of your waterproofing system. Experts can spot potential issues before they become serious and recommend appropriate maintenance measures. They can also test drainage systems and evaluate the effectiveness of existing waterproofing solutions.
If you notice any damage to the waterproofing membrane, address it promptly. Small repairs are much more manageable and cost-effective than dealing with extensive water damage. Keep spare materials on hand for minor repairs, but always consult professionals for significant issues.
Remember to maintain proper ventilation in crawl spaces and basements. Good air circulation helps prevent moisture buildup that can stress your waterproofing system. Consider installing a humidity monitor to track moisture levels and take action before problems develop.
Proper foundation waterproofing is not just an optional add-on but a crucial investment in your shed’s longevity and functionality. By following the detailed steps and techniques outlined above, you can effectively protect your structure from moisture damage, mold growth, and structural deterioration. Remember that successful waterproofing relies on careful attention to detail, using quality materials, and addressing all potential water entry points. While the process may seem time-consuming, the long-term benefits far outweigh the initial effort and cost. Regular inspection and maintenance of your waterproofing system will ensure its effectiveness for years to come, keeping your shed dry, stable, and ready to serve its purpose through all seasons. Don’t cut corners when it comes to foundation waterproofing – your future self will thank you for the thorough job you do today.