
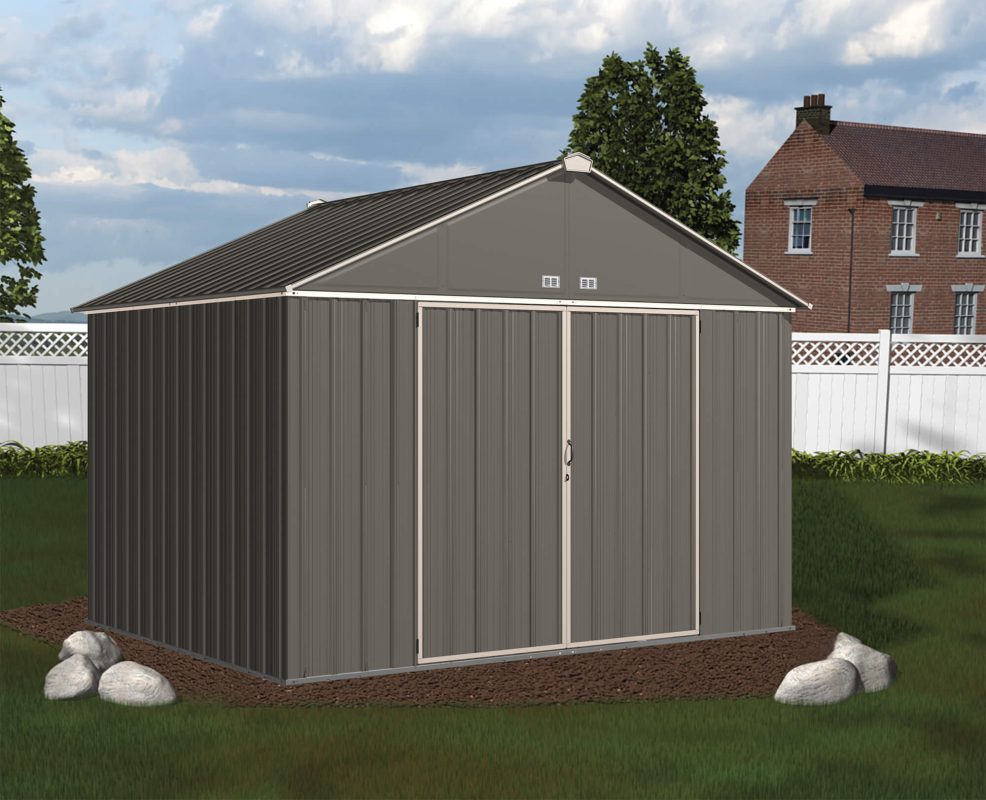


Strong Shed Door Framing That Keeps Your Storage Safe
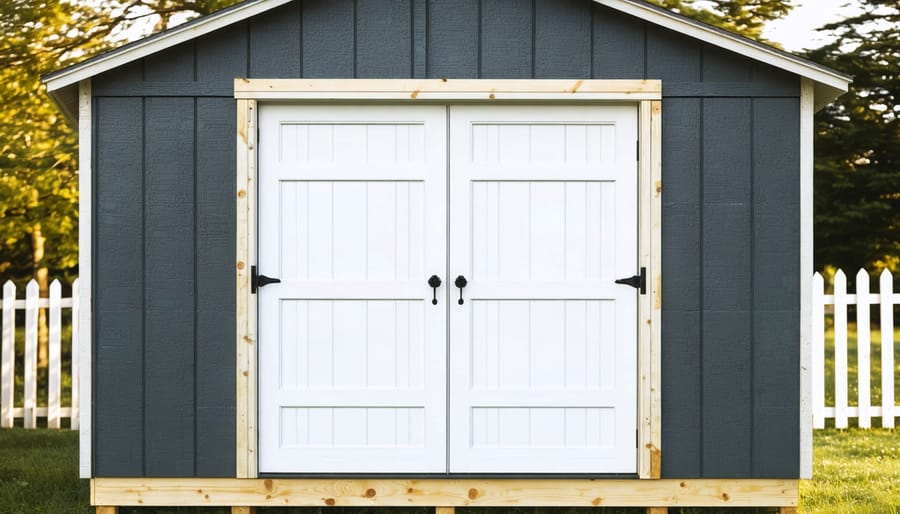
Frame your shed door opening with precision – it’s the cornerstone of a secure, functional storage solution that will serve you for decades. Start by measuring twice: the rough opening should be 3 inches wider and 2.5 inches taller than your finished door size to accommodate the frame and threshold. Install double jack studs (trimmers) on both sides of the opening, secured with 16d nails every 12 inches, then add a sturdy double header across the top to distribute the weight load evenly. Reinforce the bottom threshold with pressure-treated lumber to prevent moisture damage and ensure smooth operation.
A properly framed shed door isn’t just about functionality – it’s about creating a lasting entrance that enhances your shed’s security and appearance. Whether you’re building new or upgrading existing construction, the key lies in precise measurements, quality materials, and careful attention to squaring and leveling each component. Follow these fundamentals, and you’ll create a robust door frame that stands the test of time while maintaining perfect alignment for smooth operation year after year.
Essential Components of Shed Door Framing
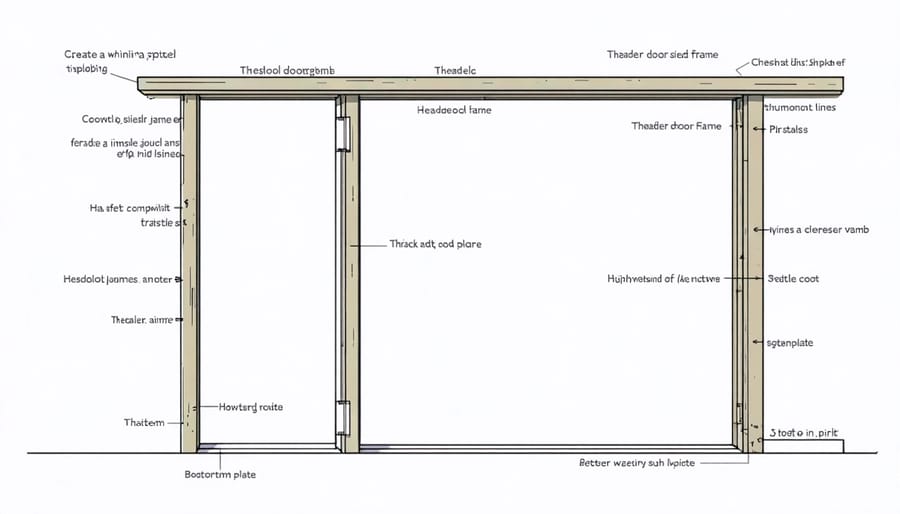
Header and Jamb Requirements
The header and jambs are crucial components that ensure your shed door operates smoothly and stays secure. For residential sheds, your door header should typically be 2×6 lumber for openings up to 4 feet wide, while wider openings may require 2×8 or even 2×10 headers. Always factor in your shed’s roof load when selecting header size – regions with heavy snowfall need more robust headers.
Your door jambs should be made from pressure-treated 2x4s to prevent rot and moisture damage. Install them plumb (perfectly vertical) and secure them firmly to both the header above and the floor below. For added stability, double up your jambs by using two 2x4s nailed together, especially for heavier doors or in high-wind areas.
Remember to leave a 1/2-inch gap between your door and the jamb for smooth operation and seasonal wood movement. This gap also allows space for weatherstripping, which helps keep your shed dry and draft-free. For the best results, use three hinges per door to distribute weight evenly and prevent sagging over time.
Threshold and Bottom Plate Considerations
The bottom plate and threshold are crucial components that require careful attention during shed door installation. Start by ensuring your bottom plate is level and properly treated to resist moisture. Using pressure-treated lumber for the bottom plate is essential, as it prevents rot and extends the lifespan of your door frame.
When installing the threshold, create a slight outward slope (about 3-5 degrees) to help water run away from the shed. This simple technique will help protect your threshold from water damage and prevent pooling that could lead to rot.
Consider installing a metal threshold strip over your wooden threshold for additional protection. This not only guards against wear but also creates a clean, finished look. For added moisture protection, apply a high-quality exterior caulk between the threshold and the door frame.
Remember to leave a small gap (about 1/8 inch) between the bottom of your door and the threshold to prevent sticking while ensuring the door remains weather-tight when closed. This careful attention to the threshold and bottom plate setup will significantly improve your shed door’s functionality and longevity.
Step-by-Step Framing Process
Measuring and Layout
Before starting the framing process, accurate measurements are crucial for a properly functioning shed door. Begin by measuring the rough opening’s height and width, adding an extra 1½ inches to both dimensions to account for the door frame. Mark these measurements clearly on your lumber using a carpenter’s square and pencil.
For precision layout, use a level to draw plumb lines on both sides of the opening. These lines will guide your frame installation and ensure your door hangs straight. Mark the locations for your header and threshold on the vertical jambs, keeping in mind that a standard door requires a ¾-inch gap at the bottom for clearance.
Next, measure and mark the positions for your hinges. Typically, door hinges are placed 7 inches from the top, 11 inches from the bottom, and one in the middle. Double-check all measurements before cutting any lumber, following the carpenter’s principle of “measure twice, cut once.”
Remember to account for any hardware or weatherstripping you plan to install, as these will affect your final measurements. Using a tape measure with clear markings and taking your time during this stage will save you frustration later in the project.
Frame Assembly
Begin by laying out your frame components on a flat, clean surface. Following professional framing techniques, join the vertical stiles to the horizontal rails using 3-inch exterior wood screws. Place two screws at each joint, driving them at slight angles for added strength. For the best results, pre-drill your holes to prevent wood splitting.
Next, check your frame for square by measuring diagonally from corner to corner – both measurements should be equal. If they’re not, adjust the frame by gently tapping the corners with a rubber mallet. Once square, install the diagonal brace, cutting it to fit snugly between opposite corners. Secure it with screws at each end and where it intersects with the rails.
Finally, test the frame’s stability by lifting it carefully and checking for any wobble or flex. If needed, add additional bracing or reinforcement points. Double-check all connections are tight and that your frame sits perfectly level before moving on to the next stage of construction.

Securing the Frame
Securing your door frame properly is crucial for long-term stability and smooth operation. Start by ensuring you have proper foundation support before anchoring the frame. Use galvanized lag screws or structural screws at least 3 inches long to attach the frame to the shed’s wall studs. Place these fasteners every 16 inches along both sides of the frame, and don’t forget to secure the header with at least three screws.
For added stability, install metal L-brackets at the bottom corners where the frame meets the floor. These brackets prevent the frame from shifting over time and provide extra reinforcement against heavy use. If your shed has a concrete foundation, use concrete anchors to secure the bottom of the frame.
Remember to check that the frame remains plumb (perfectly vertical) as you secure it. Use shims where necessary to maintain proper alignment, and double-check that all screws are tight but not over-tightened, which could split the wood. This attention to detail during installation will ensure your shed door operates smoothly for years to come.
Security Enhancement Features
Reinforcement Techniques
A well-reinforced door frame is essential for your shed’s security and longevity. Start by installing diagonal braces across the corners of your frame, creating a triangular support pattern that prevents sagging and warping over time. These braces should be cut at 45-degree angles and securely fastened with exterior-grade screws or galvanized nails.
For additional strength, consider adding metal corner brackets at each joint where vertical and horizontal frame members meet. These brackets not only reinforce the connection points but also help maintain square corners, which is crucial for proper door operation.
Installing a horizontal support beam, known as a header, above the door opening provides crucial structural support. Make sure this header extends at least 3 inches beyond the door opening on each side and is properly supported by jack studs (shorter vertical supports) on both sides.
Weather stripping channels can serve a dual purpose by reinforcing the frame while keeping out drafts and moisture. Install them along the entire perimeter of the frame, ensuring they’re properly aligned and securely fastened.
For heavier doors or in areas with high winds, consider adding a second layer of framing lumber (double-framing) around the entire door opening. This technique significantly increases the frame’s stability and load-bearing capacity while providing better anchoring points for hinges and locks.

Hardware Selection
Selecting the right hardware is crucial for ensuring your shed door operates smoothly and securely. For hinges, consider heavy-duty T-hinges or strap hinges, which provide excellent support for wooden doors. A typical shed door requires at least three hinges – one at the top, one at the bottom, and one in the middle – to prevent sagging and ensure proper weight distribution.
When it comes to security, a robust hasp and staple set paired with a weather-resistant padlock offers reliable protection for your stored items. For added convenience, consider installing a door closer or pneumatic cylinder to prevent the door from swinging open in strong winds.
The size and weight of your door should guide your hardware choices. For standard single doors, 6-inch T-hinges usually suffice, while larger or double doors may require 8-inch or longer hinges. Remember to choose hardware with a weather-resistant finish, such as galvanized steel or stainless steel, to prevent rust and ensure longevity.
Don’t forget about door handles! A sturdy pull handle on the outside and a simple grab handle on the inside make operating your shed door much easier. For the best results, select hardware from the same manufacturer and finish to maintain a cohesive look while ensuring all components work well together.
Proper shed door framing is a crucial element that can make or break your storage solution. Throughout this guide, we’ve covered the essential aspects of creating a sturdy, long-lasting door frame that will serve you well for years to come. Remember that success lies in careful planning, precise measurements, and attention to detail during the construction process.
The key takeaways include selecting the right materials for your climate, ensuring proper header installation, and maintaining square corners throughout the framing process. While it may be tempting to rush through the door framing stage, taking your time to double-check measurements and level surfaces will save you countless headaches down the road.
For best results, always start with a detailed plan, gather all necessary materials before beginning, and don’t hesitate to seek help if you encounter challenging steps. Consider weather-stripping and proper sealing techniques to protect your shed’s contents from the elements. Regular maintenance checks will help identify any issues before they become major problems.
Whether you’re building a new shed or upgrading an existing one, proper door framing is an investment in security and functionality. By following the guidelines we’ve discussed, you’ll create a reliable entrance that enhances both the usability and value of your storage space. Remember, a well-constructed door frame is the foundation for smooth operation and lasting durability.