

Transform Your Cold Shed Floor Into a Cozy Workshop Space
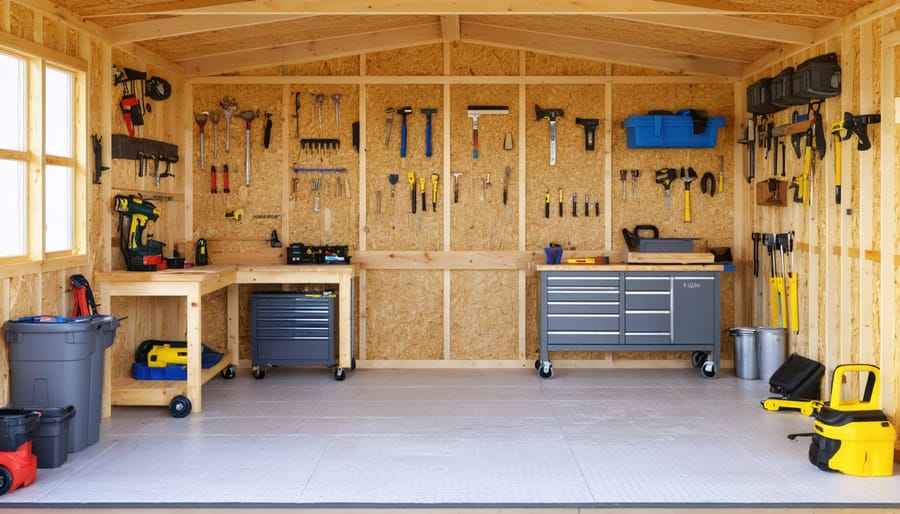
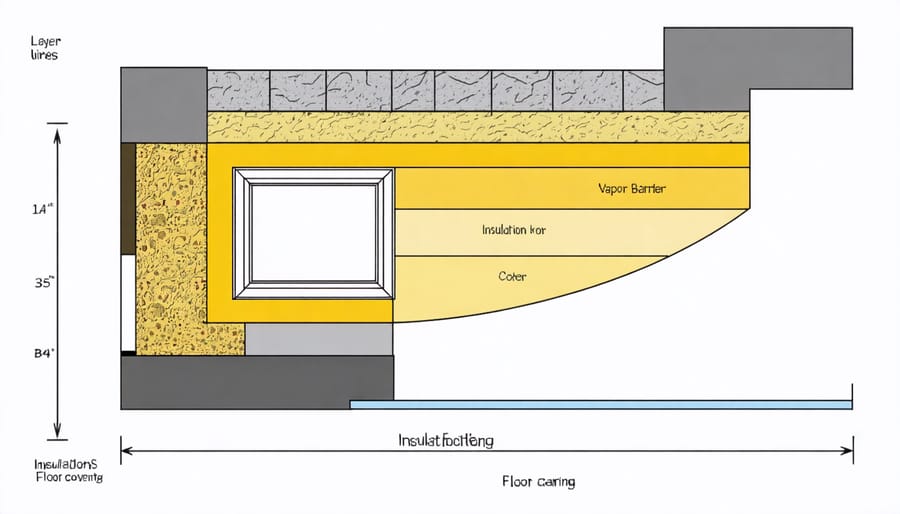
Insulating your shed floor transforms a basic storage space into a comfortable, energy-efficient workshop or retreat where you can effectively control your shed’s temperature year-round. Begin by lifting existing floorboards to assess the joists and underfloor space, checking for moisture damage or pest issues that require addressing. Install a vapor barrier directly against the ground to prevent moisture migration, ensuring it extends up the sides of your foundation by 6 inches. Choose between rigid foam boards (R-value 4-6.5 per inch) or fiberglass batts (R-value 3.1-3.4 per inch) based on your climate and budget, cutting materials to fit snugly between floor joists. For maximum effectiveness, combine multiple insulation layers with a weatherproof subfloor to create a thermal break that prevents heat loss through the ground. This practical upgrade not only enhances comfort but also protects stored items from temperature fluctuations and ground moisture, making your shed usable in all seasons.
Assessing Your Current Shed Floor
Signs Your Shed Floor Needs Insulation
Recognizing when your shed floor needs insulation is crucial for protecting your stored items and maintaining a comfortable space. If you notice condensation forming on the underside of items stored directly on the floor, this is a clear warning sign. Cold floors that feel damp or chilly to the touch, especially during winter months, indicate poor insulation. Watch out for musty odors or visible mold growth on items near the floor, as these suggest excess moisture problems. Items showing rust or corrosion on their bottom surfaces point to inadequate floor protection. Warped floorboards or lifting vinyl flooring can also signal moisture issues that proper insulation could prevent. If you spot gaps between the floor and walls or feel drafts near the floor level, your shed likely needs better insulation. Pay attention to increasing energy bills if your shed is heated, as this could indicate heat loss through an uninsulated floor.
Measuring and Calculating Materials
Start by measuring your shed’s floor dimensions, multiplying length by width to calculate the total square footage. Add an extra 10% to your measurements to account for cutting waste and mistakes. For a typical 8×10 shed, you’ll need 80 square feet of insulation material, plus 8 square feet extra.
Make a sketch of your floor plan, noting any obstacles like support posts or built-in features. This helps determine if you’ll need to cut the insulation to fit around these areas. Remember to measure the depth between your floor joists – standard depths are usually 4, 6, or 8 inches – to ensure you purchase the correct insulation thickness.
For vapor barriers, calculate the same square footage plus 15% extra to allow for adequate overlap at seams. Don’t forget to account for any tape needed for sealing joints – typically one roll of vapor barrier tape per 50 square feet of floor space.
Keep these measurements handy when shopping for materials, and consider taking photos of your space for reference.
Preparing Your Shed Floor
Moisture Control and Vapor Barriers
Before laying down insulation, it’s crucial to establish effective moisture protection strategies to prevent dampness from compromising your shed floor. Start by installing a high-quality vapor barrier across the entire floor surface, extending it about six inches up the walls. A 6-mil polyethylene sheet works well for this purpose and creates an effective moisture barrier between the ground and your shed floor.
Make sure to overlap any seams by at least 12 inches and seal them with waterproof tape designed for vapor barriers. Pay special attention to the edges where the floor meets the walls, as these areas are particularly vulnerable to moisture intrusion. If your shed sits directly on the ground, consider adding a layer of gravel underneath before installing the vapor barrier to improve drainage.
For extra protection, especially in areas with high humidity or frequent rainfall, apply a liquid waterproofing membrane to the underside of your floor boards before installing the vapor barrier. This creates an additional defense against moisture while allowing the wood to breathe. Remember that proper moisture control isn’t just about protecting your insulation – it’s about preserving the longevity of your entire shed structure.
Leveling and Surface Preparation
Before installing any insulation, ensuring your shed floor is level and properly prepared is crucial for long-term success. Start by thoroughly cleaning the existing floor surface, removing all dirt, debris, and any loose materials. Use a push broom and, if necessary, a shop vacuum to achieve a spotless surface.
Next, inspect the floor for any uneven areas, dips, or high spots. A long level or straight edge can help identify these irregularities. For concrete floors, fill any cracks or holes with an appropriate concrete patching compound. For wooden floors, replace any damaged boards and secure loose ones with screws to prevent future squeaking.
If your floor has significant level issues, you may need to use a self-leveling compound for concrete surfaces or shims for wooden floors. When using self-leveling compound, work in sections and follow the manufacturer’s instructions carefully. For wooden floors, use cedar or pressure-treated shims to maintain consistent height across the surface.
Once leveled, allow any patching materials to cure completely. Check for moisture issues by taping down a clear plastic sheet for 24 hours – if condensation appears underneath, you’ll need to address the moisture problem before proceeding with insulation. Finally, ensure the floor is completely dry and sweep one last time to remove any dust from the preparation work.
Insulation Installation Methods
Rigid Foam Board Installation
Before diving into foam board insulation techniques, ensure you have all your materials ready: rigid foam boards, a utility knife, tape measure, and adhesive or fasteners.
Start by measuring and cutting your foam boards to fit snugly between the floor joists. Leave a small 1/8-inch gap around the edges for expansion. For the best results, use a straight edge and score the foam board deeply with your utility knife before snapping it along the line.
Apply construction adhesive in a zigzag pattern on the back of the foam board. Press the board firmly against the subfloor, ensuring it’s flush with the surface. If using fasteners, space them every 12 inches along the joists for secure attachment.
For optimal insulation, use foam board with a minimum R-value of 3.5 per inch thickness. Consider using two layers if additional insulation is needed, staggering the joints to prevent thermal bridging.
Seal all seams between boards with foil tape designed for insulation. This creates an effective vapor barrier and maximizes insulation efficiency. Pay special attention to corners and edges where cold air might penetrate.
Finally, inspect your work to ensure all boards are securely fastened and seams are properly sealed. This attention to detail will help maintain consistent temperature control in your shed.
Alternative Insulation Options
While fiberglass and foam board are popular choices, several alternative insulation materials can effectively protect your shed floor. Recycled denim insulation offers an eco-friendly option that’s safe to handle and provides excellent thermal performance. It comes in batts similar to fiberglass but without the irritating fibers, making installation more comfortable.
Sheep’s wool insulation is another natural alternative that performs exceptionally well in humid conditions. It can absorb and release moisture without losing its insulating properties, making it ideal for sheds in damp climates. The installation process mirrors that of traditional batts, but the material is more forgiving when fitting around obstacles.
Spray foam kits designed for DIY use offer another solution. While typically more expensive, they provide superior air-sealing capabilities and can be applied directly to the underside of your shed floor. The foam expands to fill gaps and creates a moisture barrier, though proper ventilation during application is essential.
Reflective foil insulation, while thinner than other options, works well in combination with air gaps. It’s lightweight, easy to cut, and can be stapled directly to floor joists. For the best results, maintain an air space on at least one side of the foil barrier.
Consider cork insulation boards for a sustainable choice that’s naturally resistant to mold and mildew. They’re easy to cut and install, though they may require additional waterproofing in very wet conditions.
Securing and Protecting the Insulation
Once your insulation is in place, protecting it is crucial for long-term effectiveness. Start by installing a vapor barrier over the insulation using 6-mil polyethylene sheeting. Overlap the seams by at least 6 inches and secure the edges with construction tape designed for vapor barriers.
For the most secure installation, staple the vapor barrier to the joists using a heavy-duty stapler. Place staples every 8 inches along the joists to prevent sagging. Pay special attention to the edges where the floor meets the walls, ensuring there are no gaps where moisture could penetrate.
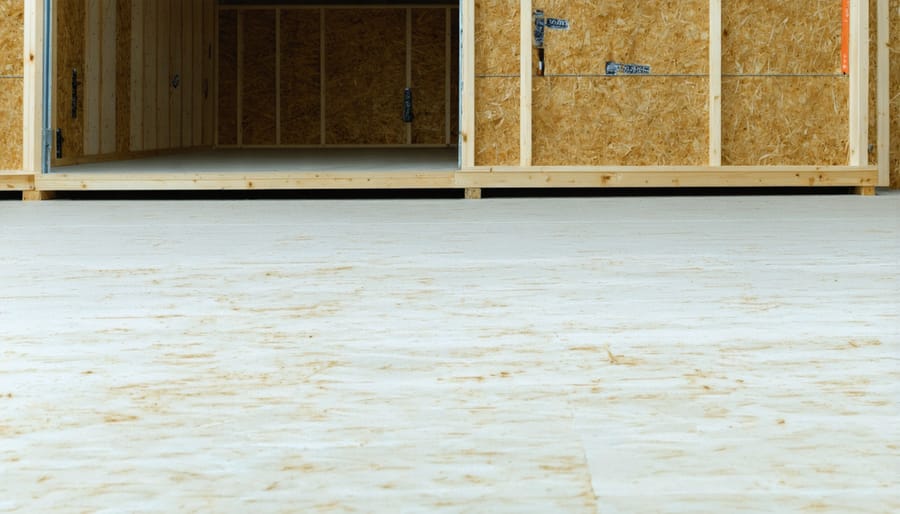
Next, install a sturdy subfloor over the vapor barrier. Plywood or oriented strand board (OSB) of at least 5/8 inch thickness works well for this purpose. This not only protects the insulation but also provides a solid walking surface. Secure the subfloor panels with screws rather than nails to prevent them from working loose over time.
Consider adding small ventilation gaps around the perimeter of the shed floor to allow any trapped moisture to escape. You can create these by leaving a 1/4-inch gap between the subfloor and walls, which can be covered with baseboards later.
For added protection in areas prone to pests, install hardware cloth or mesh screening between the insulation and subfloor. This extra barrier helps prevent rodents and other creatures from making homes in your newly insulated space.
Finishing Touches
Installing Floor Covering
Once your insulation is securely in place, it’s time to choose and install your floor covering. Plywood is the most popular option, offering durability and a solid foundation for your shed. Use 3/4-inch exterior-grade plywood for the best results, ensuring it’s treated to resist moisture and wear.
Another excellent choice is oriented strand board (OSB), which tends to be more budget-friendly while still providing good durability. When installing either plywood or OSB, leave a 1/8-inch gap around the edges to allow for natural expansion and contraction.
For added protection, consider installing vinyl flooring or rubber mats over your plywood base. These materials offer additional moisture resistance and are easy to clean. Interlocking rubber tiles are particularly practical, as they’re simple to install and can be replaced individually if damaged.
Remember to secure your chosen floor covering with appropriate screws or nails, spacing them every 6-8 inches along the joists. For vinyl or rubber coverings, use appropriate adhesive and follow manufacturer guidelines for installation. Whatever covering you choose, ensure it’s level and well-secured to prevent tripping hazards and maximize your shed’s usability.
Sealing and Weatherproofing
To protect your newly insulated shed floor from moisture and weather damage, it’s essential to implement proper sealing measures. Start by applying a high-quality silicone caulk around all edges where the floor meets the walls, ensuring no gaps remain that could allow water infiltration. Pay special attention to corners and any areas where utilities enter the shed.
Next, consider applying a waterproof membrane or vapor barrier along the perimeter of your shed’s foundation. This extra layer of protection helps prevent ground moisture from seeping upward. Remember that maintaining proper floor ventilation is crucial even with these protective measures in place.
For added protection, treat any exposed wood with a water-resistant sealant or preservative. This step is particularly important for shed floors that sit close to the ground. Consider installing metal flashing around the base of your shed walls to direct water away from the foundation and floor.
Finally, create a slight gradient around your shed’s perimeter using gravel or soil to ensure water naturally flows away from the structure. This simple landscaping trick can significantly extend the life of your insulation and floor materials while keeping your stored items dry and protected.
Insulating your shed floor is a valuable investment that enhances the functionality and longevity of your storage space. By following the steps outlined in this guide, you can create a warmer, drier environment that better protects your belongings and makes your shed more comfortable to use year-round.
Remember to regularly inspect your insulated floor for any signs of moisture or damage, particularly after severe weather events. Check the vapor barrier integrity at least twice a year and address any tears or gaps promptly. Keep the area around your shed well-drained to prevent water from seeping underneath and compromising your insulation work.
To maintain optimal performance, vacuum or sweep your shed floor regularly to prevent debris from accumulating between boards or damaging the surface material. If you notice any soft spots or uneven areas developing, investigate immediately to prevent more extensive damage.
With proper maintenance, your insulated shed floor should provide years of reliable service. The initial investment in time and materials will pay off through reduced moisture problems, better temperature regulation, and enhanced protection for stored items. Whether you’ve chosen rigid foam boards, spray foam, or natural materials, your newly insulated floor will contribute significantly to the overall functionality of your outdoor storage space.
Make seasonal checks part of your regular home maintenance routine, and your shed floor will continue to serve you well through all weather conditions.