Inspect your shed roof regularly for signs of damage, leaks, or deterioration to catch issues early and maintain shed integrity. Clean the roof thoroughly, removing debris, moss, and dirt to ensure the waterproofing material adheres properly. Choose a high-quality, durable waterproofing product specifically designed for your shed’s roof material, such as bitumen-based sealants for felt roofs or acrylic coatings for metal. Apply the waterproofing material meticulously, following the manufacturer’s instructions and covering the entire roof surface, including seams, joints, and around protrusions like vents or pipes.
Inspect Your Shed Roof
Check for Cracks, Holes, and Gaps
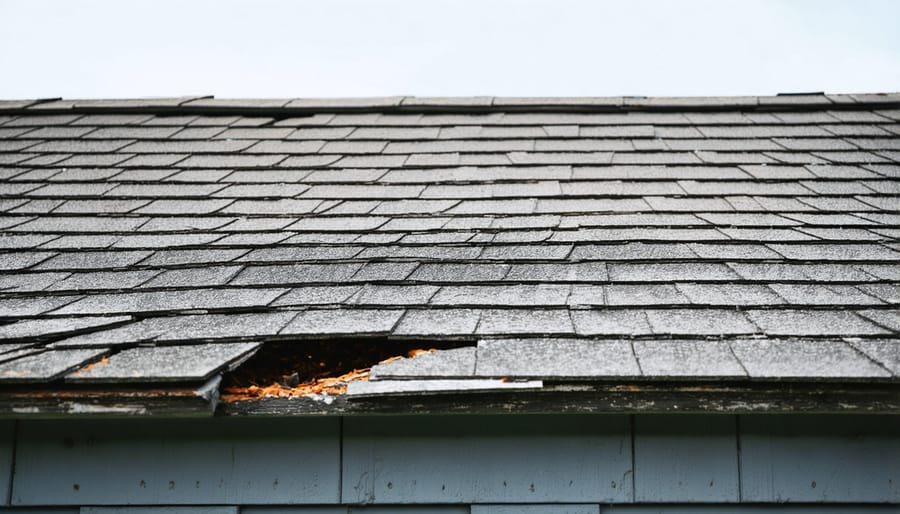
Inspecting your shed roof for cracks, holes, and gaps is a crucial first step in the waterproofing process. Take a close look at the roofing material, paying attention to any signs of damage or wear. Small cracks may be difficult to spot, so run your hand along the surface to feel for any irregularities. Don’t forget to check around chimneys, vents, and other protrusions, as these areas are prone to leaks. Holes can range from tiny punctures to larger openings caused by falling branches or other debris. Gaps often occur at the seams or edges of the roofing material, allowing water to seep through. Use a flashlight to illuminate the roof from various angles, making it easier to identify any potential problem areas. If you find any cracks, holes, or gaps, mark them clearly with chalk or tape so you can easily locate and repair them later.

Look for Signs of Water Damage
Inspect your shed roof regularly for telltale signs of water damage, such as dark water stains, soft or spongy areas on the roof sheathing, or visible mold growth. Inside the shed, look for water spots on the ceiling, dampness on the walls, or a musty odor that could indicate a leak. Pay close attention to areas around vents, chimneys, or any roof penetrations, as these are common sources of water infiltration. Catching and addressing water damage early can save you from costly repairs down the line and prevent your stored items from being ruined by moisture. If you notice any signs of water damage, take immediate action to identify the source of the leak and make necessary repairs before proceeding with waterproofing your shed roof.
Clean and Repair the Roof
Remove Debris and Clean the Surface
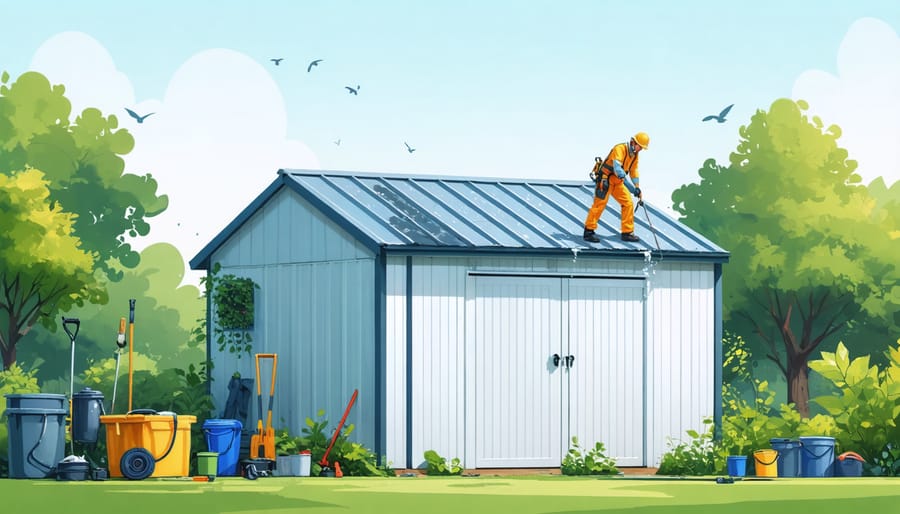
Before applying any waterproofing material, it’s crucial to ensure the shed roof is clean and free of debris. Safely access the roof using a sturdy ladder, and wear non-slip shoes for added stability. Remove any leaves, twigs, or accumulated dirt using a broom or leaf blower. If there’s moss or algae growth, use a soft-bristled brush and a mixture of water and mild detergent to scrub it away gently. Rinse the roof thoroughly with a garden hose, and allow it to dry completely. Inspect the roof for any loose nails, cracked or missing shingles, or other signs of damage, and make necessary repairs before proceeding with the waterproofing process. By taking the time to clean and prepare the surface, you’ll ensure optimal adhesion and long-lasting results.
Repair Cracks, Holes, and Damaged Areas
Before applying any waterproofing material, it’s crucial to repair any cracks, holes, or damaged areas on your shed roof. Small cracks can be filled with roofing cement using a putty knife, while larger holes may require a patch made from the same material as your roof. For metal roofs, clean the area around the damage, apply a rust-inhibiting primer, and then cover with a metal repair kit or sealant. With asphalt shingles, remove the damaged shingle, replace it with a new one, and seal the edges with roofing cement. Don’t forget to inspect and replace any damaged flashing around vents, chimneys, or edges. By taking the time to properly repair existing damage, you’ll ensure a solid foundation for your waterproofing efforts and extend the life of your shed roof.
Choose the Right Waterproofing Material
Liquid Rubber Coatings
Liquid rubber coatings offer a seamless, durable solution for waterproofing your shed roof. These easy-to-apply coatings form a protective barrier that prevents water infiltration, extending the life of your roof. Liquid rubber is elastomeric, allowing it to expand and contract with temperature changes without cracking. It also resists UV damage, ensuring long-lasting protection. Applying liquid rubber is a straightforward process that can be done with a brush, roller, or spray gun. With its excellent adhesion properties, liquid rubber coatings bond strongly to various roofing materials, providing a reliable waterproofing solution for your shed.
Waterproof Membranes and Underlayments
Waterproof membranes and underlayments are essential components in protecting your shed roof from water damage. These materials are applied directly to the roof decking, creating a barrier that prevents water from seeping through and causing rot, mold, or structural issues. Waterproof membranes come in various forms, such as self-adhering sheets or liquid-applied coatings, and are designed to withstand the elements and maintain a watertight seal. Underlayments, such as felt paper or synthetic materials, provide an additional layer of protection beneath the primary roofing material. By investing in quality waterproof membranes and underlayments, you can ensure your shed roof remains dry and your stored items stay safe from water damage for years to come.
Acrylic Roof Coatings
Acrylic roof coatings are a popular choice for waterproofing shed roofs. These coatings form a seamless, durable membrane that protects against water intrusion, UV damage, and weathering. They adhere well to various roofing materials, including metal, asphalt, and wood. Acrylic coatings are easy to apply using a brush, roller, or sprayer, making them a convenient option for DIY enthusiasts. They offer excellent flexibility, allowing the coating to expand and contract with temperature changes without cracking. Acrylic coatings are available in a range of colors, enabling you to customize your shed’s appearance while providing long-lasting waterproofing protection.
Apply the Waterproofing Material
Prepare the Roof Surface
Before applying any waterproofing material, ensure the roof surface is clean, dry, and in good condition. Remove dirt, debris, and loose material with a broom or pressure washer. If there are any cracks, holes, or damaged areas, repair them with a suitable patching compound or sealant. For optimal adhesion, consider applying a primer specifically designed for your chosen waterproofing material. This will help the coating bond more effectively to the roof surface, providing long-lasting protection against water intrusion. Always follow the manufacturer’s instructions for application and drying times to achieve the best results.

Apply the First Coat
When applying the first coat of waterproofing material, start at the lowest point of the roof and work your way up. This ensures that any overlapping coats will direct water downward. Use a brush, roller, or sprayer, depending on the product you’ve chosen. Apply an even, thorough coat, paying close attention to corners, seams, and any areas around protrusions like vents or chimneys. Make sure to cover the entire surface, including a few inches up the sides of the shed where the roof meets the walls. Allow this first coat to dry completely according to the manufacturer’s instructions before proceeding. Drying times can vary based on temperature, humidity, and the specific product used. Be patient and give the first coat ample time to cure before moving on to the next step in the waterproofing process.
Allow Adequate Drying Time
Allowing the first coat of waterproofing material to dry completely is crucial for effective shed roof protection. Drying time varies depending on the product and weather conditions, but it’s essential to follow the manufacturer’s guidelines. Rushing the process can lead to an uneven or inadequate seal, compromising the roof’s water resistance. Be patient and give the first coat ample time to cure before applying the second layer.
Apply Additional Coats (If Needed)
For extra protection and longevity, consider applying a second or even third coat of your chosen waterproofing material. Allow each coat to dry completely before applying the next, following the manufacturer’s recommended drying times. When applying additional coats, use even, overlapping strokes to ensure consistent coverage. Pay special attention to seams, joints, and areas around protrusions like vents or pipes. These multiple layers create a thicker, more durable barrier against water intrusion, providing your shed roof with long-lasting protection from the elements. Remember, taking the time to apply additional coats now can save you from costly repairs down the line.
Maintain Your Waterproofed Shed Roof

Regular Inspections
Regular inspections of your shed roof are crucial to maintaining its waterproof integrity. At least once a year, and especially after severe weather events, take the time to visually examine your roof. Look for any signs of wear, such as cracks, splits, or punctures in the roofing material. Check for loose or missing fasteners, and ensure any sealants or flashing remain intact. Catching minor issues early can prevent more extensive damage and costly repairs down the line. By staying vigilant and addressing problems promptly, you can extend the life of your shed roof and keep your stored items safe and dry.
Clean and Repair as Needed
To keep your shed roof in top shape and maintain its waterproofing abilities, regular cleaning and timely repairs are essential. Start by removing any debris, such as leaves, twigs, or moss, that may have accumulated on the roof surface. This debris can trap moisture and lead to deterioration over time. Next, inspect the roof closely for any signs of damage, like cracks, holes, or loose fasteners. If you spot any issues, address them promptly to prevent water from seeping through and causing further damage to your shed’s structure or contents. For minor cracks or holes, apply a compatible sealant or patch according to the manufacturer’s instructions. If you notice extensive damage or are unsure about the repair process, consider consulting a professional to ensure the integrity of your shed roof’s waterproofing system. By staying proactive with cleaning and repairs, you can extend the life of your shed roof and keep your belongings safe and dry.
Waterproofing your shed roof is crucial for protecting your valuable stored items from water damage, mold, and mildew. By taking the time to properly inspect, prepare, and seal your shed roof, you can ensure that your belongings stay safe and dry for years to come. Don’t let a leaky roof ruin your tools, equipment, or sentimental items – take action today to waterproof your shed roof and enjoy the peace of mind that comes with knowing your storage space is secure. With the right materials and a little effort, you can create a watertight barrier that will stand up to the elements and keep your shed in top condition.


Leave a Reply