


Transform your backyard shed into a professional-grade workshop by maximizing every square inch of space. Start with proper site preparation to ensure a level, well-draining foundation that supports heavy equipment. Install strategically placed windows and LED shop lights to create bright, shadow-free work zones that reduce eye strain during detailed projects. Incorporate modular wall storage systems with adjustable shelving, pegboards, and tool organizers to keep frequently used items within arm’s reach while maximizing floor space for larger equipment.
Design your workshop layout around specific work zones – designate areas for woodworking, mechanical projects, and assembly to improve workflow efficiency and safety. Consider installing insulation, proper ventilation, and a mini-split HVAC system to maintain comfortable working conditions year-round. Add a sturdy workbench with integrated power outlets and storage drawers as your workshop’s centerpiece, positioning it to take advantage of natural light from windows or skylights.
Whether you’re a weekend woodworker or serious craftsperson, a well-planned workshop shed creates the perfect environment for bringing your DIY projects to life while protecting valuable tools and equipment from the elements.
Essential Workshop Layout Planning
Workbench Placement and Design
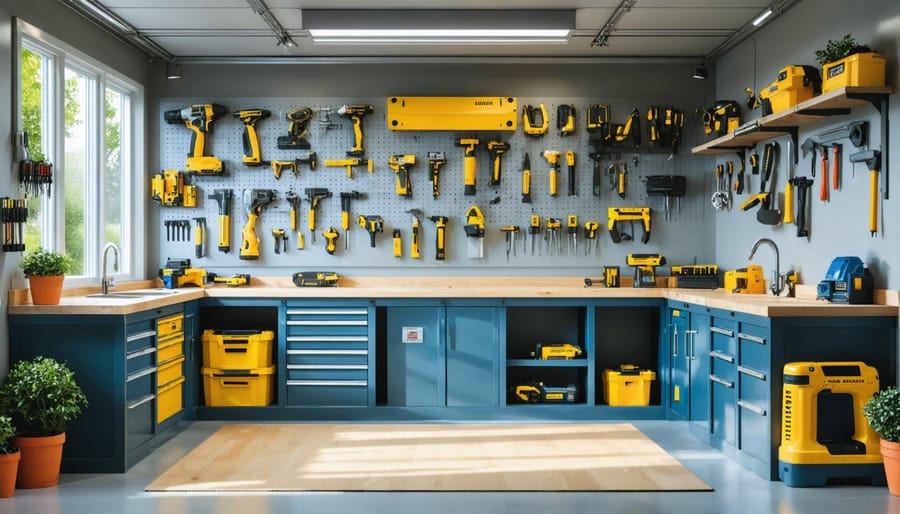
A well-designed workbench is the heart of any workshop shed, and proper placement is crucial to optimize your storage space and workflow. Position your workbench along the longest wall to maximize available space, ideally near a window for natural light. Consider a height of 34-36 inches for most woodworking tasks, though this can be adjusted based on your height and primary activities.
L-shaped or U-shaped configurations work well in larger sheds, providing ample surface area and creating convenient zones for different tasks. Include at least one heavy-duty vise, and ensure your bench top is sturdy enough to withstand hammering and heavy tool use. A thick hardwood or laminated surface offers durability and stability.
Don’t forget to incorporate storage solutions underneath and above your workbench. Pull-out drawers, pegboards, and shelving units keep tools within arm’s reach while maintaining a clean workspace. Including electrical outlets along the bench area ensures power tools are always accessible, and good task lighting is essential for detailed work.

Tool Storage Solutions
Effective tool storage is crucial for maintaining an organized and efficient workshop shed. Consider installing pegboards on your walls – they’re incredibly versatile and allow you to create custom layouts for hanging frequently used tools. Magnetic strips work wonders for keeping metal tools easily accessible while saving space.
For power tools, build or install sturdy shelving units with adjustable heights. Clear plastic bins labeled by category help keep smaller items like screws, nails, and drill bits organized and visible. A rolling tool cart serves double duty as both storage and a mobile work surface, perfect for projects that require multiple tools.
Make use of vertical space by installing overhead storage racks for lumber and long-handled tools. Door-mounted organizers can house spray cans, sandpaper, and other slim items. Consider adding a fold-down workbench with integrated storage underneath – it’s a space-saving solution that doubles as a work area.
Remember to keep frequently used tools at eye level and heavier items closer to the ground. This arrangement not only makes your workshop more efficient but also safer to use.
Power and Lighting Solutions
Electrical Setup Basics
A reliable electrical setup is crucial for any workshop shed, and safety should always be your top priority. Start by consulting a qualified electrician to assess your power needs and ensure compliance with local building codes. Most workshop sheds require a dedicated circuit from your home’s main electrical panel, typically 20-30 amps depending on your tool requirements.
Consider installing multiple electrical outlets along the walls at workbench height, spacing them roughly every 4-6 feet. This arrangement prevents the need for potentially hazardous extension cords. Include at least one GFCI (Ground Fault Circuit Interrupter) outlet to protect against electrical shocks in damp conditions.
For lighting, combine overhead LED fixtures for general illumination with adjustable task lighting above your workbench. Motion sensors for exterior lighting can enhance security and convenience when approaching your shed in low-light conditions.
Don’t forget to plan for future needs by installing extra circuits and outlets. Many DIY enthusiasts find themselves adding more power tools over time, and it’s easier to install additional capacity during initial setup than to modify later.
Remember to weatherproof all exterior connections and use appropriate conduit for underground wiring. Label your circuit breakers clearly and keep a basic electrical diagram posted inside your shed for reference. This attention to detail in your electrical setup will ensure a safe and efficient workshop environment for years to come.
Strategic Lighting Options
Proper lighting is essential for any workshop, and your shed workspace deserves careful consideration of both natural and artificial light sources. Start by adding natural light through windows or skylights, which not only brightens your space but also helps reduce energy costs during daylight hours.
For artificial lighting, consider a layered approach. Install bright LED overhead lights (4000-5000K) for general illumination, ensuring complete coverage of your workspace. Position these fixtures to minimize shadows, especially over workbenches and tool storage areas. Task lighting is crucial for detailed work – adjustable LED work lamps or under-cabinet strips provide focused illumination where you need it most.
Don’t forget about exterior lighting near the entrance and any outdoor work areas. Motion-sensor security lights serve dual purposes: safety and convenience when accessing your workshop after dark. For energy efficiency, opt for LED fixtures throughout, and consider installing dimmer switches to adjust light levels based on your needs.
Strategic placement of power outlets near lighting fixtures makes it easier to add portable work lights when needed. Remember to install light switches near the entrance and in convenient locations near workstations to avoid fumbling in the dark.

Climate Control and Ventilation
Insulation Solutions
Proper insulation is crucial for creating a comfortable year-round workspace in your shed. Start with high-quality fiberglass batts or rigid foam boards for the walls, ensuring an R-value of at least R-13 for moderate climates. Don’t forget to insulate the floor and ceiling, where heat loss commonly occurs. For an eco-friendly workshop conversion, consider natural alternatives like sheep’s wool or recycled denim insulation.
Before installation, seal any gaps or cracks with weatherstripping and caulk. Install a vapor barrier on the warm side of the insulation to prevent moisture buildup. For walls, place insulation between studs, ensuring a snug fit without compression. Consider adding reflective foil insulation beneath metal roofing to deflect summer heat.
Pro tip: Leave a small air gap between the insulation and exterior walls to prevent condensation. For finishing, cover the insulation with moisture-resistant drywall or plywood, creating a clean workspace while protecting the insulation material. Remember to insulate any windows with thermal curtains or cellular shades for additional temperature control.
Ventilation Systems
Proper ventilation is crucial for maintaining a comfortable and safe workshop environment. A well-ventilated shed helps regulate temperature, remove dust and fumes, and prevent moisture buildup that could damage your tools. Consider installing adjustable roof vents or soffit vents to create natural airflow through your workshop. These passive systems work year-round without increasing your energy costs.
For active ventilation, wall-mounted exhaust fans are an excellent choice, especially when working with paints, stains, or materials that produce dust. A simple 20-inch box fan in your window can make a significant difference during warmer months. Adding a couple of small windows that can be opened on opposite walls creates cross-ventilation, which is particularly effective for cooling your space.
Don’t forget about winter ventilation needs. A combination of small vents near the floor and ceiling helps prevent condensation while maintaining warmth. Some workshop owners have found success with installing mini dehumidifiers to control moisture levels during humid seasons, protecting both tools and materials from rust and damage.
Storage and Organization Systems

Wall-Mounted Storage
Maximizing vertical space in your workshop shed is crucial for maintaining an organized and efficient workspace. Wall-mounted storage solutions offer the perfect answer, keeping your tools and materials easily accessible while freeing up valuable floor space for your projects.
Start by installing pegboards, which provide flexible storage options for frequently used tools. These versatile panels can be customized with various hooks and holders, allowing you to create a tool organization system that evolves with your needs. For added functionality, consider painting your pegboard in a light color to improve visibility and add a professional touch to your workshop.
Heavy-duty shelving units mounted directly to the wall studs can handle bulkier items and power tools. Install adjustable bracket systems that let you modify shelf heights as your storage needs change. For frequently used items, position shelves at eye level, while seasonal or rarely used equipment can go higher up.
Magnetic strips make excellent holders for metal tools and create an attractive, organized display. Mount several strips at different heights to accommodate various tool sizes. Consider installing wall-mounted cabinets with doors to protect sensitive equipment from dust and moisture while maintaining a clean, uncluttered appearance.
Don’t forget about the space behind your door – it’s perfect for hanging lightweight tools or installing a slim organizer for sandpaper, finishing materials, or safety equipment. Remember to leave some wall space clear for mounting larger tools like circular saw guides or level storage.
Mobile Storage Solutions
Mobile storage solutions are game-changers for workshop organization, offering the flexibility to adapt your space as projects evolve. Rolling tool cabinets and carts serve as versatile workstations that can be moved exactly where you need them. Consider investing in heavy-duty casters for your storage units – they make it easy to reconfigure your workshop layout while keeping tools accessible.
Modular storage systems are particularly effective, allowing you to mix and match components as your needs change. Stack customizable bins on wheeled bases, or opt for collapsible workbenches that can be tucked away when not in use. Many DIY enthusiasts swear by utility carts with multiple tiers, perfect for keeping frequently used tools within arm’s reach while working on projects.
For maximum efficiency, look for storage solutions with built-in handles and lightweight materials. Portable tool organizers with clear compartments help you spot items quickly, while nested containers save space when not in use. A popular trend among workshop owners is incorporating mobile pegboard stations that can be wheeled around the space, providing instant tool organization wherever you’re working.
Remember to consider weight distribution when loading mobile storage units, and always secure items properly before moving them. Strategic placement of mobile storage can also create temporary workstations, effectively doubling your usable space during larger projects.
Safety and Security Features
Protecting your workshop shed and its valuable contents should be a top priority. Start with robust door locks, including a heavy-duty padlock or deadbolt system. Consider installing a combination of different lock types for enhanced security – a hasp and staple lock alongside a key-operated rim lock provides dual protection.
Motion-sensor lighting around your shed serves two purposes: it deters potential intruders and provides safe visibility when you’re working after dark. Install these lights at the entrance and around vulnerable access points. For additional security, consider installing a simple wireless alarm system that alerts you when doors or windows are opened.
When it comes to safety inside the workshop, proper ventilation is crucial. Install vents near the roof and floor to create airflow, especially if you’ll be working with paints or chemicals. Mount a fire extinguisher near the entrance and install smoke detectors – these are non-negotiable safety features for any workshop space.
Tool security is equally important. Install a lockable tool cabinet or create a pegboard system where tools can be secured with a cable lock. Keep valuable power tools in a separate, reinforced storage unit within your shed. Consider marking your tools with an engraver or UV pen for identification purposes.
For electrical safety, ensure all wiring is properly installed and protected from moisture. Use GFCI outlets to prevent shock hazards, and install surge protectors for your power tools. Keep a first aid kit readily accessible and post emergency contact numbers in a visible location. Remember to maintain clear pathways to exits and keep the space well-organized to prevent accidents.
Converting your shed into a workshop is an exciting project that can transform an underutilized space into a productive haven for your hobbies and DIY projects. By carefully considering elements like proper insulation, adequate lighting, strategic storage solutions, and comfortable workspaces, you can create a workshop that perfectly suits your needs. Remember to start with a solid plan, focusing on essential features like ventilation, power supply, and weather protection before moving on to organizing tools and creating dedicated work zones.
Don’t feel overwhelmed by the process – tackle one aspect at a time, and you’ll soon see your workshop taking shape. Whether you’re a woodworking enthusiast, crafting hobbyist, or general DIY-er, your converted shed workshop can become a space that inspires creativity and productivity. Consider starting with basic improvements and gradually adding features as your needs evolve and budget allows.
Now that you have these ideas and guidelines in hand, it’s time to take that first step toward creating your ideal workshop space. With proper planning and execution, your shed can become the workshop you’ve always dreamed of having.
Leave a Reply