


Transform your property into a water-saving oasis by installing a rainwater collection system – one of the most practical eco-friendly backyard solutions available to homeowners. With just a few basic materials and a weekend of work, you can harvest thousands of gallons of free water annually for gardening, washing, and emergency backup. This DIY project typically costs between $100-500, depending on your setup’s size, and can reduce your water bill by up to 30% while helping protect local watersheds from storm runoff. Whether you’re looking to create a simple rain barrel system or install a comprehensive underground storage tank, this guide will walk you through the essential steps to build a reliable, efficient rainwater harvesting system that meets your needs and budget.
Planning Your Budget-Friendly Collection System
Calculating Your Water Needs
To determine the right size for your rainwater collection system, start by measuring your roof’s catchment area. Simply multiply your home’s length by its width to get the square footage. For example, a 30′ x 40′ roof provides 1,200 square feet of collection area.
Next, check your area’s average monthly rainfall. Local weather services or gardening websites typically provide this information. For every inch of rain that falls on 1,000 square feet of roof, you can collect approximately 600 gallons of water.
To calculate your potential collection volume, use this formula:
Roof square footage × rainfall in inches × 0.6 = gallons of water collected
Consider your water needs when sizing your storage tanks. A typical garden requires about 0.5 gallons per square foot per week during growing season. Factor in your climate, landscape size, and intended uses – whether you’re planning to water gardens, wash cars, or supplement household needs.
Remember to account for dry spells by adding 15-20% extra capacity to your calculations. This ensures you’ll have enough water when you need it most.
Essential Components Shopping List
Here’s a comprehensive list of essential components needed for your rainwater collection system, along with estimated costs to help you plan your budget effectively:
– Rain Barrel or Storage Tank ($50-200): Choose from recycled food-grade barrels or purpose-built tanks, sized according to your needs and available outdoor storage solutions
– Downspout Diverter Kit ($15-30): Includes diverter and necessary fittings to connect your gutters to the collection system
– Mesh Screen Filter ($10-20): Prevents leaves and debris from entering your tank
– Overflow Valve ($8-15): Directs excess water away from your home’s foundation
– Spigot or Tap ($5-15): For easy water access
– First Flush Diverter ($25-40): Optional but recommended to remove initial dirty runoff
– PVC Pipes and Fittings ($20-40): For custom connections and overflow routing
– Concrete Blocks or Stand ($15-30): Creates a stable, elevated base for gravity feed
– Optional Pump ($60-150): If you need increased water pressure
Total estimated cost: $150-500, depending on system size and optional components chosen. Remember to check local hardware stores for deals and consider starting with a basic setup that you can expand later.
DIY Installation Steps
Preparing Your Collection Area
Before installing your rainwater collection system, proper preparation of your gutters and downspouts is essential for maximum efficiency. Start by thoroughly cleaning your gutters, removing all debris, leaves, and buildup that could contaminate your collected water or cause blockages. Check that your gutters are properly sloped toward the downspouts – aim for about a quarter-inch drop for every 10 feet of gutter length.
Next, inspect your downspouts and decide where you’ll position your collection barrel or tank. Choose a location that’s level, stable, and easily accessible. You’ll need to modify your downspout to direct water into your collection system. Consider installing a diverter kit, which allows you to switch between collecting rainwater and directing it away from your house during winter months or when your tank is full.
To prevent debris from entering your collection system, install gutter guards and a first-flush diverter. Gutter guards keep leaves and large particles out, while the first-flush diverter removes the initial flow of water that typically contains the most contaminants from your roof.
Don’t forget to measure the height needed for your collection container. Most systems work best when elevated on a solid platform, allowing you to access the spigot easily and create better water pressure for your garden hose. A sturdy base of concrete blocks or a purpose-built stand works well for this purpose.
Setting Up Your Storage Tank
Proper tank placement is crucial for the success of your rainwater collection system. Start by selecting a level area near your downspouts that can support the weight of your filled tank. Remember, water weighs approximately 8.3 pounds per gallon, so a full 500-gallon tank will weigh over 4,000 pounds!
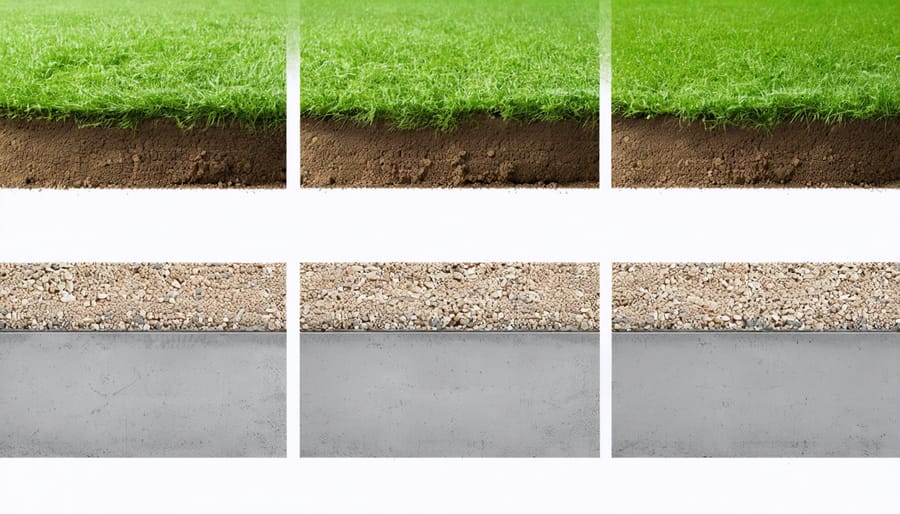
Create a solid foundation using either a concrete pad or compacted gravel base. The foundation should extend at least 6 inches beyond your tank’s edges and be perfectly level to prevent tipping or stress on the tank walls. For smaller systems, a bed of sand at least 4 inches deep can work as a cost-effective alternative.
Position your tank on the north or east side of your property when possible, as this helps minimize algae growth by reducing direct sunlight exposure. Ensure there’s enough clearance around the tank for maintenance and that it’s easily accessible for any future repairs.
Consider elevating your tank slightly (12-24 inches) to improve water pressure and make it easier to access the outlet valve. You can use concrete blocks or a purpose-built stand, but make sure whatever you choose can handle the tank’s full weight. This elevation also helps prevent sediment buildup at the bottom of your tank.
Before placing your tank, install a level bed of pea gravel or crushed stone beneath the pad or foundation. This helps with drainage and prevents soil erosion under your tank. If you’re using multiple tanks, leave at least 2 feet of space between them for easy access and maintenance.
Don’t forget to check local building codes and HOA regulations regarding water tank placement and screening requirements. Some areas may require you to conceal the tank with fencing or landscaping, which should be factored into your placement decision.
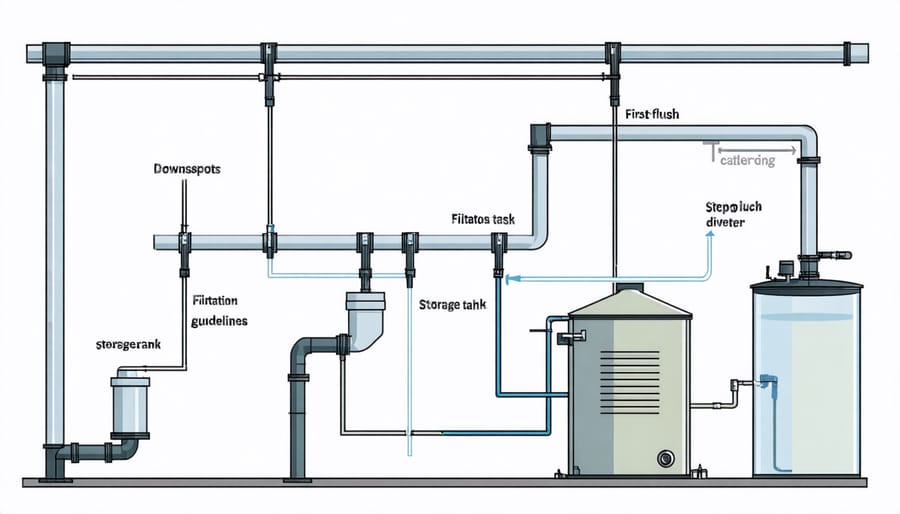
Installing Filters and Connections
Proper filtration is essential for maintaining clean, usable rainwater and protecting your system’s components. Start by installing a first-flush diverter at your downspout connection. This clever device diverts the initial rainfall that carries the most debris and contaminants away from your collection system.
Next, attach a leaf screen or gutter guard where your downspout meets the collection pipe. This prevents leaves, twigs, and larger debris from entering your system. Make sure it’s easily accessible for regular cleaning.
For the main filtration system, install a sediment filter between your collection tank and any pumps or outlets. A good-quality filter with a 50-micron rating will catch fine particles while maintaining decent water flow. Consider installing a clear filter housing – it makes it much easier to see when it needs cleaning.
When connecting components, use food-grade PVC pipes and fittings. Apply pipe cement properly and allow sufficient drying time before testing. All connections should be watertight to prevent leaks and contamination. Pro tip: Use threaded fittings where possible to make future maintenance easier.
Don’t forget to include an overflow valve near the top of your tank. This prevents system pressure buildup and directs excess water away from your home’s foundation. Position the overflow outlet so it drains to a suitable area of your yard.
For optimal performance, install a floating intake filter inside your tank. This draws water from just below the surface where it’s cleanest, rather than from the bottom where sediment settles. A simple float ball attached to a flexible hose works perfectly for this purpose.
Remember to make all components easily accessible for maintenance. Label your system’s main connection points and keep a basic diagram for future reference. Regular inspection of filters and connections will ensure your rainwater harvesting system operates efficiently for years to come.
Maintenance and Usage Tips
Seasonal Maintenance Schedule
Regular maintenance is crucial for keeping your rainwater collection system operating efficiently throughout the year. Following these seasonal maintenance tips will help extend the life of your system and ensure clean, usable water.
Spring (March-May):
– Clean gutters and downspouts of winter debris
– Check for and repair any frost damage
– Inspect filters and clean or replace as needed
– Test pump functionality if applicable
Summer (June-August):
– Monitor mosquito activity and ensure screens are intact
– Clean barrel exteriors to prevent algae growth
– Check seals and connections for leaks
– Clear overflow valves of any blockages
Fall (September-November):
– Remove leaves from gutters frequently
– Clean first-flush diverters
– Inspect roof catchment area for debris
– Test all valves and fittings
Winter (December-February):
– Drain pipes and disconnect if freezing is a concern
– Cover exposed components for protection
– Clear snow and ice from gutters
– Check for and repair any cracks or damage
Monthly Tasks:
– Inspect screens and filters
– Check water quality
– Clean debris from collection surfaces
– Monitor water levels and system performance
Remember to keep a maintenance log to track when tasks are completed and note any issues that need attention. This helps prevent small problems from becoming costly repairs.

Smart Ways to Use Your Collected Water
Making the most of your collected rainwater can significantly reduce your outdoor water usage while supporting a more sustainable lifestyle. The most obvious application is garden irrigation – use your harvested water to nourish vegetable gardens, flower beds, and lawn areas. For maximum efficiency, consider installing a drip irrigation system that connects directly to your storage tank.
Your collected rainwater is perfect for washing outdoor furniture, cleaning tools, and maintaining your deck or patio. Since rainwater is naturally soft and free from additives, it’s excellent for washing cars without leaving water spots. You can also use it to top off swimming pools or decorative fountains, reducing your reliance on municipal water.
During dry spells, your stored rainwater becomes invaluable for maintaining compost bins and supporting indoor plants. Consider using it for cleaning outdoor trash bins, filling pet water bowls, or washing muddy boots. If you’ve installed appropriate filtration systems, you might even use the water for toilet flushing or laundry.
To maximize your water conservation efforts, try these smart tips:
– Water gardens early morning or evening to reduce evaporation
– Use mulch around plants to retain moisture
– Install moisture sensors to prevent overwatering
– Keep track of rainfall patterns to optimize collection
– Regular system maintenance ensures clean, usable water year-round
Remember to check local regulations regarding rainwater usage, as some areas have specific guidelines about how collected water can be used.
Setting up a rainwater collection system is not just an environmentally conscious choice – it’s a smart investment in your home’s sustainability and your wallet. By following the steps outlined in this guide, you can create an efficient system that helps reduce your water bills while providing a reliable source of water for your garden and outdoor needs.
Remember to check local regulations, choose the right collection containers, and ensure proper filtration and maintenance of your system. The initial setup may require some time and effort, but the long-term benefits far outweigh the investment. Regular maintenance and seasonal checks will keep your system running smoothly for years to come.
Start small if you need to – even a single barrel can make a difference. As you become more comfortable with the system, you can always expand it to meet your growing needs. By harvesting rainwater, you’re not just saving money; you’re contributing to water conservation and creating a more sustainable future for your community.
Take the first step today and join the growing number of homeowners embracing this eco-friendly solution. Your garden – and the environment – will thank you.
Leave a Reply