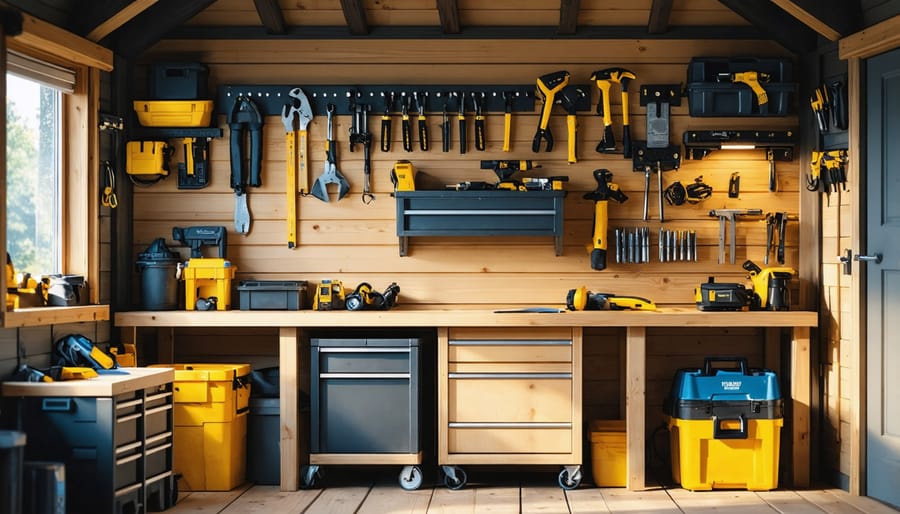
Install a subpanel in your shed, fed by a suitably sized underground cable from your main electrical panel, to power lights, outlets and small appliances. Carefully plan the layout of lighting fixtures, switches and receptacles to maximize functionality while keeping your shed organized. Use GFCI-protected outlets, proper grounding, and weatherproof boxes to ensure a safe and code-compliant installation. With the right preparation and attention to detail, you can transform your backyard shed into a well-lit, powered workspace or hobby room.
Planning Your Shed’s Electrical Layout
Determining Your Power Requirements
To determine your shed’s power needs, start by listing all the electrical devices and appliances you plan to use inside. Common items include lighting, power tools, a mini-fridge, or even a space heater. Check the wattage rating for each device, typically found on a label or in the owner’s manual. Add up the wattages to get your total power requirement in watts.
Next, calculate the amperage by dividing the total wattage by the voltage (usually 120V). This tells you the minimum amp rating for your shed’s electrical service. For example, if your total wattage is 2400W, you’ll need at least a 20-amp service (2400W / 120V = 20A). It’s always wise to add a safety buffer of about 20% to account for future needs or peak usage. Proper sizing ensures your shed has adequate, safe power for all your activities.
Outlet and Switch Placement
When placing outlets and switches in your shed, consider both convenience and safety. Position outlets strategically around the shed, such as near workbenches or tool storage areas, to easily plug in power tools or lighting. Install outlets at a comfortable height, typically around 18-48 inches from the floor. Avoid placing outlets too close to windows or doors to prevent exposure to weather elements. For light switches, locate them near the entrance for easy access when entering the shed. If your shed is larger, consider adding multiple switches for better control over lighting zones. Ensure all outlets and switches are properly grounded and protected by GFCI (Ground Fault Circuit Interrupter) devices to reduce the risk of electric shock, especially in potentially damp environments. By thoughtfully placing outlets and switches, you’ll create a functional and safe electrical setup that enhances your shed’s usability for years to come.
Creating a Wiring Diagram
Before starting your shed electrical installation, create a wiring diagram to simplify the process. Sketch out the shed’s layout, marking the locations of outlets, switches, and light fixtures. Use symbols to represent each component, and draw lines to indicate the wiring paths. Label the wire sizes and types needed for each section. This visual plan helps you determine the materials required and serves as a guide during installation, making the project more efficient and reducing the risk of errors. As you work, refer to your diagram to stay on track and ensure all components are properly connected.


Gathering the Required Materials
Wire and Cable
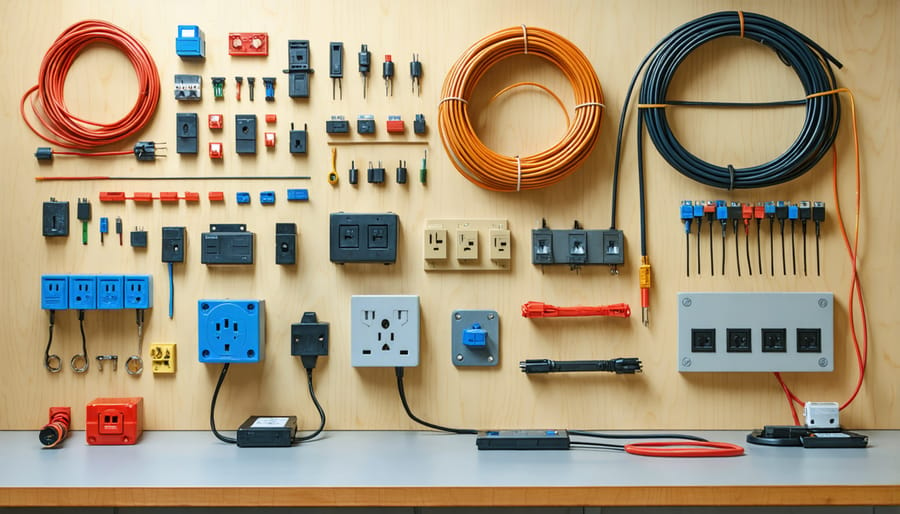
When wiring your shed, it’s crucial to choose the right types and gauges of wire to ensure safety and efficiency. For most sheds, 12-gauge wire is sufficient for lighting and general-purpose outlets, while 10-gauge wire is recommended for high-demand appliances like power tools or air conditioners. Always opt for outdoor-rated, weather-resistant wire to withstand the elements. UF-B cable is a popular choice for underground runs, while THWN wire is suitable for conduits. Remember to select wire colors according to standard electrical codes: black or red for hot wires, white for neutral, and green or bare copper for ground. Properly sized and rated wire will guarantee a reliable and code-compliant electrical system in your shed.
Boxes, Outlets, and Switches
When selecting electrical boxes and fixtures for your shed, it’s important to choose products that meet local building codes and are rated for outdoor use. Weatherproof boxes, GFCI outlets, and vapor-tight light switches are essential for safety and longevity. Consider the number and placement of outlets and switches based on your intended use of the shed. Opt for sturdy, high-quality products from reputable brands to ensure reliable performance in all seasons. Don’t forget to properly seal any holes or gaps around boxes and fixtures to prevent moisture and pests from entering your shed’s electrical system.
Circuit Breakers and Subpanels
When selecting circuit breakers for your shed’s subpanel, it’s crucial to match them with the appropriate wire gauges and load requirements. A 20-amp breaker typically pairs with 12-gauge wire, while a 15-amp breaker uses 14-gauge wire. Consider the total amperage of the devices and appliances you plan to run in your shed to determine the main breaker’s size. It’s wise to slightly overestimate your needs to accommodate future additions. Don’t forget to account for lighting and outlets when calculating your load requirements. Consult with a licensed electrician if you’re unsure about sizing your breakers and wires correctly.

Step-by-Step Installation Walkthrough
Running the Wiring
Once you have the wire and boxes in place, it’s time to run the Romex NM cable from the subpanel to each box. Start by measuring the distance from the subpanel to the first box, adding a few extra feet for any twists and turns. Cut the cable to length and secure one end to the subpanel using a cable connector and the built-in clamps.
Next, begin routing the cable along the shed’s framing, using cable staples every few feet to keep it in place. Be sure to keep the cable tight against the framing and avoid any sharp bends or kinks that could damage the wires inside. If you need to make any turns, use a cable strap to secure the wire and prevent it from sagging.
As you approach each box location, leave enough slack in the cable to comfortably reach the box and make your connections. Once you’ve reached the box, secure the cable to the framing within 8 inches of the box using a cable staple.
Repeat this process for each box, running a separate cable from the subpanel to each one. If you have multiple cables running along the same framing member, keep them neatly bundled together using cable ties every few feet.
When all your cables are in place, double-check each one to ensure it’s securely fastened and free of any damage. With the wiring in place, you’re ready to move on to making the final connections in each box and at the subpanel.
Installing Boxes and Fixtures
With the electrical wiring in place, it’s time to install the electrical boxes and fixtures. Choose weatherproof, outdoor-rated boxes for any outlets or switches. Securely mount the boxes to the shed’s framing, ensuring they’re level and flush with the wall surface. If you’re installing light fixtures, select ones suitable for outdoor use and follow the manufacturer’s instructions for mounting.
When connecting outlets and switches, pay close attention to electrical safety precautions. Make sure the power is turned off at the main panel before working on any wiring. Connect the wires according to the diagram, with the black (hot) wire to the brass terminal, white (neutral) wire to the silver terminal, and green or bare (ground) wire to the green terminal. Secure the connections with wire nuts and carefully tuck the wires into the box.
For light fixtures, follow a similar process. Connect the wires according to the manufacturer’s instructions, making sure to maintain proper polarity. Once the wiring is complete, carefully fold the wires into the box and secure the fixture in place.
After all the boxes and fixtures are installed, double-check your work. Make sure all connections are tight and secure, and that no bare wires are exposed. Once you’re satisfied with the installation, you can move on to the final steps of your shed electrical project.
Connecting to Power
After wiring the shed subpanel, it’s time to connect it to the main circuit panel in your house. Start by turning off the main breaker in the house and verifying that power is off with a voltage tester. Run the appropriately sized cable from the shed subpanel to the main panel, following all local codes and regulations. Secure the cable to the shed and house using weatherproof clamps.
Inside the main panel, connect the cable to a new double-pole breaker sized according to the subpanel’s amperage. Carefully connect the black (hot) wires to the breaker terminals, the white (neutral) wire to the neutral bus bar, and the green (ground) wire to the ground bus bar. Double-check all connections and make sure they are tight and secure.
Before turning the power back on, conduct a final inspection of the entire system. Verify that all wiring is correct, connections are tight, and no bare wires are exposed. Once satisfied, turn on the main breaker and then the shed subpanel breaker. Using a voltage tester, confirm that power is flowing to the shed outlets and lights. If everything checks out, congratulations! You’ve successfully installed electrical wiring in your shed, providing a safe and reliable power source for all your projects and storage needs.
Having a wired shed in your backyard is a game-changer. No more stumbling around in the dark or relying on flashlights and battery-powered lamps. With proper lighting and electrical outlets, your shed becomes a functional workspace for hobbies, home improvement projects, or even a cozy retreat. Plus, the satisfaction of completing the electrical installation yourself is unbeatable.
By following the steps outlined in this guide, you’ll have the knowledge and confidence to tackle this project head-on. From planning and gathering materials to running wires and installing fixtures, you’ll be equipped with the skills to bring power to your shed safely and efficiently. And once you’re done, don’t forget about securing your newly electrified shed to protect your valuable tools and equipment.
Imagine the possibilities: a well-lit potting bench for your gardening projects, a dedicated space for woodworking or crafting, or even a small home office away from the distractions of the main house. With a wired shed, you can transform this once simple storage space into a versatile and functional extension of your home. So, roll up your sleeves, grab your tools, and get ready to experience the pride and convenience of a shed with electricity.


Leave a Reply