Assess Your Shed Floor

Identifying Floor Material
Identifying the material of your shed floor is a crucial first step in determining the best waterproofing approach. The most common shed floor materials are wood and concrete, each requiring different waterproofing methods. For wooden floors, look for telltale signs like visible wood grain, nail holes, and a hollow sound when tapped. Concrete floors, on the other hand, have a smooth, solid surface and a dull thud when tapped. If you’re unsure, try scratching the surface with a coin – concrete won’t scratch easily, while wood will. Once you’ve identified your shed floor material, you can proceed with the appropriate waterproofing technique to ensure long-lasting protection against moisture damage.
Inspecting for Damage
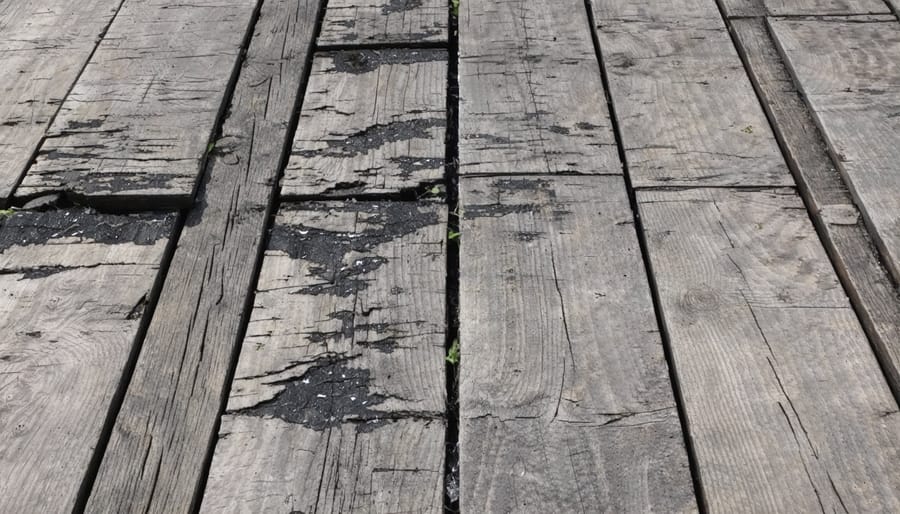
Before waterproofing your shed floor, it’s crucial to inspect for any damage that may compromise the process. Start by clearing out the shed and sweeping the floor to remove debris. Examine the floor closely for cracks, holes, or signs of water damage like stains, warping, or soft spots. Pay extra attention to corners, edges, and areas around the door where water may enter. If you find any damage, repair it with concrete patching compound or wood filler, depending on your floor material. Once repairs are complete and dry, you’re ready to begin waterproofing for a long-lasting, moisture-resistant shed floor.
Prepare the Shed Floor
Cleaning the Floor
Before applying any waterproofing solution, it’s essential to thoroughly clean the shed floor. Start by removing all items from the shed and sweeping away loose dirt, dust, and debris. If there are any existing coatings or sealants, use a paint scraper or wire brush to remove them. For tough stains or grime, consider using a pressure washer or a mixture of warm water and mild detergent. Scrub the floor with a stiff-bristled brush, paying extra attention to corners and crevices. Once you’ve removed all the dirt and debris, rinse the floor with clean water and allow it to dry completely. This may take several hours or even a day, depending on the humidity and ventilation in your shed. A clean, dry surface is crucial for ensuring proper adhesion of the waterproofing material.
Repairing Damage
Before waterproofing your shed floor, repair any damage to ensure a solid, even surface. Fill small cracks with concrete patching compound and sand smooth once dry. For larger holes or cracks, use a concrete repair kit, following the manufacturer’s instructions. If you discover rotted wood, remove and replace the affected areas with pressure-treated lumber. Sand any rough spots and clean the surface thoroughly to create an ideal base for waterproofing. By addressing these issues first, you’ll achieve better results and longer-lasting protection when applying your chosen waterproofing solution.
Choose a Waterproofing Method
Waterproof Sealants
Waterproof sealants offer a quick and easy solution for protecting your shed floor, but they come with both advantages and drawbacks. On the plus side, these products form a barrier against moisture, preventing water from seeping into the wood or concrete. They’re also relatively inexpensive and simple to apply. However, sealants may not be as durable as other waterproofing methods and might require frequent reapplication. Popular options include Thompson’s WaterSeal, KILZ L377711 Interior/Exterior Concrete Brick and Tile Liquid Masonry Sealer, and SEAL-ONCE MARINE Penetrating Wood Sealer. When choosing a sealant, consider factors like the type of floor material, drying time, and whether you need a clear or tinted finish.
Word count: 100
Waterproof Coatings
Waterproof coatings offer a convenient and effective way to protect your shed floor from moisture damage. These coatings form a barrier that prevents water from seeping into the wood or concrete, extending the life of your shed. They are easy to apply and come in various finishes, from clear to colored options. However, some coatings may require multiple applications for optimal protection and can be slippery when wet. For wooden shed floors, consider products like Thompson’s WaterSeal or KILZ Interior/Exterior Sealer. For concrete floors, opt for a product like DRYLOK Concrete Floor Paint or Rust-Oleum EpoxyShield Garage Floor Coating. Always follow the manufacturer’s instructions for best results.
Waterproof Membranes
Waterproof membranes offer an effective solution for protecting shed floors from moisture. These thin, flexible sheets form a barrier against water, preventing it from seeping through the floor. Advantages include easy installation, durability, and compatibility with various flooring materials. However, membranes can be punctured and may require careful subfloor preparation for optimal adhesion. Consider options like self-adhesive bituminous membranes or polyethylene sheets, which provide reliable waterproofing at a reasonable cost. For best results, ensure proper installation and sealing of seams and edges to create a continuous, impermeable barrier that keeps your shed floor dry and your stored items safe.

Apply the Waterproofing Treatment
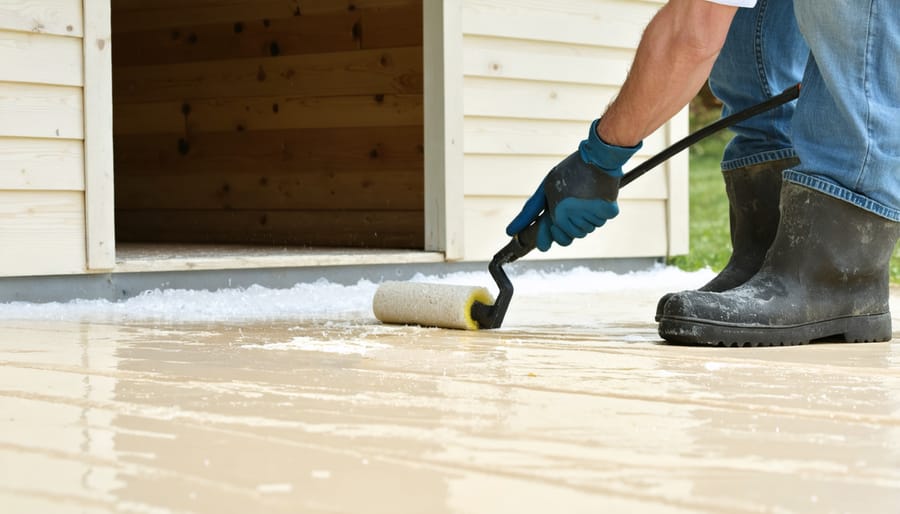
When you’re ready to apply the waterproofing treatment, ensure that you have all the necessary tools and materials on hand, such as a brush, roller, or sprayer, depending on the product you’ve chosen. Always wear protective gear, including gloves, goggles, and a face mask, to avoid contact with chemicals.
Begin by thoroughly mixing the waterproofing solution according to the manufacturer’s instructions. If using a two-part epoxy, carefully measure and mix the components in the recommended ratio. For liquid membranes or sealers, stirring the product well before application is usually sufficient.
Start applying the waterproofing treatment in a corner of the shed floor, working your way towards the entrance. Use even, overlapping strokes to ensure complete coverage. If using a brush or roller, pay extra attention to edges, corners, and any cracks or joints, as these areas are more vulnerable to water infiltration.
If the product requires multiple coats, allow adequate drying time between each layer, as specified by the manufacturer. This is crucial for proper adhesion and effectiveness of the waterproofing treatment.
For optimal results, maintain a consistent application thickness throughout the process. Regularly check the floor for any missed spots or thin areas, and reapply the product as needed. If using a sprayer, keep the nozzle at a constant distance from the surface to achieve even coverage.
Once the final coat is applied, allow the waterproofing treatment to cure fully before walking on the surface or placing any items back inside the shed. Curing times can vary depending on the product and environmental conditions, so refer to the manufacturer’s guidelines for specific instructions.
By following these steps and taking the necessary precautions, you can ensure a successful application of your chosen waterproofing method, effectively protecting your shed floor from moisture damage for years to come.
Allow Adequate Drying Time
Allowing adequate drying time is crucial when waterproofing your shed floor. The duration varies depending on the product used and environmental conditions like temperature and humidity. Water-based sealers typically dry within a few hours, while solvent-based products may take up to 24 hours. For epoxy coatings, allow at least 24-48 hours of drying time before walking on the surface or placing items back inside the shed. If you live in a humid area or are waterproofing during colder months, extend the drying time accordingly. Proper drying ensures the waterproofing treatment adheres correctly and provides long-lasting protection for your shed floor.
Maintain Your Waterproofed Shed Floor
To keep your waterproofed shed floor in top condition, regular maintenance is key. Start by sweeping the floor to remove dirt, debris, and leaves that can scratch or wear down the waterproofing layer. Inspect the floor periodically for any signs of wear, cracks, or peeling, especially in high-traffic areas or corners. If you notice any damage, clean the affected area thoroughly and reapply the waterproofing treatment as needed. For long-lasting protection, consider reapplying the waterproofing every few years or as recommended by the product manufacturer. By following these simple steps to maintain your waterproofed shed floor, you can ensure that your shed remains dry, clean, and well-protected for years to come. Additionally, keeping your shed organized and avoiding excessive weight on the floor will further contribute to its longevity and functionality.
Conclusion
In conclusion, waterproofing your shed floor is a simple yet effective way to protect your valuable stored items from moisture damage and extend the life of your shed. By following the steps outlined in this article, including assessing your shed, preparing the floor, choosing the right waterproofing method, and properly applying and maintaining the waterproofing material, you can ensure your shed remains dry and secure for years to come. Don’t wait until it’s too late – take action now to waterproof your shed floor and enjoy the peace of mind that comes with knowing your belongings are safe from the elements. Your shed will thank you!


Leave a Reply