


Transform your metal shed from a dark storage space into a bright, functional workshop by installing windows in your shed. The process requires careful planning and precise execution, but with the right tools and technique, you can complete this project in a weekend. Start by selecting windows specifically designed for metal structures, as these come with appropriate mounting hardware and weather-resistant seals. Measure twice and cut once – proper window sizing prevents water infiltration and ensures structural integrity. This guide walks you through the essential steps of cutting precise openings, reinforcing the frame, and creating a weathertight seal that will keep your shed dry and well-lit for years to come. Whether you’re creating a workshop, garden room, or storage space, adding windows dramatically improves functionality while increasing your shed’s value and appeal.
Essential Tools and Materials

Tools Checklist
Before starting your window installation project, gather these essential tools to ensure a smooth process:
– Electric drill with metal drill bits (various sizes)
– Metal snips or tin snips for cutting the shed wall
– Tape measure and pencil for accurate measurements
– Level to ensure proper alignment
– Caulking gun and weatherproof sealant
– Safety glasses and work gloves
– Power screwdriver with appropriate bits
– File or deburring tool for smoothing rough edges
– Utility knife for trimming
– Work light or flashlight
– Sawhorses or stable work surface
– Clamps to hold window frame in place
– Hammer and rubber mallet
– Center punch for marking drill points
Pro tip: Consider having a helper on hand, as window installation often requires an extra set of hands for positioning and support. Keep all tools organized in a nearby toolbox or tray to maintain efficiency throughout the project.
Remember to inspect all tools before starting and ensure batteries are charged for any cordless equipment. Having everything ready beforehand will make the installation process much smoother and safer.
Materials List
To complete this project successfully, you’ll need the following materials:
• Pre-fabricated window unit (sized to fit your shed opening)
• Silicone caulk suitable for metal and glass
• Self-tapping metal screws (1-inch length recommended)
• Weather stripping tape
• Butyl tape for moisture barrier
• Metal flashing (for header and sill)
• Foam insulation strips
• Drill bits for metal (appropriate size for your screws)
• Primer and paint (matching your shed color)
• Sheet metal shears or tin snips
• Measuring tape
• Level
• Safety equipment:
– Safety glasses
– Work gloves
– Dust mask
– Knee pads
Optional materials include:
• Window trim kit (if desired for aesthetic finish)
• Expansion foam for gaps
• Metal window frame anchors
• Window screen (if not included with window unit)
• Touch-up paint for any scratches
Remember to purchase slightly more materials than calculated to account for potential mistakes or adjustments during installation.
Planning and Preparation
Choosing the Right Location
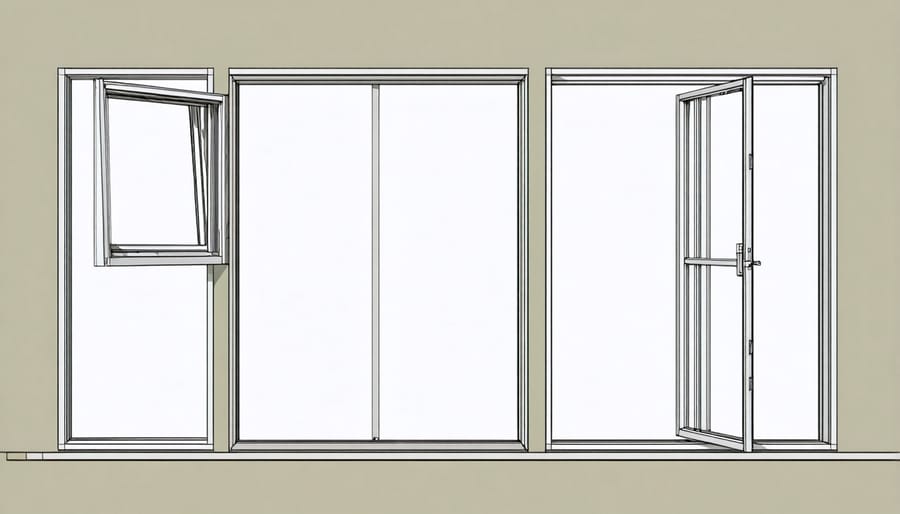
Before cutting into your metal shed, carefully consider the optimal window placement to maximize natural light and ventilation. Similar to planning a proper shed foundation guide, window positioning requires thoughtful consideration.
For most metal sheds, installing windows on the east or west-facing walls provides balanced daylight throughout the day. Avoid placing windows on the south-facing wall if you live in a hot climate, as this can create excessive heat buildup inside your shed. North-facing windows offer consistent, indirect light that’s perfect for workspaces.
Consider your shed’s interior layout when choosing window locations. Place windows where they won’t interfere with shelving units or storage areas. For ventilation purposes, installing windows on opposite walls creates effective cross-breeze. Keep windows at least 12 inches away from corners and seams to maintain structural integrity.
Height matters too – position windows at eye level for visibility while standing, or slightly higher if you’re planning to install workbenches beneath them. Remember to check local building codes, as some areas have specific requirements for window placement in outdoor structures.
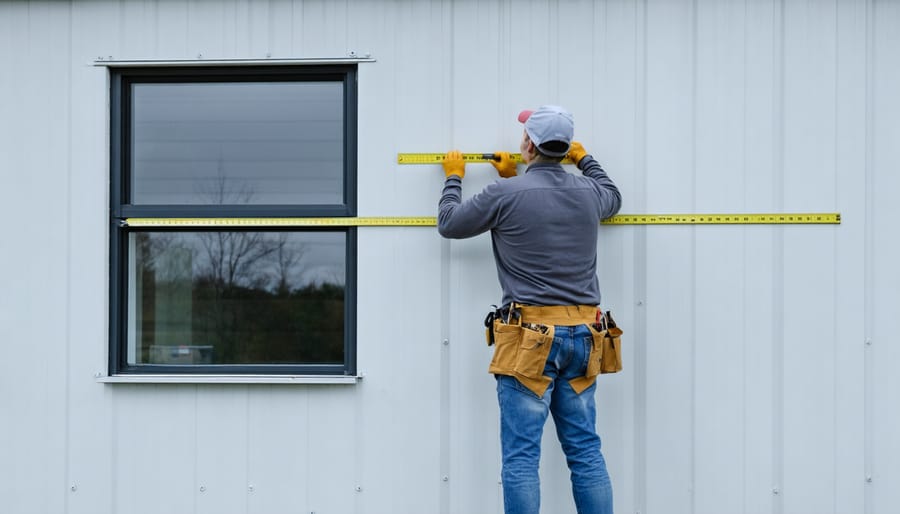
Measuring and Marking
Before cutting into your metal shed, precise measurements are crucial for a successful window installation. Start by marking the desired window location from the inside of the shed using a pencil and level. Measure the window’s dimensions and add an extra 1/2 inch on all sides to allow for proper fitting and insulation. Draw your outline using a straight edge and level, making sure your lines are perfectly square.
Double-check all measurements before proceeding, as errors at this stage can be costly and difficult to correct. Mark your cutting lines clearly with a permanent marker, and place masking tape along the lines to prevent the marker from rubbing off and to protect the metal surface while cutting. If your shed has vertical ribs or corrugations, take extra care to account for these in your measurements and marking.
Pro tip: Consider the shed’s interior layout and exterior appearance when choosing your window placement. The bottom of the window should be at least 3 feet from the ground for security purposes.
Surface Preparation
Before cutting into your metal shed, proper surface preparation is essential for a successful window installation. Start by cleaning the designated area thoroughly with a degreaser and cloth to remove any dirt, rust, or debris. Mark your cutting lines precisely using a straight edge and permanent marker, ensuring they’re perfectly level by using a spirit level.
Apply masking tape along the cutting lines to prevent the metal from scratching and help create cleaner cuts. This also provides a good guide for your cutting tool. For added stability during cutting, reinforce the area from the inside by applying strips of plywood or sturdy cardboard, securing them temporarily with clamps.
If you encounter any rust spots, sand them down and apply a rust converter before proceeding. Finally, lay down a drop cloth beneath your work area to catch metal shavings and make cleanup easier. Remember to wear safety glasses and work gloves throughout this preparation phase.
Installation Process
Cutting the Opening
Before making any cuts, carefully mark your window outline on the shed wall using a level and marker. Add an extra 1/2 inch to your measurements to ensure proper fit. For safety, wear protective goggles, gloves, and a dust mask throughout this process.
Start by drilling pilot holes at each corner of your marked window outline. These holes will serve as starting points for your cutting tool. For metal sheds, a jigsaw with a fine-toothed metal cutting blade works best, though you can also use tin snips for thinner gauge metal.
If using a jigsaw, insert the blade through one of the pilot holes and slowly follow your marked line. Keep the tool steady and maintain even pressure – rushing this step can result in jagged edges or mistakes. Work your way around the outline, taking breaks if needed to ensure precise cuts.
For additional stability while cutting, you might want to place a piece of plywood inside the shed wall as backing. This prevents the metal from vibrating excessively during cutting. Once you’ve completed the cut, carefully remove the metal panel and use a metal file to smooth any sharp edges.
Pro tip: Place a drop cloth below your work area to catch metal shavings, making cleanup easier and preventing scattered debris around your yard. Remember to sweep up any remaining metal pieces thoroughly, as they can be hazardous to pets and lawn equipment.
Frame Installation
Before installing the window frame, double-check your measurements and ensure you have proper wall framing to support the window. Begin by applying a continuous bead of weatherproof silicone caulk around the opening’s perimeter. This creates a water-tight seal between the frame and the metal wall.
Position the window frame into the opening, making sure it’s level and plumb. Use shims at the bottom and sides to achieve perfect alignment – this is crucial for smooth window operation. While holding the frame in place, drill pilot holes through the frame’s pre-drilled mounting holes into the metal shed wall.
Secure the frame using self-tapping sheet metal screws, starting with the top corners. Work your way around the frame, checking level and plumb as you go. Don’t fully tighten the screws until all are in place, as this allows for minor adjustments if needed.
Once the frame is secure, apply a second bead of weatherproof caulk around the entire perimeter where the frame meets the shed wall. This double-seal approach ensures maximum weather protection. Check that the frame is square by measuring diagonally from corner to corner – both measurements should be equal. If they’re not, loosen the screws and adjust until perfect alignment is achieved.
Test the frame’s stability by gently pressing against it from both inside and outside. There should be no movement or flexing.
Sealing and Waterproofing
Proper sealing and waterproofing are crucial steps to keep water out of your shed and protect your interior from moisture damage. Start by applying a high-quality silicone caulk around the entire window frame, both inside and outside. Make sure to create a continuous bead without any gaps or bubbles, paying special attention to the corners where leaks commonly occur.
Next, install weather stripping around any moving parts of the window to create an additional barrier against drafts and moisture. For metal sheds, use foam tape with strong adhesive backing designed specifically for metal surfaces.
Apply a waterproof flashing tape along the top of the window frame, extending it at least 6 inches up the wall and 3 inches down each side. This creates a waterproof barrier that directs water away from the window opening. For added protection, consider installing a small awning or drip edge above the window to further deflect rainwater.
Test your sealing job by gently spraying water around the window frame with a garden hose. Look for any signs of water penetration on the inside. If you spot any leaks, apply additional caulk to those areas. Remember that proper sealing not only prevents water damage but also helps maintain comfortable temperatures inside your shed while reducing energy costs if you plan to heat or cool the space.
Finishing Touches
Testing and Adjustments
After completing the installation, test the window by opening and closing it several times to ensure smooth operation. Check that the sash moves freely without sticking or making unusual noises. Next, inspect the weatherstripping by closing the window firmly and looking for any visible gaps or light penetration around the edges.
On a rainy day or using a garden hose on low pressure, test for water tightness around the frame. Watch for any leaks or water seepage. If you notice water getting in, apply additional caulk to the problem areas and let it cure completely.
For casement windows, verify that the crank mechanism works properly and that the window locks securely. Adjust the hinges if needed to achieve proper alignment. Some minor adjustments to the frame may be necessary over time as the shed settles.
Finally, clean both sides of the glass and check that all hardware is properly tightened. Make periodic inspections part of your regular shed maintenance routine to catch and address any issues early.
Maintenance Tips
Regular maintenance will keep your shed window functioning properly for years to come. Clean the window and frame at least twice a year using mild soap and water, avoiding harsh chemicals that could damage the metal or seals. Check the weatherstripping and caulking annually, replacing any cracked or deteriorated sections to prevent water infiltration.
Keep the window track clean and lubricated with silicone spray to ensure smooth operation. Inspect the frame regularly for signs of rust, especially around screws and joints. If you spot any rust, sand it down immediately and apply touch-up paint designed for metal surfaces.
During winter months, ensure proper ventilation to prevent condensation buildup, which can lead to rust and mold. Test the window’s operation periodically to catch any issues early. If you notice any loose screws or hardware, tighten them promptly to maintain the window’s structural integrity and weather resistance.
For metal sheds in coastal areas, consider applying a protective coating annually to prevent salt-air corrosion.
Installing a window in your metal shed might have seemed daunting at first, but with the right tools and by following these steps carefully, you can successfully complete this project. Remember that proper measurement and planning are crucial for a successful installation, and taking time to prepare your work area and materials will make the process much smoother. Don’t rush through the waterproofing steps – this is essential for preventing future leaks and protecting your shed’s contents. If you’ve followed each step carefully, you now have a professionally installed window that will provide natural light and ventilation to your storage space.
Many DIY enthusiasts have successfully completed this project, and you can too. If you encounter any challenges during installation, don’t hesitate to double-check your measurements or take a step back to ensure everything aligns properly. The effort you put into this project will pay off with a more functional and inviting shed space. With your new window properly installed and sealed, you can enjoy improved lighting and airflow while maintaining the security and weather resistance of your metal shed. Congratulations on enhancing your shed with this valuable addition!
Leave a Reply