


Transform your stuffy, overheated shed into a comfortable, well-ventilated space that protects tools and stored items from moisture damage. Proper ventilation prevents mold growth, extends your shed’s lifespan, and maintains ideal storage conditions throughout every season. Whether you’re building a new shed or upgrading an existing structure, strategic ventilation solutions range from simple passive systems to powered options that guarantee optimal airflow.
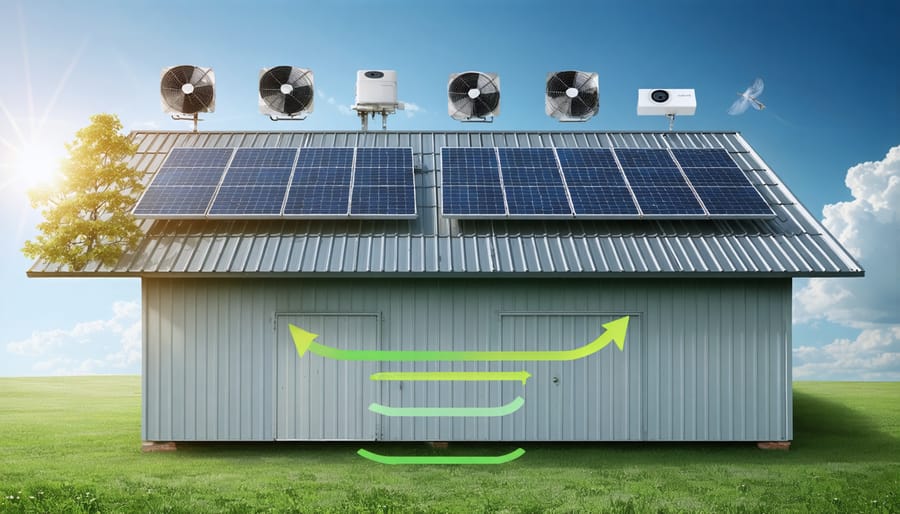
Installing ridge vents along your shed’s roofline creates natural convection currents, while adding soffit vents near the foundation establishes a consistent flow of fresh air. Combine these passive methods with solar-powered fans or traditional electric ventilation systems for maximum effectiveness in larger spaces. Smart placement of windows, doors, and vents not only improves air circulation but also reduces humidity levels that can rust tools and damage stored materials.
Choose from these proven ventilation methods to create a custom solution that matches your climate, shed size, and specific storage needs. The right combination of ventilation features will protect your investment while making your shed a more functional space year-round.
Natural Ventilation Solutions
Strategic Vent Placement
Strategic vent placement is key to creating effective airflow in your shed. For optimal ventilation, you’ll want to position vents to take advantage of natural air movement while ensuring complete air circulation throughout the space.
Roof vents work best when installed near the peak of your shed’s roof, where hot air naturally collects. Install them in pairs on opposite sides to create a cross-flow effect, with one vent acting as an intake and the other as an exhaust. For a typical 8×10 shed, two roof vents spaced 6-8 feet apart usually provide adequate ventilation.
Soffit vents should be placed under the eaves of your shed, where they can draw in cooler air from ground level. Install them evenly along both sides of the structure, with at least two vents per side for balanced airflow. This placement creates a natural chimney effect, as cool air enters through the soffits and rises to exit through the roof vents.
Gable vents are most effective when installed high in the triangular wall ends of your shed. For maximum efficiency, place one vent in each gable end, allowing air to flow freely from one end of the building to the other. If your shed is larger than 120 square feet, consider installing additional gable vents at different heights to enhance air movement.
Remember to keep vents clear of shelving, stored items, and other obstructions to maintain proper airflow throughout your shed.
Ridge Vent Systems
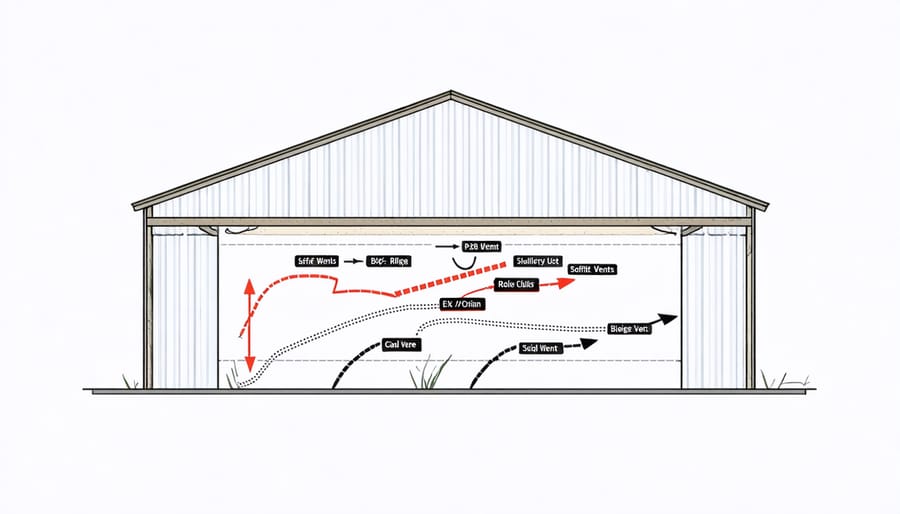
Ridge vent systems represent one of the most effective and aesthetically pleasing solutions for shed ventilation. Running along the peak of your shed’s roof, these continuous vents create a natural chimney effect that draws hot air up and out while allowing fresh air to enter through lower vents. If you’re planning a new shed or upgrading an existing one, proper vented roof installation is crucial for optimal performance.
These systems work particularly well because hot air naturally rises to the highest point in your shed. The continuous opening along the ridge allows this warm air to escape consistently, preventing heat buildup that could damage stored items or create uncomfortable working conditions. Most ridge vent systems are designed with special weather guards that prevent rain and snow from entering while maintaining proper airflow.
For the best results, pair your ridge vent with soffit vents at the eaves. This combination creates a complete air circulation system, with fresh air entering through the soffits and warm air exiting through the ridge. The beauty of ridge vents lies in their subtle appearance – they blend seamlessly with your roofline while providing constant, maintenance-free ventilation year-round.
Many modern ridge vent systems come with built-in filters to keep out insects and debris, making them a practical choice for protecting both your shed and its contents. They’re available in various materials and styles to match different roofing types and architectural preferences.
Powered Ventilation Options
Solar-Powered Fans
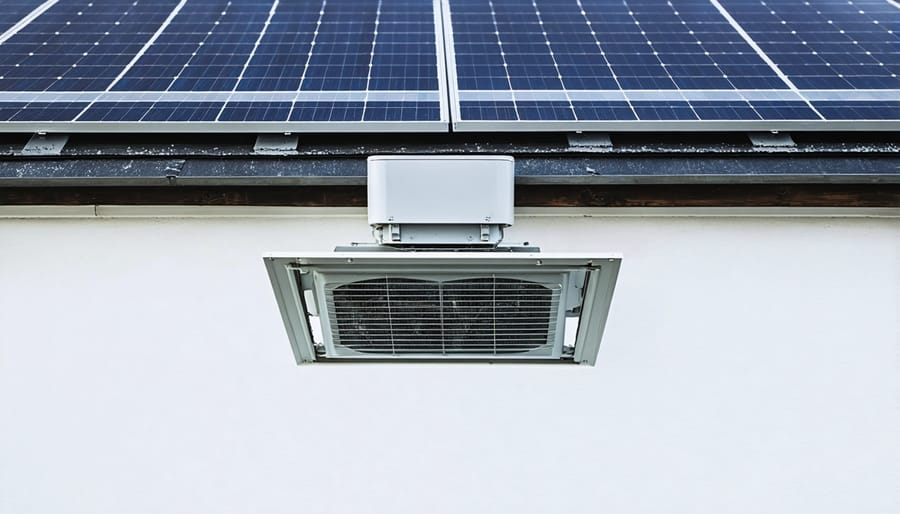
Solar-powered fans offer an eco-friendly and cost-effective solution for keeping your shed cool without increasing your energy bills. These innovative ventilation devices harness the sun’s power when you need it most – during bright, hot days when ventilation is crucial.
Most solar fans come with built-in panels that can be mounted directly on your shed’s roof or walls. The beauty of these systems is their self-sufficiency; they work hardest during peak sunlight hours when temperatures are highest, naturally aligning with your cooling needs. Many models even come with small battery backups, allowing them to run for a short time after sunset.
When choosing a solar-powered fan for your shed, consider the size of your space. A typical 10×12 shed usually requires a fan rated at 500-800 cubic feet per minute (CFM). Look for models with adjustable solar panels that you can position for optimal sun exposure throughout the day.
Installation is typically straightforward, requiring basic tools and minimal DIY experience. Mount the solar panel where it receives maximum sunlight, usually on the south-facing side of your roof. Position the fan near the shed’s peak, where hot air naturally collects. Some homeowners install two fans – one for intake and one for exhaust – creating a more efficient airflow system.
For best results, pair your solar fan with proper insulation and other passive ventilation methods. Many users report temperature reductions of 10-15 degrees during peak summer hours, making their sheds more comfortable for both storage and workspace purposes.
Remember to clean the solar panels occasionally and check that they remain properly angled toward the sun for maximum efficiency.
Electric Exhaust Fans
Electric exhaust fans are a powerful solution for maintaining optimal airflow in your shed, especially when natural ventilation alone isn’t enough. These fans work by actively pulling hot, stale air out while drawing fresh air in through other openings, creating a consistent circulation pattern that helps control both temperature and humidity.
For most residential sheds, a 12-inch exhaust fan is typically sufficient. These fans can be mounted high on your shed’s wall or in the gable end, where hot air naturally accumulates. Many models come with adjustable speeds and even humidity sensors, allowing you to customize the ventilation based on your specific needs.
Installation is relatively straightforward – most fans can be connected to your existing electrical system or operated using solar power. For maximum efficiency, position your exhaust fan on the side opposite from your air intake vents. This creates a cross-ventilation effect that thoroughly refreshes the air throughout your entire shed.
A particularly popular option is the thermostat-controlled fan, which automatically activates when your shed reaches a certain temperature. This hands-off approach ensures your shed stays properly ventilated without requiring constant monitoring. Remember to clean your fan regularly and check the motor at least twice a year to maintain optimal performance.
Some homeowners find that combining an electric exhaust fan with passive ventilation methods provides the most effective solution, especially during extreme weather conditions.
DIY Ventilation Improvements
Adding Window Vents
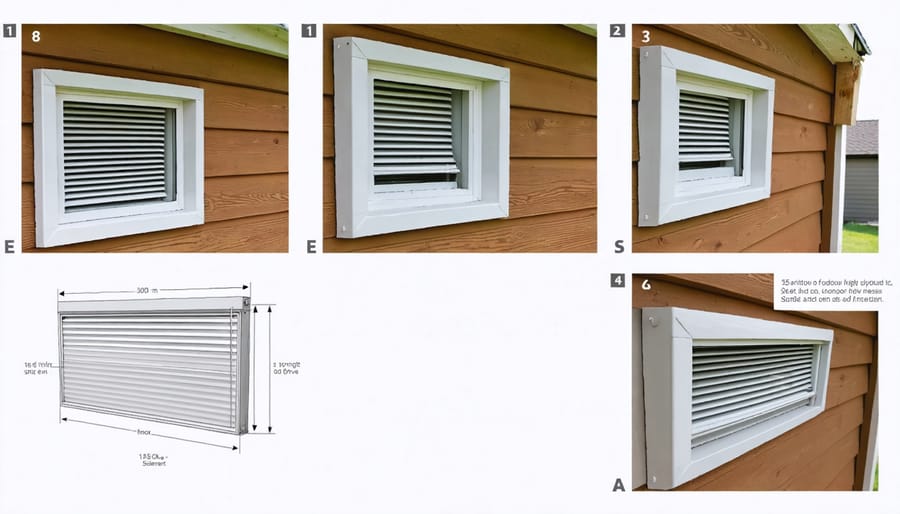
Installing window vents in your shed is a cost-effective way to improve air circulation while maintaining security. Start by measuring your shed windows and purchasing appropriately sized vents – static aluminum or plastic vents work well for most applications.
Begin the installation by marking the vent position on your window frame. For optimal airflow, place vents near the top of the window where warm air naturally rises. Using a drill with the appropriate bit size, create pilot holes at the corners of your marked area. Then, using a jigsaw or reciprocating saw, carefully cut along your marked lines to create the vent opening.
Before installing the vent, sand the edges of the cut area to remove any splinters or rough spots. Apply a weather-resistant sealant around the opening’s perimeter to prevent moisture infiltration. Position the vent in the opening and secure it with weather-resistant screws – typically included with the vent unit.
For added protection, consider installing mesh screens behind the vents to keep insects and debris out while maintaining airflow. If you’re working with metal shed walls, use self-tapping screws and apply a rust-resistant primer to any exposed metal edges.
Pro tip: Install vents on opposite walls when possible to create cross-ventilation. For larger sheds, consider installing multiple vents to ensure adequate air movement throughout the space. Remember to clean your vents seasonally to maintain optimal performance and prevent blockages that could reduce airflow.
Always check local building codes before making modifications to your shed, as some areas have specific requirements for ventilation in outdoor structures.
Creating Cross Ventilation
Creating effective cross ventilation in your shed is one of the most efficient ways to maintain a comfortable environment and prevent condensation buildup. The key lies in strategic placement of openings to create a natural flow of air throughout the structure.
Start by installing vents on opposite walls of your shed, ideally at different heights. When warm air rises, it naturally exits through higher vents while cooler air enters through lower openings, creating a continuous airflow cycle. For optimal results, position your lower vents on the side that typically receives prevailing winds in your area.
Consider these practical placement tips:
– Install gable vents near the roof peak on both ends
– Place soffit vents under the eaves
– Add wall vents at waist height on opposite walls
– Include a ridge vent along the roof’s peak for maximum air movement
The size of your vents matters too. A good rule of thumb is to have 1 square foot of ventilation for every 150 square feet of floor space. For example, a 10×12 shed (120 square feet) would need about 0.8 square feet of total vent area.
To enhance cross ventilation, keep stored items away from vents and maintain clear pathways for air to flow between opposite openings. Adding adjustable vents allows you to control airflow during different seasons, reducing it during colder months while maximizing it during summer heat.
Remember to consider your local climate when planning vent placement. In humid areas, you might need additional ventilation points, while in drier regions, the basic opposite-wall setup might suffice.
Seasonal Ventilation Adjustments
Proper ventilation needs change with the seasons, and adapting your shed’s airflow throughout the year is crucial for protecting your stored items. Following effective year-round ventilation strategies can help maintain optimal conditions in your storage space.
During summer months, maximize airflow by keeping vents fully open and running fans during the hottest parts of the day. Consider installing removable screens on windows and doors to allow maximum air circulation while keeping insects out. For particularly hot climates, adding a solar-powered fan can provide extra cooling when needed.
Winter requires a different approach. While some airflow is still necessary to prevent moisture buildup, you’ll want to reduce the amount of cold air entering the shed. Close some vents partially, but never completely, to maintain minimal air circulation. If you have windows, keep them closed but ensure ridge vents remain partially open to release any warm, moist air that rises.
Spring and fall are transition seasons requiring frequent adjustments. Monitor humidity levels and adjust vent openings accordingly. These seasons often bring rain, so pay special attention to preventing moisture accumulation. Keep lower vents slightly more open during these months to encourage air movement that helps dry out any dampness.
Remember to check weather stripping and seals seasonally, making repairs as needed to maintain proper ventilation control.
Proper shed ventilation is essential for protecting your valuable belongings and maintaining a comfortable storage environment. Whether you choose natural ventilation methods like ridge vents and soffit vents, or opt for powered solutions such as solar fans and exhaust systems, the key is to implement a strategy that suits your specific needs. Remember that good airflow prevents moisture buildup, reduces heat accumulation, and extends your shed’s lifespan. Don’t wait for problems to arise – take action now by incorporating some of these ventilation ideas into your shed design. With minimal investment and effort, you can create a well-ventilated space that keeps your tools, equipment, and stored items in excellent condition throughout the seasons. Start with the basics, and you can always upgrade your ventilation system as needed.
Leave a Reply