


Proper shed roof ventilation prevents moisture damage, extends your structure’s lifespan, and maintains a stable environment for stored items. Without adequate airflow, heat and humidity build up rapidly, leading to warped wood, rusted tools, and potentially hazardous mold growth. Installing the right ventilation system – whether through ridge vents, soffit combinations, or simple gable-end units – transforms your basic storage space into a protected, climate-controlled environment that safeguards your investments. Modern ventilation solutions balance effectiveness with energy efficiency, offering homeowners practical options for every budget and shed design. From preventing condensation in winter to reducing sweltering summer temperatures, strategic roof ventilation serves as your shed’s first line of defense against weather-related deterioration.
Why Your Shed Needs Proper Roof Ventilation
The Hidden Costs of Poor Ventilation
Poor ventilation in your shed can lead to costly consequences that often go unnoticed until significant damage occurs. Without proper airflow, excess humidity becomes trapped, leading to moisture damage that can compromise your shed’s structural integrity and ruin your stored belongings.
The hidden costs start with mold and mildew growth, which not only creates unpleasant odors but can also trigger health issues and destroy valuable items. Wood rot silently attacks support beams and flooring, while metal tools and equipment may develop rust and corrosion. Even seemingly sturdy items like power tools and garden equipment can deteriorate rapidly in these conditions.
Inadequate ventilation can also lead to warped wooden surfaces, peeling paint, and damaged insulation. Perhaps most concerning is the potential impact on expensive items like riding mowers, bicycles, or seasonal decorations that you’ve carefully stored away. By understanding these risks, you can take proactive steps to protect your investment and preserve your stored belongings for years to come.
Temperature Control Benefits
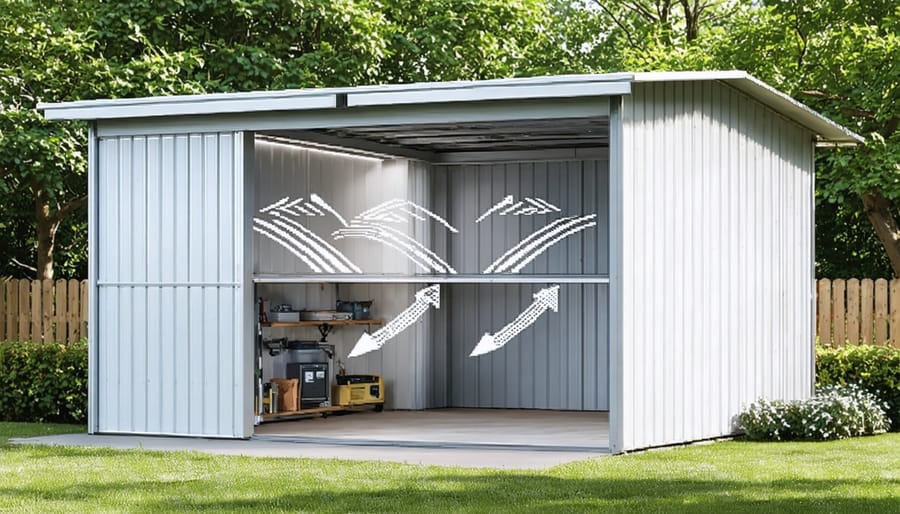
Proper ventilation in your shed plays a crucial role in maintaining comfortable temperatures throughout the year. During hot summer months, effective ventilation helps release trapped heat that builds up under your shed’s roof, preventing the interior from becoming uncomfortably warm. This natural cooling effect protects your stored items from heat damage and makes working in your shed more pleasant.
In winter, ventilation continues to work its magic by reducing moisture accumulation and preventing temperature extremes. Without adequate airflow, your shed can become a freezer in cold weather, potentially damaging temperature-sensitive items. Good ventilation creates a steady flow of air that helps regulate temperature, keeping the environment more stable year-round.
This temperature control benefit extends to protecting your stored belongings. Tools stay rust-free, wooden items avoid warping, and sensitive electronics remain safe from temperature-related damage. Plus, a well-ventilated shed requires less energy to maintain comfortable conditions if you decide to add heating or cooling solutions later.
Essential Shed Roof Ventilation Components
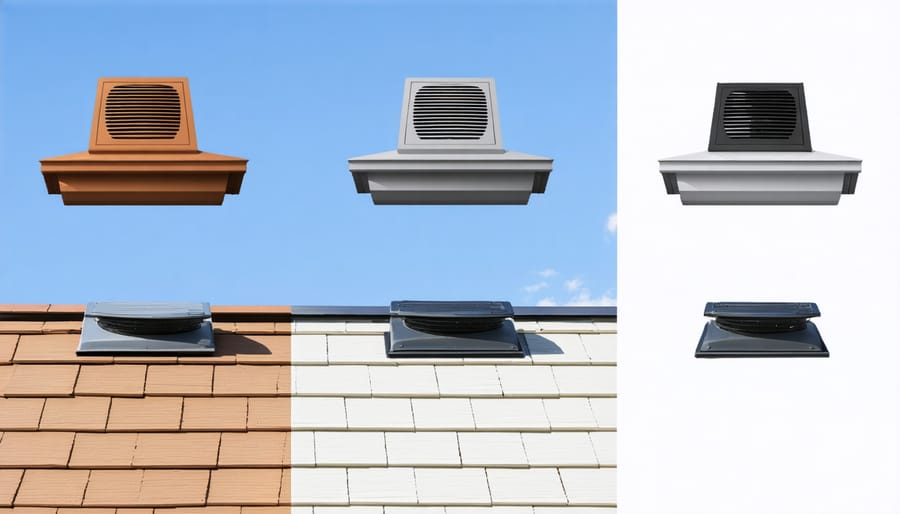
Ridge Vents vs. Static Vents
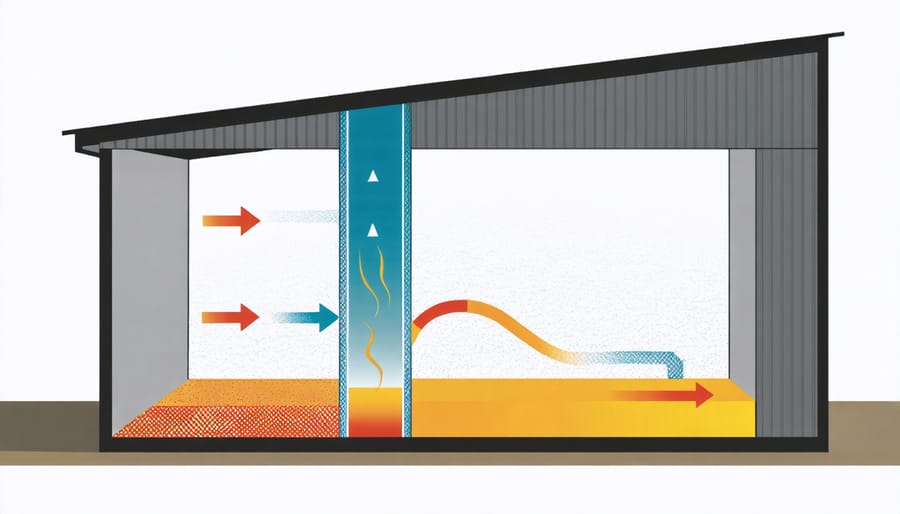
When comparing ventilation options for your shed, ridge vents and static vents each offer unique benefits. Ridge vents run along the peak of your roof, providing continuous airflow across the entire length. They work particularly well with soffit vents, creating a natural chimney effect that draws cool air in from below while expelling hot air at the top.
Static vents, also known as box vents, are individual units installed near the roof’s peak. While they’re typically less expensive and easier to install than ridge vents, you’ll usually need multiple units to achieve the same ventilation coverage. Many shed owners find that two or three static vents work well for a standard-sized shed.
Ridge vents generally offer superior airflow and blend seamlessly with your roof line, making them virtually invisible from the ground. They’re also less likely to leak since they don’t create individual penetration points in your roof. Static vents, while more noticeable, are an excellent choice for smaller sheds or when working with a limited budget. Both options will significantly improve your shed’s ventilation when properly installed.
Soffit Vents and Air Intake
A well-ventilated shed requires a balanced system of air intake and exhaust, with soffit vents playing a crucial role in this process. These vents, installed under the roof’s overhang, allow fresh air to enter at the lowest point of your shed’s roof. When paired with ridge or gable vents at the top, they create an effective natural airflow that helps regulate temperature and moisture.
For optimal performance, you’ll want to ensure your soffit vents provide adequate intake area – typically, you should aim for a 1:1 ratio between intake and exhaust ventilation. Installing continuous soffit vents or evenly spaced individual vents along both sides of your shed creates the most effective airflow pattern. Consider combining this with installing windows for additional ventilation to enhance air circulation further.
Remember to keep soffit vents clear of insulation and debris, as blocked vents can disrupt the entire ventilation system. Installing vent baffles can help maintain a clear airflow path, especially if you plan to insulate your shed’s roof.
Installing Your Shed Roof Ventilation System
Calculating Your Ventilation Needs
To determine the right amount of ventilation for your shed, start with the simple 1:300 rule – you need 1 square foot of ventilation for every 300 square feet of floor space. For most backyard sheds, this means you’ll need between 1-2 square feet of total ventilation area.
Measure your shed’s floor space by multiplying its length by width. For example, an 8×10 shed has 80 square feet of floor space, requiring about 0.27 square feet (or roughly 39 square inches) of ventilation. Split this area between intake vents (lower) and exhaust vents (upper) for optimal airflow.
For peaked roofs, add 20% more ventilation to account for the additional air space. If you store equipment that generates heat or moisture, like lawn mowers or pool chemicals, increase your ventilation by another 15-20%.
Consider your local climate too – hot, humid regions benefit from additional ventilation, while cold climates might need less. Remember, it’s better to slightly over-ventilate than under-ventilate, as proper airflow prevents moisture damage and extends your shed’s life.
Installation Best Practices
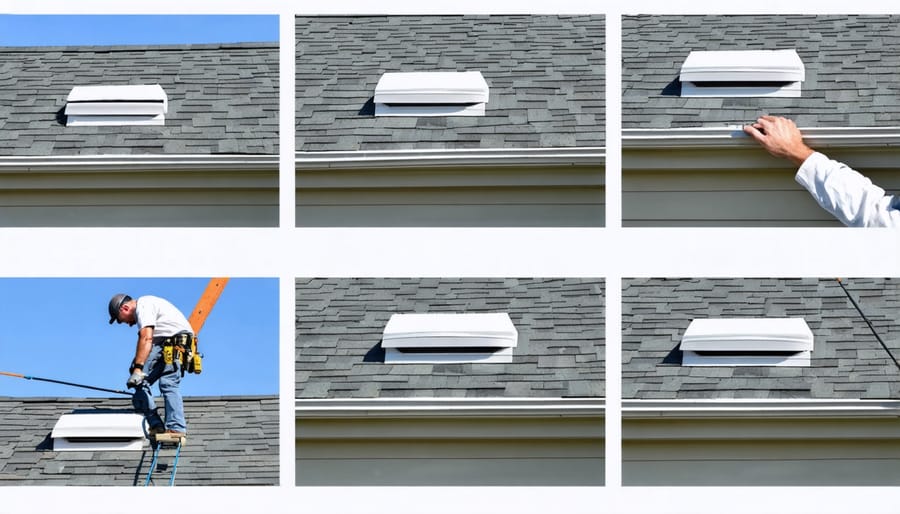
To ensure optimal shed roof ventilation, start by carefully planning your vent placement before installation. Position intake vents along the eaves or soffits and exhaust vents near the ridge or peak of the roof. When installing a metal roof, be sure to integrate ventilation components during the process rather than adding them later.
For gable vents, install them as high as possible in the gable ends, and ensure they’re properly sealed against moisture. When adding ridge vents, cut the opening slightly smaller than the vent width to prevent water infiltration. Always use rust-resistant fasteners and appropriate flashing around all roof penetrations.
Consider installing a vapor barrier beneath your roofing material to prevent condensation issues. Space your vents evenly to create consistent airflow, typically allowing 1 square foot of ventilation for every 150 square feet of attic space. Double-check all seals and weatherstripping during installation, and test the airflow before completing the project.
Remember to follow local building codes and manufacturer specifications throughout the installation process. This attention to detail during installation will help prevent future ventilation problems and extend your shed’s lifespan.
Common Installation Mistakes to Avoid
When installing shed roof ventilation, avoid placing vents too close to the roof’s edge, as this can reduce their effectiveness. A common mistake is installing too few vents, creating insufficient airflow. Always calculate your shed’s square footage to determine the proper number of vents needed. Don’t forget to seal around vent openings – many DIYers skip this crucial step, leading to water leaks and pest intrusion.
Another frequent error is blocking vents with stored items or installing shelving that impedes airflow. Keep vents clear and position storage accordingly. Some homeowners also make the mistake of installing vents on only one side of the roof, creating uneven air circulation. Remember to balance intake and exhaust vents for optimal airflow.
Lastly, avoid using damaged or poor-quality vent covers, as these can fail quickly and compromise your shed’s protection.
Maintenance and Optimization Tips
Seasonal Maintenance Checklist
To keep your shed’s ventilation system working effectively year-round, follow these seasonal maintenance tasks. In spring, clear any debris from vents and check for winter damage or pest intrusion. Test all mechanical vents to ensure smooth operation and lubricate moving parts if needed. During summer, inspect screens for tears and verify that air is flowing freely through all vents.
Fall maintenance is crucial – remove leaves and other debris that might block airflow, and check seals around vents for signs of wear. Consider installing vent covers to prevent snow from entering during winter months. Throughout winter, regularly remove snow buildup around roof vents and check that ice hasn’t formed inside the ventilation system.
Monthly inspections of your ventilation components will help identify potential issues early. Look for signs of moisture, unusual odors, or excessive heat buildup – these indicate your ventilation might need attention. Remember to clean vent covers and screens every three months to maintain optimal airflow.
Troubleshooting Common Issues
Even well-installed ventilation systems can sometimes develop issues. If you notice excessive moisture or stuffiness, first check that all vents are clear of debris, spider webs, and leaves. For soffit vents, ensure insulation isn’t blocking airflow. A quick cleaning with a brush or compressed air can often resolve these problems.
If your shed still feels humid after cleaning the vents, consider adding more ventilation points or installing a small battery-operated fan for additional air circulation. Strange odors often indicate trapped moisture – check for water leaks and ensure ground moisture isn’t seeping up through the floor.
For sheds with condensation issues during winter, verify that warm air can escape through ridge vents or upper vents. Sometimes, simply adjusting the positioning of stored items to improve airflow can make a significant difference. If mold appears, address it immediately with appropriate cleaners and improve ventilation to prevent recurrence.
Remember that prevention is better than cure – regular maintenance checks can help you spot and fix minor issues before they become major problems.
Proper shed roof ventilation is more than just an optional feature – it’s a crucial component that protects your investment and ensures your stored items remain in pristine condition. Throughout this guide, we’ve explored how effective ventilation prevents moisture buildup, reduces heat accumulation, and extends your shed’s lifespan. Whether you choose static vents, ridge vents, or powered ventilation systems, the key is maintaining a balanced airflow that works year-round.
Remember that successful ventilation starts with proper planning and installation, followed by regular maintenance checks. By implementing the ventilation strategies we’ve discussed, you’ll create a healthier environment for both your stored belongings and the shed’s structural components. Don’t underestimate the impact of proper airflow – it can mean the difference between a shed that lasts for decades and one that succumbs to moisture damage within a few years.
Take the time to assess your specific needs, consider your local climate, and choose the ventilation solution that best suits your situation. Your future self will thank you for making this important investment in your shed’s longevity and functionality.
Leave a Reply