


Choosing the right shed flooring transforms a basic storage space into a durable, moisture-resistant foundation that protects your valuable tools and equipment. From pressure-treated plywood and concrete slabs to innovative composite materials, each flooring option offers unique benefits for different climates, budgets, and usage patterns. Whether you’re building a new shed or upgrading an existing structure, understanding your flooring choices impacts everything from installation complexity to long-term maintenance requirements. This guide explores the most practical shed flooring solutions, helping you balance cost, durability, and ease of installation to create a stable, long-lasting foundation for your outdoor storage needs.
By focusing on essential factors like moisture resistance, load-bearing capacity, and installation requirements, you’ll discover how to select flooring that withstands heavy equipment, prevents ground moisture infiltration, and maintains its integrity through changing seasons. Let’s explore the most effective options to ensure your shed floor serves as a reliable foundation for years to come.
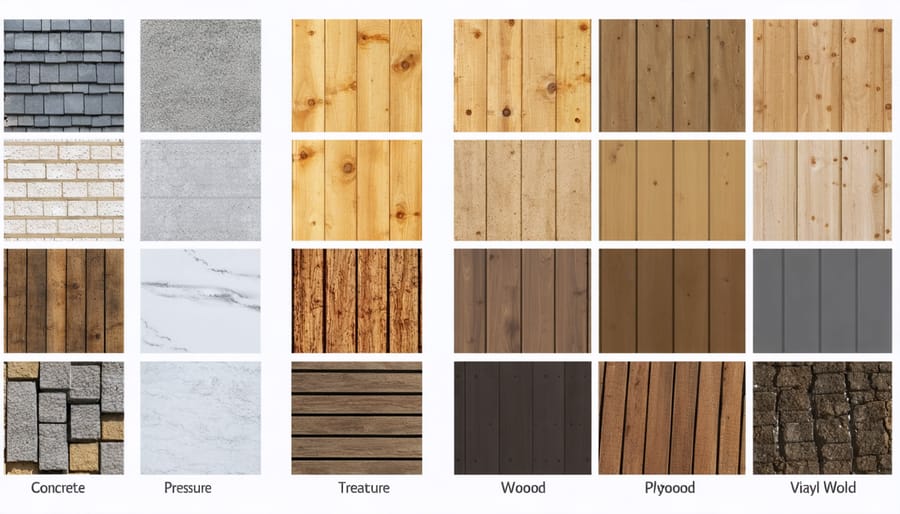
Popular Shed Flooring Materials
Concrete Flooring
Concrete flooring offers unmatched durability and stability for your shed, making it an excellent long-term investment. A properly installed concrete slab provides a level, moisture-resistant foundation that can support heavy equipment and withstand years of use. The typical 4-inch thick slab with wire mesh reinforcement creates a sturdy base that prevents settling and cracking.
While concrete requires professional installation or significant DIY expertise, its benefits often justify the initial effort and cost. The surface can be sealed to prevent moisture seepage and treated with non-slip additives for added safety. Many homeowners appreciate that concrete floors can be painted or stained to match their shed’s aesthetic, while still maintaining their practical advantages.
Consider adding a vapor barrier beneath the slab and ensuring proper drainage around your shed to maximize the concrete’s lifespan. Though it’s one of the more expensive flooring options upfront, concrete’s minimal maintenance requirements and exceptional longevity make it a cost-effective choice over time.
Pressure-Treated Wood
Pressure-treated wood is a popular and cost-effective choice for shed flooring, offering excellent durability and natural resistance to moisture, insects, and decay. This specially treated lumber undergoes a chemical process that forces preservative compounds deep into the wood’s fibers, making it significantly more resilient than standard lumber.
Available in various grades and thicknesses, pressure-treated boards typically come in 5/4″ decking boards or 2×6″ planks, both suitable for shed floors. The wood’s natural look adds aesthetic appeal while providing a sturdy foundation that can last 15-20 years with proper maintenance.
Installation is straightforward, requiring basic carpentry skills and tools. Always allow pressure-treated wood to dry completely before sealing, and ensure proper ventilation beneath the floor to prevent moisture buildup. While initially green in color, the wood naturally weathers to an attractive gray tone over time. Regular maintenance includes annual inspections and resealing every few years to maintain its protective qualities.
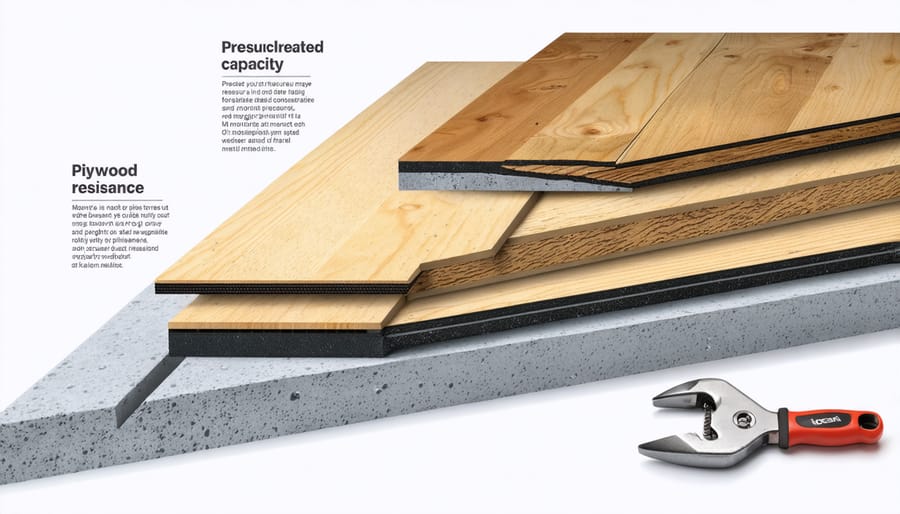
Plywood and OSB
Plywood and oriented strand board (OSB) are popular engineered wood options that offer excellent durability at budget-friendly prices. Plywood, made from multiple layers of wood veneer, provides superior strength and resistance to warping. It’s particularly well-suited for shed floors that will bear heavy equipment or frequent foot traffic. For best results, opt for exterior-grade plywood rated for ground contact, with a minimum thickness of ¾ inch.
OSB, while slightly less expensive than plywood, offers comparable strength and durability. Its compressed wood strand construction makes it especially resistant to delamination. However, it can be more susceptible to moisture damage if not properly protected. Both materials benefit from waterproofing plywood floors treatments to extend their lifespan and maintain structural integrity.
When installing either option, ensure proper support with joists spaced 16 inches on center, and always leave a small expansion gap around the edges to accommodate seasonal movement. Both materials can be painted or sealed to enhance their appearance and weather resistance.
Vinyl and Composite Materials
Modern vinyl and composite materials offer some of the most versatile and budget-friendly flooring options for storage sheds. These materials combine durability with easy maintenance, making them increasingly popular among homeowners. Vinyl flooring comes in sheets or tiles, providing excellent moisture resistance and a wide range of designs that can mimic wood or stone. Installation is straightforward, often featuring click-lock systems that DIY enthusiasts can handle without professional help.
Composite flooring materials, made from a blend of plastic and wood fibers, offer exceptional durability and weather resistance. They’re particularly well-suited for areas with high humidity or frequent temperature changes. These materials won’t rot, warp, or attract insects, and they require minimal maintenance beyond occasional cleaning. While the initial cost might be higher than some traditional options, the long-term value makes them a smart investment, especially for sheds storing heavy equipment or frequently accessed tools.
Installation Essentials
Ground Preparation
Before installing your shed flooring, proper ground preparation is essential for ensuring long-term stability and durability. Start by selecting the best foundation for your shed and clearing the designated area of vegetation, rocks, and debris. Remove any grass or weeds, and dig down approximately 4-6 inches to create a clean working surface.
Use a level and string lines to mark the perimeter of your shed area, extending about 12 inches beyond the planned shed dimensions. Check for proper drainage by observing how water naturally flows across the site. If necessary, create a slight grade (about 1 inch per 8 feet) away from the shed location to prevent water pooling.
Fill the excavated area with a layer of crushed stone or gravel (¾-inch or smaller) for drainage. Compact the gravel thoroughly using a plate compactor, working in layers of 2-3 inches at a time. This creates a solid, well-draining base for your shed floor.
Finally, use a long level or transit level to ensure the surface is completely flat. Add or remove material as needed to achieve perfect levelness. Remember, taking extra time during ground preparation will prevent future issues like settling, tilting, or water damage to your shed floor.

Moisture Protection
Protecting your shed floor from moisture is crucial for its longevity and the safety of your stored items. The first line of defense starts with proper site preparation, ensuring the ground slopes away from your shed to prevent water pooling. Installing a vapor barrier beneath your flooring material creates an essential moisture barrier between the ground and your shed’s interior.
To effectively waterproof your shed floor, consider adding a layer of gravel beneath the foundation, which helps with drainage and prevents ground moisture from seeping upward. A 4-6 inch layer of crushed stone or gravel provides excellent drainage capabilities.
For additional protection, install perimeter drainage around your shed using French drains or surface channels. These systems direct water away from the structure, preventing it from accumulating around the foundation. Treat wooden floors with water-resistant sealants or paint, reapplying every few years to maintain effectiveness.
Consider raising your shed floor slightly off the ground using pressure-treated lumber sleepers or concrete blocks. This elevation creates an air gap that promotes ventilation and reduces direct contact with ground moisture. Regular inspection of your moisture protection systems, especially after heavy rains, helps identify and address potential issues before they become serious problems.
Remember to maintain proper ventilation inside your shed, as good airflow helps prevent condensation and reduces the risk of mold growth. Installing roof vents or small gaps near the roof line can significantly improve air circulation.
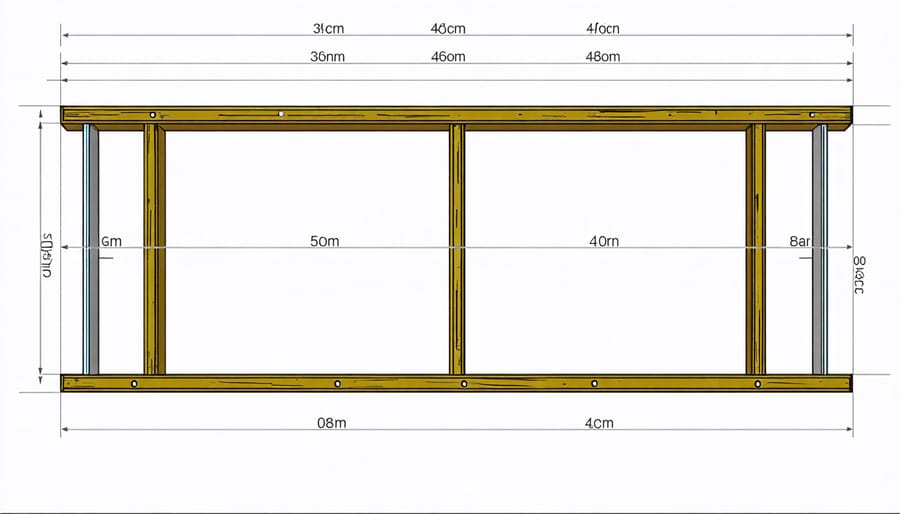
Support Structure
A solid support structure forms the foundation of any reliable shed floor. The key components include bearers (the main supporting beams) and joists (the cross members), which work together to create a sturdy base for your flooring material.
For a typical garden shed, bearers should be pressure-treated lumber sized at least 4×6 inches, spaced no more than 4 feet apart. These rest on concrete blocks or pier foundations to keep the wood off the ground and prevent moisture damage. Your joists should be 2×6 inches for spans up to 8 feet, installed 16 inches on center for optimal support.
The spacing between support elements is crucial – too far apart and your floor may sag or feel bouncy. A good rule of thumb is that joists should be sized up one inch for every additional 2 feet of span beyond 8 feet. For heavy equipment storage, consider reducing joist spacing to 12 inches on center.
Remember to use joist hangers and galvanized nails or screws for all connections. Adding diagonal bracing between bearers provides extra stability against lateral movement. For moisture protection, install a vapor barrier between the ground and your support structure, extending it up the sides of the bearers by several inches.
When building near trees, consider additional support points to account for possible root growth and ground movement. A properly constructed support structure will ensure your shed floor remains level and stable for years to come.
Maintenance and Care
Regular Inspection Tips
Keep your shed floor in top condition with these essential inspection tips. Every three months, take a walk through your shed and check for these key issues:
Look for signs of moisture damage, including dark spots, warping, or soft areas in the flooring. Pay special attention to corners and areas near the door where water might seep in. Check the seams between floor panels or boards for any separation or lifting.
Inspect for pest activity by looking for small holes, sawdust piles, or droppings. These could indicate unwanted visitors making homes beneath your floor. Take note of any squeaking or movement when walking across the floor, as this might suggest loose fasteners or weakening support structures.
Test the floor’s level with a basic spirit level – any significant changes could point to foundation issues. Examine the floor’s finish for wear patterns, especially in high-traffic areas. For concrete floors, watch for cracks or crumbling.
Keep a maintenance log to track changes over time, making it easier to spot developing problems. Address any issues promptly to prevent more extensive damage and costly repairs down the line.
Cleaning and Protection
Regular maintenance of your shed floor will significantly extend its lifespan and keep it looking great for years to come. Start by sweeping the floor weekly to prevent dirt and debris buildup, which can scratch and damage the surface. For deeper cleaning, use a suitable cleaner based on your flooring material – mild soap and water work well for most surfaces, while wood floors might need specialized cleaners.
For concrete floors, consider applying a quality sealant every 2-3 years to prevent moisture penetration and staining. Wood floors benefit from annual treatment with appropriate wood sealers or preservatives to protect against rot and insects. If you have vinyl or rubber flooring, occasional waxing can help maintain its protective layer.
Place heavy equipment on floor protectors or rubber mats to prevent dents and scratches. In high-traffic areas, consider using removable rubber mats or runners to protect the floor’s surface. For areas where you store chemicals or oil-based products, use containment trays to prevent spills from damaging the floor.
Keep an eye out for signs of wear or damage and address issues promptly to prevent them from worsening. Good ventilation in your shed will also help prevent moisture-related problems and extend your floor’s life.
Repairs and Replacements
Even the most durable shed flooring will eventually need some attention. For concrete floors, watch for cracks and chips, which can be easily repaired with concrete patching compound. Small cracks should be addressed promptly to prevent water infiltration and further damage. Wood flooring might require occasional board replacement due to rot or pest damage – look for soft spots, discoloration, or boards that feel springy when walked on.
Vinyl and rubber flooring typically show wear through scuffs and tears. Small tears can often be patched, but larger damage might require replacing individual tiles or sections. For plywood floors, delamination is a common issue that usually signals the need for replacement, especially if water damage is involved.
Consider a complete floor replacement when repairs become frequent, structural integrity is compromised, or water damage is extensive. A good rule of thumb: if repairs would cost more than 50% of a new floor installation, replacement is usually the better investment. Regular inspections every six months can help catch issues early, making repairs simpler and more cost-effective.
Choosing the right flooring for your shed is a crucial decision that impacts both its functionality and longevity. Throughout this guide, we’ve explored various options, from concrete and wooden floors to vinyl and rubber solutions, each offering unique benefits for different needs and situations.
Remember that your ideal flooring choice should align with your shed’s primary purpose. For workshop sheds, durability and stability are paramount, making concrete or heavy-duty plywood excellent choices. For garden storage, moisture resistance becomes crucial, pointing toward treated wood or vinyl options. If you’re creating a hobby space, comfort and aesthetics might lead you toward engineered wood or premium vinyl solutions.
Consider your local climate and the shed’s location when making your final decision. Areas with high rainfall or humidity require special attention to moisture protection, while regions with extreme temperature fluctuations need flooring that can handle expansion and contraction.
Budget considerations are important, but remember that investing in quality flooring often pays off in the long run through reduced maintenance needs and extended lifespan. Factor in not just the initial material costs, but also installation expenses and long-term maintenance requirements.
Whatever flooring option you choose, proper installation is key to its performance. Don’t hesitate to consult professionals if you’re unsure about any aspect of the installation process. Additionally, establish a regular maintenance routine to protect your investment – simple actions like sweeping, occasional deep cleaning, and prompt repair of any damage can significantly extend your floor’s life.
By carefully considering your needs, local conditions, and maintenance capabilities, you can select a shed flooring solution that provides years of reliable service. Take time to weigh all options, and remember that the best choice is one that balances durability, functionality, and your specific requirements while fitting within your budget constraints.
Leave a Reply