
How to Waterproof Plywood
Plywood is a versatile and commonly used construction material known for its strength and durability. However, plywood is not naturally resistant to water, which makes it susceptible to damage and decay when exposed to moisture. Whether you plan to use plywood for outdoor projects or in areas prone to humidity, waterproofing becomes crucial to extend its lifespan and maintain its structural integrity.
This article will guide you through waterproofing plywood effectively, ensuring that your projects remain strong and durable even when exposed to moisture.
Understanding the Need for Waterproofing Plywood
Before delving into the steps of waterproofing plywood, it’s essential to understand why it’s necessary. Unprotected plywood quickly absorbs water, leading to swelling, warping, and eventual rotting. Furthermore, it can compromise the strength of the plywood and render it unsuitable for its intended purpose. Waterproofing plywood ensures that it remains strong and durable even when exposed to moisture, making it suitable for various applications, including outdoor furniture, decks, boat building, and more.
When plywood gets exposed to moisture, the wood fibers absorb the water, causing the material to swell. This swelling can result in a warped and uneven surface, compromising the structural integrity of the plywood. Furthermore, constant exposure to moisture can lead to rot and decay, making the plywood unsuitable for use over time. Learning to waterproof plywood is an important part of site preparation before constructing a new shed.
By effectively waterproofing plywood, you create a barrier that prevents water from penetrating the surface. This barrier keeps the plywood dry, preventing swelling, warping, and rotting. Waterproofed plywood maintains its strength and stability, ensuring your projects stand the test of time.
Materials Required
To successfully waterproof plywood, you will need the following materials:
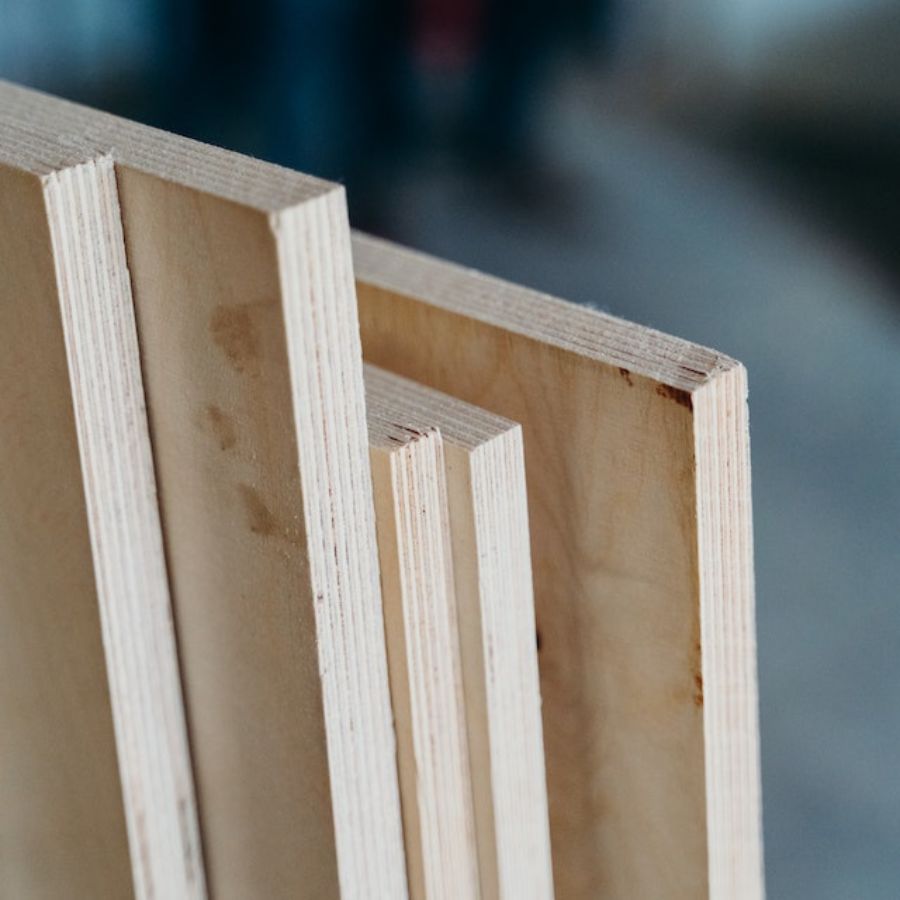
Plywood Sheets
When considering waterproofing plywood, starting with suitable materials is crucial. Choose plywood sheets that are suitable in thickness and grade for your project. It ensures that the untreated plywood has a solid foundation for the waterproofing process. Selecting the appropriate plywood sets the stage for effectively waterproofing and sealing the wood, protecting it from moisture damage. So, before diving into waterproofing plywood, ensure you have the correct type of plywood compatible with the waterproofing products and techniques you plan to use.
Sandpaper (Medium and Fine Grit)
Sandpaper is an essential tool in achieving a waterproof plywood surface. You can effectively smooth out any rough edges and prepare the untreated plywood for waterproofing using medium and fine-grit sandpaper. Sanding helps create a clean and even surface, allowing for better adhesion of sealants, such as epoxy resin, during the sealing process. By investing time in sanding the plywood, you ensure that the waterproofing products will adhere properly, creating a durable and water-resistant barrier. So, before sealing plywood, prepare the surface using sandpaper to achieve the best results in waterproofing plywood.
Exterior Wood Filler
When working with plywood for outdoor use, it is crucial to address any gaps or voids in the surface. Exterior wood filler is a necessary product to fill these imperfections. Applying the wood filler creates a smooth and even surface on the plywood, preparing it for further treatments like wood stain or waterproofing. This step is essential when sealing plywood edges, ensuring no water can penetrate the wood through gaps. Whether you’re using marine grade plywood or regular plywood, using an exterior wood filler in conjunction with an epoxy sealer helps enhance the overall waterproofing of the plywood sheets, protecting them from moisture damage.
Waterproofing Sealant (Such as Polyurethane or Epoxy)
Applying a suitable waterproofing sealant is vital for waterproofing plywood for outdoor use. Bonds like polyurethane or epoxy protect against moisture, preventing water from penetrating the plywood surface. These sealants enhance the waterproofing capabilities of plywood sheets and provide added protection against UV rays, rot, and other forms of damage. By applying a waterproofing sealant, you can effectively seal plywood edges and ensure the long-lasting durability of the wood. Whether you’re working with marine-grade plywood or regular plywood, choosing the proper waterproofing sealant is essential for preserving the integrity of your project.
Paintbrush or Roller
A paintbrush or roller is the perfect tool to achieve an even application of waterproofing sealant when sealing plywood. Whether working with epoxy resin or other sealants, using a paintbrush or roller ensures the sealant is spread evenly across the plywood surface. In addition, it helps to create a uniform protective layer on plywood sheets, boards, and edges, effectively sealing the wood against moisture. You can achieve a professional finish by applying the waterproofing sealant with a paintbrush or roller. Moreover, you can also enhance the longevity and water resistance of the plywood sheet or board.
Paint Tray
When waterproofing plywood, a paint tray is a practical accessory that comes in handy. The paint tray is a container to hold the sealant during application. By pouring the waterproofing sealant into the paint tray, you can easily access the sealant and efficiently load your paintbrush or roller. Again, this eliminates the need for constantly dipping into the original container, ensuring a smooth and uninterrupted application. The paint tray contains the sealant, reducing the risk of spills and messes. A paint tray can streamline waterproofing and achieve consistent results when sealing plywood.
Clean Cloth
When sealing plywood, a clean cloth is essential for a smooth finish. A clean cloth comes into play after sanding the plywood surface and applying the sealant. It helps wipe away any left sanding residue, ensuring a clean surface for the sealant. Additionally, the cloth is handy for removing any excess sealant that may have pooled or dripped during the application process. Using a clean cloth, you can achieve a neat and professional result when sealing plywood boards, sheets, and edges with epoxy resin or other sealants. You can enhance their waterproofing capabilities.
Safety Goggles
When working with plywood boards or sheets and engaging in sanding and sealing for waterproofing purposes, it is crucial to prioritize safety. Safety goggles play a vital role in protecting your eyes during these tasks. Sanding can generate fine particles, and sealants like epoxy sealer may emit fumes that can harm the eyes. Wearing safety goggles protects your eyes from potential hazards, ensuring a safe working environment. Also, it is essential to prioritize safety while waterproofing plywood sheets and sealing plywood edges for a successful project and to safeguard your well-being.
Gloves
When working with sealants and chemicals to waterproof plywood, it is essential to prioritize hand protection. Gloves are a barrier, ensuring your hands are safe from skin irritation or chemical contact. Whether applying sealants or handling waterproofing agents, wearing gloves is crucial to maintain safety and prevent harmful substances from coming into direct contact with your skin. You can confidently seal plywood and protect your hands from irritation or damage using gloves. Prioritizing hand protection when waterproofing plywood ensures a safer and more comfortable experience while achieving effective results.
Painter’s Tape (Optional)
When sealing plywood to make it waterproof, painter’s tape is an optional but helpful tool. Painter’s tape assists in creating clean lines and acts as a protective barrier for adjacent surfaces during sealing. By carefully applying painter’s tape along the edges or adjoining areas, you can prevent the sealant from spreading beyond the intended scope, ensuring precise and neat results. This tape helps maintain a professional finish and prevents unintentional damage or smudging to surrounding surfaces. While not essential, painter’s tape can be valuable when sealing plywood to achieve a clean and polished appearance.
Step-by-Step Process
When considering how to waterproof plywood, it’s essential to consider its application, such as being used as a foundation for a shed. Complement your knowledge with this guide on protecting wood for outdoor use from the University of Minnesota. Here are the steps to follow to waterproof plywood.
Preparation
Proper preparation is critical before waterproofing plywood to achieve optimal results. Begin by ensuring the plywood surface is clean, dry, and free from dirt, dust, or debris. Use medium-grit sandpaper to smooth out rough edges or imperfections, creating a smooth surface for sealing. After sanding, wiping away the sanding residue with a clean cloth is essential, ensuring a clean and even base. By taking these steps, you create the ideal foundation for the waterproofing process, allowing the sealant to adhere correctly and effectively seal the plywood. Proper preparation is crucial for successful waterproofing and sealing of plywood.
Filling the Gaps
Before you waterproof plywood, addressing any gaps or voids in the surface is essential. These gaps can compromise the waterproofing and allow water to penetrate the plywood, leading to potential damage. To fill these gaps, use exterior wood filler, following the manufacturer’s instructions. Once applied, allow the filler to dry completely. After drying, lightly sand the filled areas to create a smooth surface. This step ensures the waterproofing sealant adheres effectively and adequately seals the plywood. Filling the gaps and creating a smooth surface enhances the overall plywood waterproofing and sealing, providing long-lasting protection.
Selecting the Waterproofing Sealant
Choose a suitable waterproofing sealant based on your project’s requirements. Polyurethane and epoxy are popular choices. Polyurethane is easy to apply, provides good protection against moisture, and is available in various finishes. On the other hand, epoxy offers excellent waterproofing and creates a hard, durable surface. Consider factors such as the intended use of the plywood, the desired appearance, and the level of protection needed when selecting the sealant.
Applying the Waterproofing Sealant
Start by stirring the sealant thoroughly to ensure proper consistency. Use a paintbrush or roller to apply an even coat of the sealant onto the plywood surface, working in the direction of the wood grain. Pay extra attention to the edges and corners to ensure complete coverage. Apply a thin coat to avoid excessive pooling or dripping. Allow the sealant to penetrate the wood fibers and create a protective layer. Follow the manufacturer’s instructions regarding the number of coats needed and the drying time between each coat.
Drying Time and Sanding
It is essential to consider the drying time and sanding process to achieve a smooth and polished finish when waterproofing plywood. Follow these steps for optimal results:
- Drying Time: After applying the first coat of sealant, allow it to dry completely. The drying time will depend on the specific type of sealant used. Refer to the manufacturer’s instructions for the recommended drying duration. Taking time with this step is crucial, as premature handling or applying subsequent coats can negatively impact the sealant’s effectiveness.
- Sanding the Surface: Lightly sand the surface using fine-grit sandpaper once the first coat has dried. Again, this helps smoothen out any rough spots, imperfections, or brush marks on the plywood surface. Be gentle while sanding to avoid removing too much of the sealant. Sand in the direction of the wood grain for a consistent finish.
- Removing Sanding Residue: After sanding, wipe away any sanding residue using a clean cloth. This step ensures the surface is free from dust and debris, providing a clean canvas for subsequent coats or the final finish. A clean cloth helps remove any remaining sanding particles and prepares the plywood for the next steps of the waterproofing process.
By allowing the first coat of sealant to dry correctly and sanding the surface, you create a smooth and refined foundation for the subsequent coats. Sanding helps eliminate imperfections and promotes adhesion between layers. Wiping away the sanding residue ensures a clean surface, ready for further application or finishing touches. Remember to follow the manufacturer’s instructions regarding drying time for the sealant and exercise care while sanding to achieve the desired results.
Additional Coats
To maximize the waterproofing capability of your plywood, applying multiple coats of sealant is often necessary. Follow these steps to ensure optimal protection:
Same Process as Before
Apply subsequent coats of the sealant using the same application process. Whether you’re using a brush, roller, or sprayer, evenly distribute the sealant across the plywood surface. Pay attention to areas requiring additional protection, such as joints or edges.
Complete Drying Time
Allow each coat to dry completely before applying the next one. Drying time can vary depending on the type of sealant and environmental conditions. Consult the manufacturer’s instructions for the recommended drying time. Rushing the process may compromise the effectiveness of the sealant.
Recommended Number of Coats
Check the manufacturer’s instructions to determine the recommended coats for optimal protection. It may vary depending on the specific sealant one is using. Applying the recommended number of coats ensures a robust and durable waterproofing layer on the plywood.
Enhanced Waterproofing
Applying multiple coats enhances the overall waterproofing ability of the sealant. Each coat adds a layer of protection, further safeguarding the plywood against moisture infiltration. The additional coats strengthen the protective barrier and contribute to the longevity of the waterproofing effect.
By following these guidelines and applying multiple coats of sealant, you ensure that your plywood receives the utmost protection against water damage. Each additional coat builds upon the previous one, creating a more substantial, resilient waterproofing barrier. Remember the recommended drying time and number of coats specified by the manufacturer to achieve the best results. With each additional coat, your plywood becomes increasingly resistant to water penetration, ensuring its longevity and performance in various environments.
Optional – Paint or Varnish
Applying paint or varnish is an excellent option to enhance your plywood’s waterproofing and aesthetics. Not only does it add a pop of color and finish to the plywood, but it also offers an extra layer of protection against moisture. Here’s how you can go about it:
Selecting the Right Paint or Varnish
When choosing paint or varnish for waterproofing plywood, choose products specifically designed for outdoor or high-moisture environments. Look for those with excellent water resistance and durability to ensure long-lasting results.
Applying the Paint or Varnish
Apply an even coat of paint or varnish onto the plywood surface using a paintbrush or roller. Work toward the wood grain for a smooth and uniform finish. Be sure to allow each coat to dry completely before applying the next one, following the manufacturer’s instructions.
Multiple Coats for Enhanced Protection
Applying numerous coats of paint or varnish strengthens the waterproofing ability and provides a more robust layer of protection against moisture. Consider adding at least two or three coats, allowing sufficient drying time between each coat.
Enjoy the Added Benefits
Once the paint or varnish has dried completely, you can enjoy the enhanced aesthetics of the plywood. The added layer of protection provided by the paint or varnish helps safeguard the plywood from moisture, prolonging its lifespan.
By incorporating paint or varnish into your waterproofing process, you add a personal touch to your plywood project and provide extra protection against the damaging effects of moisture. Remember to choose the right products, apply multiple coats, and allow ample drying time. This optional step will make your waterproof plywood safe and visually appealing.
Curing and Final Touches
Applying paint or varnish is an excellent option to enhance your plywood’s waterproofing and aesthetics. Not only does it add a pop of color and finish to the plywood, but it also offers an extra layer of protection against moisture. Here’s how you can go about it:
Selecting the Right Paint or Varnish
When choosing paint or varnish for waterproofing plywood, choose products specifically designed for outdoor or high-moisture environments. Look for those with excellent water resistance and durability to ensure long-lasting results.
Applying the Paint or Varnish
Apply an even coat of paint or varnish onto the plywood surface using a paintbrush or roller. Work toward the wood grain for a smooth and uniform finish. Be sure to allow each coat to dry completely before applying the next one, following the manufacturer’s instructions.
Multiple Coats for Enhanced Protection
Applying various coats of paint or varnish strengthens the waterproofing ability and provides a more robust layer of protection against moisture. Consider adding at least two or three coats, allowing sufficient drying time between each coat.
Once the paint or varnish has dried completely, you can enjoy the enhanced aesthetics of the plywood. The added layer of protection provided by the paint or varnish helps safeguard the plywood from moisture, prolonging its lifespan.
By incorporating paint or varnish into your waterproofing process, you add a personal touch to your plywood project and provide extra protection against the damaging effects of moisture. Remember to choose the right products, apply multiple coats, and allow ample drying time. This optional step will make your waterproof plywood safe and visually appealing.
Conclusion
Waterproofing plywood is essential to protect it from moisture-related damage and extend its lifespan. Following the step-by-step process outlined in this guide, you can effectively waterproof plywood for various applications. You can ensure its durability and strength. After mastering how to waterproof plywood, you can apply these techniques to prevent water damage around the bottom of your shed.
Remember to choose the suitable sealant, apply multiple coats, and allow sufficient drying time between each coat. For more insights on wood waterproofing, check out this in-depth study on wood as an engineering material by the U.S. Department of Agriculture.
With proper waterproofing, your plywood projects will withstand the test of time, even in wet and humid conditions. Invest time and effort into waterproofing your plywood to ensure that it remains structurally sound and resistant to moisture, enabling you to enjoy its benefits for years to come.
Looking for a storage sheds?
Browse our full range of storage sheds from authorized dealer brands. Free shipping to the continental US.