


Transform your outdoor shed into a comfortable, year-round storage space with proper insulation – a DIY project that pays for itself through energy savings and enhanced durability. Installing insulation requires basic tools, careful planning, and a weekend of focused work, but delivers immediate benefits in temperature control and moisture prevention. From choosing between fiberglass batts, foam boards, or spray foam to sealing air gaps and adding vapor barriers, this comprehensive guide walks you through every step of insulating your shed like a professional. Whether you’re protecting valuable tools, creating a workshop space, or simply extending your storage options, proper insulation makes your shed more functional while potentially reducing heating and cooling costs by up to 50%. Learn the essential techniques, material options, and expert tips to tackle this valuable home improvement project with confidence.
Planning Your Shed Insulation Project
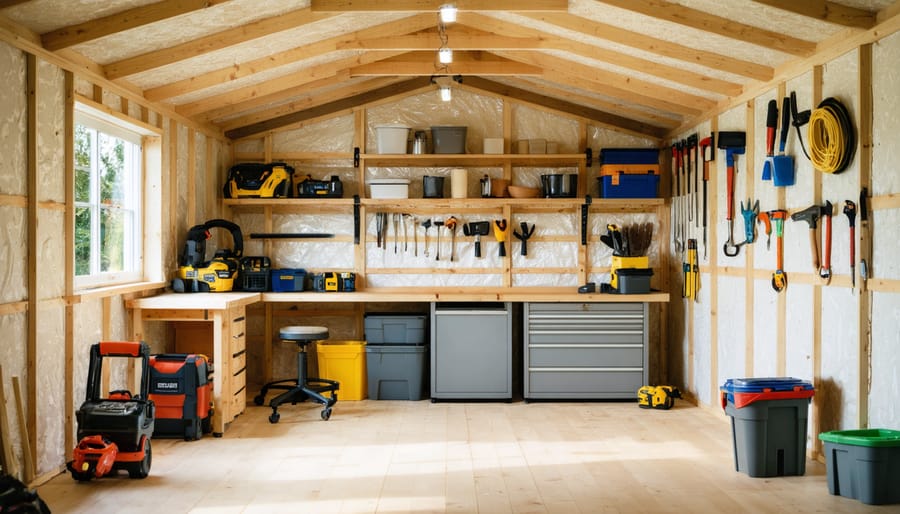
Essential Materials and Tools
To get started with your shed insulation project, you’ll need several key materials and tools. For insulation, budget for either fiberglass batts ($0.50-$1.00 per square foot) or rigid foam boards ($1.00-$2.00 per square foot). You’ll also need a vapor barrier ($0.10-$0.30 per square foot) to prevent moisture issues.
Essential tools include:
– Utility knife ($5-$10)
– Measuring tape ($5-$15)
– Safety gear: gloves, dust mask, and safety glasses ($20-$30)
– Staple gun and staples ($15-$25)
– Straight edge or T-square ($10-$20)
– Caulking gun and weatherproof caulk ($10-$15)
Additional materials:
– Weatherstripping for doors and windows ($5-$10)
– Foil tape for sealing joints ($8-$12)
– Furring strips if needed ($1-$2 per linear foot)
For a typical 8×10 shed, expect to spend between $200-$400 total on materials. Prices may vary based on your location and material choices. Remember to measure your shed carefully before purchasing to avoid waste and unnecessary expenses.
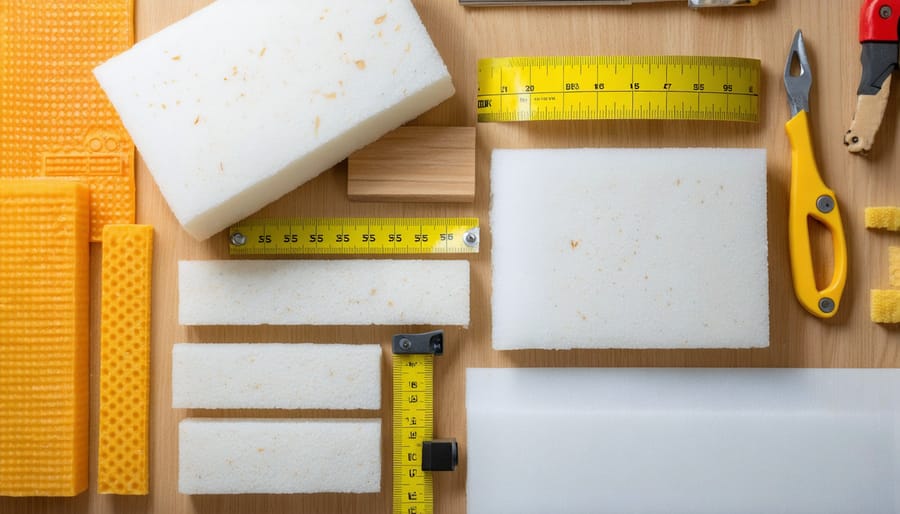
Choosing the Right Insulation Type
When it comes to insulating your shed, choosing the right material is crucial to prevent condensation issues and maintain a comfortable environment. Fiberglass batts are a popular choice due to their affordability and ease of installation, offering an R-value between R-13 and R-19. They work well between wall studs and ceiling joists but must be paired with a vapor barrier.
Rigid foam boards are another excellent option, providing superior insulation in a thinner profile. These boards are moisture-resistant and can be easily cut to size, making them perfect for tight spaces. You’ll find three main types: polyisocyanurate (highest R-value), extruded polystyrene (moderate R-value), and expanded polystyrene (budget-friendly).
For those seeking an eco-friendly solution, sheep’s wool insulation offers natural moisture management and is sustainable. While it costs more initially, it’s non-toxic and easy to handle without protective gear. Reflective foil insulation works well in hot climates, reflecting heat away from your shed while taking up minimal space. Choose based on your climate, budget, and installation comfort level.
Step-by-Step Installation Process
Preparing the Shed Structure
Before adding insulation, it’s crucial to ensure your shed is in top condition. Start by thoroughly cleaning the interior, removing cobwebs, dirt, and any items stored inside. This gives you a clear workspace and helps identify potential problems.
Inspect the walls, floor, and roof for any damage, paying special attention to signs of water infiltration or rot. Repair any holes, cracks, or gaps using appropriate materials like wood filler or caulk. These repairs prevent heat loss and protect your insulation from moisture damage.
Next, check that you have a proper ventilation system in place. Good airflow helps prevent condensation and maintains healthy air quality inside your shed.
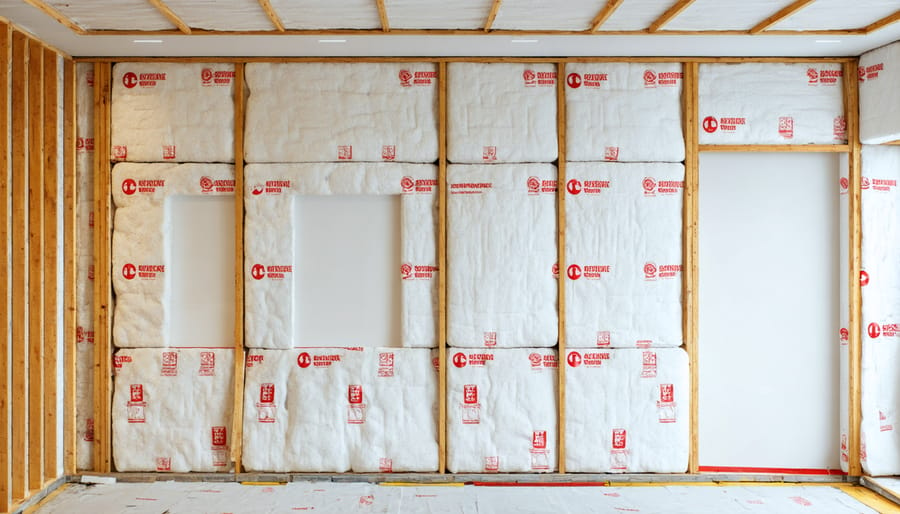
Install a vapor barrier along the walls and ceiling using 6-mil polyethylene sheeting. This critical step prevents moisture from seeping through the walls and damaging your insulation. Secure the barrier using a staple gun, overlapping sheets by at least 6 inches, and seal the seams with waterproof tape.
Don’t forget to check the door and window frames for drafts. Weather stripping and door sweeps can significantly improve your shed’s ability to retain heat. If your shed has a concrete floor, consider laying a moisture barrier before adding floor insulation to prevent ground moisture from rising.
Wall Insulation Installation
Installing wall insulation is a crucial step in creating a comfortable and energy-efficient shed environment. Start by checking your wall cavities are clean and free from moisture or debris. If you’re working with exposed studs, this process will be straightforward. For finished walls, you’ll need to remove the interior wall panels first.
Begin by measuring the spaces between your wall studs. Most sheds have standard 16-inch or 24-inch spacing, but it’s essential to measure each cavity as there can be variations. Cut your insulation batts or rolls to fit these spaces, making them slightly wider than the actual gap to ensure a snug fit.
Before installing the insulation, roll out your vapor barrier (typically 6-mil polyethylene sheeting) against the exterior wall. This creates a moisture barrier that prevents condensation from damaging your insulation. Secure the vapor barrier with a staple gun, overlapping seams by at least 6 inches and taping them for a proper seal.
Now, install the insulation batts between the studs. Wear protective gear, including gloves, a dust mask, and eye protection. Press the insulation firmly into place, being careful not to compress it too much, as this reduces its effectiveness. The insulation should fill the cavity completely without bulging or leaving gaps.
If you encounter electrical outlets or windows, cut the insulation to fit around these obstacles. Leave a small gap around electrical boxes for safety, and avoid covering any wiring directly with insulation.
Once all cavities are filled, install a second layer of vapor barrier over the insulation on the interior side if you live in a particularly humid climate. This creates a complete moisture barrier system. Secure this layer the same way as the first, ensuring all seams are properly overlapped and taped.
Pro tip: Use unfaced insulation if you’re installing separate vapor barriers. If using faced insulation, the kraft paper facing should always point toward the heated side of the space (typically the interior of your shed).
Remember to check local building codes, as requirements for vapor barriers can vary depending on your climate zone.
Roof and Floor Insulation
Proper roof and floor insulation are crucial components of a well-insulated shed that can protect your belongings and maintain comfortable temperatures year-round. Let’s tackle both areas with practical, DIY-friendly solutions.
For roof insulation, start by measuring the space between your roof joists. Roll-type insulation, like fiberglass batts or mineral wool, works excellently here. Cut the insulation to fit snugly between the joists, wearing protective gear like gloves and a dust mask. Leave a small gap between the insulation and roof deck for ventilation to prevent moisture buildup. Secure the insulation with staples or insulation support wires, then cover with a vapor barrier facing the interior of your shed.
Floor insulation is equally important, especially if you want to waterproof your shed foundation and create a comfortable space. Begin by ensuring your shed floor is raised off the ground to prevent moisture seepage. For wooden floors, lift the floorboards carefully and install rigid foam board insulation between the joists. Cut the boards to fit precisely, and use expanding foam around the edges to seal any gaps.
Pro tip: Consider adding a moisture barrier beneath your floor insulation for extra protection. A layer of 6-mil polyethylene sheeting works wonderfully for this purpose.
For concrete floors, lay down a damp-proof membrane first, followed by rigid insulation boards directly on top. Cover with plywood to create a functional floor surface. This method not only insulates but also creates a warmer, more comfortable floor to walk on.
Remember to seal any gaps around the edges where the floor meets the walls using weatherstripping or caulk. This prevents drafts and helps maintain consistent temperatures inside your shed.
Finishing Touches and Maintenance
Interior Wall Finishing
Once your insulation is securely in place, you’ll want to cover it with appropriate wall finishing materials to create a polished look and protect the insulation. Plywood and oriented strand board (OSB) are popular choices for shed walls, offering durability and a clean appearance at a reasonable price. These materials are easy to work with and can be painted or stained to match your preferences.
For a more finished look, consider using drywall, though keep in mind it requires more skill to install and isn’t as moisture-resistant as wood-based options. If you choose drywall, opt for moisture-resistant panels and apply a good primer and paint designed for high-humidity areas.
Beadboard or tongue-and-groove planks offer a charming, cottage-style finish that’s both functional and attractive. These materials are relatively easy to install and can be found in various materials, including vinyl options that resist moisture particularly well.
When installing your wall covering, make sure to:
– Use appropriate fasteners for your chosen material
– Leave small gaps around edges for expansion
– Install a vapor barrier if recommended for your climate
– Seal all joints and seams properly
– Consider adding trim pieces for a professional finish
Remember to choose materials that match your shed’s primary use and your local climate conditions. For workshops or hobby spaces, you might want to include pegboard sections for tool organization.

Long-term Maintenance Tips
Regular maintenance of your shed’s insulation is crucial to maintain ideal temperature control and protect your investment. Start by conducting seasonal inspections of your insulation, particularly before winter and after spring. Look for signs of moisture, pest intrusion, or areas where the insulation may have shifted or compressed.
Keep your shed’s ventilation system clean and unobstructed to prevent condensation buildup. Check roof vents, soffit vents, and any installed fans regularly, removing debris and dust that might impair their function. If you notice any dampness, address it immediately by improving airflow or adding additional ventilation points.
Monitor the vapor barrier for tears or gaps, repairing any damaged areas with appropriate tape or replacement material. Pay special attention to areas around windows, doors, and any utility penetrations where air leaks commonly occur.
Consider applying a fresh coat of weatherproof sealant to exterior joints every few years to prevent moisture from seeping in. Keep gutters clean and ensure proper drainage around your shed’s foundation to prevent water from compromising the insulation’s effectiveness.
If you spot any discoloration on walls or ceiling, investigate promptly as this could indicate water infiltration. Replace any insulation that shows signs of mold, mildew, or water damage to maintain a healthy environment in your shed and protect your stored items.
Insulating your shed is a rewarding DIY project that can transform your outdoor storage space into a more functional and comfortable environment. By following the steps and guidelines we’ve covered, you can successfully complete this project over a weekend while potentially saving hundreds of dollars in professional installation costs.
Remember to carefully plan your insulation project, choose the right materials for your specific needs, and take all necessary safety precautions. Whether you’re protecting valuable tools, creating a workshop, or simply aiming to reduce temperature fluctuations, proper insulation will make a significant difference in your shed’s usability throughout the year.
Don’t be intimidated by the process – take it one step at a time. Start with a thorough inspection of your shed, ensure it’s weathertight, and then move forward with your chosen insulation method. The key to success lies in careful preparation and attention to detail during installation.
If you’re ready to begin, gather your materials and tools, review the safety guidelines, and start with a small section to build your confidence. The satisfaction of completing this project yourself, combined with the immediate benefits of a well-insulated shed, makes this DIY endeavor well worth the effort.
Happy insulating, and enjoy your newly comfortable and energy-efficient shed space!
Leave a Reply