


Transform your portable shed into a comfortable, year-round workspace by properly insulating its walls, floor, and ceiling. Start with a vapor barrier against the shed’s interior walls to prevent moisture damage, then install rigid foam boards or fiberglass batts between the wall studs. Seal all gaps around windows, doors, and electrical outlets with expanding foam to eliminate drafts and maximize energy efficiency. Choose insulation with an R-value of at least R-13 for walls and R-19 for the ceiling to maintain consistent temperatures throughout the seasons. This crucial upgrade not only protects your stored items from extreme temperatures but also reduces condensation issues that can lead to mold and rust. Whether you’re creating a workshop, home office, or storage space, proper insulation transforms a basic shed into a functional, climate-controlled environment that serves your needs year-round.
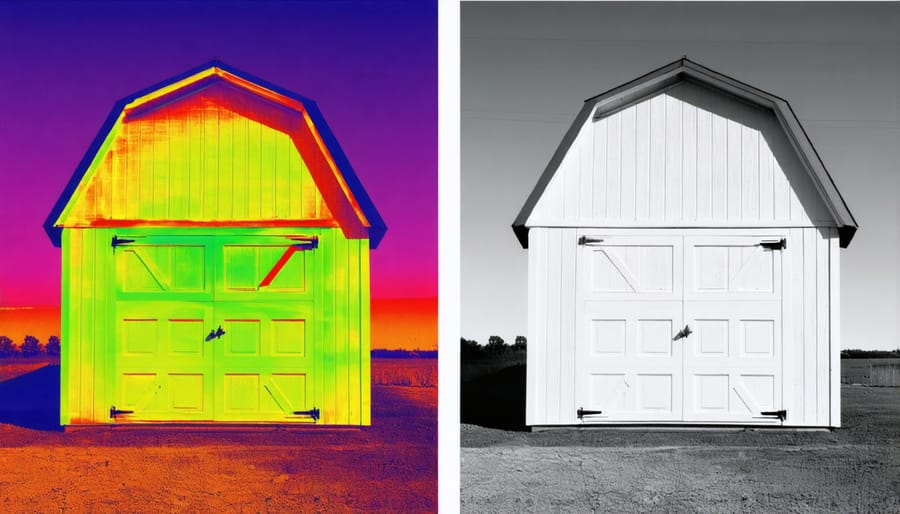
Why Your Portable Shed Needs Insulation
Temperature Regulation Benefits
Proper insulation plays a vital role in helping maintain consistent temperatures in your portable shed throughout the year. During summer months, insulation creates a barrier against intense heat, keeping your stored items cool and protected from temperature-related damage. In winter, it prevents warm air from escaping and cold air from seeping in, which not only protects your belongings but also reduces energy costs if you’re using heating equipment.
This temperature regulation is particularly important for storing temperature-sensitive items like power tools, paint, electronics, or garden supplies. Without proper insulation, extreme temperature fluctuations can lead to condensation, which may cause rust, mold, or warping of stored materials. Additionally, if you’re planning to use your shed as a workspace, insulation ensures a comfortable environment year-round, making it possible to tackle projects regardless of the weather outside.
Moisture Control Advantages
Proper insulation does more than just regulate temperature – it’s your shed’s best defense against moisture-related problems. When installed correctly, insulation creates a barrier that prevents condensation from forming on your shed’s walls and ceiling. This is particularly important for protecting stored items from rust, mold, and mildew damage.
The right insulation system works alongside proper ventilation to maintain optimal humidity levels throughout the year. It prevents warm, moist air from meeting cold surfaces where condensation typically forms. This is especially crucial in areas where temperature fluctuations are common, as these changes can lead to significant moisture buildup.
By controlling moisture levels, you’ll also extend the life of your shed’s structure. Wood components stay drier and less prone to rot, while metal fixtures are better protected from corrosion. Plus, your stored items remain in better condition, free from dampness and musty odors that often plague uninsulated sheds.
Choosing the Right Insulation Materials
Fiberglass Insulation Options
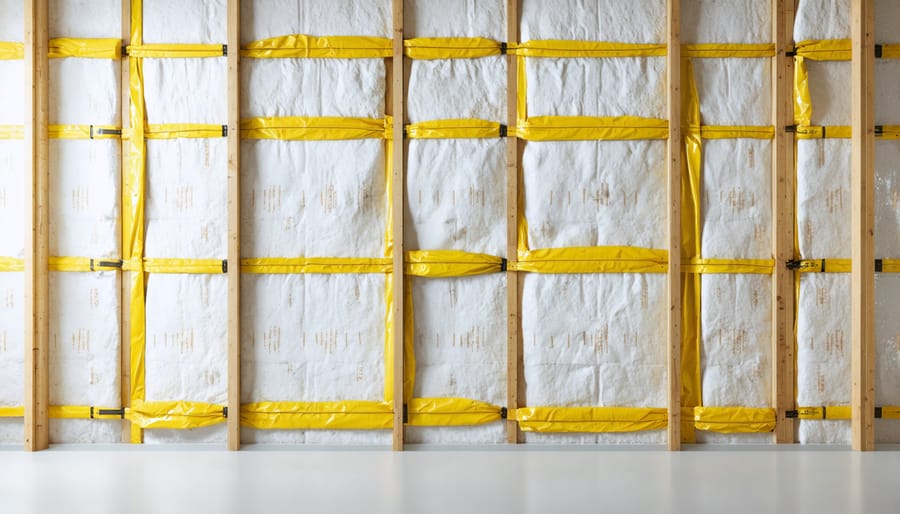
Fiberglass insulation batts remain a popular choice for portable shed insulation, offering an excellent balance of affordability and effectiveness. These pink or yellow rolls come in standard widths that fit perfectly between wall studs and ceiling joists, making installation relatively straightforward for DIY enthusiasts.
When working with fiberglass batts, always wear protective gear including gloves, a dust mask, and safety goggles. The batts should be cut slightly larger than the space they’ll fill to ensure a snug fit without compression. For best results, install a vapor barrier (typically plastic sheeting) on the warm side of the insulation to prevent moisture buildup.
One significant advantage of fiberglass insulation is its fire-resistant properties, adding an extra layer of safety to your shed. It’s also naturally sound-dampening, which helps create a quieter environment if you’re using your shed as a workshop.
Remember to leave no gaps during installation, as even small spaces can significantly reduce insulation effectiveness. For areas around electrical outlets or pipes, carefully cut the batts to fit rather than cramming or bunching the material.
Foam Board Solutions
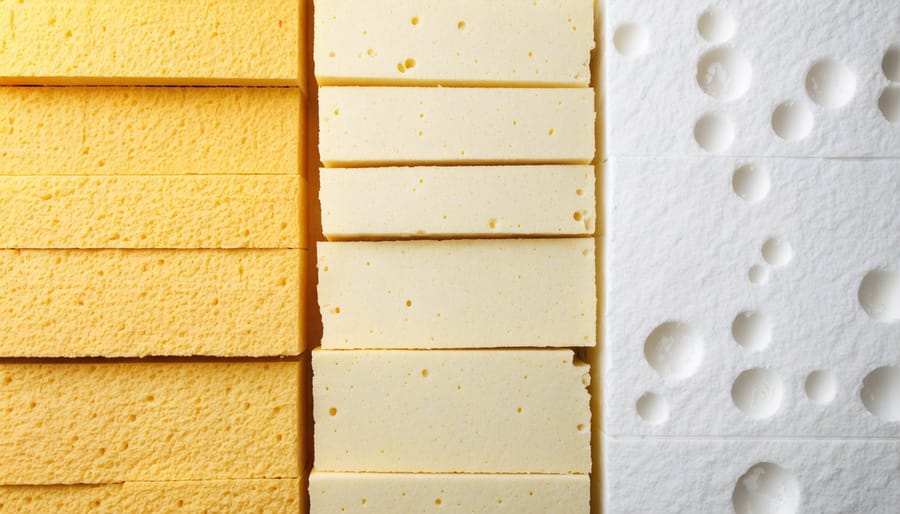
Foam board insulation offers an excellent solution for portable shed insulation, combining effectiveness with ease of installation. The most common types include expanded polystyrene (EPS), extruded polystyrene (XPS), and polyisocyanurate (polyiso) boards, each offering unique benefits for your shed project.
EPS boards are budget-friendly and lightweight, making them perfect for wall and ceiling applications. XPS boards, recognizable by their pink or blue color, provide superior moisture resistance and are ideal for areas where dampness might be a concern, such as near the foundation or in regions with high humidity.
For maximum insulation value, polyiso boards are the top performers, offering the highest R-value per inch of thickness. These boards work exceptionally well in roofs and walls where space is limited but thermal protection is crucial.
When installing foam boards in your portable shed, consider using 1-inch thick panels for walls and 2-inch panels for the roof to achieve optimal temperature control. Remember to seal the edges with foam-compatible tape and cover exposed foam with a fire-rated barrier for safety. This combination of materials and proper installation will help maintain comfortable temperatures year-round while keeping your stored items protected.
Spray Foam Applications
Spray foam insulation offers a powerful solution for insulating your portable shed, particularly for addressing hard-to-reach spaces and creating an airtight seal. This expanding foam comes in two main varieties: closed-cell and open-cell foam. For shed applications, closed-cell foam is typically the better choice due to its superior moisture resistance and higher R-value per inch.
Before applying spray foam, ensure your shed’s walls are clean and dry. While DIY spray foam kits are available, professional installation often yields better results, especially for larger sheds. The foam expands rapidly upon application, filling gaps and creating an effective air barrier that helps prevent moisture infiltration.
Focus on spraying around windows, doors, and corners where air leaks commonly occur. Pay special attention to areas where utilities enter the shed, as these spots are prone to drafts. When applying, use smooth, steady movements and maintain the recommended distance from the surface to ensure even coverage.
Remember that spray foam requires proper safety equipment, including a respirator, protective clothing, and eye protection. For small touch-ups or minor insulation needs, minimal expansion foam in spray cans works well and is more manageable for DIY applications.
Step-by-Step Installation Process
Preparation Steps
Before starting your insulation project, gather all necessary materials including insulation rolls or batts, a utility knife, measuring tape, protective gear (gloves, safety glasses, and dust mask), and a staple gun. You’ll also need a pry bar and hammer for any minor adjustments to the shed’s structure.
Begin by thoroughly cleaning the interior of your portable shed, removing all items and sweeping away dust and debris. Inspect the shed for any gaps, cracks, or damage that needs repair. Pay special attention to areas around windows, doors, and corners where drafts commonly occur.
Next, measure all surfaces you plan to insulate: walls, ceiling, and floor if applicable. Add 10% to your measurements to account for mistakes or unusual spaces. This is also the perfect time to check that your shed is level and properly anchored to its foundation.
Consider installing a vapor barrier if your shed is in a particularly humid area. Before installing any insulation, ensure proper ventilation points are marked and left unobstructed. If your shed has electrical wiring, photograph its location for reference during installation.
Finally, organize your workspace by setting up adequate lighting and creating a designated area for cutting insulation materials. Having everything prepared beforehand will make the installation process smoother and more efficient.
Wall Insulation Installation
Start by removing any existing wall panels or siding to access the wall cavities. If your shed has exposed studs, you’re already one step ahead. Measure the spaces between studs carefully, as these dimensions will determine the size of insulation you’ll need.
For most portable sheds, fiberglass batts or rolls work perfectly. Cut the insulation slightly larger than the measured space – about ½ inch wider – to ensure a snug fit. Wear protective gear, including gloves, a dust mask, and safety goggles, before handling any insulation materials.
Press the insulation between the studs, starting at the top and working your way down. Avoid compressing the material too much, as this reduces its effectiveness. The paper or foil backing (if present) should face the interior of the shed. Secure the insulation with a staple gun, placing staples every 8 inches along the studs.
For areas around windows, doors, or electrical outlets, cut the insulation carefully to fit around these obstacles. Use a utility knife and straightedge for clean, precise cuts. Fill any small gaps with spray foam insulation to prevent heat loss through these areas.
Once all cavities are filled, install a vapor barrier if your climate requires it. Finally, replace the wall panels or install new ones to complete the job. Remember to seal any joints or seams with appropriate weatherstripping or caulk.
Roof and Floor Insulation
Insulating your portable shed’s roof and floor is crucial for maintaining a comfortable temperature and protecting your belongings. For the roof, start by measuring the space between rafters and cutting rigid foam board or fiberglass batts to fit snugly. Install a vapor barrier on the warm side of the insulation to prevent moisture buildup, and secure the insulation with staples or insulation supports.
For optimal results, consider adding a layer of reflective foil insulation beneath your roof covering to deflect heat during summer months. Leave a small air gap between the foil and roofing material for better performance.
Floor insulation requires a slightly different approach. Begin by ensuring your shed has adequate ground clearance and proper moisture protection. Install a moisture barrier directly on the subfloor, then lay rigid foam board or batts between floor joists. For added protection, consider installing a layer of plywood over the insulation to create a solid, insulated floor surface.
Remember to seal any gaps around the edges with expanding foam or weatherstripping. This prevents drafts and ensures your insulation works effectively. If your shed sits directly on the ground, consider installing a moisture-resistant barrier underneath and adding a layer of gravel for drainage before tackling the floor insulation.
Pro tip: When insulating both roof and floor, always work from the inside out and wear appropriate protective gear, including gloves and a dust mask.
Vapor Barrier Installation
Installing a vapor barrier is crucial to prevent condensation damage and maintain your shed’s insulation effectiveness. Start by rolling out 6-mil polyethylene sheeting along your walls and ceiling, overlapping seams by at least 12 inches. Secure the barrier using construction staples every 12-16 inches, ensuring it’s snug against the surface. Pay special attention to corners and joints, using waterproof tape to seal any gaps or seams. When installing around electrical outlets or fixtures, cut carefully and seal with outlet gaskets. Place the vapor barrier on the warm side of your insulation (typically the interior) to stop moisture from penetrating the insulation material. Remember to leave a small gap at the bottom of walls for proper ventilation and to prevent trapped moisture. This barrier will significantly extend the life of your insulation while protecting your stored items from humidity damage.
Maintenance and Long-Term Care
Regular maintenance of your insulated portable shed ensures its longevity and optimal performance throughout the seasons. Start by conducting quarterly inspections of your insulation, paying special attention to areas around windows, doors, and corners where moisture might accumulate. Check for any signs of water damage, mold, or pest intrusion, as these issues can compromise your insulation’s effectiveness.
Ensure your shed has a proper ventilation system to prevent moisture buildup, which can degrade insulation over time. During humid seasons, consider using a dehumidifier to maintain optimal moisture levels and protect both your insulation and stored items.
If you notice any damaged or compressed insulation, replace it promptly to maintain the shed’s thermal efficiency. Keep an eye on the vapor barrier’s condition, repairing any tears or gaps immediately to prevent moisture from seeping into the insulation material. For foam board insulation, check for cracks or separations between panels and seal them with appropriate tape or foam sealant.
Clean your shed’s gutters regularly and ensure proper drainage around the structure to prevent water from seeping into the foundation or walls. Trim any overhanging branches that could damage the roof or create excess moisture against the walls. During winter, remove snow buildup from the roof to prevent unnecessary strain on the insulation system.
Consider scheduling an annual professional inspection to catch any potential issues early and maintain your shed’s insulation effectiveness for years to come. Keep spare insulation materials on hand for quick repairs, and maintain good records of any maintenance work performed.
Insulating your portable shed is a worthwhile investment that pays dividends in both comfort and functionality. By following the steps and guidelines we’ve discussed, you can create a climate-controlled space that protects your belongings and extends your shed’s lifespan. Remember to start with a thorough assessment of your needs, choose appropriate insulation materials, and ensure proper installation techniques.
Don’t forget the importance of addressing potential moisture issues and maintaining adequate ventilation throughout the process. Whether you’re creating a workshop, storing temperature-sensitive items, or simply wanting to improve your shed’s efficiency, proper insulation makes all the difference.
Take your time with the project, follow safety guidelines, and consider seeking professional help if you’re unsure about any step. The effort you put into insulating your portable shed today will reward you with years of improved functionality and protection for your stored items.
Ready to get started? Gather your materials, plan your approach, and transform your portable shed into a well-insulated, year-round storage solution that meets all your needs.
Leave a Reply