
Transform Your Dark Shed Into a Bright Workspace With Smart LED Lighting
Transform your dim, underutilized shed into a bright, functional workspace with modern LED lighting solutions that combine energy efficiency with powerful illumination. LED lights revolutionize shed lighting by consuming up to 75% less energy than traditional bulbs while providing clearer, more focused light exactly where you need it. From battery-operated motion sensors for quick tool retrieval to hardwired overhead panels for detailed project work, today’s LED options offer unprecedented flexibility for every shed size and use case. Whether you’re organizing garden tools, setting up a workshop, or creating a hobby space, proper LED lighting enhances safety, productivity, and comfort while significantly reducing your energy costs. Join thousands of homeowners who’ve discovered how the right LED lighting setup can extend their usable outdoor space well into the evening hours, making their sheds practical and inviting year-round.\n\n\n
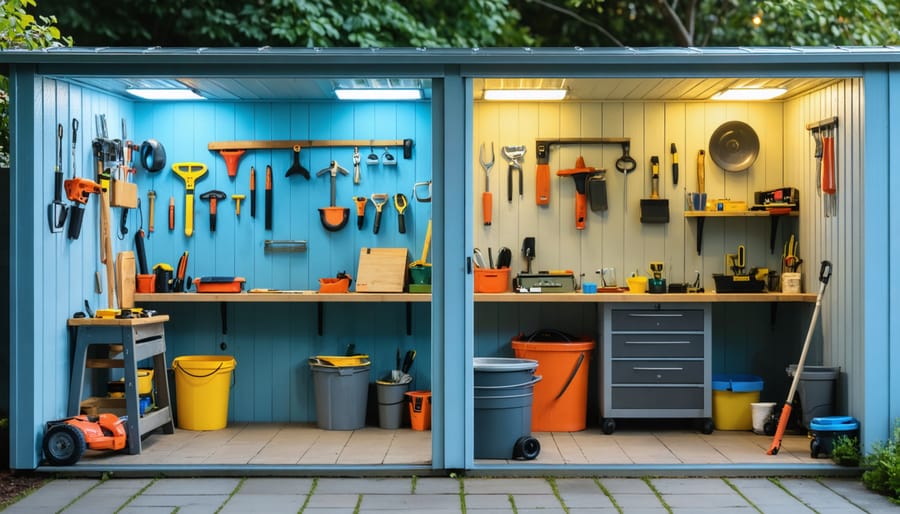
Why LED Lighting is Perfect for Your Shed
\n\n
 \n
\n\n\n
Energy Savings and Long-Term Value
\n\nLED lights in your shed can dramatically reduce energy consumption while providing superior illumination. Compared to traditional incandescent bulbs, LED lights use up to 75% less energy and last 25 times longer, making them a smart investment for any shed owner. A typical 60-watt incandescent bulb can be replaced with a 9-watt LED that provides the same brightness, resulting in significant savings on your energy bills over time.\n\nBeyond immediate energy savings, LED lights offer exceptional long-term value. With a lifespan of up to 50,000 hours, you won’t need to climb up and replace bulbs nearly as often. This durability is particularly valuable in shed environments where changing bulbs can be challenging. Additionally, LED lights perform better in cold weather and are more resistant to vibrations and impacts, making them ideal for outdoor storage spaces. When you factor in reduced maintenance costs and lower electricity bills, LED lights quickly pay for themselves while providing reliable, efficient illumination for years to come.\n\n
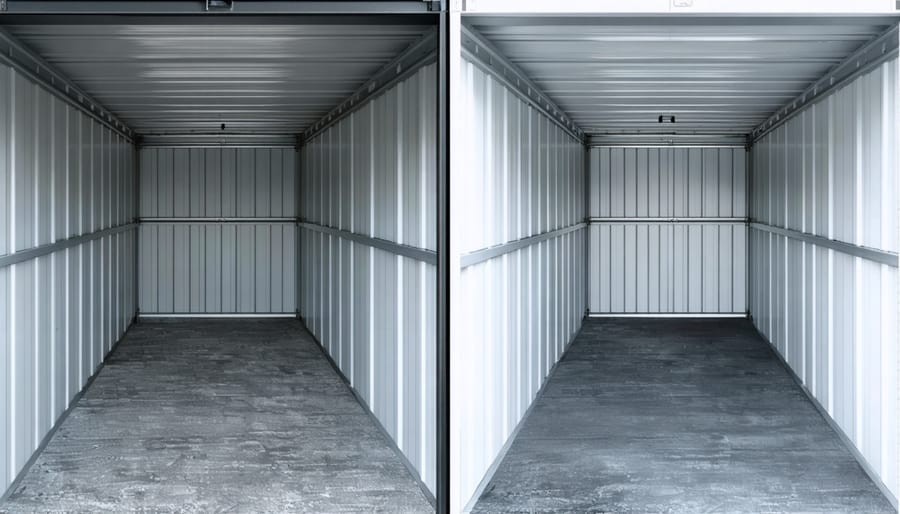
Weather-Resistant and Durable
\n\nLED lights for sheds are engineered to withstand the challenging conditions typically found in outdoor storage environments. Unlike traditional bulbs, quality LED fixtures feature robust weatherproof housings that protect against moisture, dust, and temperature fluctuations. Most outdoor-rated LED lights come with an IP65 or higher rating, ensuring they remain functional even during heavy rain or high humidity conditions.\n\nThe durability of LED lights extends beyond their weather resistance. These fixtures can handle vibrations from nearby equipment or door movements without failing, and their solid-state construction means no fragile filaments to break. With lifespans ranging from 25,000 to 50,000 hours, you won’t need to worry about frequent replacements, even if you use your shed regularly. Plus, LEDs maintain their brightness and efficiency in cold temperatures, making them perfect for unheated storage spaces year-round.\n\nWhen choosing shed lights, look for models with corrosion-resistant materials and sealed designs to ensure long-lasting performance in your outdoor space.\n\n\n
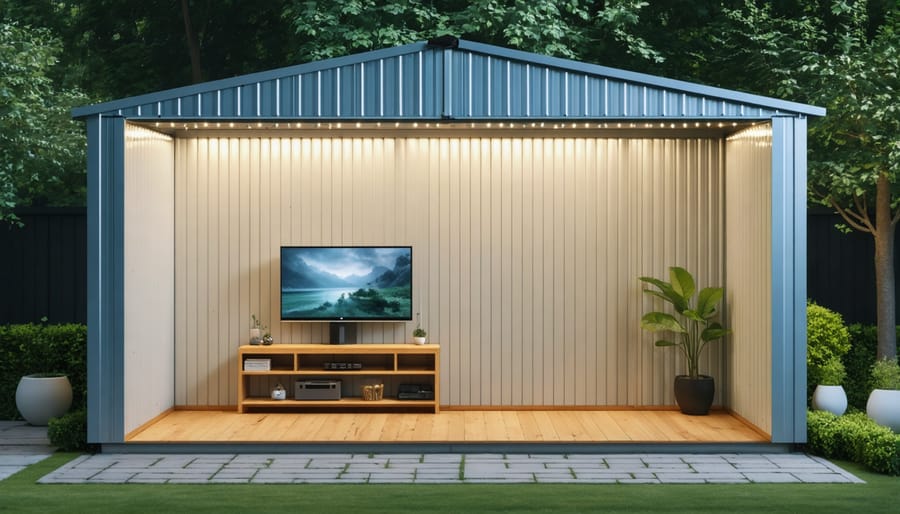
Smart LED Solutions for Every Shed Type
\n\n
 \n
\n\n\n
Battery-Powered vs. Hardwired Systems
\n\nWhen choosing lighting for your shed, one of the first decisions you’ll need to make is between battery-powered and hardwired LED systems. Each option has its unique advantages, and your choice will depend largely on how you use your shed and your comfort level with electrical setup for your shed.\n\nBattery-powered LED lights offer excellent flexibility and easy installation. They’re perfect for basic storage sheds where you only need occasional lighting. Most battery-operated options come with remote controls or motion sensors, and you won’t need to worry about running electrical lines. However, you’ll need to replace or recharge batteries periodically, and they might not provide as much brightness as hardwired systems.\n\nHardwired LED systems, while requiring more initial setup, offer consistent, reliable lighting and often greater illumination. They’re ideal for workshop sheds or spaces you use frequently. Once installed, you won’t need to worry about battery changes, and you can easily add features like dimmer switches or smart controls. The main drawbacks are the higher initial cost and the need for professional installation if you’re not comfortable with electrical work.\n\nFor occasional shed use, battery-powered systems are often sufficient. But if you spend significant time in your shed or need reliable, bright lighting, investing in a hardwired system might be worth the extra effort and expense.\n\n
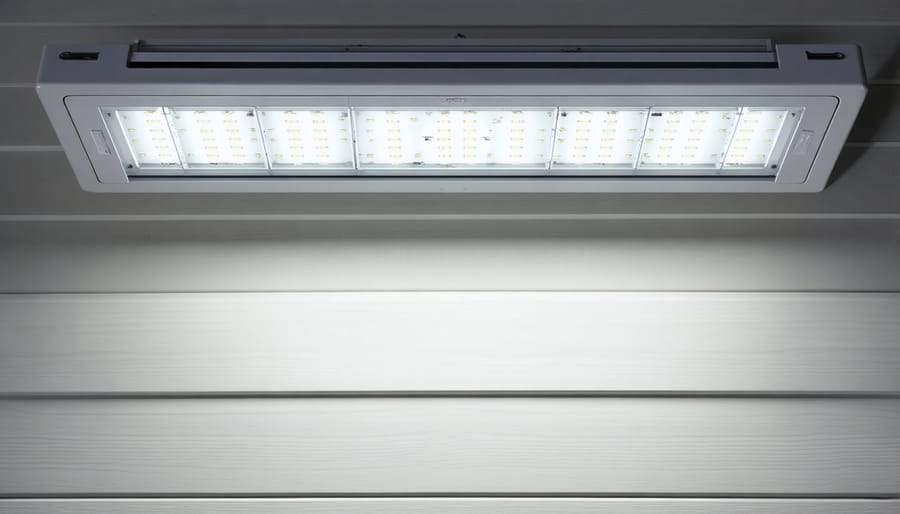
Motion Sensors and Smart Controls
\n\nAdding motion sensors and smart controls to your shed LED lights takes convenience and security to the next level. These intelligent features ensure your lights activate automatically when you approach the shed and turn off when they’re not needed, saving energy and adding an extra layer of security to your property.\n\nMotion sensors are particularly useful when carrying tools or supplies – no more fumbling for switches in the dark! Most modern motion sensors can be adjusted for sensitivity and duration, allowing you to customize how they respond to movement and how long the lights stay on. Position sensors near entry points and high-traffic areas for optimal coverage.\n\nSmart controls offer even more versatility through smartphone apps or home automation systems. You can schedule your shed lights to turn on at specific times, adjust brightness levels remotely, or integrate them with other smart home devices. Some systems even send notifications when motion is detected, providing peace of mind when you’re away from home.\n\nFor added convenience, consider dual-technology sensors that combine motion detection with ambient light sensing. These smart devices only activate your lights when both motion is detected and natural light levels are low, preventing unnecessary operation during daylight hours.\n\nInstallation is typically straightforward, with many sensors being wireless and battery-operated, making them perfect for DIY installation. Just ensure they’re properly weatherproofed if mounted outside your shed.\n\n\n
Installation Made Simple
\n\n
Tools and Materials Needed
\n\nBefore starting your shed lighting project, gather these essential tools and materials:\n\nBasic Tools:\n- Phillips and flathead screwdrivers\n- Wire strippers/cutters\n- Power drill with various drill bits\n- Measuring tape\n- Pencil for marking\n- Level\n- Wire nuts and electrical tape\n- Safety glasses and work gloves\n\nLED Lighting Components:\n- LED light fixtures (appropriate for your shed size)\n- LED strip lights (optional for task lighting)\n- Motion sensor (recommended)\n- Light switches\n- Junction boxes\n- Mounting brackets\n- Cable clips or staples\n\nElectrical Supplies:\n- 14/2 electrical cable (or as specified by your fixtures)\n- Weather-resistant electrical box\n- Waterproof wire connectors\n- Weatherproof cable entry glands\n- Circuit tester\n\nOptional Materials:\n- Cable conduit for exposed wiring\n- Dimmer switch\n- Timer switch\n- Battery backup system\n- Solar panel kit (for off-grid installations)\n\nRemember to check local building codes before purchase, as requirements may vary by location. Having these items ready before starting will ensure a smooth installation process.\n\n
 \n
\n\n\n
Installation Steps and Safety Tips
\n\nBefore starting your LED light installation, gather all necessary tools: wire strippers, electrical tape, screwdrivers, and a voltage tester. Always prioritize safety by turning off power at the main breaker and avoiding these common electrical safety mistakes.\n\nStart by planning your light placement. Position fixtures above workbenches, storage areas, and entry points for optimal illumination. If running new wiring, use outdoor-rated cables and weatherproof junction boxes to protect against moisture.\n\nFollow these steps for a successful installation:\n1. Mount the LED fixtures securely to joists or sturdy surfaces\n2. Connect the wiring according to manufacturer instructions\n3. Use wire nuts and electrical tape for all connections\n4. Install weatherproof covers on switches and outlets\n5. Test all connections before closing up junction boxes\n\nSafety tips to remember:\n- Wear insulated gloves when handling electrical components\n- Double-check all connections before restoring power\n- Install GFCI protection for outdoor circuits\n- Keep all wiring away from sharp edges and heat sources\n- Use proper wire gauge for your circuit’s amperage\n\nAfter installation, test all lights and switches thoroughly. Consider adding motion sensors or timers for convenience and energy savings. Remember to inspect connections periodically and keep spare bulbs on hand for quick replacements.\n\n\n
Maintenance and Troubleshooting
\n\nRegular maintenance of your shed LED lights ensures longevity and optimal performance. Start by dusting the fixtures monthly with a soft, dry cloth to prevent dirt buildup that can reduce brightness. For stubborn grime, use a slightly damp cloth, but avoid direct water contact with electrical components.\n\nCheck all connections quarterly, ensuring wires remain secure and undamaged. Look for signs of wear, such as frayed cables or loose mounting brackets. If you notice flickering lights, first verify that all connections are tight. Sometimes, a simple twist of the bulb or reconnection of wires can resolve the issue.\n\nFor battery-operated LED systems, test batteries monthly and replace them before they’re completely drained to prevent potential corrosion. If using solar-powered LEDs, clean the solar panels regularly and ensure they receive adequate sunlight by trimming any overhanging branches.\n\nCommon troubleshooting tips include:\n- If lights won’t turn on, check the power source and switches\n- For dimming lights, verify the voltage supply matches manufacturer specifications\n- When certain sections stop working, inspect the wiring for breaks\n- If motion sensors malfunction, clean the sensor surface and adjust sensitivity settings\n\nMost LED problems can be resolved through these simple maintenance steps. However, if you notice unusual heat, smoke, or electrical odors, immediately disconnect the system and consult a qualified electrician. Remember to keep spare bulbs and fuses on hand for quick replacements when needed.\n\nFor outdoor LED fixtures, inspect weather seals seasonally to prevent moisture damage, especially before wet seasons begin. This proactive approach will help maintain your shed lighting system’s efficiency and extend its lifespan.\n\n\nIlluminating your shed with LED lights is a smart investment that combines energy efficiency, safety, and functionality. Whether you’ve chosen battery-operated puck lights for quick installation or opted for a complete hardwired system, LED lighting transforms your shed into a more usable space. Remember to consider your specific needs when selecting fixtures, paying attention to brightness levels, motion sensor capabilities, and power sources. By following proper installation guidelines and maintenance tips, you’ll enjoy reliable, cost-effective lighting for years to come. Don’t let poor lighting limit your shed’s potential – take action today to create a well-lit, practical space that enhances your property and makes every project more enjoyable. With the right LED lighting solution, your shed can become the functional workspace or storage area you’ve always wanted.