
Make Your Shed Smart: Easy Steps to Connect Virtual Assistants
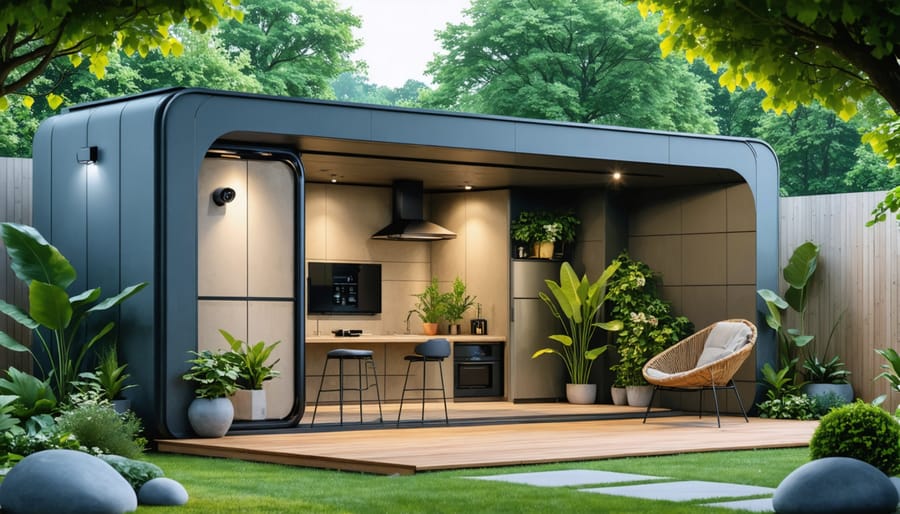
Transform your outdoor storage into a cutting-edge smart space with professional-grade installation training that empowers you to integrate modern technology seamlessly. Master the fundamentals of smart device selection, wireless networking, and automated security systems specifically designed for shed environments. Whether you’re a DIY enthusiast or a homeowner seeking to enhance your property’s functionality, smart home installation training provides the essential skills to create a connected, efficient storage solution.\n\nLearn to navigate crucial aspects like weather-resistant equipment selection, proper power supply installation, and strategic sensor placement that maximizes both security and convenience. Our comprehensive approach covers everything from basic motion detection to advanced climate control systems, ensuring your shed becomes an intelligent extension of your smart home ecosystem. With hands-on guidance and practical troubleshooting techniques, you’ll gain the confidence to tackle complex installations while avoiding common pitfalls that often challenge beginners.\n\nThis targeted training demystifies smart technology integration, breaking down complex concepts into manageable steps that align with any skill level. From selecting compatible devices to establishing reliable wireless connections in challenging outdoor environments, you’ll develop the expertise needed to create a truly automated storage space that responds to your specific needs.\n\n\n
 \n
\n\n\n
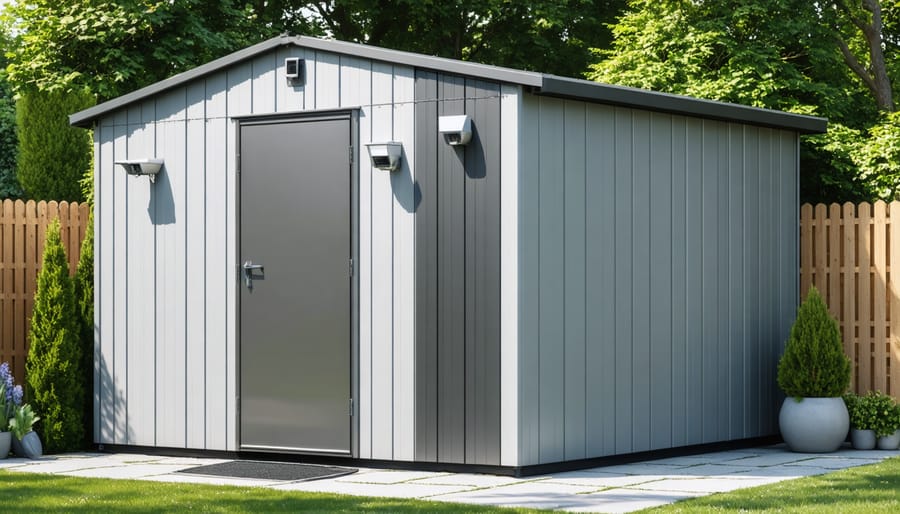
Preparing Your Shed for Smart Integration
\n\n
Power and Connectivity Requirements
\n\nUnderstanding the power requirements for smart integration is crucial for a successful smart home installation. Most smart devices require a stable power source and reliable internet connectivity to function properly. Start by ensuring your shed has proper electrical wiring, ideally with dedicated circuits for smart devices. A standard 120V outlet should suffice for most installations, but consider installing multiple outlets to accommodate future expansions.\n\nFor internet connectivity, you have several options. A Wi-Fi extender can effectively bridge the gap between your home’s router and the shed, typically covering distances up to 300 feet. Mesh network systems offer another excellent solution, providing seamless coverage across your property. For larger properties or situations where Wi-Fi signals struggle to reach the shed, consider installing an ethernet cable for a direct, reliable connection.\n\nPower backup solutions are worth considering to maintain system functionality during outages. A small UPS (Uninterruptible Power Supply) can keep critical devices running during brief power interruptions. For smart security devices, consider installing a dedicated battery backup system to ensure continuous operation.\n\nRemember to weatherproof all outdoor connections and use appropriate outdoor-rated cables and equipment. This includes using weatherproof outlet covers and ensuring all cable entry points are properly sealed to prevent moisture intrusion.\n\n
Weather-Proofing Considerations
\n\nWhen installing smart devices outdoors, proper weather-proofing is essential for longevity and reliable performance. Start by selecting devices specifically rated for outdoor use with appropriate IP ratings for water and dust resistance. Install weather-resistant covers or housing units over exposed devices, ensuring they’re properly sealed against moisture while maintaining necessary ventilation.\n\nPosition devices under existing overhangs or install small protective awnings where possible. For ground-level installations, create a slight slope away from the device to prevent water pooling. Use waterproof electrical boxes and weather-resistant cables, making sure all connections are properly sealed with silicone or appropriate weather-proof sealant.\n\nConsider temperature fluctuations in your area and install devices within their recommended operating temperature range. In extremely hot climates, position devices away from direct sunlight or add heat shields. For cold regions, ensure devices are rated for freezing temperatures and consider adding insulation around sensitive components.\n\nRegular maintenance is crucial – inspect weather seals monthly, clean any debris from protective covers, and check for signs of water damage or corrosion. Replace worn seals promptly to maintain protection against the elements.\n\n\n
 \n
\n\n\n
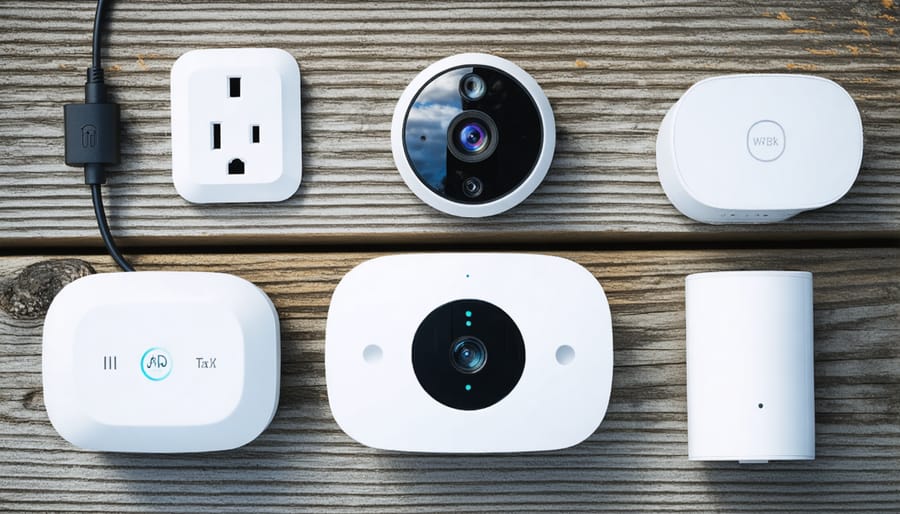
Essential Smart Devices for Your Shed
\n\n
Smart Lighting Systems
\n\nModern smart lighting solutions have revolutionized how we illuminate our homes, offering both convenience and energy efficiency. When installing smart lighting, start by choosing between hub-based systems like Philips Hue or standalone options such as smart bulbs that connect directly to your Wi-Fi network. For beginners, we recommend starting with a simple smart bulb setup in high-traffic areas.\n\nMotion sensors are game-changers for hands-free operation, particularly useful in storage areas and entryways. Consider installing smart switches alongside your bulbs – they provide traditional wall control while maintaining smart functionality. For outdoor spaces, look for weatherproof options rated for exterior use.\n\nVoice control integration through Alexa or Google Assistant adds another layer of convenience. Set up schedules to automate lights based on time of day, sunrise/sunset, or specific triggers. Many systems also offer dimming capabilities and color changing options, perfect for creating different moods or improving visibility for specific tasks.\n\nRemember to plan your lighting zones thoughtfully, grouping fixtures that naturally work together. This makes managing your system more intuitive and ensures a smooth user experience.\n\n
Security Sensors and Cameras
\n\nModern security sensors and cameras form the backbone of effective security measures for your smart home setup. Start with motion sensors at key entry points, positioning them 6-7 feet high for optimal coverage. Popular choices include the Ring Motion Sensor or Arlo Smart Motion Detection systems, which integrate seamlessly with most home automation hubs.\n\nFor camera placement, focus on installing weatherproof models with night vision capabilities at entrance points and vulnerable areas. Position cameras at a 30-45 degree angle to maximize viewing area while avoiding direct sunlight. The Ring Stick Up Cam or Arlo Pro series are excellent choices for outdoor monitoring.\n\nDoor and window sensors should be installed on all access points, ensuring proper alignment between the sensor and magnet components. Test each sensor’s connection to your hub before final mounting, and consider adding glass break sensors for additional protection.\n\nRemember to protect your cameras and sensors from the elements by using proper weatherproof housing and ensuring all wiring is properly sealed and protected. Regular maintenance checks will help keep your security system functioning reliably year-round.\n\n
Environmental Monitors
\n\nEnvironmental monitors form the foundation of a comfortable and healthy smart home. These devices track temperature, humidity, and air quality, providing real-time data through your smartphone or central hub. Install temperature sensors in key areas like living rooms and bedrooms to optimize heating and cooling efficiency. Humidity monitors help prevent mold growth and maintain optimal moisture levels, especially crucial in bathrooms and basements. Air quality sensors detect harmful pollutants, VOCs, and CO2 levels, alerting you when ventilation is needed. For best results, position sensors away from direct sunlight, heat sources, and air vents. Many modern environmental monitors can trigger automated responses, such as activating air purifiers or adjusting your HVAC system when readings fall outside preset parameters. This creates a responsive, healthy living environment while potentially reducing energy costs.\n\n\n
Setting Up Virtual Assistant Integration
\n\n
 \n
\n\n\n
Alexa Setup Process
\n\nSetting up Alexa in your smart home begins with downloading the Amazon Alexa app on your smartphone. Once installed, open the app and sign in with your Amazon account. If you don’t have one, you’ll need to create it first.\n\nNext, plug in your Alexa device (Echo, Dot, or Show) and wait for the light ring to turn orange. This indicates it’s in setup mode. In the Alexa app, tap the “+” icon and select “Add Device.” Choose “Amazon Echo” from the list of devices, then follow the prompts to connect to your Wi-Fi network.\n\nOnce your Alexa device is online, you can start connecting compatible smart home devices. In the app, go to “Devices” and tap “+” again to add new smart home products. Alexa will scan for nearby devices in pairing mode. When your device appears, select it and follow the specific setup instructions.\n\nTo create a more seamless experience, organize your devices into groups. For example, you might create a “Shed Lights” group containing all your shed’s smart bulbs. This allows you to control multiple devices with a single command like “Alexa, turn on shed lights.”\n\nRemember to enable relevant skills in the Alexa app for specific smart home devices. These skills are like apps that extend Alexa’s capabilities and ensure proper communication with your smart home equipment.\n\n
Google Assistant Configuration
\n\nSetting up Google Assistant for your smart home begins with downloading the Google Home app on your smartphone. Once installed, open the app and sign in with your Google account. If you don’t have one, you’ll need to create it first.\n\nTo start the configuration process, tap the “+” icon in the top-left corner and select “Set up device.” Choose whether you’re adding a new device or linking to an existing one. If you’re setting up a Google Nest speaker or display, select “New device” and follow the on-screen instructions to connect it to your Wi-Fi network.\n\nFor integrating smart devices, select “Works with Google” and choose your device manufacturer from the list. You’ll need to link your device’s account with Google Home by signing in through the manufacturer’s login page. Once connected, assign your devices to specific rooms and create custom names for easier voice control.\n\nTo enhance your smart home experience, set up routines by going to the “Routines” section. Here, you can create automated sequences of actions triggered by specific phrases or times of day. For example, saying “Hey Google, good morning” could turn on your lights, adjust the thermostat, and play your favorite news briefing.\n\nRemember to regularly check for firmware updates in the Google Home app to ensure optimal performance and security of your connected devices.\n\n
Creating Custom Commands
\n\nSetting up personalized voice commands for your smart shed is easier than you might think. With modern voice command automation, you can create custom phrases that feel natural and intuitive to use.\n\nStart by accessing your smart home app’s custom command section, usually found in the settings menu. Choose a trigger phrase that’s memorable and distinct from other commands – something like “Hey Assistant, open my workshop” or “Time to garden.” Avoid generic phrases that might conflict with existing commands.\n\nNext, map out the sequence of actions you want your command to perform. For example, you might want a single phrase to unlock the door, turn on the lights, and activate the ventilation system. Most platforms allow you to bundle multiple actions into one command, making your shed operation more efficient.\n\nRemember to create commands for different scenarios:\n- Morning routines (“Start workshop day”)\n- Security protocols (“Lock up shop”)\n- Lighting scenes (“Evening project mode”)\n- Climate control (“Cool down shed”)\n\nTest each command thoroughly before finalizing it, and share these custom commands with family members who need access. Consider creating backup commands using slightly different phrases in case you forget the exact wording of your primary commands.\n\nFor safety, always include verbal confirmation requirements for critical commands like door operations or power tool activation. This extra step prevents accidental triggering and keeps your smart shed secure.\n\n\n
Troubleshooting Common Issues
\n\nEven the most carefully planned smart home installations can encounter hiccups along the way. Here’s how to address some of the most common issues you might face during setup and operation.\n\nIf your devices won’t connect to your network, start by checking your Wi-Fi signal strength. Smart devices often require a strong, stable connection. Consider installing a Wi-Fi extender if your shed is far from your main router. Also, ensure your network password is entered correctly and your router supports the 2.4GHz frequency band, as many smart devices prefer this over 5GHz.\n\nWhen devices appear offline in your app, try the classic “turn it off and on again” approach. Unplug the device, wait 30 seconds, and plug it back in. If the problem persists, check if your app needs updating or if there’s a firmware update available for the device.\n\nVoice commands not working? First, verify that your smart assistant (like Alexa or Google Home) is properly linked to your devices. Sometimes, you’ll need to unlink and relink the devices in your assistant’s app. Also, try rephrasing your commands using simpler, more direct language.\n\nFor motion sensors triggering falsely, adjust the sensitivity settings in your app. Position sensors away from heat sources, moving branches, or areas with changing light conditions that might cause false alerts.\n\nBattery-powered devices dying too quickly? This often indicates poor signal strength, causing devices to work harder to maintain connection. Move your hub closer or add a signal repeater. Also, check if your devices are set to optimal power settings – some may have energy-saving modes you can enable.\n\nIf your automation routines aren’t executing properly, double-check the trigger conditions and timing. Sometimes, conflicting routines or incorrect scheduling can cause issues. Break down complex routines into smaller, simpler ones for easier troubleshooting.\n\nRemember to keep your hub’s firmware and device apps updated, as manufacturers often release fixes for common problems through updates.\n\n\nTransforming your shed into a smart storage space is an exciting project that combines modern technology with practical organization. By following the installation training steps we’ve covered, you’ll be well-equipped to create a secure, efficient, and connected outdoor space that meets your specific needs. Remember to start with a solid plan, choose compatible devices, and take time to properly set up your network infrastructure.\n\nDon’t let initial challenges discourage you – every smart home project has its learning curve, but the benefits of automated lighting, climate control, and security are well worth the effort. Take advantage of manufacturer resources, community forums, and professional support when needed. Start small with basic automation and gradually expand your system as you become more comfortable with the technology.\n\nWhether you’re protecting valuable tools, monitoring humidity levels, or simply wanting the convenience of remote access, a smart shed represents the perfect blend of traditional storage and modern innovation. Take that first step today, and enjoy the satisfaction of creating your own intelligent storage solution that works seamlessly with your lifestyle.