
Where You Put Your Shed Matters More Than You Think
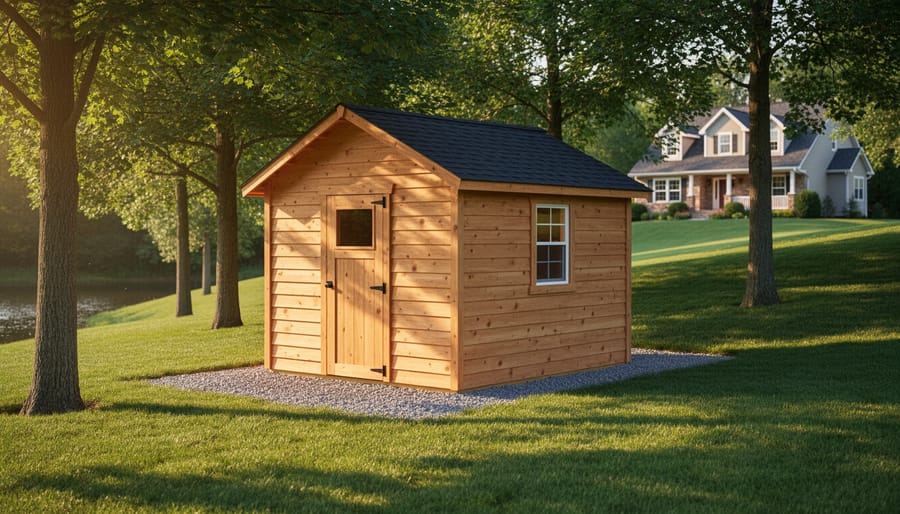
Choose level ground or a gentle slope to minimize excavation and prevent water pooling around your shed’s foundation. This simple decision reduces your environmental footprint by preserving existing soil structure and drainage patterns while cutting construction costs and labor.\n\nPosition your shed where it naturally benefits from existing trees for summer shade, reducing future energy needs for cooling stored items, but maintain at least 3 feet of clearance to prevent moisture damage and pest issues. This balance protects both your investment and the established landscape you’re working to preserve.\n\nAvoid low-lying areas where water naturally collects during storms, as these spots require extensive drainage modifications that disturb more soil and vegetation. Instead, look for naturally well-drained locations that work with your yard’s existing water flow rather than against it.\n\nConsider proximity to your home’s utilities if you’re planning to add electricity or water later, keeping cable runs short to minimize trenching and material use. The right eco-friendly shed solutions start with smart placement decisions that save money, extend your shed’s lifespan, and reduce environmental impact from day one. Small homes and storage structures that respect the land they sit on deliver practical benefits for years while keeping your yard healthier and more functional.\n\n\n
Why Low-Impact Site Selection Actually Saves You Money
\n\nChoosing the right spot for your eco-friendly small home might feel like just another box to check, but here’s the truth: smart placement puts money back in your pocket from day one.\n\nThink about it this way. When you position your structure on naturally level ground, you’ll spend far less on site preparation and foundation work. One homeowner in Oregon saved over $1,200 simply by selecting a flat area instead of grading a sloped section of their yard. That’s money you could invest in eco-friendly building materials instead.\n\nDrainage is another huge consideration. Place your small home where water naturally flows away, and you’ll avoid the nightmare expenses of foundation repairs, rotting floors, or mold remediation. These problems can easily cost thousands to fix, while proper placement costs you nothing but a little extra planning time.\n\nEnergy savings add up too. Position your structure with southern exposure for natural warmth in winter, and you’ll reduce heating needs. Shade it with existing trees in summer, and cooling becomes easier. Some owners report cutting their energy costs by 30 percent just through strategic placement.\n\nMaintenance costs drop significantly when you work with your landscape rather than against it. Placing your home away from overhanging branches means less gutter cleaning, fewer roof repairs, and reduced risk of damage during storms. Avoiding areas with aggressive tree roots protects your foundation for decades.\n\nThe lifespan difference is remarkable. Structures built on well-chosen sites regularly last 15 to 20 years longer than those placed in problem areas. That’s real value extending far into the future, all because you took time to assess your options carefully before breaking ground.\n\n\n
Reading Your Yard Like a Pro
\n\n
The Water Question: Where Does Rain Actually Go?
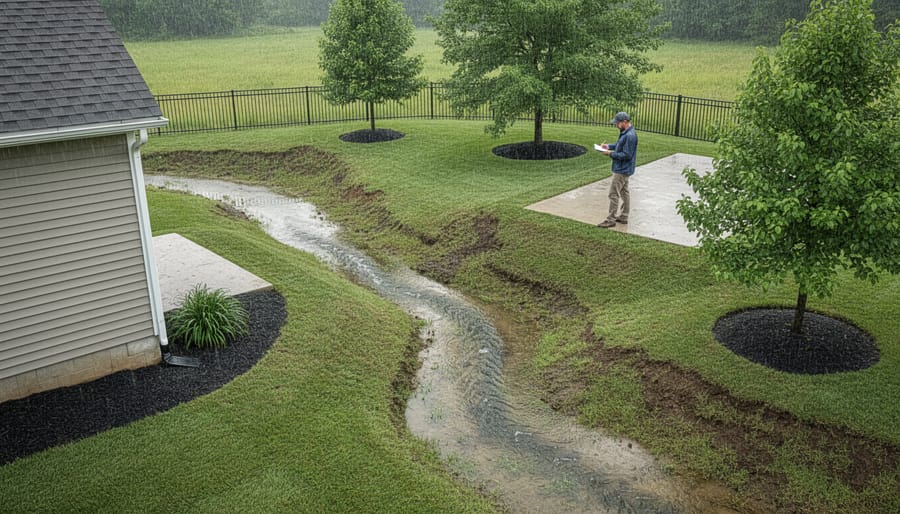
\n\nBefore you finalize your shed location, spend some time watching how water moves through your yard during a heavy rain. This simple observation can save you from significant headaches down the road. Grab an umbrella and notice where puddles form, which areas stay soggy longest, and where water naturally flows during storms.\n\nLook for telltale signs of poor drainage: depressions in the ground, bare patches where grass struggles to grow, or areas where leaves and debris collect. These spots indicate natural low points where water accumulates. Placing your shed in these locations can lead to floor rot, foundation settling, and ongoing moisture problems inside.\n\nInstead, choose slightly elevated ground or gentle slopes where water naturally runs away from the structure. If your ideal spot has drainage concerns, don’t worry. Simple solutions like adding a gravel base, creating a slight grade, or installing a French drain can redirect water effectively. Managing rainwater runoff not only protects your investment but also prevents erosion and keeps water from pooling against your home’s foundation.\n\nRemember, working with your yard’s natural water flow is always easier and more eco-friendly than fighting against it.\n\n
 \n
\n\n\n
Working With Trees and Plants (Not Against Them)
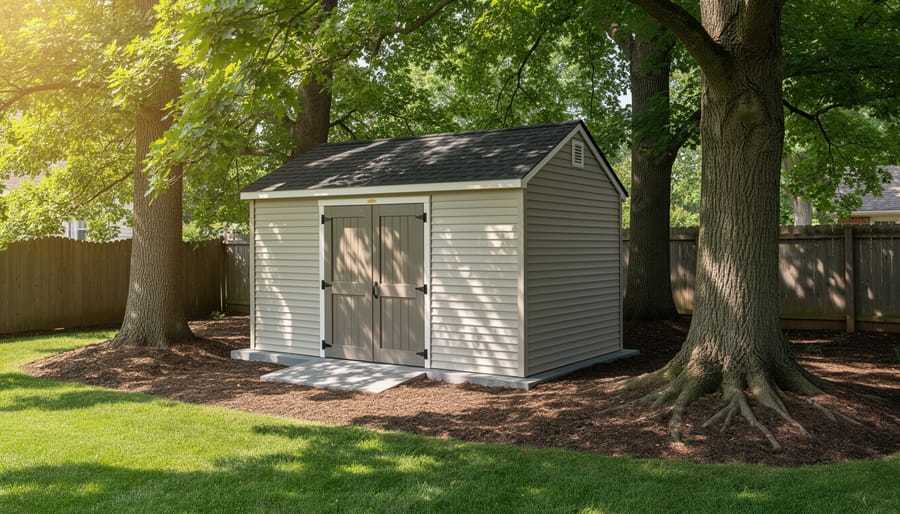
\n\nBefore breaking ground, take a walk around your property to identify existing trees, shrubs, and landscaping. The smartest eco-friendly approach is positioning your shed to work with these natural features rather than removing them. Mature trees provide natural cooling that can reduce your shed’s internal temperature by up to 15 degrees in summer, which means stored items last longer and you’ll use less energy if you ever add ventilation or electricity.\n\nWhen selecting your spot, stay at least 10 feet from tree trunks to avoid root systems. Tree roots extend far beyond the canopy, and building over them not only harms the tree but can cause serious foundation problems as roots continue growing underneath your structure. I’ve seen countless sheds with cracked floors and uneven settling because someone ignored this simple rule.\n\nConsider natural shade patterns throughout the day. Positioning your shed under dappled shade or on the north side of trees keeps it cooler without blocking essential sunlight from your garden. Take photos of your yard at different times to track sun movement before deciding.\n\nIf you must remove vegetation, transplant perennials to another location rather than discarding them. Work with your landscape, and it will reward you with a shed that stays cooler, sits more securely, and looks naturally integrated into your property.\n\n
Ground Truth: Understanding Your Soil
\n\nBefore breaking ground for your eco-friendly small home or shed, understanding what’s beneath your feet saves headaches and money down the road. Start with the simple jar test: dig about six inches down, grab a handful of soil, and place it in a clear jar with water. Shake it vigorously and let it settle overnight. Sand sinks first, then silt, with clay floating on top. This layering reveals your soil composition and helps predict how well it’ll support your structure.\n\nFor drainage, dig a hole one foot deep and fill it with water. If it drains within 24 hours, you’re in good shape. Slower drainage means you’ll need to plan for proper water management. Walking your site after heavy rain tells you where water naturally pools—avoid these spots or plan adequate grading. Compact soil by stepping firmly across your proposed site; excessive sinking indicates weak ground that needs addressing before construction begins.\n\n\n
The Smart Spots (And the Places to Avoid)
\n\n
Green Light Locations
\n\nThe ideal spot for your eco-friendly small home minimizes environmental disruption while setting you up for long-term success. Let’s explore what makes a location truly “green-lit” for your project.\n\nStart by looking for gentle slopes rather than perfectly flat ground. A slight grade of 2-5% allows natural water drainage away from your structure, eliminating the need for extensive grading work that disturbs soil and vegetation. This means less erosion, healthier surrounding plants, and a drier shed floor without expensive drainage systems.\n\nWell-drained areas are your best friend. Walk your property after a rain and notice where puddles linger versus where water disappears quickly. Sandy or loamy soil areas naturally manage moisture better than clay-heavy spots. One homeowner shared that choosing the naturally drier section of her yard saved hundreds on foundation prep and prevented future moisture issues.\n\nAccessibility matters more than you might think. Select spots reachable by existing pathways or driveways. Creating new access routes means clearing vegetation, compacting soil, and potentially removing trees. An accessible location near your home also reduces the temptation to drive across your lawn repeatedly, which damages grass and soil structure.\n\nAvoid low-lying areas, heavy tree cover requiring removal, or spots demanding significant excavation. The greenest approach works with your land’s natural features rather than against them, saving money while protecting your yard’s ecosystem.\n\n
 \n
\n\n\n
Red Flag Zones
\n\nEven with the best intentions, some locations can undermine your eco-friendly goals before you even break ground. Let’s look at spots that deserve a hard pass when planning your small home site.\n\nWetlands and marshy areas might seem harmless, but building here disrupts natural water filtration systems and wildlife habitats. Plus, you’ll likely face drainage nightmares that require expensive interventions down the road. If water pools in an area after rain or the ground feels perpetually squishy, it’s nature’s way of saying “not here.”\n\nSteep slopes present a double whammy. They require significant grading work that damages soil structure and plant life, and they create erosion problems that affect your entire property. If you’re eyeing a hillside spot, remember that fighting gravity gets expensive and rarely stays eco-friendly.\n\nAreas thick with mature trees might look picturesque, but clearing them defeats your environmental purpose. These established trees already provide cooling shade, carbon storage, and habitat. Instead of removing them, work around them.\n\nWatch your boundaries too. Building too close to property lines invites neighbor disputes, while proximity to underground utilities means you’ll need extensive excavation that disturbs more soil than necessary. Most municipalities require specific setbacks from utilities anyway, so you’ll save headaches by planning accordingly.\n\nWhen a location requires extensive modification to work, it’s telling you something important. Listen to it.\n\n\n
Prep Work That Protects Your Property
\n\n
The Gentle Approach to Leveling
\n\nYou don’t need heavy machinery or extensive digging to create a perfectly level foundation for your eco-friendly shed. The secret lies in working with what you have while making minimal adjustments.\n\nStart by identifying your shed’s footprint using stakes and string. Check the natural slope by placing a long, straight board across the area with a level on top. Most yards have some gentle slope, which is actually helpful for drainage. Your goal isn’t to create a perfectly flat surface across your entire yard, but rather to establish level ground within your shed’s specific footprint.\n\nFor minor variations of a few inches, consider using pier blocks or adjustable deck blocks at each corner and along the perimeter. These allow you to compensate for uneven terrain without removing soil. If one corner sits lower, simply stack blocks or add gravel beneath to raise it. This approach preserves the existing ground cover and soil structure.\n\nWhen you do need to add or remove soil, work in thin layers. Scraping away just the top two inches of sod and redistributing it elsewhere in your yard minimizes waste. Add a thin layer of compacted gravel only where needed for stability. This gentle approach protects beneficial soil organisms and prevents erosion while giving your shed a solid, long-lasting foundation.\n\n
Foundation Options That Work With Nature
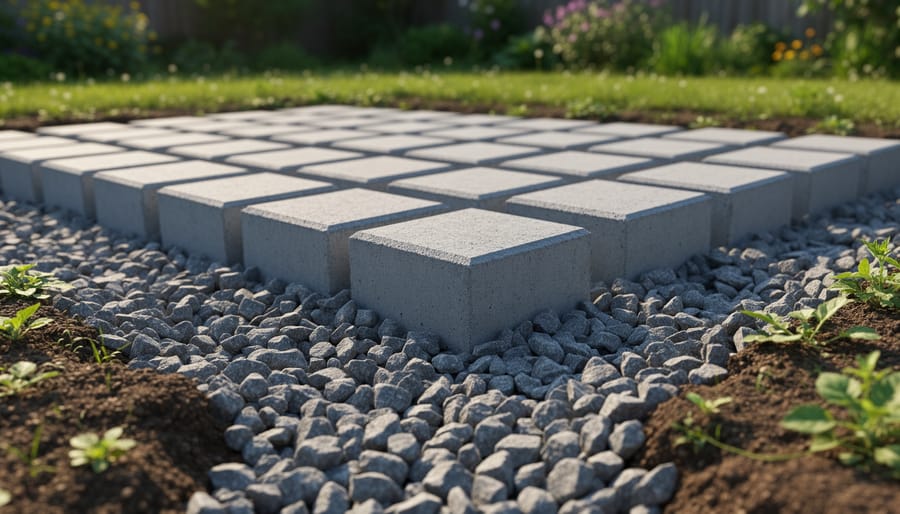
\n\nChoosing the right foundation makes all the difference when you’re building an eco-friendly small home. The good news? You have several earth-friendly foundation methods that work beautifully without requiring heavy equipment or concrete trucks tearing up your yard.\n\nGravel pads are incredibly popular for good reason. They provide excellent drainage, adjust naturally with ground movement, and you can install them yourself in a weekend. The gravel allows rainwater to percolate back into the soil instead of creating runoff. Just level your site, lay down landscape fabric, and spread 4-6 inches of crushed stone. The downside? You’ll need to check levelness annually and add gravel as needed.\n\nConcrete deck blocks offer a middle-ground solution. These precast blocks sit directly on tamped soil or gravel, creating a stable platform without pouring a full slab. They’re reusable if you ever move your structure, and installation is straightforward enough for most DIYers. However, they work best on already-level ground and may shift slightly on slopes.\n\nTimber frames using pressure-treated skids give you that classic, natural look while keeping your structure off the ground. They’re perfect for uneven terrain and promote air circulation underneath. One homeowner told us her timber foundation lasted 15 years with just occasional leveling adjustments. The trade-off is that wood eventually needs replacing, though treated lumber significantly extends lifespan.\n\nEach option minimizes environmental disruption while giving your small home the stable base it deserves.\n\n
 \n
\n\n\n\n
Making Peace With Your Neighbors (And Local Rules)
\n\nBefore you fall in love with a particular spot in your yard, take time to do some neighborly homework. Start by calling your local building department to learn about setback requirements, which dictate how far your small home must sit from property lines, streets, and other structures. These rules exist for good reasons like fire safety and property access, and ignoring them can mean costly relocations later.\n\nIf you live in a community with a homeowners association, review their guidelines carefully. Some HOAs have specific rules about structure sizes, colors, or even whether alternative dwellings are permitted at all. Getting approval before you build saves headaches and preserves good relationships with your neighbors.\n\nDon’t forget the underground world. Contact your utility company or dial 811 for free utility location services. Knowing where water lines, gas pipes, and electrical cables run prevents dangerous accidents and expensive repairs. This simple step protects both your investment and your safety.\n\nWhen it comes to positioning your eco-friendly small home, consider your neighbors’ views and privacy. Placing your structure too close to their living spaces or blocking their sunlight can strain relationships. One homeowner shared how moving their planned site just fifteen feet made all the difference: “My neighbor was worried about losing afternoon sun in her garden. We adjusted the placement slightly, and now we’re both happy.”\n\nThink about noise and activity patterns too. Position doorways and windows away from neighboring outdoor spaces where families gather. This thoughtful approach to siting demonstrates respect for the community while still achieving your sustainable living goals.\n\n\n
Real Homeowners, Real Results
\n\nHere’s what happens when homeowners put eco-friendly principles into practice during shed site selection. These real examples show how a little planning goes a long way.\n\nSarah and Tom inherited a sloped backyard in Portland that turned into a muddy mess every winter. They wanted a small garden shed but worried about drainage. Instead of leveling the lowest spot near their fence, they chose a slightly elevated area mid-slope. They added a simple gravel bed beneath the shed and positioned it so natural water flow continued downhill past both sides. The result? Their shed stays bone-dry year-round, they avoided expensive drainage systems, and the natural water flow actually improved. Their vegetable garden below the shed now benefits from the directed runoff. As Tom put it, “We worked with the land instead of against it, and it solved our problem without any chemicals or major digging.”\n\nThe Martinez family in Austin faced a different challenge. Their dream shed location had two mature oak trees they refused to remove. After measuring carefully, they discovered a 10-by-12-foot clearing just eight feet from the largest oak. They positioned their shed there, keeping all roots undisturbed, and the tree canopy now provides natural cooling that drops interior temperatures by 15 degrees in summer. No air conditioning needed, and their trees continue thriving.\n\nFinally, there’s Janet, a retired teacher in Vermont who needed accessible storage near her back door. She selected a flat area just twelve feet from her entrance, avoiding a prettier but hilly spot. The level path means easy access with her walker, and positioning the shed closer to the house reduced the concrete pathway needed by half.\n\n\nHere’s the truth: spending just fifteen minutes walking your property with fresh eyes can save you hours of frustration down the road. Those few minutes help you spot drainage issues before they flood your shed, identify tree roots before they crack your foundation, and catch slope problems before they become expensive fixes. That’s not just eco-friendly thinking—it’s smart, practical homeowner decision-making.\n\nThe good news? Every eco-friendly choice we’ve discussed actually makes your life easier. Placing your shed where water naturally flows away means less maintenance. Avoiding tree removal saves your wallet and your landscape. Working with your yard’s natural features instead of against them creates a shed site that simply works better, season after season.\n\nYou don’t need to be an environmental expert to make thoughtful decisions. You just need to observe, ask a few key questions, and trust what you see. One homeowner told us that her fifteen-minute site walk revealed a slight slope she’d never noticed—redirecting her shed placement saved her basement from water issues she didn’t even know were coming.\n\nReady to get started? Grab a lawn chair, sit in your proposed shed spot for ten minutes, and simply watch how water moves during the next rain. That single observation will tell you more than any guidebook ever could.