
Fix Your Leaky Shed Roof This Weekend (Without Calling a Pro)
Inspect your shed roof on a dry, clear day by walking the perimeter and looking for curled shingles, exposed nail heads, moss growth, or visible gaps where water could penetrate. Small leaks often appear far from their source, so trace water stains on interior walls or ceilings back to their origin point on the roof surface.
Replace damaged asphalt shingles by carefully lifting the edges of surrounding shingles with a pry bar, removing old roofing nails, and sliding new shingles into place before securing with galvanized roofing nails. For metal roofing, apply butyl tape or specialized metal roof sealant to seal around fasteners and seams where rust or separation has occurred.
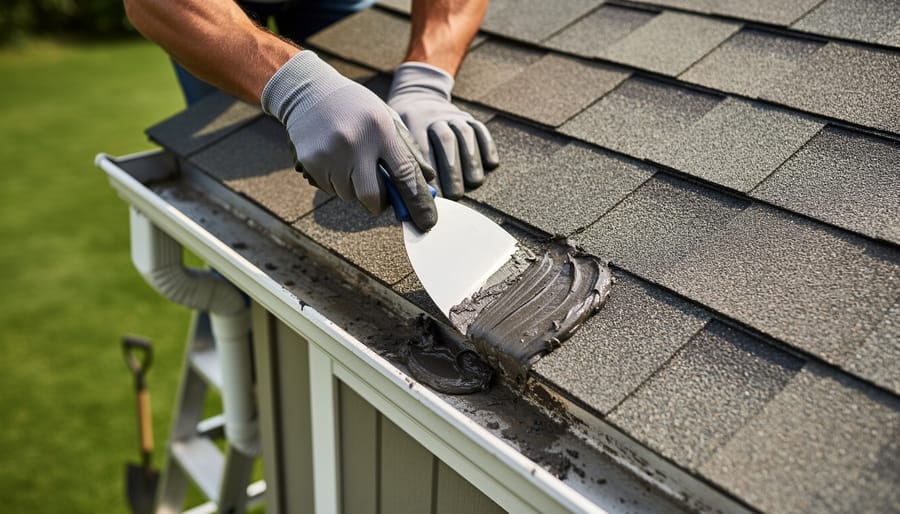
Patch small holes and cracks immediately using roofing cement and a putty knife, applying a generous layer that extends at least two inches beyond the damaged area. Cover the wet cement with a fabric mesh patch, then apply another layer of cement over the top for a waterproof seal that prevents minor issues from becoming major problems.
Clean gutters and downspouts quarterly to prevent water backup that can seep under roofing materials and rot the underlying structure. Most shed roof repairs take just a few hours and cost under fifty dollars in materials, saving you hundreds compared to professional services while extending your shed’s lifespan by years when addressed promptly.
Spotting Problems Before They Get Worse
Inside Warning Signs
Your shed’s roof problems often announce themselves from the inside long before you spot exterior damage. Learning to recognize these warning signs can save you from costly repairs down the road.
Water stains are your first clue that something’s wrong. Look for yellowish or brown discoloration on your shed’s ceiling or walls, especially after rainstorms. These telltale marks indicate water is finding its way through your roofing materials, even if you don’t see active dripping.
Speaking of drips, any moisture inside your shed during or after rain is an obvious red flag. Check corners and edges carefully, as leaks often start in these vulnerable spots before spreading.
Your nose can be just as helpful as your eyes. A musty, damp smell means moisture is trapped somewhere, likely from a slow leak you haven’t spotted yet. This persistent dampness creates the perfect environment for mold and mildew to grow.
Visible mold appears as dark spots or fuzzy patches on wood surfaces, walls, or stored items. Beyond being unsightly, mold indicates ongoing moisture problems that need immediate attention. Left unchecked, it can compromise your shed’s structural integrity and damage everything you’ve stored inside.
Regular interior inspections help you catch these issues early when repairs are simpler and more affordable.
Exterior Red Flags
Before climbing up to inspect your shed roof, take a thorough walk around the entire structure from ground level. Start by scanning for damaged or missing shingles, which often appear curled, cracked, or completely absent after storms. These vulnerable spots are prime entry points for water and should be addressed quickly.
Next, look for missing or exposed fasteners. You might notice raised nail heads, loose screws, or gaps where fasteners have worked themselves free over time. These seemingly small issues can lead to bigger problems during windy conditions.
Check metal components carefully for rust spots or corrosion, especially around flashing, valleys, and any metal roofing panels. Even small rust patches can spread rapidly and compromise your roof’s integrity.
Examine panels for cracks or splits, particularly if your shed has metal or plastic roofing. Temperature changes cause these materials to expand and contract, sometimes resulting in stress fractures.
Finally, step back and view your roofline from different angles. Any sagging or dipping areas indicate potential structural issues underneath that need immediate attention. These red flags often signal water damage or weakened support beams requiring more than surface-level repairs.
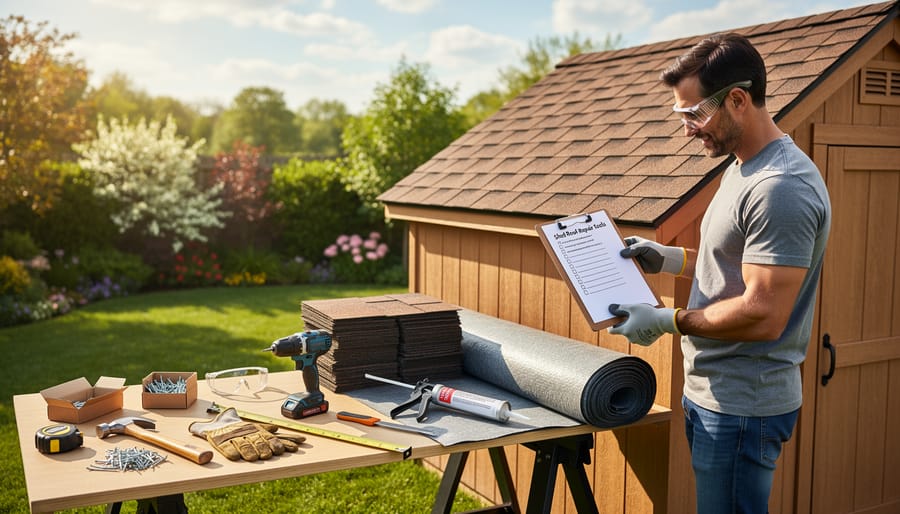
Essential Tools and Materials You’ll Need
Before you climb onto your shed roof, gathering the right tools and materials will make your repair project smoother and more successful. Here’s what you’ll need, organized by the type of repair you’re tackling.
For leak detection and general inspection, start with basic safety equipment: a sturdy ladder, work gloves, and non-slip footwear. Grab a flashlight or headlamp, a putty knife for scraping, and a wire brush for cleaning surfaces. You’ll also want a garden hose for water testing potential leak areas.
When patching small holes and cracks, pick up roofing cement or sealant (about $10-15 per tube), a caulking gun, and a trowel for spreading. For asphalt shingle repairs, you’ll need replacement shingles that match your existing roof, roofing nails, a pry bar, and a hammer. Don’t forget roofing cement to secure everything in place.
Metal roof repairs require slightly different supplies: self-tapping screws, metal patches cut to size, and butyl tape or specialized metal roof sealant. A drill with appropriate bits will make fastening much easier.
For felt or rubber membrane roofs, stock up on roofing adhesive, a utility knife with fresh blades, and patch material that matches your roofing type. A roller helps ensure patches bond properly without air bubbles.
Budget-conscious DIYers will appreciate that most repairs can be completed for under $50 in materials. Many homeowners find they already own some basic tools, making shed roof repair an accessible weekend project. Always buy slightly more material than you think you’ll need since matching products later can be challenging, and having extras on hand prevents mid-project trips to the hardware store.
Quick Fixes for Common Shed Roof Problems
Patching Small Holes and Cracks
Catching small holes and cracks early can save you from major headaches down the road. The good news? Most minor damage is surprisingly easy to fix yourself with just a few basic supplies.
For asphalt shingles, roofing cement is your best friend. Clean the damaged area thoroughly, removing any loose debris or dirt. Apply a generous layer of roofing cement directly over the crack or hole using a putty knife, then smooth it out evenly. For holes larger than a quarter, cut a piece of fiberglass mesh or metal flashing slightly bigger than the damaged area, press it into a layer of cement, then cover it with another layer on top. This creates a durable sandwich that seals out moisture.
Metal shed roofs require a slightly different approach. After cleaning the area with a wire brush to remove rust, apply a metal roof sealant or use a self-adhesive metal repair patch. These patches work wonderfully because they conform to your roof’s contours and create a waterproof seal.
For wooden shed roofs with small cracks, wood filler or exterior-grade caulk works well before applying a protective coating. Always let repairs cure according to the product instructions before exposing them to weather.
Here’s a tip from experienced DIYers: tackle repairs on a dry, mild day. Extreme temperatures can affect how sealants and cements cure, potentially compromising your repair. Also, keep extra roofing cement on hand for quick touch-ups throughout the year. Regular maintenance of these small fixes prevents them from becoming expensive problems later.
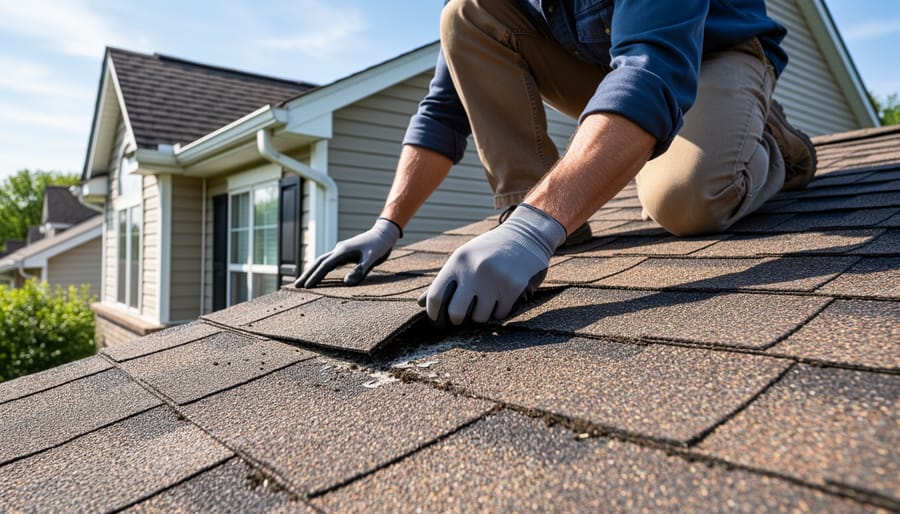
Replacing Damaged Shingles or Panels
Replacing damaged roofing materials on your shed is more straightforward than you might think, and catching problems early can save you from bigger headaches down the road. Here’s how to tackle this repair with confidence.
For asphalt shingles, start by carefully lifting the shingle above the damaged one using a pry bar. You’ll need to remove the nails holding the damaged shingle in place, working gently to avoid tearing surrounding materials. Slide out the old shingle, then slip the new one into position. Secure it with roofing nails, placing them where the shingle above will cover them. Apply a dab of roofing cement under the lifted shingle and press it back down to seal everything properly.
Metal panels require a different approach. Remove the screws or fasteners holding the damaged panel, being mindful of how panels overlap. Most metal roofing systems have panels that interlock, so you’ll need to understand the direction of installation before attempting removal. Once you’ve freed the damaged panel, slide the new one into place, ensuring proper overlap with adjacent panels. Use matching screws with rubber washers to prevent future leaks.
For plastic or polycarbonate panels commonly found on shed roofs, the process is similar to metal. These materials can become brittle over time, so handle them carefully during removal. When installing the replacement, avoid overtightening screws, which can crack the material.
One homeowner shared that after replacing just three damaged shingles on her garden shed, she prevented what could have become extensive interior water damage. The entire repair took less than an hour and cost under twenty dollars in materials. The key is addressing small problems before they escalate into major repairs requiring professional intervention.
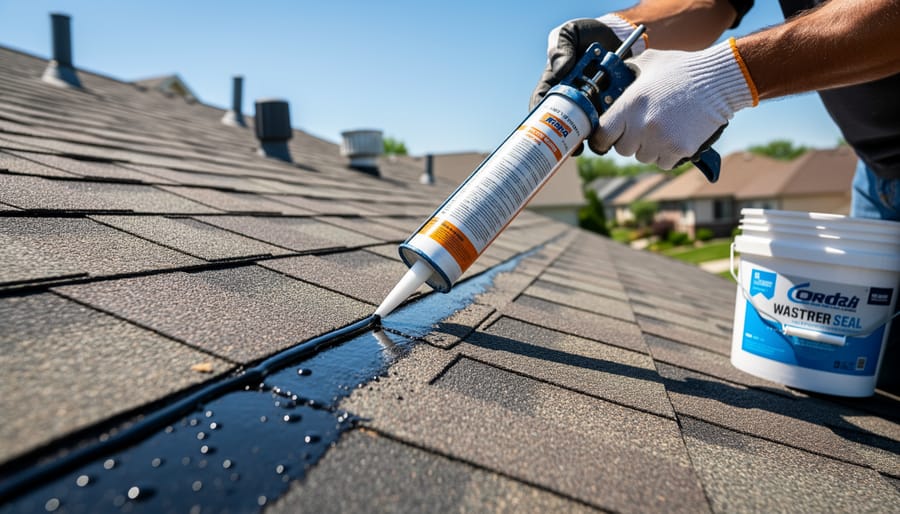
Sealing Leaky Seams and Flashing
Leaky seams and flashing are among the most common culprits behind shed roof problems. These vulnerable spots where different surfaces meet create perfect pathways for water to sneak inside, but the good news is they’re usually straightforward to fix yourself.
Start by inspecting all the edges where your roof meets walls, around vents, chimneys, and any other protrusions. Look for cracked, missing, or peeling sealant, as well as lifted or corroded flashing. On a rainy day, you might even spot water trails that lead you straight to the problem area.
Once you’ve identified the trouble spots, clean them thoroughly. Remove any old, deteriorated sealant with a putty knife and brush away dirt and debris. The surface needs to be completely dry before you apply new sealant, so pick a stretch of dry weather for this project.
For most shed applications, a high-quality roofing sealant or silicone caulk works beautifully. Apply a generous bead along seams, pressing it firmly into gaps. For flashing repairs, you might need to gently lift the shingles, apply sealant underneath, then press everything back down securely.
Here’s a helpful tip from experienced DIYers: don’t skimp on sealant. A proper seal is worth the extra few dollars and will save you headaches down the road. Apply it smoothly and evenly, creating a watertight barrier that protects your shed contents.
Allow the sealant to cure completely according to manufacturer instructions before exposing it to rain, usually 24-48 hours.
Fixing Loose or Missing Fasteners
Loose or missing fasteners are a common culprit behind roof leaks and potential damage. Over time, thermal expansion and contraction can cause screws and nails to work their way out, leaving vulnerable gaps where water can sneak in.
Start by inspecting your shed roof for any raised nail heads or missing screws, especially around roof panels, flashing, and trim. You’ll want to replace old fasteners rather than simply hammering them back in, as they’ve likely lost their holding power. Choose corrosion-resistant roofing screws with rubber or neoprene washers that create a watertight seal. These are far superior to standard nails for weatherproofing.
When replacing fasteners, position them about half an inch from the original holes to ensure they bite into fresh, solid material. For metal roofing, always drive screws through the raised ribs rather than the valleys where water flows. The washer should compress slightly but not over-tighten, which can crack the washer and compromise the seal.
After securing all fasteners, apply a small dab of roofing sealant around each screw head for extra protection. This simple step takes just minutes but significantly extends the life of your repair. Consider doing a full fastener inspection twice yearly to catch problems before they become serious leaks.
Addressing Rust on Metal Roofs
Rust spots on your metal shed roof need prompt attention to prevent them from spreading and causing leaks. Start by using a wire brush or sandpaper to remove loose rust and flaking paint, working down to bare metal. Once you’ve cleaned the area thoroughly, wipe it down with a damp cloth and let it dry completely.
Next, apply a rust converter product following the manufacturer’s instructions. This chemical solution transforms rust into a stable compound that you can paint over. After the converter dries, prime the treated area with a metal primer designed for outdoor use. Finish with a quality metal roof paint that matches your existing color.
To prevent future corrosion, inspect your roof regularly for scratches or chips in the protective coating, as these expose metal to moisture. Consider applying a clear sealant annually to high-risk areas like seams and fasteners. Keep gutters clean to prevent water pooling, and trim overhanging branches that hold moisture against the roof surface. These simple preventative steps will extend your metal roof’s lifespan significantly.
Weatherproofing Upgrades That Extend Roof Life
Applying Protective Roof Coatings
Applying a protective roof coating is one of the smartest investments you can make for your shed’s longevity. These coatings create a barrier against water, UV rays, and temperature extremes, often extending your roof’s lifespan by 5-10 years. Reflective coatings are particularly effective, reducing heat absorption by up to 30% and keeping your shed contents cooler during summer months.
Before applying any coating, thoroughly clean your roof to remove dirt, debris, and loose material. A pressure washer works well for this, but a stiff brush and garden hose will do the job too. Let the surface dry completely—this usually takes 24-48 hours depending on weather conditions.
Choose a coating suited to your roof material. Acrylic-based products work wonderfully on metal and asphalt shingles, while elastomeric coatings excel on flat or low-slope roofs. Apply using a roller or sprayer on a mild day between 50-85 degrees Fahrenheit, avoiding rain in the forecast for at least 24 hours.
Most coatings require two coats for optimal protection. The first coat seals the surface, while the second provides the waterproof barrier. Consider scheduling this project as part of a seasonal roof makeover to maximize protection before harsh weather arrives. The investment of around 50-150 dollars in materials delivers impressive returns in prevented damage and extended roof life.
Improving Drainage and Ventilation
Preventing moisture damage starts with keeping water away from your shed roof in the first place. A few simple upgrades can make a world of difference in extending your roof’s lifespan and avoiding costly repairs down the road.
Start by installing gutter guards to keep leaves and debris from clogging your drainage system. Clogged gutters overflow, causing water to seep under shingles and rot wooden components. These mesh or screen covers are inexpensive and take just minutes to snap into place, saving you from frequent cleanings.
Next, verify your roof has adequate slope for water runoff. Even a slight dip or flat spot can create pooling that accelerates wear. You can check this by watching how water flows during rain or by using a level. If you spot problem areas, consider implementing drainage solutions like strategically placed shims under shingles or improved ground-level drainage.
Don’t overlook the importance of proper ventilation inside your shed. Adding ridge vents or soffit vents allows moisture-laden air to escape, preventing condensation that damages roofing materials from underneath. This is particularly crucial if you store temperature-sensitive items or work inside your shed regularly. These upgrades work together to create a comprehensive moisture management system that keeps your roof healthy for years to come.
When to Call a Professional Instead
While DIY shed roofing repairs can save you money and give you great satisfaction, some situations genuinely call for professional expertise. Recognizing when you’re in over your head isn’t admitting defeat—it’s being smart about safety and long-term results.
If more than 30% of your shed roof shows damage, you’re likely looking at a complete re-roofing job rather than spot repairs. This involves significant material costs, specialized tools, and knowledge of proper installation sequences that can make DIY attempts more expensive in the long run.
Structural issues are another clear red flag. If you notice sagging roof sections, damaged or rotting rafters, or compromised trusses, stop right there. These problems affect your shed’s integrity and require professional assessment to ensure repairs meet safety standards. Working on structurally unsound roofing also puts you at serious personal risk.
Safety concerns should always take priority. If your shed roof is particularly steep, high off the ground, or you’re uncomfortable working at heights, calling a professional is the right choice. No repair is worth risking a fall or injury.
Finally, consider bringing in experts when dealing with complex flashing repairs around chimneys or unusual roof configurations, or if you’ve attempted repairs that didn’t solve the problem. Sometimes a fresh professional eye can identify underlying issues you might have missed. Many homeowners find that tackling simple repairs themselves while leaving complicated work to pros strikes the perfect balance between savings and peace of mind.
You’ve now got the knowledge and skills to tackle most shed roof repairs with confidence! Taking the DIY approach not only saves you significant money on professional labor costs, but also gives you that genuine sense of accomplishment that comes from maintaining your property yourself. Many homeowners find that once they’ve completed their first repair, they feel empowered to handle future maintenance tasks more readily.
Remember, the key to extending shed lifespan is regular inspections. Make it a habit to check your roof at least twice yearly, ideally in spring and fall. Catching small issues early prevents them from becoming expensive problems down the road.
If you do need replacement materials like roofing panels, shingles, or flashing, Storage Sheds Outlet offers quality options designed to match common shed specifications. With the right materials and your newfound repair skills, your shed roof will protect your belongings reliably for years to come. Don’t wait until a small leak becomes structural damage—take action today and enjoy the peace of mind that comes with a well-maintained shed.
Looking for a storage sheds?
Browse our full range of storage sheds from authorized dealer brands. Free shipping to the continental US.