
Build a Budget-Friendly 6ft Privacy Screen That Actually Looks Great
Transform your backyard into a private sanctuary with a 6-foot outdoor privacy screen that combines style and functionality. Modern budget-friendly privacy solutions now offer homeowners the perfect balance of seclusion and aesthetic appeal without compromising their wallet. Whether you’re looking to block unwanted views, create an intimate dining space, or shield your pool area from neighboring properties, today’s privacy screens come in various materials like weather-resistant bamboo, durable vinyl, and natural reed – each offering unique benefits for different outdoor settings. The right 6-foot privacy screen not only enhances your outdoor living space but also increases property value while providing year-round protection from prying eyes and harsh elements. From easy-to-install panels to customizable designs, these versatile screening options adapt to any landscape layout while maintaining the perfect height for maximum privacy.
Affordable Materials for Your 6ft Privacy Screen
Natural Material Options
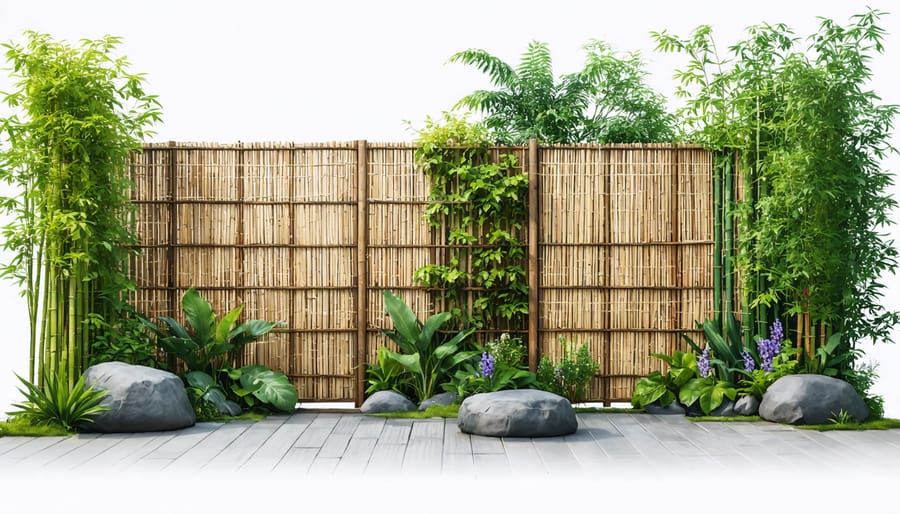
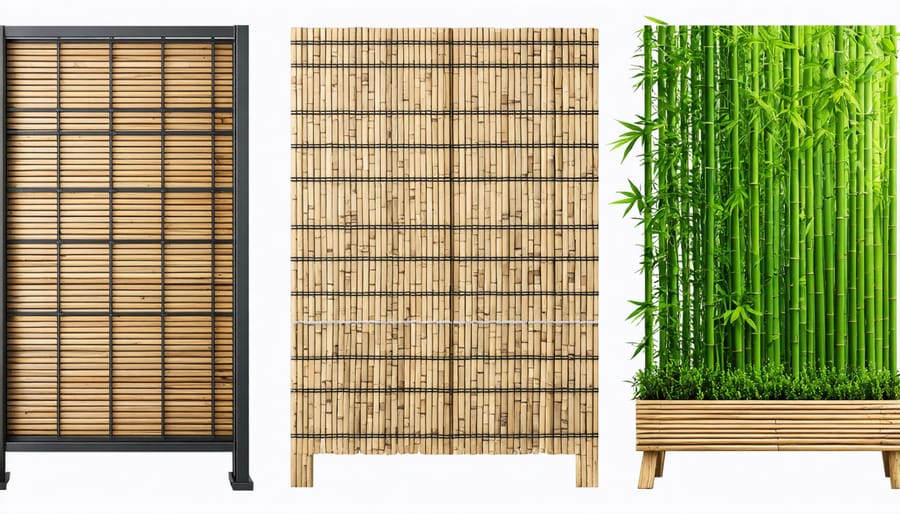
Natural materials offer a warm, organic look while providing excellent privacy for your outdoor space. Bamboo screening stands out as a popular choice, offering a sustainable and naturally weather-resistant option that can last for years with proper care. Available in both rolled fencing and panel formats, bamboo brings an exotic touch to any garden or patio setting.
Reed fencing provides another eco-friendly alternative that’s lightweight and easy to install. Made from dried river reeds bound together, these screens create a rustic, natural aesthetic while effectively blocking unwanted views. They’re particularly suitable for areas where a lighter touch is desired, and they blend beautifully with existing garden features.
Repurposed wood screens offer a unique opportunity to add character to your outdoor space while being environmentally conscious. Old fence panels, wooden pallets, or reclaimed lumber can be transformed into stunning privacy screens with some basic DIY skills. These materials can be stained or painted to match your existing outdoor décor, and their natural weathering often adds to their charm over time. Best of all, using repurposed wood keeps costs down while creating a one-of-a-kind privacy solution.
Synthetic Budget Solutions
For budget-conscious homeowners, synthetic materials offer excellent value without compromising on style or durability. Weather-resistant polyester fabric screens provide an affordable solution, typically featuring UV protection and water-resistant properties that help them withstand various weather conditions. These screens often come with reinforced edges and grommets for easy installation.
Plastic lattice panels represent another cost-effective option, offering both privacy and ventilation. Available in various patterns and colors, these lightweight panels can be easily customized with paint to match your outdoor décor. Many homeowners appreciate that these panels require minimal maintenance and won’t rot or rust like traditional materials.
Recycled materials are gaining popularity in outdoor privacy solutions. Repurposed plastic lumber and composite materials offer the look of natural wood without the maintenance concerns. These eco-friendly options are typically fade-resistant and can withstand harsh weather conditions for years. Some manufacturers even offer recycled content privacy screens made from post-consumer materials, making them both environmentally conscious and budget-friendly choices.
Consider combining different synthetic materials to create a unique look while maintaining affordability. For instance, pairing weather-resistant fabric with plastic lattice can create interesting layered effects while keeping costs manageable.
Simple DIY Installation Methods
Ground Post Installation
Proper post installation is crucial for ensuring your 6ft privacy screen remains sturdy and upright for years to come. Start by marking your post locations, spacing them 6-8 feet apart for optimal support. Dig holes at least 24 inches deep, or about one-third of the post height. In areas with loose soil or high winds, consider going deeper to 30 inches.
For each hole, pour 6 inches of gravel at the bottom for drainage. Position your post in the center, using a level to ensure it’s perfectly straight. Have a helper hold the post while you pour quick-setting concrete mix around it, leaving 2-3 inches at the top for soil.
Mix your concrete according to package instructions and pour it around the post, checking the level frequently as you work. Add water as directed and let the concrete set for about 20-30 minutes before initial hardening. Keep the post braced during this time to prevent shifting.
Pro tip: Create a slight slope away from the post when finishing the concrete to prevent water pooling. Allow the concrete to cure fully for 24-48 hours before attaching your privacy screen panels. For extra protection against rot, consider using concrete post anchors or treating the portion of the post that will contact the ground with a weatherproof sealant.
Panel Attachment Techniques
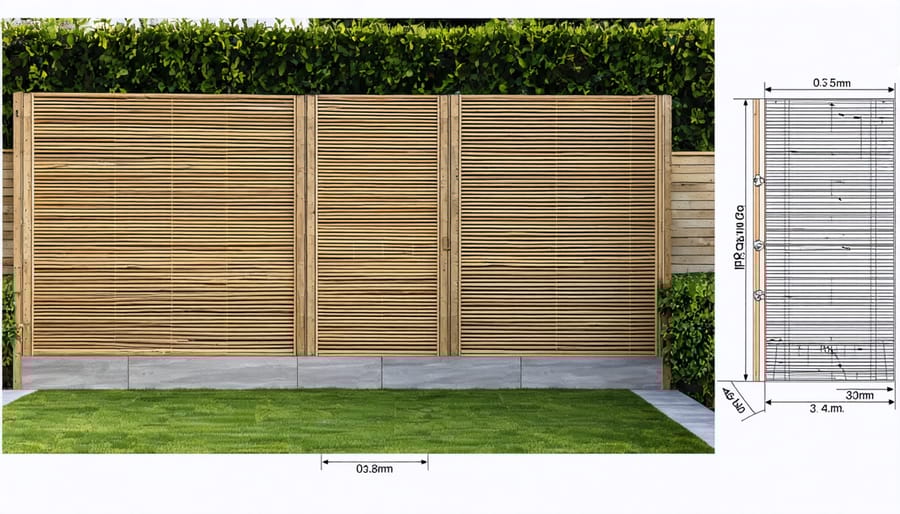
Securing your privacy screen panels properly is crucial for long-term stability and safety. Start by installing sturdy posts at least 2 feet into the ground, using quick-setting concrete for maximum support. Space these posts no more than 6 feet apart to prevent sagging and ensure proper tension across the screen.
For panel attachment, use heavy-duty brackets or U-clips designed for outdoor use. Stainless steel hardware resists rust and provides lasting durability. Position brackets at the top, middle, and bottom of each panel, spacing them approximately 2 feet apart vertically. This three-point attachment system prevents wind damage and maintains panel alignment.
Consider using a combination of fixed and sliding brackets. Fixed brackets at the ends provide stability, while sliding brackets in the middle allow for natural material expansion and contraction with weather changes. Always pre-drill holes to prevent splitting and use weather-resistant screws that match your bracket material.
For added security, especially in windy areas, install cross-braces between posts at 45-degree angles. These braces distribute wind load more effectively across the structure. When working with fabric or mesh screens, use tension cables along the top and bottom edges to prevent billowing and maintain a neat appearance.
Remember to check and tighten all hardware seasonally, as temperature changes can affect attachment points over time. This simple maintenance routine will significantly extend your privacy screen’s lifespan.
Enhancing Your Privacy Screen
Adding Climbing Plants
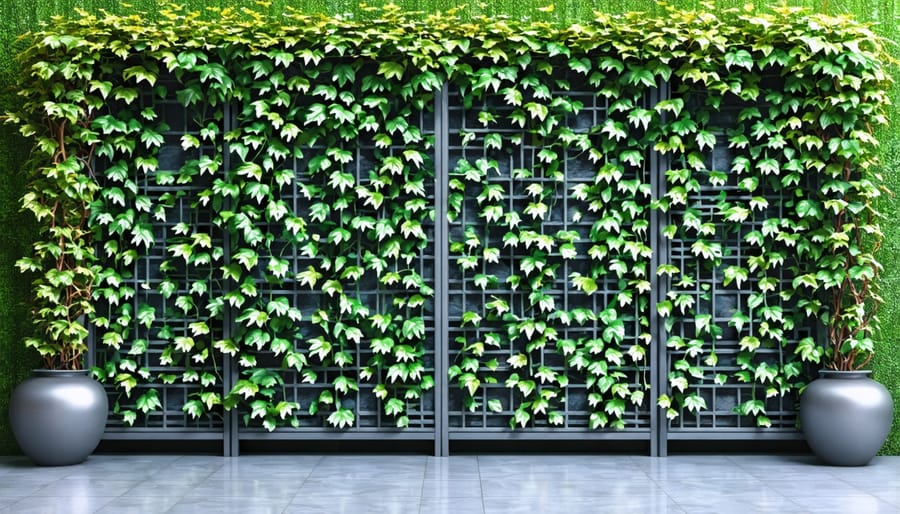
Transform your privacy screen into a living wall by incorporating climbing plants that add natural beauty and extra coverage. Fast-growing vines like English Ivy, Clematis, or Virginia Creeper can quickly cover your screen while creating a lush, green barrier. For year-round privacy, consider evergreen options such as Star Jasmine or Carolina Jessamine, which also provide fragrant blooms during flowering seasons.
Before planting, install sturdy trellises or garden twine along your privacy screen to support the climbing plants. Place your chosen climbers about 18-24 inches apart at the base of the screen, ensuring they have enough room to grow and spread. Add quality potting soil mixed with compost to provide essential nutrients for healthy growth.
For easy maintenance, choose plants suited to your climate zone and available sunlight. Consider combining different varieties for visual interest – mix flowering vines with dense foliage plants. Regular pruning will keep your living screen neat and prevent overgrowth. Water deeply but infrequently to encourage deep root growth, and apply a slow-release fertilizer in spring to promote vigorous growth throughout the season.
Remember that climbing plants may take one to two growing seasons to provide full coverage, but the natural beauty they add is worth the wait.
Decorative Elements
Transform your 6ft privacy screen into a stunning outdoor feature with creative decorative elements. Consider adding climbing plants like jasmine or ivy for a natural, living wall effect. Solar-powered string lights woven through the screen create enchanting evening ambiance while preserving privacy.
Get creative with repurposed materials for decoration, such as hanging colorful mason jars as planters or attaching weather-resistant artwork. Decorative panels or lattice overlays can add visual interest while maintaining the screen’s functionality.
Paint your privacy screen in colors that complement your home’s exterior, or create an artistic focal point with a nature-inspired mural. Consider incorporating weatherproof fabric panels in strategic sections for a softer look that still ensures privacy. Mounted planter boxes can transform your screen into a vertical garden, perfect for growing herbs or seasonal flowers.
For a modern touch, add geometric patterns using weather-resistant tape or paint. Metal or wooden decorative elements can be attached to create depth and visual interest while maintaining the screen’s durability. Remember to choose weather-resistant decorations that won’t compromise the screen’s structural integrity.
Maintenance Tips for Longevity
Keeping your 6ft privacy screen in top condition doesn’t have to be complicated. Following these seasonal maintenance tips will help extend its lifespan and maintain its pristine appearance.
Start by regularly inspecting your privacy screen for any signs of wear, loose components, or weather damage. For wooden screens, apply a fresh coat of weather-resistant sealant or paint annually to protect against moisture and UV rays. If you notice any small cracks or splits, address them promptly with appropriate wood filler to prevent further deterioration.
Metal screens benefit from periodic cleaning with mild soap and water to remove dirt and prevent rust. Watch for any signs of oxidation and treat affected areas with rust-resistant primer and paint. For vinyl or synthetic materials, gentle pressure washing twice a year keeps them looking fresh while removing built-up grime.
Pay special attention to mounting brackets and support posts, ensuring they remain sturdy and level. Tighten any loose screws or hardware, and check ground contact points for signs of soil erosion or shifting. During severe weather seasons, consider temporary reinforcement or removal of removable panels to prevent wind damage.
For climbing plant-covered screens, trim vegetation regularly to prevent overwhelming the structure and ensure proper airflow. Remove fallen leaves and debris that might accumulate and retain moisture against the screen’s surface.
A 6-foot tall outdoor privacy screen offers the perfect solution for creating your own peaceful sanctuary while maintaining your home’s aesthetic appeal. Whether you’ve chosen natural bamboo, sleek metal panels, or versatile fabric screens, these privacy solutions provide the ideal balance of function and style. Remember to carefully consider your specific needs, from weather resistance to maintenance requirements, before making your final choice. With proper installation and care, your privacy screen will serve as a beautiful backdrop for years of outdoor enjoyment. Don’t wait to transform your outdoor space – start planning your privacy screen project today and create the secluded retreat you’ve always wanted.