
How Fire-Resistant Insulation Can Save Your Shed (And Everything Inside It)
Choose fire-rated materials like mineral wool or fiberglass insulation with a Class A fire rating—these won’t ignite even when exposed to direct flames, giving you precious minutes to protect what matters most. Install fire-resistant barriers between your shed’s walls and any heat sources, such as electrical panels or stored equipment, creating a protective buffer zone that stops flames from spreading. Seal all gaps and cracks with intumescent caulk that expands when heated, automatically blocking fire pathways before they become dangerous.
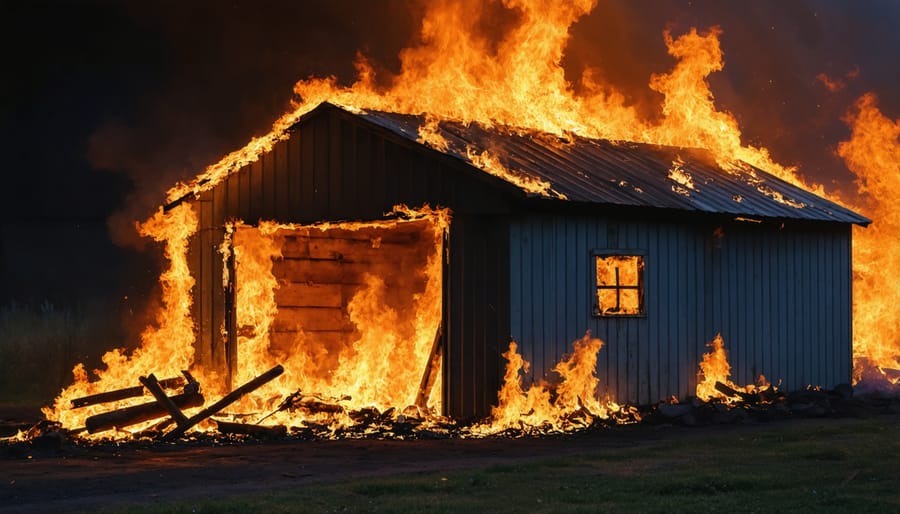
Your shed likely holds more than just lawn equipment—power tools, seasonal decorations, important documents, or even workshop space represent significant investments worth protecting. Every year, thousands of homeowners face devastating losses when shed fires spread to nearby structures or destroy irreplaceable belongings. The good news? Fire-proof insulation offers affordable, DIY-friendly protection that works 24/7, even when you’re not home.
Beyond the obvious reasons to insulate your shed for temperature control and energy efficiency, fire-resistant options provide a critical safety layer that standard insulation simply can’t match. These specialized materials actively resist combustion, slow flame spread, and buy valuable time during emergencies—transforming your shed from a potential fire hazard into a safer storage space.
Whether you’re storing valuable equipment, creating a workshop, or simply want peace of mind, understanding fire-proof insulation options helps you make informed decisions that protect your property and investment for years to come.
Why Your Shed Needs Fire Protection
Common Fire Risks in Storage Sheds
Storage sheds often become unintentional fire hazards simply because of what we keep in them. Let’s look at the most common culprits that could put your shed—and everything in it—at risk.
Gasoline-powered equipment like lawnmowers and gas cans are probably the biggest concern. Even sealed containers can leak fumes that ignite from a single spark. Similarly, propane tanks for grills or portable heaters create serious fire potential, especially when stored in poorly ventilated spaces.
Electric heaters might seem harmless, but they’re a leading cause of shed fires during colder months. Many homeowners don’t realize these units need proper clearance and should never run unattended. Extension cords present another sneaky hazard—overloaded or damaged cords can overheat and spark fires, particularly when buried under boxes or tangled with other equipment.
Then there’s the everyday stuff we forget about: oily rags from workshop projects, dried leaves that blow inside, cardboard boxes stacked against walls, and old paint cans. When you’re storing flammable materials like these, even a small ignition source can cause devastating damage.
The good news? Understanding these risks is your first step toward better protection through proper insulation and smart storage practices.
What’s at Stake
Your shed likely holds more value than you might realize at first glance. Between power tools, lawn equipment, bicycles, and seasonal decorations, many homeowners store thousands of dollars worth of belongings in their backyard structures. Beyond the financial investment, there’s often irreplaceable sentimental value—family heirlooms, children’s memorabilia, or that vintage toolbox passed down from your grandfather.
The stakes climb even higher when you consider proximity. Most sheds sit just 10-20 feet from the main house, and a shed fire can quickly spread to your home, especially on windy days. What starts as a small electrical spark or overheated lawn mower can escalate into a devastating loss affecting your entire property.
Insurance can help replace items, but many homeowners discover their shed contents aren’t fully covered under standard policies. Even with coverage, you’ll face deductibles, premium increases, and the frustrating reality that some cherished possessions simply can’t be replaced. Taking proactive steps to fireproof your shed isn’t just about protecting stuff—it’s about safeguarding your peace of mind and financial security.
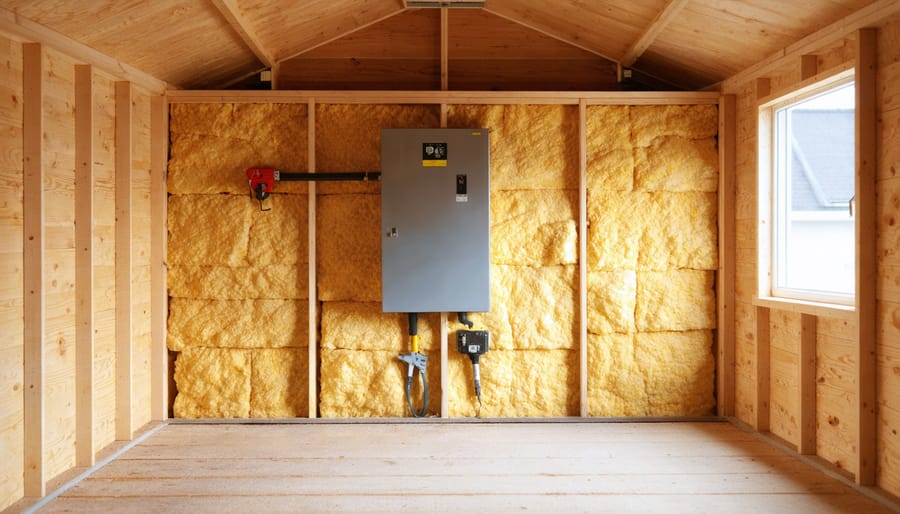
What Makes Insulation Fire-Resistant
Understanding Fire Ratings
When shopping for fire-proof insulation, you’ll frequently encounter “Class A” fire ratings—but what does this actually mean for your shed and belongings?
In simple terms, Class A is the highest fire resistance rating available for building materials. Think of it as an A+ on a safety report card. Materials with this rating spread flames very slowly and produce minimal smoke when exposed to fire. For your shed, this translates to precious extra minutes—potentially 15 to 30 minutes or more—before flames spread, giving you time to respond or allowing firefighters to arrive.
Here’s a practical example: Sarah, a homeowner in Colorado, installed Class A-rated mineral wool insulation in her garden shed where she stores expensive landscaping equipment and her husband’s woodworking tools. When a nearby brush fire threatened her property, the insulation helped contain heat and slow potential ignition, protecting their investment.
Class A materials must pass rigorous flame-spread tests, scoring between 0-25 on industry testing scales (lower numbers mean better protection). Compare this to untreated wood, which typically scores around 100-200, and you’ll understand why this rating matters for protecting what you’ve stored in your shed.
How Fire-Resistant Insulation Buys You Time
Fire-resistant insulation doesn’t make your shed fireproof, but it does something incredibly valuable—it buys you precious time. When fire strikes, these materials work by slowing the spread of flames, often containing them to one area rather than letting them race through the entire structure. This means you’ll have critical extra minutes to grab important items, call for help, or safely evacuate.
What really sets fire-resistant options apart is their ability to reduce toxic smoke production. Traditional insulation can release dangerous fumes when burning, but fire-rated materials are designed to resist combustion and emit far less smoke. One homeowner who installed fire-resistant insulation in his workshop shed told us, “Knowing I have that extra buffer if something goes wrong helps me sleep better at night.”
That additional response time—even just five to ten minutes—can make all the difference between a minor incident and total loss of your shed and its contents.
Best Fire-Resistant Insulation Options for Your Shed
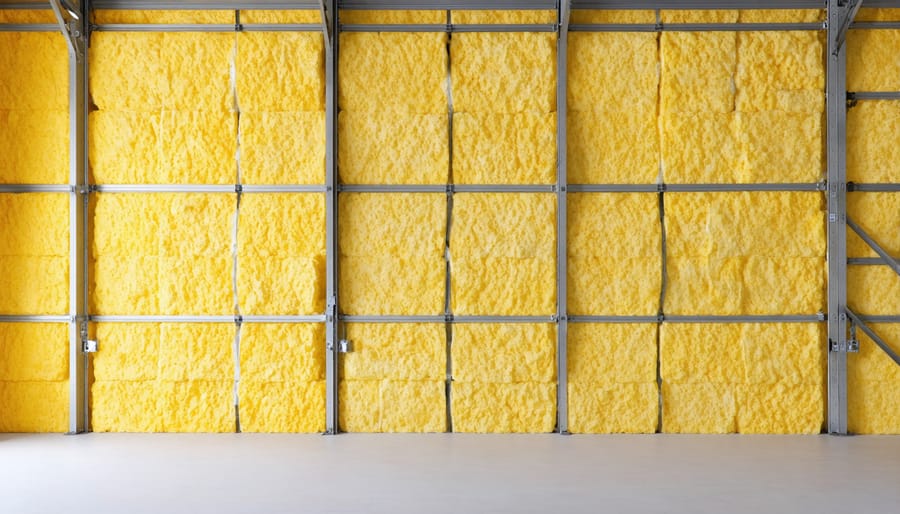
Mineral Wool (Rock Wool)
Mineral wool, also known as rock wool, stands out as one of the most fire-resistant insulation materials you can choose for your shed. Made from molten rock spun into fibrous strands, this material can withstand temperatures exceeding 1,800°F without melting or releasing toxic fumes—a huge advantage if fire breaks out near your stored equipment or workshop area.
Beyond its impressive fire ratings, mineral wool offers excellent soundproofing and moisture resistance, making it ideal for sheds used as hobby spaces or workshops. Unlike some insulation materials that compress over time, rock wool maintains its density and effectiveness for decades.
Installation is straightforward for DIY enthusiasts. The batts cut easily with a standard serrated knife and fit snugly between wall studs without requiring special fasteners. However, you’ll want to wear protective gear including gloves, long sleeves, and a dust mask, as the fibers can irritate skin and lungs during handling.
The cost typically ranges from $0.80 to $1.50 per square foot, positioning it at the mid-to-high end of insulation options. Many shed owners find this investment worthwhile, especially when storing valuable tools, power equipment, or flammable materials like gasoline and paint. As one homeowner shared: “After insulating my workshop shed with rock wool, I sleep better knowing my expensive woodworking tools have that extra layer of fire protection.”
Fiberglass Insulation with Fire-Resistant Facing
Fiberglass insulation with fire-resistant facing offers an excellent middle-ground solution for shed owners seeking enhanced fire protection without breaking the bank. This traditional insulation material gets upgraded with a special facing—typically foil or specially treated paper—that resists ignition and slows flame spread.
**Performance in Real-World Conditions**
When exposed to fire, the facing acts as a protective barrier, buying precious time before flames can penetrate. While not completely fireproof, treated fiberglass can slow fire progression by 30-60 minutes depending on thickness and facing quality. One shed owner in Colorado shared that after a nearby brush fire, his properly installed fire-resistant fiberglass “gave firefighters enough time to save everything inside—worth every penny.”
**When to Choose This Option**
This solution works best for climate-controlled sheds or workshops where you’re already planning to insulate anyway. It’s particularly smart for sheds storing valuable tools, equipment, or serving as home offices. The dual benefit of thermal and fire protection makes it cost-effective.
**Installation Tips**
Always wear protective gear—gloves, long sleeves, and a mask. Cut batts to fit snugly between studs, keeping the fire-resistant facing toward the interior. Seal seams with fire-rated tape for maximum protection.
**Cost Considerations**
Expect to pay 15-25% more than standard fiberglass, though exact insulation costs vary by region and shed size. The investment typically pays off through combined thermal efficiency and added fire protection.
Cellular Glass Insulation
If you’re looking for the absolute best fire protection for your shed, cellular glass insulation is the premium choice that delivers exceptional peace of mind. This material is made from crushed glass that’s heated and transformed into rigid boards filled with tiny sealed cells—completely non-combustible with a Class A fire rating.
What makes cellular glass stand out is its impressive dual performance: it won’t burn, melt, or release toxic smoke when exposed to flames, while providing excellent thermal insulation year-round. One homeowner who stores valuable woodworking equipment shared, “After a neighbor’s garage fire, I upgraded to cellular glass. It’s pricey, but knowing my tools are protected helps me sleep better.”
The drawbacks? Cost is significant—typically three to four times more expensive than mineral wool—and the rigid boards require careful cutting and fitting, making DIY installation more challenging for beginners.
This investment makes sense when you’re storing high-value items, irreplaceable collections, or using your shed as a workshop with electrical equipment. For basic storage needs, more budget-friendly options might be sufficient. Consider cellular glass when maximum fire protection justifies the premium price tag.
Fire-Resistant Foam Boards
Fire-resistant foam boards offer an excellent middle ground for shed owners seeking DIY-friendly insulation with enhanced fire protection. These rigid panels—typically made from polyisocyanurate or extruded polystyrene—come treated with fire retardants that significantly improve their safety profile compared to standard foam products.
Most fire-resistant foam boards carry Class A or Class 1 fire ratings, meaning they resist flame spread effectively. Popular options include Thermax and similar products with aluminum foil facing that acts as both a vapor barrier and additional fire barrier. The rigid structure makes installation straightforward: simply measure, cut with a utility knife, and secure between studs or directly to walls.
**Real-world insight**: Tom from Minnesota shared that installing fire-resistant foam in his workshop shed took just one weekend, and he appreciated the clean cuts and lightweight handling compared to mineral wool.
However, keep these limitations in mind: foam boards still require proper covering with drywall or metal panels for full fire protection—never leave them exposed. They’re also less effective in extreme heat situations compared to mineral-based options. Seams need careful taping to maintain both thermal efficiency and fire resistance. While they won’t make your shed completely fireproof, they dramatically improve safety margins when installed correctly alongside other fire prevention measures.
What to Avoid
Steer clear of standard fiberglass insulation, which melts quickly and releases toxic fumes during fires. Foam board insulation, while popular, can ignite and spread flames rapidly if not fire-rated. Regular cellulose insulation is essentially compressed paper—fuel for fires. Even spray foam, though convenient, often lacks adequate fire resistance without special additives. Many homeowners discover too late that their “regular” insulation actually accelerates fire spread rather than slowing it. If you’re storing flammable items like gasoline, paint thinners, or lawn equipment, budget-friendly options simply won’t provide the protection you need.
Installing Fire-Resistant Insulation in Your Shed
Assessing Your Current Shed
Before investing in fire-proof insulation, take time to thoroughly inspect your shed. Start by examining the construction materials—wooden sheds naturally present higher fire risks than metal ones, while older structures may have gaps or deteriorated sections that need attention first.
Walk around your shed and identify vulnerable areas where fire could spread quickly. Check near electrical outlets, lighting fixtures, and any heating equipment. Look for exposed wood, especially near the roofing and floor joists. These spots should be your insulation priorities.
Next, consider what you’re storing. Are you keeping flammable liquids like gasoline or paint thinners? Power tools with lithium batteries? Garden chemicals? The contents directly influence your insulation needs. One homeowner shared how discovering his forgotten gas cans prompted an immediate insulation upgrade—a decision that gave him real peace of mind.
Also assess moisture levels, as damp conditions can compromise both fire safety and insulation effectiveness. Installing proper moisture barrier solutions before adding fire-proof insulation ensures long-lasting protection.
Document these findings with photos—they’ll help you calculate materials needed and create a logical installation plan that addresses your shed’s unique vulnerabilities.

DIY Installation Tips
Before starting your DIY insulation installation, gather essential tools: utility knife, measuring tape, staple gun, safety goggles, dust mask, and work gloves. Fire-resistant insulation typically comes in batts or rigid boards, making it manageable for most homeowners.
**Safety First:** Always wear protective gear. Fire-proof insulation materials can irritate skin and lungs during installation. Ensure proper ventilation in your shed, and never work alone when handling large panels.
**Installation Steps:** Measure wall cavities carefully before cutting—precision matters for maximum fire protection. Start from the top and work downward, fitting insulation snugly between studs without compressing it, which reduces effectiveness. Secure with staples every 8-12 inches along the edges.
**Common Mistakes to Avoid:** Don’t leave gaps around electrical boxes or corners where fire could penetrate. Avoid over-stuffing insulation, as this actually decreases its fire-retardant properties. Many DIYers forget to insulate the shed ceiling, which is where heat and flames rise first.
One homeowner shared: “I thought cutting insulation slightly oversized would be better, but it created bulges that prevented proper drywall installation. Exact measurements saved me on my second shed!”
Take your time during installation—proper placement now means better fire protection for years ahead.
When to Hire a Professional
While DIY installation works for many homeowners, hiring a professional makes sense for complex projects involving spray foam application, extensive retrofitting, or whole-shed insulation systems. Professionals bring expertise in fire code compliance and proper ventilation requirements—critical factors that impact both safety and insurance coverage.
When selecting a contractor, look for certifications in fire-resistant material installation, verified insurance, and local references from similar shed projects. Ask to see examples of their previous work and request detailed quotes that break down material versus labor costs.
Expect professional installation to cost between $500-$2,500 depending on shed size and materials chosen. Sarah from Oregon shared: “Hiring a pro for our 10×12 workshop gave us peace of mind knowing everything met local fire codes—worth every penny for our stored tools and equipment.”
Beyond Insulation: Complete Fire Protection Strategy
Fire-Resistant Building Materials
Fire-resistant insulation works best when paired with other protective building materials. Consider upgrading your shed’s exterior with metal roofing, which won’t ignite from flying embers during a wildfire or neighboring fire. Metal roofs also reflect heat, keeping your shed cooler and reducing fire risk from the outside.
Fire-rated doors are another smart investment—these specially treated doors can resist flames for 20-90 minutes, giving you precious time to respond to emergencies. Look for doors with a fire rating label to ensure they meet safety standards.
Don’t overlook your shed’s siding either. Fiber cement or treated wood siding offers significantly better fire resistance than standard materials. One homeowner in California shared how their fiber cement siding prevented fire from spreading when nearby brush ignited, protecting valuable tools and family heirlooms stored inside.
These upgrades create layers of protection that work together with your fire-resistant insulation, transforming your shed into a truly fire-safe storage solution.
Smart Storage Practices
Even the best fire-proof insulation can’t overcome poor storage habits. Start by keeping flammable materials like gasoline, paint thinners, and oils in approved containers, stored low to the ground and away from heat sources. Create distinct zones in your shed—one area for tools, another for chemicals, and keep combustibles separate from electrical equipment.
Ventilation is your friend here. Install roof vents or ridge vents to prevent heat buildup and allow fumes to escape naturally. Many homeowners discover this simple addition dramatically reduces fire risk while keeping their sheds fresher. Leave at least three feet of clearance around heaters or electrical panels, and never stack items against walls where wiring runs.
Think vertically! Wall-mounted shelving keeps flammables organized and visible, reducing the chance you’ll forget what’s stored where. One DIY enthusiast shared how labeling everything and maintaining a “no clutter” rule transformed her shed from a fire hazard into a safe, functional space. Regular cleanouts—seasonally works well—help you dispose of old chemicals properly and maintain those crucial clear spaces that could make all the difference in an emergency.
Fire Detection and Suppression
Even the best fire-proof insulation works better alongside basic detection and response tools. Install battery-operated smoke detectors near your shed’s entrance and test them monthly—they’re your first line of defense. Keep a small ABC-rated fire extinguisher mounted inside by the door where you can grab it quickly. For sheds storing high-value items or power tools, consider battery-powered water mist systems designed specifically for small structures. These affordable additions give you precious minutes to respond and can prevent a small spark from becoming a total loss.
Protecting your shed with fire-proof insulation isn’t just about safeguarding a structure—it’s about preserving the things that matter. Whether it’s your grandfather’s woodworking tools, your children’s bicycles, or expensive lawn equipment, the items in your shed often carry both monetary and sentimental value. When you consider that a single fire incident could destroy thousands of dollars worth of belongings in minutes, investing a few hundred dollars in proper fire-resistant insulation suddenly seems like one of the smartest decisions you can make.
Take a moment this weekend to honestly assess your shed’s current fire risk. Walk around and look for potential hazards: exposed electrical wiring, flammable materials stored near heat sources, or lack of any fire protection whatsoever. The good news? You now have the knowledge to make meaningful improvements, whether through DIY installation or professional upgrades.
Remember, fire safety isn’t about living in fear—it’s about gaining peace of mind. There’s real comfort in knowing that if the unexpected happens, you’ve taken reasonable steps to protect what’s yours. At Storage Sheds Outlet, we understand this peace of mind matters, which is why we offer shed options with fire-resistant materials built right in, along with the supplies you need to upgrade your existing structure. Your shed—and everything in it—deserves that protection.