
Keep Your Shed Dry: Smart Moisture Barrier Solutions That Actually Work

Protect your shed investment and valuable storage items with a properly installed moisture barrier – the critical foundation for proper shed insulation and long-term durability. Installing a high-quality vapor barrier beneath your shed’s flooring prevents ground moisture from seeping upward, while strategically placed barriers in walls and ceilings combat condensation that leads to mold, rot, and rust. This multi-layered moisture protection system not only extends your shed’s lifespan but also maintains the integrity of stored items, from power tools to seasonal decorations. Modern moisture barriers, including 6-mil polyethylene sheets and advanced composite materials, create an impenetrable shield against dampness while remaining cost-effective for any budget. By implementing these moisture control measures during construction or renovation, you’re ensuring your shed remains a dry, reliable storage space for decades to come.
How Moisture Threatens Your Shed’s Structure
Common Sources of Moisture in Sheds
Moisture can find its way into your shed through various sources, making it crucial to identify these potential entry points. The most common source is ground moisture, which seeps up through the floor when there’s inadequate base preparation or poor drainage. Rainwater often infiltrates through gaps around windows, doors, and roof joints, especially during heavy storms or when seals deteriorate over time.
Condensation is another significant concern, occurring when warm, humid air meets cooler surfaces inside your shed. This is particularly common in metal sheds during temperature changes. Poor ventilation exacerbates this issue, trapping moisture-laden air inside. Garden tools and equipment stored while wet can also contribute to internal moisture, as can nearby vegetation that prevents proper airflow around the structure.
Identifying these moisture sources is the first step in implementing effective solutions to keep your shed dry and your stored items protected.
The Cost of Ignoring Moisture Problems
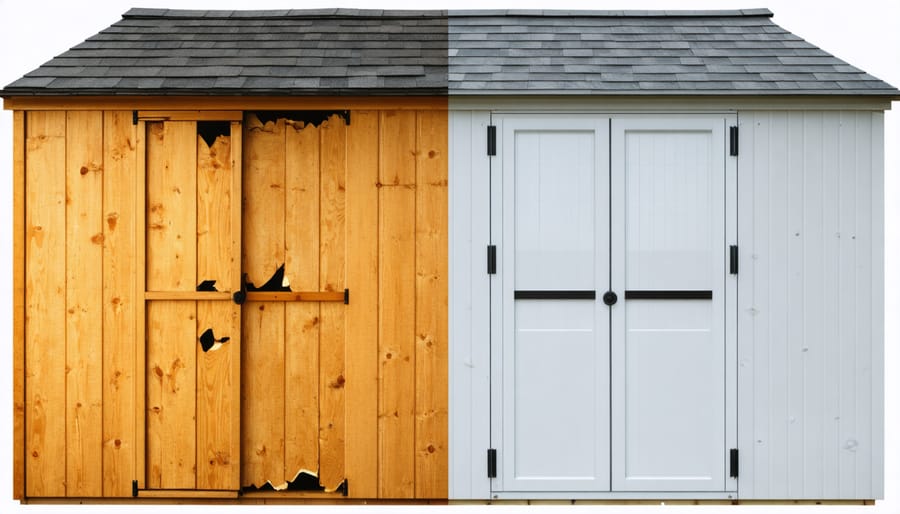
Ignoring moisture issues in your shed can lead to devastating consequences for both your structure and stored belongings. What might start as a small damp spot can quickly escalate into severe problems like wood rot, mold growth, and structural weakening. To protect your shed investment, it’s crucial to address moisture concerns early. The cost of repairs can be staggering – replacing rotted floor joists alone can run upwards of $500, while extensive structural repairs might exceed $2,000. Add in the potential loss of stored items, and the financial impact becomes even more significant. Many homeowners have learned the hard way that replacing damaged tools, equipment, and family treasures far exceeds the initial cost of proper moisture protection. Plus, dealing with mold remediation can add hundreds more to your repair bill. Prevention through proper moisture barriers is always more economical than facing these expensive repairs later.
Effective Moisture Barrier Types and Materials
Vapor Barriers vs. Vapor Retarders
When it comes to protecting your shed from moisture, you’ll often hear about vapor barriers and vapor retarders. While these terms are sometimes used interchangeably, there are important differences to understand. Vapor barriers are materials that almost completely block moisture transmission, with a permeance rating of 0.1 perms or less. Think of them as a solid wall against water vapor. Common examples include polyethylene sheets and foil-faced materials.
Vapor retarders, on the other hand, slow down moisture movement rather than blocking it completely. They come in different classes, with Class I being the most restrictive (similar to vapor barriers), Class II offering moderate restriction, and Class III providing the least restriction. This flexibility can be beneficial, as some moisture movement may actually help prevent trapped moisture issues in certain climates.
For most shed applications, a Class I or Class II vapor retarder is typically sufficient. These options provide excellent moisture control while still allowing minimal vapor transmission when needed. The key is matching the right type to your local climate and shed construction. In humid climates, you might want a true vapor barrier, while in mixed climates, a vapor retarder could be the better choice.
Remember that proper installation is just as important as the material choice. Even the best vapor barrier won’t work effectively if there are gaps or tears in the material.
Best Materials for Your Climate Zone
Choosing the right moisture barrier for your shed depends heavily on your local climate conditions. In hot, humid regions like the Southeast, opt for heavy-duty polyethylene barriers with a minimum thickness of 6 mil to combat intense moisture levels. These regions also benefit from barriers with additional UV protection to prevent degradation from strong sunlight.
For coastal areas, look for moisture barriers specifically rated for salt exposure and high winds. Marine-grade vapor barriers offer superior protection against corrosive salt air and frequent rain. In northern climates where freeze-thaw cycles are common, choose flexible barriers that won’t crack or become brittle in extreme cold.
Arid regions like the Southwest require different considerations. While moisture might seem less concerning, sudden rain storms can cause significant damage. Select barriers with good tensile strength that can withstand temperature extremes and won’t degrade under intense UV exposure. These areas benefit from breathable barriers that allow any trapped moisture to escape while still protecting against sudden weather changes.
For moderate climates, standard 4-mil polyethylene barriers usually suffice, but consider upgrading based on specific local conditions. Whatever your climate, pair your moisture barrier with appropriate climate control solutions for optimal protection. Remember that proper installation matters as much as material choice – even the best barrier won’t perform well if incorrectly installed.
Installation Best Practices
Wall and Ceiling Installation
Installing moisture barriers on walls and ceilings requires careful attention to detail, but with the right approach, it’s a manageable DIY project. Start by measuring your walls and ceiling, adding an extra 6 inches all around to ensure adequate coverage and overlap.
For walls, begin at the bottom and work your way up. Secure the barrier using galvanized staples every 12-16 inches along the studs, making sure to overlap seams by at least 6 inches. When joining sections, use moisture-resistant tape to create a continuous seal. Pay special attention to corners, where two walls meet, by creating a neat fold and securing it firmly.
Ceiling installation can be trickier and might require an extra set of hands. Start from one end and work systematically across the ceiling joists. Use plenty of staples to prevent sagging, especially in the middle sections. When installing overhead, it’s better to work in smaller sections to maintain control and ensure proper placement.
For both walls and ceiling, carefully cut around any obstacles like windows, doors, or vents. Create an airtight seal by using appropriate flashing tape around these openings. Remember to check for any tears or punctures during installation and repair them immediately with tape designed for moisture barriers.
After installation, inspect your work from all angles to ensure there are no gaps or loose sections that could compromise the barrier’s effectiveness.
Floor and Foundation Protection
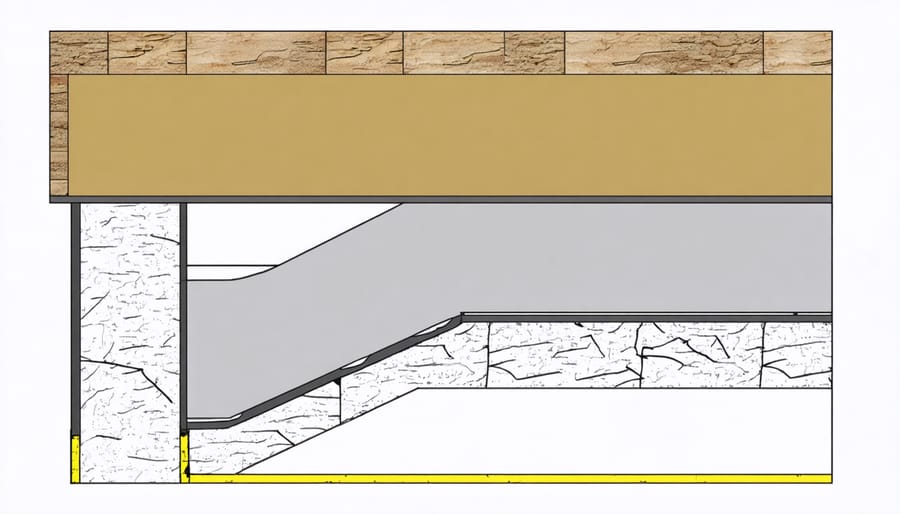
Protecting your shed’s floor and foundation from ground moisture is crucial for long-term durability. Start by clearing the installation area of vegetation and creating a slight slope away from the planned shed location to encourage water runoff. A 4-inch layer of gravel or crushed stone creates an effective base layer, allowing water to drain away from your shed’s foundation.
For maximum protection, lay a heavy-duty polyethylene vapor barrier directly on the leveled ground before adding the gravel. This plastic sheeting should extend at least 6 inches beyond your shed’s footprint on all sides. When installing multiple sheets, overlap them by 12 inches and seal the seams with moisture-proof tape.
If you’re using a concrete foundation, incorporate a vapor barrier between the soil and concrete to prevent moisture from wicking up. For wooden floors, install pressure-treated skids or joists to elevate the floor frame above ground level. Add hardware cloth beneath the floor frame to prevent rodents from nesting while maintaining proper airflow.
Consider installing a perimeter drain system around your shed, especially in areas with poor drainage or high water tables. This simple addition can dramatically reduce moisture-related issues by channeling water away from your structure’s foundation.
Remember to inspect your moisture barrier annually for tears or damage, particularly around the edges where it might be exposed to sunlight or weather elements.
Maintenance and Monitoring Tips
Regular maintenance and monitoring of your shed’s moisture barrier is crucial for its long-term effectiveness. Start by conducting seasonal inspections, particularly during spring and fall, to check for any signs of damage or wear. Look for tears, punctures, or areas where the barrier might have pulled away from the foundation or walls.
Keep the area around your shed well-ventilated by maintaining proper airflow and trimming back any vegetation that might trap moisture against the structure. Clear away leaves, branches, and debris that could accumulate and compromise the barrier’s performance.
Check your drainage system regularly, ensuring gutters and downspouts are clear and functioning correctly. Make sure the ground around your shed maintains a slight slope away from the building to prevent water pooling near the foundation.
If you notice any small tears or damage, address them promptly using appropriate repair tape or patches designed for moisture barriers. For larger issues, consult a professional to assess whether a section needs replacement.
Monitor the interior of your shed for any signs of moisture problems, such as musty odors, mold growth, or condensation on walls. These could indicate that your moisture barrier needs attention. Keep a maintenance log to track inspections and repairs, helping you stay proactive about protecting your shed investment.
Consider installing a humidity monitor inside your shed to keep track of moisture levels and address any concerning changes before they become major issues.
A properly installed moisture barrier is essential for protecting your shed and its contents from water damage and extending its lifespan. By following the guidelines for selection, installation, and maintenance of your shed’s moisture barrier, you can create a reliable defense against ground moisture, condensation, and water infiltration. Remember to regularly inspect your barrier for damage, address any issues promptly, and ensure proper ventilation works in tandem with your moisture barrier system. The initial investment in quality materials and careful installation will pay dividends through reduced maintenance costs and better protection for your stored items. Whether you’re building a new shed or upgrading an existing one, implementing an effective moisture barrier is one of the most important steps you can take to protect your investment and ensure your shed serves you well for years to come.