
Smart Underground Rain Storage: The Money-Saving Solution You Never Knew You Needed
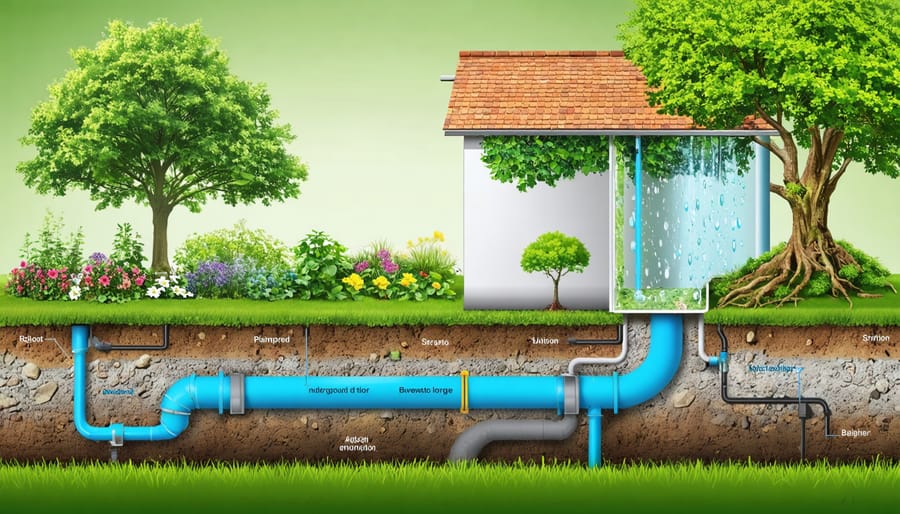
Transform your backyard into a sustainable money-saving rainwater system by installing an underground harvesting network that captures, stores, and distributes rainwater efficiently. This ingenious solution not only reduces water bills but also provides a reliable water source during dry seasons. Underground systems protect stored water from algae growth, freezing temperatures, and evaporation while maintaining your landscape’s aesthetic appeal. By collecting rainfall through buried tanks connected to your roof’s downspouts, you can store thousands of gallons of clean water for irrigation, gardening, and emergency use – all while keeping your system hidden from view. Modern underground harvesting systems combine cutting-edge filtration technology with gravity-fed distribution, creating a low-maintenance solution that pays for itself through reduced utility costs and increased property value.
Why Underground Rain Harvesting Makes Financial Sense
Initial Investment vs. Long-Term Returns
Installing an underground rain harvesting system typically requires an initial investment of $2,000 to $6,000, depending on tank size and installation complexity. While this might seem substantial, many homeowners recover their costs within 3-5 years through reduced water bills. A 1,500-gallon system can save approximately $300-500 annually in water costs, making it an attractive long-term investment.
The installation cost breakdown usually includes the tank ($800-2,500), filtration system ($200-400), pump ($300-600), and professional installation if needed ($700-2,500). DIY installation can significantly reduce these costs, potentially saving up to $2,000 on the total project.
Additional savings come from local rebates and tax incentives for water conservation projects, which can offset 20-30% of the initial costs. When factoring in rising water costs and potential drought restrictions, an underground rain harvesting system becomes not just an eco-friendly choice, but a smart financial decision for the future.
Space-Saving Benefits That Pay Off
Installing an underground rain harvesting system offers remarkable space-saving advantages that can significantly enhance your property’s value. Unlike above-ground tanks that occupy valuable yard space, underground systems remain hidden while maximizing your outdoor living area. This clever approach to water storage integrates seamlessly with other eco-friendly backyard solutions, allowing you to maintain a clean, uncluttered landscape.
Many homeowners report increased property valuations after installing underground systems, as they demonstrate sustainable living practices without compromising aesthetics. The hidden storage also creates opportunities for creative landscaping above the tank area, such as garden beds or seating areas. You’ll maintain full use of your yard while storing thousands of gallons of water beneath your feet.
For those with limited space, this solution eliminates the need to choose between water conservation and outdoor living areas. It’s a win-win investment that pays off in both functionality and property appeal.
DIY Underground Rain Harvesting System Components
Collection and Filtration Basics
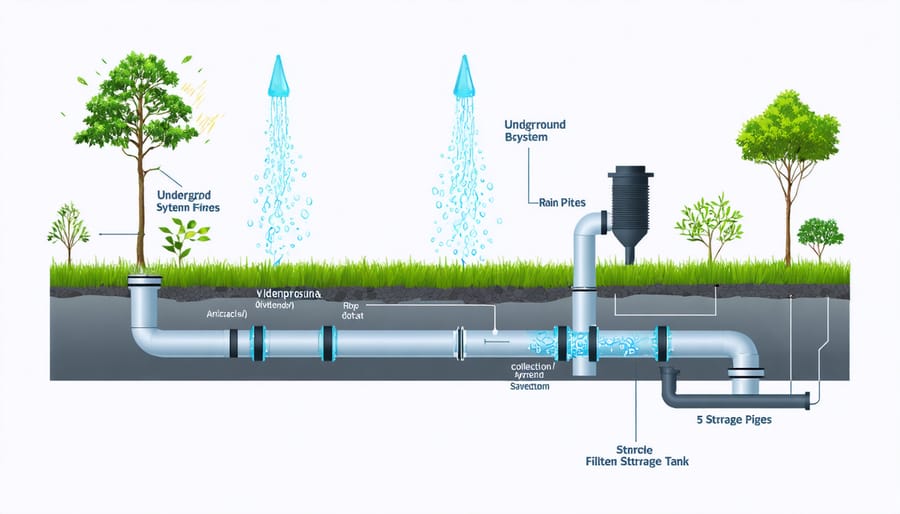
The heart of any underground rain harvesting system lies in its collection and filtration components. Your roof serves as the primary collection surface, channeling rainwater through gutters and downspouts into your underground storage. To maximize efficiency, install leaf guards on your gutters and ensure proper slopes for smooth water flow.
A first-flush diverter is essential for filtering out initial rainfall that carries most contaminants from your roof. This simple but effective device automatically diverts the first few minutes of rainfall, along with debris and pollutants, away from your storage tank.
The filtration system typically consists of three stages. First, a debris filter catches leaves, twigs, and larger particles. Next, a sediment filter removes finer particles like sand and silt. Finally, a carbon filter helps eliminate odors and improves water quality. For best results, position these filters in an easily accessible location for regular maintenance.
Consider installing a backup overflow system to handle excess water during heavy rainfall. This can be as simple as a designated drainage area or connection to existing stormwater systems. Remember to include a calmed inlet at the tank entry point to prevent stirring up settled sediment when new water enters the system.
Regular inspection and cleaning of these components ensure your harvesting system operates efficiently year-round, providing you with clean, usable rainwater whenever you need it.
Storage Tank Options and Costs
Underground storage tanks come in various materials and sizes to suit different budgets and needs. Polyethylene tanks are the most affordable option, typically ranging from $500 to $2,000 for sizes between 500 and 2,000 gallons. These lightweight tanks are durable and easy to install, making them perfect for DIY enthusiasts.
For those seeking longer-lasting solutions, concrete tanks offer exceptional durability and stability. While more expensive, ranging from $2,000 to $6,000 for similar capacities, they can last for decades with minimal maintenance. Their sturdy construction also allows for vehicle traffic over the installation area when properly reinforced.
Fiberglass tanks represent a middle-ground option, combining durability with lighter weight. Expect to pay between $1,500 and $4,000 for standard residential sizes. These tanks resist corrosion and don’t affect water quality, making them increasingly popular among homeowners.
Metal tanks, while less common for underground installation, are another option. They typically cost between $1,000 and $3,000 but may require additional protective coating to prevent rust, which can add to the overall cost.
Remember that tank prices don’t include installation costs, which can range from $1,000 to $3,000 depending on your location and site conditions. Many homeowners save significantly by handling the excavation work themselves, though professional installation ensures proper positioning and connection to your collection system.
Step-by-Step Installation Guide
Planning and Site Preparation
Selecting the right location for your underground rain harvesting system is crucial for its efficiency and longevity. Start by conducting a site survey to identify areas with natural slopes and good drainage. The ideal spot should be at least 10 feet away from your home’s foundation and clear of utility lines, tree roots, and other underground obstacles.
Consider the soil type in your chosen location, as sandy or well-draining soil is preferable. Clay-heavy soil may require additional drainage solutions. Take note of the groundwater table level – your system should be installed above it to prevent floating or contamination.
Before breaking ground, contact your local utility companies to mark underground services. This free service helps avoid costly accidents during excavation. Check local building codes and obtain necessary permits, as some areas have specific requirements for underground water storage systems.
Measure your roof area and calculate potential water collection volume to determine the appropriate tank size. Factor in annual rainfall patterns in your area to optimize storage capacity. Mark the installation area clearly and plan for overflow routes that direct excess water away from structures.
Create a detailed layout plan that includes tank placement, piping routes, and filtration system locations. This blueprint will guide your excavation work and help estimate material quantities. Remember to account for access points for maintenance and consider incorporating a pump system if needed.
Installation and Connection Tips
Installing your underground rain harvesting system requires careful planning and attention to detail. Start by marking your installation area and checking for underground utilities – always call your local utility companies before digging. Choose a location that’s slightly downhill from your roof’s downspouts for optimal water flow.
Begin excavation by digging a hole approximately 1-2 feet larger than your tank on all sides. The depth should accommodate your tank plus an additional 6 inches for the gravel base. Create a level foundation using crushed gravel, compacting it thoroughly to prevent future settling.
When positioning the tank, ensure the inlet pipe aligns with your downspouts and the outlet is accessible for maintenance. Install a pre-filter between your downspouts and the tank to catch debris. Connect your overflow pipe to direct excess water away from your home’s foundation.
For the pump system, install a submersible pump inside the tank and run electrical conduit according to local codes. Add a floating intake filter to draw cleaner water from just below the surface. Consider installing a backup power supply for continuous operation during outages.
Complete the installation by backfilling carefully around the tank with sand or crushed stone, working in layers and compacting as you go. Install your access riser and secure the lid, ensuring it’s child-proof and weather-resistant. Test the system thoroughly before finalizing the installation.
Maintenance and Money-Saving Tips
Regular maintenance of your underground rain harvesting system isn’t just about keeping it running smoothly – it’s about protecting your investment and maximizing your water savings. Following proper seasonal maintenance tips can help extend your system’s lifespan while keeping costs down.
Start by inspecting and cleaning your filters monthly during the rainy season. This simple task prevents debris buildup and ensures clean water collection. Check your tank’s water level indicators regularly and listen for any unusual sounds from your pump system that might signal needed maintenance.
To save money, consider installing a basic pressure gauge to monitor your system’s performance. This small investment can help you spot potential issues before they become expensive problems. Keep your gutters clean and properly aligned to maximize water collection efficiency.
For significant savings, program your pump to operate during off-peak electricity hours. Many homeowners find they can reduce their energy bills by 15-20% with smart timing alone. Consider adding a float switch to automatically shut off the pump when water levels are low, preventing unnecessary wear and energy use.
Don’t forget to inspect your overflow system annually and clear any vegetation growing near underground components. A well-maintained system can last 20-30 years, making your initial investment even more worthwhile.
Underground rain harvesting systems represent a smart investment in both environmental sustainability and household economy. By collecting and storing rainwater beneath your property, you’re not just reducing water bills but also contributing to groundwater conservation and stormwater management. The system’s invisible nature maintains your property’s aesthetics while providing a reliable water source for gardens, lawns, and non-potable household needs. Whether you’re a sustainability enthusiast or a practical homeowner, implementing an underground rain harvesting system is a step toward a more self-sufficient and eco-friendly lifestyle. With proper installation and maintenance, this system can serve your household for years to come while adding value to your property. Consider making this investment today – your wallet and the environment will thank you.