
Transform Your Shed with These Earth-Friendly Roofing Solutions

Transform your shed project into a lasting investment with proper roofing techniques that protect your storage and enhance your property’s value. Following eco-friendly shed design principles, start by selecting sustainable materials like recycled metal roofing or cedar shakes that offer both durability and environmental benefits. Calculate your roof pitch carefully – a minimum slope of 4:12 ensures proper water drainage while maintaining structural integrity in various weather conditions.
Master the essential components of shed roofing: proper underlayment installation, strategic ventilation placement, and secure flashing around all joints. These three elements work together to create a weatherproof barrier that prevents moisture damage and extends your roof’s lifespan. Whether you’re tackling a weekend DIY project or planning a major storage upgrade, understanding these fundamentals transforms a basic shelter into a reliable, long-term storage solution that adds value to your property while minimizing environmental impact.
Focus on precision in your measurements and material selection – even a small miscalculation can lead to leaks or structural issues down the line. With careful planning and attention to detail, you’ll create a durable roof that protects your investments while maintaining harmony with the environment.
Planning Your Green Shed Roof
Structural Requirements
Before starting your shed roofing project, it’s crucial to ensure your structure can handle the weight of your chosen roofing materials and potential weather loads. The foundation and walls must be sturdy enough to support both the dead load (weight of the roof materials) and live loads (snow, wind, and rain).
For a typical 8×10 foot shed, your rafters should be at least 2×4 lumber, spaced 16 inches on center. If you’re in an area with heavy snowfall, consider upgrading to 2×6 rafters for added strength. The roof pitch should be at least 3/12 (rising 3 inches for every 12 inches of horizontal run) to ensure proper drainage, though 4/12 or steeper is better for most climates.
Your shed’s walls need proper top plate construction – typically a double top plate made from 2x4s – to distribute the roof load evenly. Corner posts should be doubled up for additional support, and hurricane ties or rafter ties are essential to secure the roof to the walls, especially in areas prone to high winds.
Don’t forget to include adequate cross-bracing between rafters to prevent twisting and provide additional structural stability. This attention to structural integrity will ensure your shed roof lasts for years to come.
Material Selection
Choosing the right sustainable roofing materials for your shed is crucial for both durability and environmental responsibility. Modern options include recycled metal roofing, which offers excellent longevity and reflects heat effectively, keeping your shed cooler in summer. Cedar shakes provide a natural, rustic appearance and are biodegradable at the end of their lifecycle, though they require more maintenance.
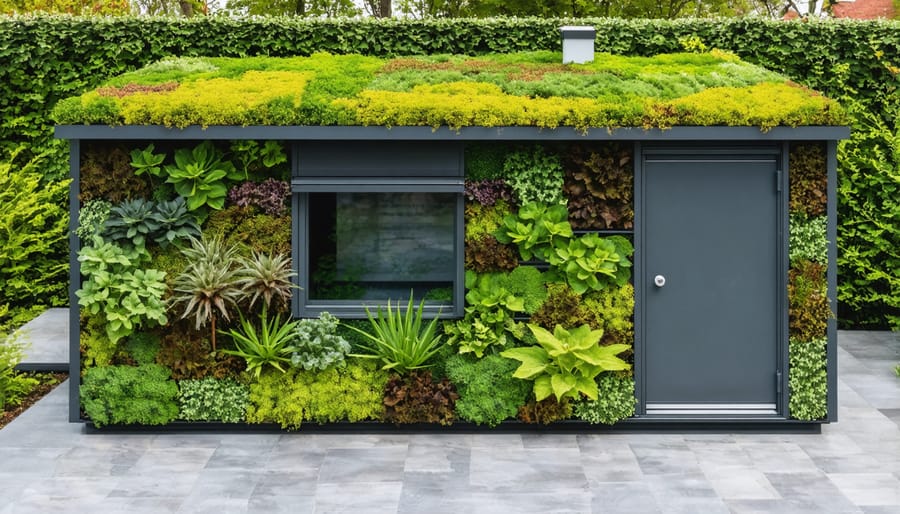
For budget-conscious homeowners, recycled composite shingles offer an eco-friendly alternative to traditional asphalt shingles. These materials are made from reclaimed plastic and wood fibers, providing excellent weather resistance while reducing landfill waste. Green roofing materials, such as living roof systems, can transform your shed into a garden feature while managing rainwater runoff effectively.
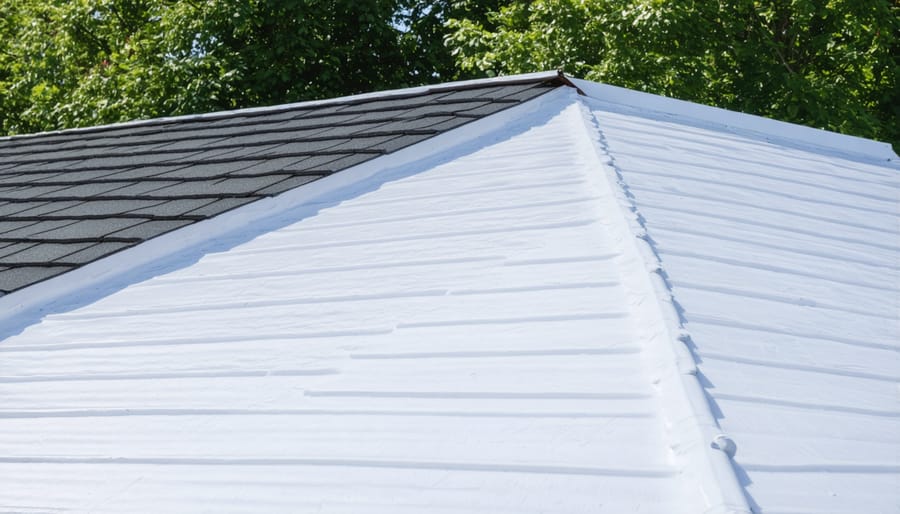
Consider your local climate when selecting materials. In rainy regions, rubber roofing made from recycled tires offers superior water resistance. For sunny areas, cool-roof materials with high solar reflectance can significantly reduce heat absorption. Remember to check local building codes, as some areas may have specific requirements for shed roofing materials.
Installing Your Eco-Friendly Roof
Waterproofing Layer
Installing a proper waterproofing layer is essential to protect your shed from moisture damage and extend its lifespan. Start by laying roofing felt or a synthetic underlayment across the entire roof deck, beginning at the bottom edge and working your way up. Overlap each row by at least 2 inches on horizontal seams and 6 inches on vertical seams to ensure water runs off effectively.
Secure the waterproofing membrane using galvanized roofing nails, spacing them approximately 4 inches apart along the edges and 8 inches in the middle. Be careful not to over-nail, as this can create unnecessary holes in the material. For added protection in harsh weather conditions, consider using self-adhesive ice and water shield along the eaves and valleys.
Pro tip: On a particularly warm day, let the roofing felt sit in the sun for about 15 minutes before installation. This makes it more pliable and easier to work with. Also, make sure to wrap the felt around any protrusions like vents or chimneys, creating proper flashing to prevent water infiltration.
For optimal results, install drip edge along the eaves before laying the waterproofing membrane, but place it on top of the membrane along the rakes. This creates a seamless barrier against water penetration and helps direct runoff away from the shed’s walls.
Drainage System
A well-designed drainage system is crucial for protecting your shed from water damage and extending its lifespan. Installing efficient drainage systems not only prevents water accumulation but can also help you harvest rainwater for garden use.
Start by installing gutters along the edges of your roof, ensuring they have a slight downward slope (about 1/4 inch per 10 feet) toward the downspouts. Choose gutters that match your roof size – 5-inch K-style gutters work well for most sheds. Position downspouts at corners where water naturally flows and extend them at least 4 feet away from your shed’s foundation.
Consider adding gutter guards to prevent leaves and debris from clogging your system. These mesh covers allow water to flow while keeping unwanted materials out, reducing maintenance needs. For areas with heavy rainfall, install splash blocks at the base of downspouts to prevent soil erosion and direct water away from your shed’s foundation.
If you’re environmentally conscious, connect your downspouts to rain barrels or a collection system. This setup allows you to store rainwater for garden irrigation while protecting your shed from water damage. Remember to clean your gutters twice a year – typically in spring and fall – to maintain proper water flow and prevent overflow issues.
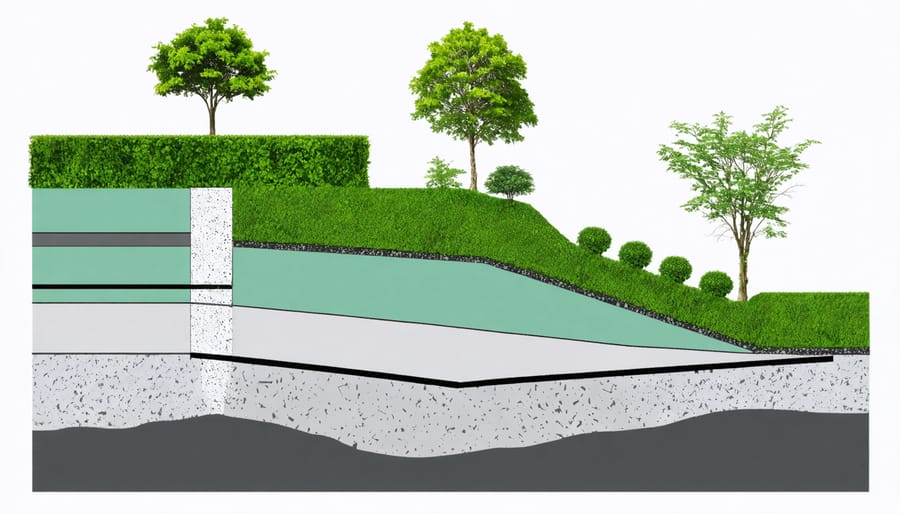
Growing Medium
The growing medium is the foundation of your green roof’s success. Start by mixing lightweight, well-draining soil specifically designed for roof gardens. A good blend typically consists of 70% inorganic materials (like expanded slate, clay, or shale) and 30% organic matter (such as compost). This ratio ensures proper drainage while providing adequate nutrients for plant growth.
Spread the growing medium evenly across your drainage layer, maintaining a depth of 4-6 inches for most sedum and grass varieties. For deeper-rooted plants, you may need up to 8 inches of soil. Always check your shed’s structural capacity before deciding on soil depth, as wet soil can be surprisingly heavy.
When laying the medium, work in small sections and avoid compacting the soil too much. Create a slight grade (about 1-2%) from the center to the edges to encourage proper drainage. Consider adding a thin layer of gravel or pebbles around the perimeter to prevent soil erosion.
Test the soil pH before planting – most green roof plants prefer slightly acidic to neutral conditions (pH 6.0-7.0). If needed, incorporate appropriate amendments to adjust the pH. Remember to leave about an inch of space below any roof edges or flashings to prevent soil from washing out during heavy rains.
Finally, water the growing medium thoroughly before planting to help it settle and identify any potential low spots that need additional soil.
Plant Selection and Placement
When selecting plants for your green roof shed, opt for hardy, low-maintenance varieties that can thrive in your local climate. Sedum varieties are excellent choices as they’re drought-resistant and spread well to create attractive coverage. Consider mixing different types of sedum for varied colors and textures throughout the seasons.
Layer your vegetation strategically, starting with shallow-rooted plants near the edges and placing deeper-rooted species toward the center where the substrate is typically thicker. This approach ensures proper water distribution and structural stability. Small native wildflowers can add visual interest while supporting local pollinators.
For optimal growth, space your plants about 6-12 inches apart, allowing room for spread. In temperate climates, early spring or fall are ideal planting times, giving roots a chance to establish before extreme weather hits. Consider adding pre-grown sedum mats for instant coverage, particularly useful for steep-pitched roofs where erosion might be a concern.
Don’t forget to include a few drought-tolerant grasses for vertical interest. These can help break up the visual plane while providing additional insulation benefits. When planting, ensure each specimen is firmly secured in the growing medium, and water thoroughly until established. Remember that your plant choices should complement your shed’s overall design while requiring minimal maintenance once established.
Maintenance and Care
Seasonal Care Guide
Keeping your shed roof in top condition requires regular attention throughout the year. Following these seasonal maintenance tips will help extend your roof’s lifespan and protect your storage investment.
In spring, start with a thorough inspection after winter’s harsh conditions. Clear any debris from gutters and downspouts, check for loose or damaged shingles, and look for signs of water damage or mold growth. This is also the perfect time to trim back any overhanging branches that could damage your roof during storms.
Summer maintenance focuses on ventilation and preventing heat damage. Ensure your roof vents are clear and functioning properly to prevent heat buildup. Check for any sun-damaged areas, particularly on asphalt shingles, and apply protective coatings if needed.
Fall preparation is crucial for winter survival. Clean all leaves and pine needles from the roof surface and gutters. Replace any damaged or missing shingles before winter arrives. Consider installing gutter guards to prevent debris accumulation.
Winter requires vigilance against snow and ice buildup. Use a roof rake to safely remove excess snow, preventing dangerous weight loads. Watch for ice dam formation, especially around the roof edges. If you notice any leaks or drafts during winter, address them promptly to prevent more extensive damage.
Remember to document all maintenance activities and keep a seasonal checklist. This helps track the roof’s condition over time and anticipate when repairs or replacements might be needed. Regular maintenance not only extends your roof’s life but also helps maintain your shed’s overall value and functionality.
Troubleshooting Common Issues
Even with careful planning and execution, you might encounter some common roofing issues. Here’s how to address the most frequent problems you may face during your shed roofing project.
Leaks are perhaps the most common concern. If you notice water dripping inside your shed, first check the flashing around any vents or chimneys. Often, a simple repair with roofing sealant can fix minor leaks. For larger gaps, you may need to replace damaged flashing or shingles.
Sagging areas in your roof typically indicate either inadequate support or water damage to the decking. Inspect your rafters and trusses for signs of damage or improper spacing. Adding additional support beams can usually resolve this issue, but extensive water damage might require replacing sections of the roof deck.
Poor ventilation can lead to moisture buildup and reduced shingle life. If you notice excessive condensation or ice dams forming in winter, consider installing ridge vents or soffit vents to improve airflow. This simple addition can significantly extend your roof’s lifespan.
Improperly installed shingles may curl, buckle, or blow off during strong winds. Ensure each shingle is properly nailed with four nails in the correct locations. For existing problems, carefully lift the surrounding shingles and replace damaged ones, making sure to seal the edges properly.
Gaps in your roofing materials can allow small animals to make their home in your shed. Regular inspection of your roof’s edges and prompt repair of any openings will prevent unwanted visitors. Installing mesh screens around vents and other openings can provide additional protection.
Remember, addressing these issues promptly can prevent more serious damage and extend your shed roof’s life significantly.
Congratulations on making it through this comprehensive guide to roofing your shed! By choosing to tackle this project yourself, you’re not just creating a weatherproof structure – you’re investing in a durable, environmentally friendly solution that will protect your belongings for years to come.
Remember that proper roof installation is crucial for the longevity of your shed. The techniques and materials we’ve discussed will help ensure your shed remains dry, secure, and energy-efficient throughout all seasons. By following the steps outlined in this guide, you’ll save money on professional installation while gaining valuable DIY skills and the satisfaction of completing the project yourself.
Whether you’ve chosen traditional shingles, metal roofing, or eco-friendly materials, your newly roofed shed will enhance your property’s value and provide reliable storage space. Don’t forget to perform regular maintenance checks and address any issues promptly to extend the life of your roof.
Ready to get started? Gather your materials, review the safety guidelines, and begin your shed roofing project with confidence. The effort you put in today will reward you with a sturdy, well-protected storage space that stands the test of time. Happy roofing, and here’s to your DIY success!
Feel free to reference this guide throughout your project, and don’t hesitate to take your time with each step. Remember, careful preparation and attention to detail are the keys to achieving professional-quality results.