
Keep Your Shed Safe: Smart Ice and Snow Management That Really Works
Winter weather poses serious risks to property and safety, demanding a strategic approach to ice and snow management. From protecting valuable structures to ensuring safe walkways, proper winter maintenance isn’t just about convenience—it’s about preventing costly damage and dangerous accidents.
A comprehensive ice and snow management plan combines preventive measures with responsive action. Strategic placement of snow barriers, regular monitoring of accumulation patterns, and maintaining proper drainage systems form the foundation of effective winter property protection. Professional property managers and homeowners alike recognize that successful snow and ice control requires both immediate response capabilities and long-term planning.
Modern ice and snow management extends beyond simple snow removal. Today’s approaches incorporate sophisticated weather monitoring, environmentally friendly de-icing products, and automated systems that work together to maintain safe, accessible spaces throughout the winter season. Understanding these elements—and how they work together—enables property owners to develop efficient, cost-effective winter maintenance strategies that protect their investments and ensure safety for all users.
Armed with the right knowledge and tools, managing winter’s challenges becomes a straightforward process rather than an overwhelming obstacle. The key lies in implementing proactive measures while maintaining the flexibility to respond to changing weather conditions.
Understanding Snow Load and Your Shed’s Limits
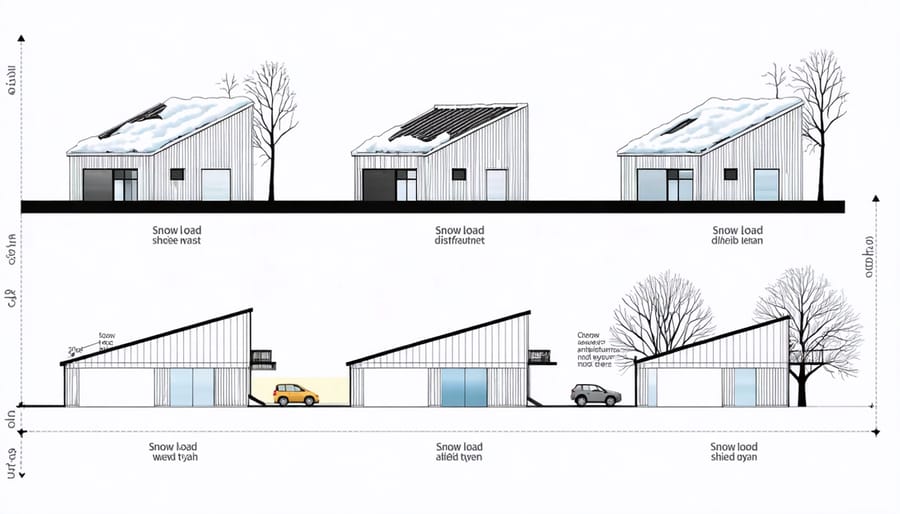
Calculate Your Shed’s Snow Load Capacity
Understanding your shed’s snow load capacity is crucial for winter safety and maintenance. Your shed’s ability to handle snow weight depends on several factors, including its weather-smart roof design, construction materials, and local building codes.
To calculate your shed’s snow load capacity, start by measuring your roof’s square footage. Most residential sheds are designed to handle 20-30 pounds per square foot of snow, but this varies by region. Check your local building department for specific requirements in your area.
A simple way to estimate snow weight is to multiply the depth of snow by its density. Fresh snow typically weighs around 3-5 pounds per cubic foot, while packed snow can weigh 12-18 pounds. For example, 12 inches of packed snow on a 100-square-foot roof could add up to 1,800 pounds of extra weight!
Watch for warning signs like creaking sounds, sagging rafters, or doors that suddenly become difficult to open. These could indicate your shed is struggling under the snow’s weight and needs immediate attention.
Warning Signs of Excessive Snow Weight
Being vigilant about snow accumulation on your shed roof can prevent costly damage and potential collapse. Watch for these tell-tale signs that indicate dangerous snow load levels. If you notice doors or windows becoming difficult to open or close, this could signal your shed’s frame is under stress. Creaking or popping sounds, especially during or after snowfall, warrant immediate attention.
Visual indicators include sagging roof lines, bowed walls, or new cracks in the structure. You might also spot bent or distorted roof supports when looking up from inside your shed. To help monitor snow load conditions, consider installing a basic deflection measuring tool or smart sensor system.
Pay special attention after multiple snowfalls without melting periods, as layered snow can become dangerously heavy. If you notice any of these warning signs, don’t wait – remove snow from your shed roof immediately using proper safety equipment and techniques. Remember, wet snow is significantly heavier than dry snow, so factor this into your assessment during warming periods or mixed precipitation events.
Preventive Measures Before Winter
Structural Reinforcement Tips
Before heavy snow and ice arrive, it’s crucial to winterize your shed with proper structural reinforcements. Start by inspecting your roof trusses and adding diagonal bracing if needed. These simple wooden supports, installed at 45-degree angles between trusses, can significantly increase your shed’s ability to handle heavy snow loads.
Consider installing additional vertical support posts, especially in larger sheds. Place these posts every 6-8 feet along the center beam to prevent sagging under winter weight. For metal sheds, adding horizontal stabilizer bars can prevent wall buckling from snow pressure.
Don’t forget about your shed’s foundation. Install concrete blocks or pressure-treated lumber beneath the floor joists to provide extra support during ground freeze-thaw cycles. This prevents shifting and potential structural damage.
Reinforce door frames with metal stripping to maintain proper alignment when snow piles up. Add weather stripping around doors and windows to prevent moisture infiltration that could weaken structural components.
For peaked roofs, install snow guards about 2 feet from the edge. These simple devices help manage snow loads by preventing dangerous avalanche-style slides while allowing for gradual melting. If your shed has a flat or low-pitched roof, consider adding extra support beams to handle the increased winter weight.
Remember to check all existing fasteners and replace any that show signs of rust or wear. Tight, secure connections are essential for maintaining structural integrity throughout the winter months.
Creating Proper Drainage Paths
Creating effective drainage paths around your shed is crucial for preventing water damage from melting snow and ice. Start by assessing the natural slope of your property and implementing proper drainage solutions that direct water away from your structure.
Install gutters along your shed’s roofline to collect melting snow and ice, ensuring downspouts extend at least 3-4 feet away from the foundation. Consider adding gutter heat cables to prevent ice dams from forming and blocking water flow during freeze-thaw cycles.
Create a gentle slope away from your shed’s foundation by grading the surrounding ground at a rate of about 1 inch per foot for the first 6-10 feet. This helps water naturally flow away from the structure rather than pooling around it.
Installing a French drain or surface channel drain can provide additional protection in areas where water tends to collect. Line these drainage paths with gravel or crushed stone to facilitate water movement and prevent soil erosion.
Don’t forget to regularly clear drainage paths of debris, leaves, and ice buildup throughout the winter season. Pay special attention to areas where snow tends to pile up after shoveling or plowing, ensuring these spots have clear routes for water to escape as temperatures rise.
By maintaining well-planned drainage paths, you’ll significantly reduce the risk of water damage to your shed’s foundation and protect your storage investment for years to come.
Safe Snow Removal Techniques
Tools and Equipment You’ll Need
Proper snow and ice management starts with having the right tools on hand. A sturdy snow shovel with an ergonomic handle is essential for manual snow removal, while a plastic shovel is ideal for lighter snowfall and protecting your shed’s surface. For heavier snow accumulation, consider investing in a quality snow blower that’s appropriately sized for your property.
Ice management requires different tools. Keep an ice scraper and roof rake handy to prevent dangerous ice dams from forming. Salt spreaders, whether handheld or push-style, help distribute ice melt products evenly and efficiently. Speaking of ice melt, stock up on pet-safe varieties that won’t damage your shed’s foundation or surrounding vegetation.
Safety equipment is equally important. Wear slip-resistant boots, warm waterproof gloves, and safety goggles when clearing snow. A sturdy ladder with rubber feet is essential for reaching higher areas safely. For monitoring purposes, invest in a weather station or outdoor thermometer to track conditions.
Don’t forget maintenance tools like a good brush for removing snow from delicate areas and a leaf blower, which can be surprisingly effective for clearing light, powdery snow. Store these tools in an easily accessible location, ready for use when winter weather strikes.
Step-by-Step Removal Process
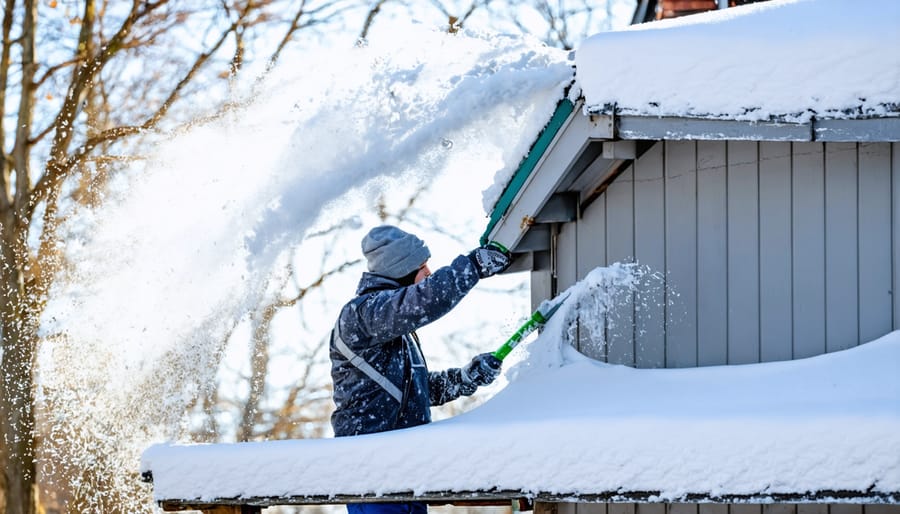
Begin by clearing any loose snow from your shed roof using a long-handled snow rake, working from the ground whenever possible. Pull the snow down in sections, starting from the edge and working your way up. Never climb onto a snow-covered shed roof, as this can be extremely dangerous.
For ice management, use a calcium chloride-based ice melt product rather than rock salt, which can damage your shed’s exterior. Spread the ice melt evenly along problem areas, being careful to avoid direct contact with plants or grass. Create a buffer zone of at least 2 feet around your shed by removing snow and ice from this area to prevent moisture from seeping into the foundation.
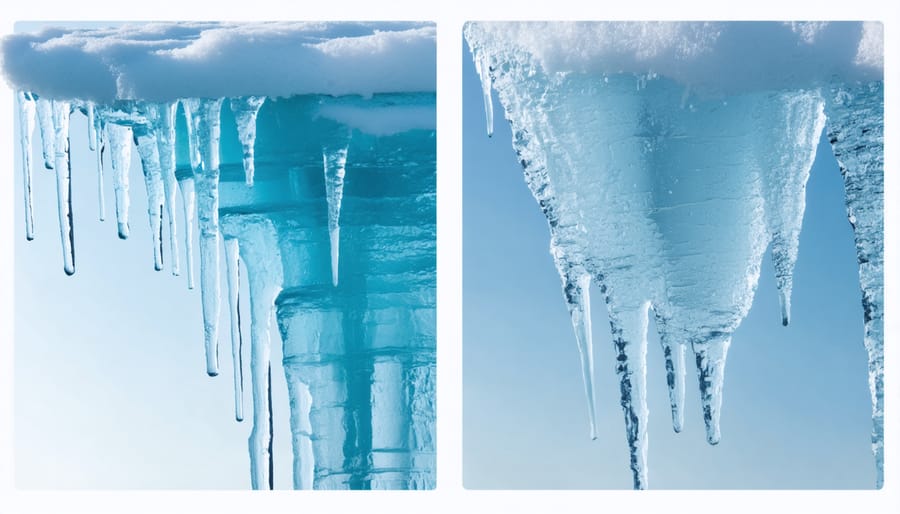
If you notice dangerous icicles forming, use your snow rake to carefully knock them down from a safe distance. For stubborn ice dams, consider using heated cables installed before winter, or call a professional for removal. Remember to clear snow from around vents and windows to maintain proper airflow.
After each removal session, inspect your shed for any damage or areas where snow and ice might have created new problems. Address these issues promptly to prevent more significant damage later.
Ice Management Solutions
Safe De-icing Methods
When it comes to de-icing your shed, using the right methods for your specific material is crucial. For metal sheds, avoid rock salt as it can cause corrosion – instead, opt for calcium chloride or magnesium chloride, which are gentler on metal surfaces while effectively melting ice. Wood shed owners should use sand or cat litter for traction, as these materials won’t damage the wood’s finish or cause deterioration.
For plastic or vinyl sheds, most commercial de-icers are safe to use, but calcium chloride is particularly effective and won’t harm the material. Consider using a rubber-edged snow shovel to carefully remove snow before applying any de-icing products, as this reduces the amount of product needed and minimizes potential damage to your shed’s surfaces.
For all shed types, you can create a pet-friendly and environmentally conscious solution by mixing warm water with rubbing alcohol in a 2:1 ratio. This mixture helps prevent ice formation and is safe for most surfaces. Remember to apply de-icing products sparingly and evenly, focusing on high-traffic areas like doorways and paths leading to your shed.
Preventing Ice Dams
Preventing ice dams starts with proper insulation and ventilation of your shed’s roof. Install quality insulation in the roof space and ensure there’s adequate airflow to maintain a consistent temperature across the entire roof surface. This helps prevent the freeze-thaw cycle that leads to ice dam formation.
Keep your gutters clean and properly maintained throughout the fall to ensure melting snow can drain effectively. Installing heat cables along your roof’s edge and in gutters can provide additional protection by creating channels for water to flow freely, even during freezing conditions.
Consider adding snow guards to your roof to prevent sudden snow slides, which can contribute to ice dam formation. Regular roof raking after heavy snowfall is also essential – remove snow at least 3-4 feet up from the roof’s edge using a roof rake with wheels to avoid damaging your roofing materials.
For extra protection, apply a waterproof membrane under your roofing material during construction or renovation. This barrier provides additional defense against water damage if ice dams do form.
Effective ice and snow management for your shed is crucial for maintaining its structural integrity and ensuring its longevity throughout the winter months. By implementing the preventive measures we’ve discussed, such as proper insulation, regular roof clearing, and maintaining adequate drainage, you can significantly reduce the risk of winter-related damage to your storage structure.
Remember that consistent monitoring and maintenance are your best defense against ice and snow accumulation. Keep essential tools like roof rakes, snow shovels, and ice melt products readily available, and always prioritize safety when performing any winter maintenance tasks. If you’re ever unsure about handling a particular situation, don’t hesitate to consult with a professional.
Taking a proactive approach to ice and snow management not only protects your investment but also ensures your shed remains functional and accessible throughout the winter season. By following these guidelines and maintaining regular upkeep, you’ll be well-prepared to handle whatever winter weather comes your way, keeping your shed safe and secure for years to come.
Looking for a storage sheds?
Browse our full range of storage sheds from authorized dealer brands. Free shipping to the continental US.