
Protect Your Shed From Wildfire Embers Before It’s Too Late
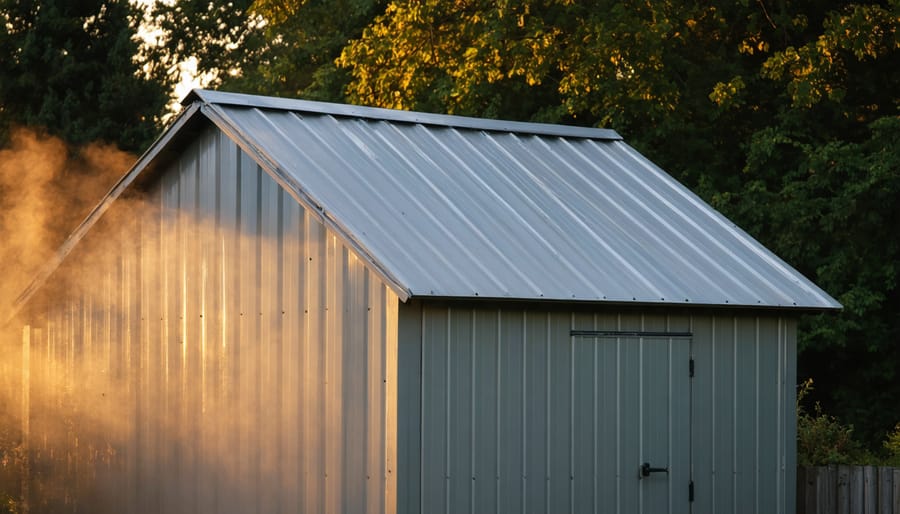
**Protect your shed from ember attacks by installing Class A fire-rated metal roofing or asphalt shingles—these materials can withstand the flying sparks that ignite 90% of structures during wildfires.** Replace wood shake roofs immediately, as they’re essentially kindling waiting for disaster, and seal all gaps where embers can infiltrate with metal flashing and fire-resistant caulking.
**Extend fire protection beyond the roof by creating a defensible space:** Clear dry vegetation within 30 feet of your shed, store firewood at least 30 feet away, and remove any debris that accumulates in roof valleys or against exterior walls. Real homeowner accounts from California’s recent fire seasons reveal that structures with comprehensive fire-hardening survived while neighboring buildings with only partial upgrades burned completely.
**Layer your weatherproofing strategy to address multiple threats simultaneously.** Fire-resistant materials like metal and tile naturally excel at moisture resistance, giving you dual protection. Install proper underlayment beneath your chosen roofing material—ice and water shields work beautifully under metal panels while providing additional ember barriers.
The investment in fire-resistant roofing pays immediate dividends through reduced insurance premiums and long-term savings by eliminating repeated roof replacements. Whether you’re retrofitting an existing shed or planning a new purchase, understanding how roofing materials perform under ember attack conditions will guide you toward solutions that genuinely protect your investment. This guide breaks down your options with practical cost comparisons and installation considerations that matter in real-world conditions.
Why Your Shed’s Roof Is the Most Vulnerable Point
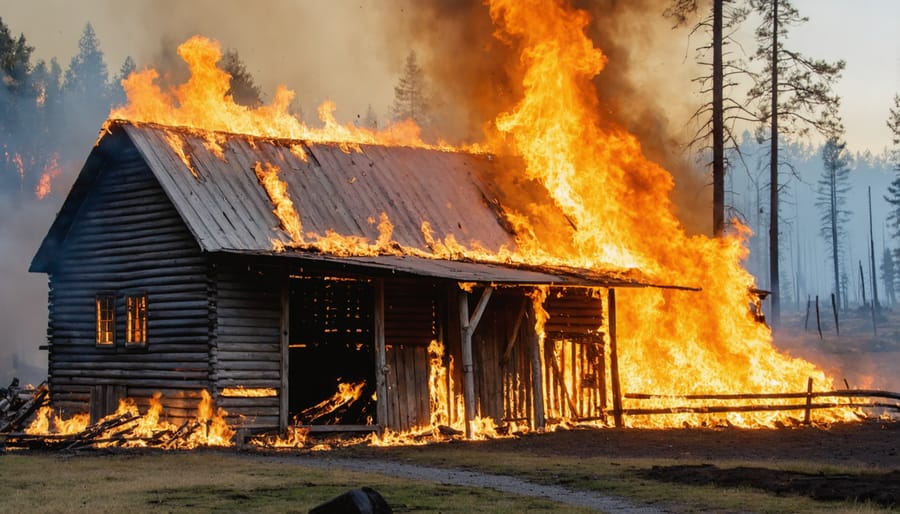
When wildfires threaten your property, your shed’s roof becomes ground zero for disaster. Here’s why: burning embers—small pieces of flaming debris—can travel up to a mile ahead of the actual fire line, carried by wind and updrafts. These airborne threats don’t necessarily need direct flame contact to ignite your structure. They simply land on vulnerable surfaces and smolder until they catch fire.
Research from the Insurance Institute for Business & Home Safety shows that up to 90% of homes destroyed during wildfires ignite from ember attacks rather than direct flames. Your shed faces the same risk, and its roof receives the brunt of this aerial assault.
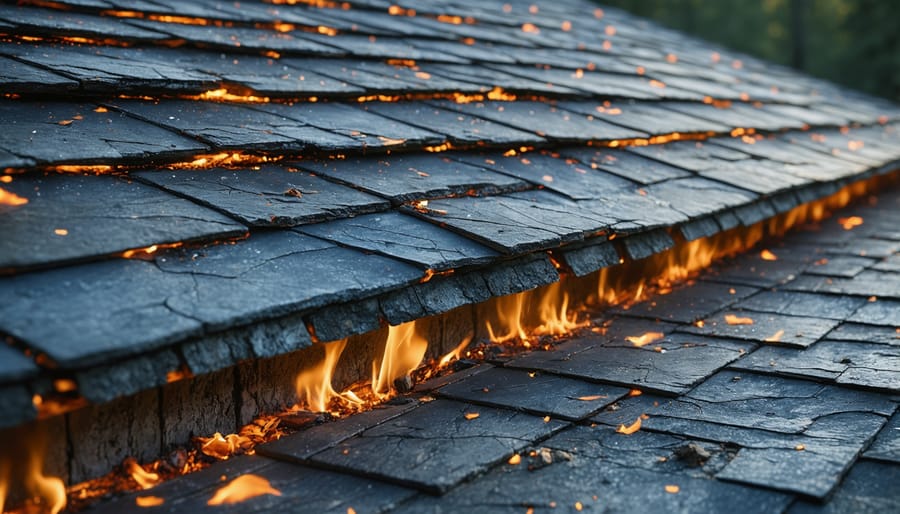
Think about it: roofs collect everything that falls from above—leaves, pine needles, dirt, and yes, embers. This debris creates perfect kindling that sits right on top of your roofing material. When a hot ember lands, it has both fuel and a surface to work with.
Common shed roofing materials offer surprisingly little protection. Asphalt shingles, while popular and affordable, can ignite at temperatures as low as 500°F—easily reached by wind-blown embers. Wood shakes are even more vulnerable, essentially acting as pre-arranged kindling on your roof. Even standard metal roofing isn’t immune; while the metal itself won’t burn, gaps at seams and edges allow embers to penetrate underneath, where they ignite wooden roof decking and insulation.
The statistics paint a sobering picture. During California’s 2018 Camp Fire, over 18,000 structures burned, with ember attacks being the primary culprit. Many property owners watched helplessly as secondary structures like sheds caught fire first, then spread to their homes.
Your shed might seem like a minor concern compared to your house, but it often stores flammable items like gasoline, paint, and lawn equipment—making it a potential fire accelerant that threatens your entire property. Protecting that roof isn’t just about saving a storage space; it’s about preventing a domino effect that could endanger everything you’ve built.
Fire-Resistant Roofing Materials That Actually Work
Class A Metal Roofing: The Gold Standard
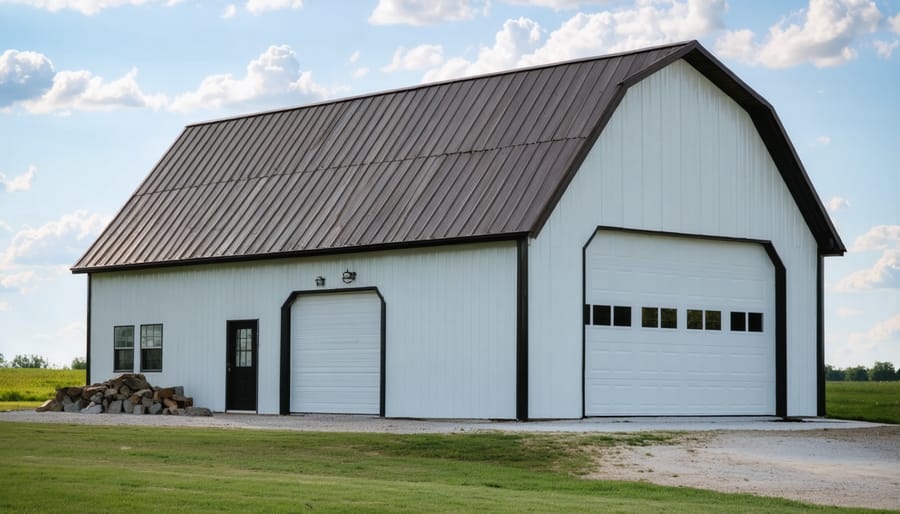
Metal roofing earns its reputation as the gold standard for fire protection, achieving the highest Class A fire rating available. Unlike traditional asphalt shingles that can ignite from ember attacks during wildfires, metal roofing is completely non-combustible, creating an impenetrable barrier against flying sparks and flames.
**Why Metal Works So Well**
Metal roofing doesn’t just resist fire—it actively deflects heat and embers away from your shed. When embers land on metal surfaces, they simply bounce off or quickly extinguish without finding fuel to ignite. This makes metal particularly valuable in wildfire-prone areas where ember storms can travel miles ahead of active flames.
**Your Metal Roofing Options**
For sheds, you’ll typically choose between corrugated steel panels and standing seam metal roofing. Corrugated panels offer the most budget-friendly option, running $2-4 per square foot for materials. Standing seam provides a sleeker appearance with concealed fasteners that eliminate potential ember entry points, though it costs $4-7 per square foot.
**Installation Insights**
Metal roofing is surprisingly DIY-friendly for shed applications. The lightweight panels are easy to handle, and most installations simply require screwing panels directly to roof purlins with weather-tight fasteners. One homeowner shared: “I reroofed my 10×12 shed in an afternoon. The peace of mind during fire season is absolutely worth the investment.”
**Cost Perspective**
While metal initially costs more than asphalt shingles, its 40-50 year lifespan and zero maintenance requirements make it the most economical long-term choice for fire protection.
Fire-Rated Asphalt Shingles: Budget-Friendly Protection
If you’re watching your budget but still want solid fire protection, Class A asphalt shingles offer an excellent middle ground. Unlike standard asphalt shingles, Class A versions include fiberglass reinforcement and special fire-retardant additives that help them withstand intense heat and flying embers—the primary culprits in wildfire spread.
**What makes them different?** Class A shingles undergo rigorous testing, including exposure to flames and embers from above while air currents blow from underneath. They must not create flames, slip off the deck, or allow fire penetration. Standard shingles simply don’t meet these requirements.
**For shed applications**, Class A asphalt shingles shine in several ways. They’re widely available at most home improvement stores, relatively easy to install yourself, and cost-effective compared to metal or tile options. One homeowner in Colorado shared, “After the nearby fire scare, I upgraded my shed roof in a weekend for under $300. It gave me real peace of mind without breaking the bank.”
**The trade-offs?** While fire-resistant, asphalt shingles don’t last as long as metal alternatives—typically 15-25 years versus 40+ for steel. They’re also heavier, requiring solid roof decking.
**When purchasing**, always verify the “Class A” rating on the packaging—it’s your assurance of genuine fire resistance. Look for reputable brands with good warranties, and consider impact-resistant versions if you face hail risks too.
Clay and Concrete Tiles: Heavy-Duty Defense
Clay and concrete tiles offer the heaviest-duty protection against ember attacks and extreme heat, earning them the highest Class A fire rating. These materials won’t ignite, melt, or warp—even under direct flame exposure. Many homeowners in wildfire-prone areas swear by tile roofing, with one California resident sharing, “After the fires swept through our neighborhood, our tile-roofed shed was the only outbuilding left standing.”
Before choosing tiles for your shed, understand the structural requirements. These materials weigh significantly more than asphalt or metal—approximately 850-1,200 pounds per square (100 square feet). Your shed’s framing must be engineered to handle this load, which often means reinforced rafters and stronger wall construction. If you’re retrofitting an existing shed, consult a structural professional to determine if upgrades are necessary.
The durability benefits extend beyond fire resistance. Tile roofs typically last 50+ years, resist rot and insect damage, and require minimal maintenance. They also provide excellent insulation, keeping stored items cooler in summer.
Cost is the main consideration—tile roofing runs $10-25 per square foot installed, making it the premium option. However, when protecting valuable equipment or irreplaceable items, this investment often proves worthwhile for long-term peace of mind.
What to Avoid: Roofing Materials That Invite Disaster
When protecting your shed from fire, some roofing materials simply aren’t worth the risk. Wood shakes and untreated cedar shingles are beautiful but act like kindling during ember storms—they can ignite in minutes. Traditional asphalt shingles without fire-resistant ratings also pose dangers, as they may crack and curl under intense heat, creating entry points for flying embers. Even treated wood products lose effectiveness over time without proper maintenance. One homeowner shared how old wood shingles on their garden shed caught fire from a neighbor’s backyard bonfire, destroying years of stored tools and memories. The bottom line? Skip organic materials and always verify fire-resistance ratings before installation.
Beyond the Roof: Complete Ember-Resistant Weatherproofing
Sealing Gaps and Vents Against Ember Entry
Even the most fire-resistant roofing material won’t fully protect your shed if embers can sneak through gaps and openings. During a wildfire, these tiny glowing fragments can travel over a mile, seeking out every vulnerable entry point in your structure.
Start by inspecting your shed’s edges where the roof meets the walls—these junctions are notorious ember traps. Look closely at eave overhangs, rake edges, and any spots where different building materials connect. Run your hand along these areas on a sunny day; if you can see daylight peeking through, embers can definitely find their way in.
For ventilation, you’ll need to balance airflow with protection. Standard vents with large openings are like welcome mats for embers. Replace them with ember-resistant vents featuring fine metal mesh (1/8-inch or smaller openings) that blocks embers while maintaining proper air circulation. These specialized vents are widely available and straightforward to install—many homeowners tackle this upgrade in a single afternoon.
Seal roof edges and eaves using fire-rated caulk or metal flashing. Pay special attention to ridge vents and gable ends, which often have surprising gaps. For joints between roofing panels or shingles, use intumescent sealants that expand when heated, creating an emergency barrier against both embers and flames.
Think of this as weatherproofing with fire safety in mind—you’re creating multiple layers of defense that protect your shed year-round.
Siding and Wall Protection Strategies
Your shed’s walls need just as much attention as the roof when it comes to fire protection. Fire-resistant siding materials like fiber cement, metal panels, or stucco create a protective barrier that won’t ignite from flying embers. If you’re keeping your current shed, consider adding a fire-resistant coating to wooden siding as an affordable upgrade.
Creating defensible space around your shed makes a huge difference. Clear away dry vegetation, leaves, and debris within at least five feet of all walls. Store firewood and combustible materials at least 30 feet away. One homeowner in California shared how simply clearing brush around their shed saved it when a nearby wildfire sent embers flying—the flames had nothing to catch onto.
The ground-level gap where your shed meets the soil deserves special attention. Embers love to sneak into these vulnerable spots and ignite from below. Using proper shed-to-ground junction protection with gravel beds and metal flashing blocks both ember entry and moisture problems. It’s a simple solution that protects against multiple threats at once, giving you peace of mind during fire season.
Gutters, Debris, and Maintenance That Saves Your Shed
Here’s a fire safety concern many shed owners overlook: clogged gutters become dangerous fire traps during wildfire season. When leaves, pine needles, and dry debris accumulate in your gutters, they create perfect kindling for ember attacks. Even a small floating ember can ignite this material, turning your drainage system into a fuse that leads directly to your roof.
The solution? Make gutter cleaning part of your regular maintenance routine. During fire season, inspect and clear gutters monthly—more frequently if you have overhanging trees. Remove all organic debris, and consider installing gutter guards designed to block leaves while allowing water flow.
Beyond gutters, keep your shed’s perimeter clear. Rake away fallen leaves within 10 feet of your structure, and trim back any vegetation touching your walls or roof. Store firewood at least 30 feet away, never against shed walls.
When you waterproof your shed roof, you’re also creating a barrier that helps prevent ember penetration through small gaps.
Set seasonal reminders: spring and fall cleanings are essential, but add mid-summer checks during peak fire season. One homeowner in Colorado credits this simple routine with saving her shed when a nearby grass fire sent embers swirling through her yard—her clean gutters and debris-free perimeter gave those embers nowhere to catch.
Making the Switch: Upgrading Your Existing Shed Roof
If you’re looking at your existing shed and wondering whether it’s time for a roofing upgrade, you’re not alone. Many homeowners face this decision, especially in fire-prone areas where ember attacks pose real threats to backyard structures.
**When to Upgrade vs. Replace**
Start by assessing your current roof’s condition. If your shed’s structure is solid but the roofing material is outdated or damaged, upgrading just the roof makes perfect sense. However, if you notice sagging roof supports, widespread rot, or structural issues, replacement might be more cost-effective long-term. A general rule: if your shed is less than ten years old with good bones, upgrading is usually the smarter choice.
**DIY or Professional Installation?**
This decision depends on your comfort level and the roofing material you choose. Metal roofing panels are surprisingly DIY-friendly—many homeowners successfully install them over a weekend with basic tools. Class A asphalt shingles require more experience with proper underlayment and flashing techniques. For tile or slate installations, professional help is strongly recommended due to weight considerations and specialized techniques. Consider following expert roof design principles to ensure proper ventilation and drainage.
**Cost Expectations**
For a typical 10×12 shed, expect to invest $800-$1,500 for metal roofing materials, $600-$1,200 for Class A shingles, and $2,000-$4,000 for professional installation if you go that route. While it’s an investment, many homeowners find peace of mind priceless.
**Planning Your Upgrade**
Begin by measuring your roof accurately and ordering 10% extra material for cuts and mistakes. Schedule the project during dry weather, ideally in spring or early summer before wildfire season peaks. Remove old roofing carefully, inspect the decking for damage, and replace any compromised sections before installing your fire-resistant material.
**Real-Life Success Story**
“We upgraded our shed roof to metal sheeting last April, just two months before the Riverside fire came within a mile of our property,” shares Jennifer Martinez from Northern California. “While our neighbors’ wooden sheds caught embers, ours stayed completely unscathed. That $1,200 investment saved our tools, camping gear, and irreplaceable family heirlooms. Best decision we ever made.”
Shopping Smart: What to Look for When Buying a New Shed
When you’re ready to invest in a new shed, making fire safety a priority from the start will give you peace of mind for years to come. The good news? You don’t have to sacrifice style or break the bank to get solid protection.
Start by asking retailers about the roofing material’s fire rating. Look for Class A fire-rated options like metal, asphalt shingles, or concrete tiles—these offer the best defense against flying embers. Don’t be shy about requesting documentation or certifications to verify these ratings. If a salesperson can’t provide clear answers about fire resistance, that’s your cue to keep shopping.
Beyond the roof, examine the complete package. Check if the shed includes ember-resistant vents (you’ll want metal mesh screens, not plastic), and ask about the siding material. Wood sheds treated with fire-retardant chemicals or composite materials with fire ratings are smarter choices than untreated lumber in fire-prone areas.
Sarah from Colorado learned this lesson after her neighbor’s shed caught fire from windblown embers. “When I replaced it, I specifically looked for metal roofing and ventilation that wouldn’t let embers sneak inside. My new shed cost about 15% more, but I sleep better knowing it’s protected.”
Balance your priorities by creating a checklist: fire resistance sits at the top, followed by your aesthetic preferences, storage needs, and budget. Many manufacturers now offer fire-resistant sheds in various styles and colors, so you won’t have to settle for an eyesore. Request samples of roofing materials to see how they’ll complement your property’s look while keeping safety non-negotiable.
Protecting your shed with fire-resistant roofing isn’t just about choosing better materials—it’s an investment in genuine peace of mind. You’ve learned which roofing options offer the best defense against ember attacks, how to extend that protection throughout your entire structure, and whether upgrading or replacing makes the most sense for your situation.
Now it’s time to take action. Start by honestly assessing your shed’s current vulnerabilities. Walk around it with fresh eyes, looking at the roof, vents, and areas where embers might find their way inside. Take photos if that helps you create a prioritization list.
Remember, you don’t have to tackle everything at once. Even small improvements—like installing ember-resistant vents or replacing deteriorating roofing sections—significantly boost your shed’s fire resistance. Many homeowners begin with the most vulnerable areas and gradually work their way through the complete weatherproofing checklist.
The good news? You’re already ahead by educating yourself and taking this threat seriously. Whether you’re planning a DIY upgrade this weekend or researching options for a future shed purchase, you’re actively protecting what matters. That proactive approach makes all the difference when fire season arrives.