
The Right Way to Frame Your Shed Floor (Before You Waste Money on Wrong Lumber)
**Start your shed floor frame with pressure-treated lumber rated for ground contact—this prevents moisture damage and rot that can compromise your entire structure within just a few years.** Choose 2×6 joists for spans up to 8 feet or upgrade to 2x8s for wider sheds, spacing them 16 inches on center for optimal strength without material waste. Inspect each board before purchasing by checking for excessive warping, large knots near edges, and deep cracks that weaken load-bearing capacity.
Your floor frame serves as the foundation for everything above it, so selecting the right lumber isn’t just about following building codes—it’s about creating a stable platform that protects your belongings from moisture, supports heavy equipment, and lasts decades without sagging or structural issues. Many DIYers overspend on premium grades when standard #2 lumber works perfectly for floor framing, or they unknowingly choose untreated wood that deteriorates rapidly when exposed to ground moisture.
This guide walks you through lumber species comparisons, proper sizing calculations based on your shed dimensions, quality indicators to examine at the lumberyard, and smart budgeting strategies that balance durability with cost-effectiveness. You’ll gain the confidence to make informed purchasing decisions that ensure your shed floor remains solid and reliable for years to come.
Why Your Shed Floor Frame Matters More Than You Think
Your shed’s floor frame is the unsung hero of the entire structure—literally holding everything together. While it might be tempting to save a few dollars on lumber or take shortcuts during construction, a poorly framed floor creates a domino effect of problems that can compromise your entire investment.
Think of your floor frame as the backbone of your shed. When properly constructed with the right materials and spacing, it distributes weight evenly across your proper shed foundation, preventing the sagging and warping that plague many DIY projects. I’ve seen too many homeowners discover—often months after completion—that undersized joists or improper spacing has turned their shed floor into a trampoline, making it unsafe to store heavy equipment or even walk across comfortably.
But structural issues aren’t the only concern. A weak floor frame allows moisture to accumulate between boards, creating the perfect environment for rot, mold, and pest infestations. One homeowner shared how his improperly ventilated floor frame led to replacing the entire floor within just three years—an expensive lesson that cost triple the initial savings.
The good news? Getting your floor frame right from the start adds minimal extra cost while potentially extending your shed’s lifespan from 10 years to 20 or more. It’s an investment that pays dividends in durability, safety, and peace of mind.
Understanding Shed Floor Framing Basics
The Anatomy of a Shed Floor Frame
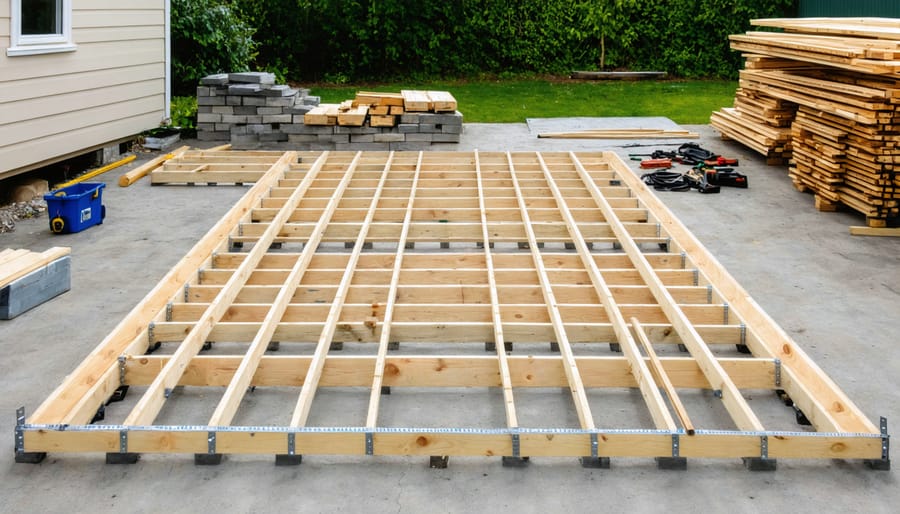
Understanding the basic building blocks of your shed floor will help you tackle this project with confidence. Think of your floor frame as a sturdy grid that keeps everything level and supported.
**Rim joists** form the outer perimeter of your frame, creating a rectangular border that defines your shed’s footprint. These anchor everything together and bear weight along the edges.
**Floor joists** run parallel across the interior, typically spaced 16 inches apart (center to center). They’re the workhorses of your floor, carrying the weight of everything you’ll store inside. Proper spacing prevents sagging and creates a solid walking surface.
**Band boards** (also called rim boards) cap the ends of your joists, boxing them in and adding extra rigidity to prevent twisting or shifting over time.
**Blocking** consists of short pieces installed between joists at mid-span. While sometimes optional on smaller sheds, blocking reduces bounce and prevents joists from rolling sideways under load—especially important for larger floors.
Together, these components create a framework that distributes weight evenly and provides a rock-solid foundation for your shed floor decking.
Load Requirements for Different Shed Sizes
Your shed’s size and purpose directly influence the lumber you’ll need for a sturdy floor frame. For smaller sheds (up to 8×10 feet) used for storing garden tools and lightweight items, 2×4 floor joists spaced 16 inches on center typically provide adequate support. However, if you’re building a larger shed (10×12 feet or more) or plan to store heavy equipment like lawn tractors or motorcycles, upgrading to 2×6 or even 2×8 joists becomes essential.
Think of it this way: a homeowner storing plastic bins and rakes needs far less structural support than someone parking a 500-pound riding mower. The weight difference matters! For heavy-duty applications, not only should you use thicker joists, but you’ll also want to reduce spacing to 12 inches on center for maximum strength. Planning ahead saves you from sagging floors and costly repairs down the road—nobody wants to reinforce a frame after discovering their shed can’t handle the load!
Best Lumber Types for Shed Floor Framing
Pressure-Treated Lumber: The Floor Framing Favorite
When it comes to building a shed floor that lasts, pressure-treated lumber is your best friend. This specially treated wood has become the go-to choice for floor framing, and for good reason—it’s designed to withstand moisture, insects, and ground contact that would quickly destroy regular lumber.
The secret lies in the treatment process, where lumber is infused with protective chemicals that guard against rot and decay. This makes pressure-treated wood perfect for those horizontal beams and joists that form your shed’s foundation, especially since they’re often exposed to ground moisture and occasional water splashing.
You’ll notice ratings stamped on pressure-treated lumber, with “Ground Contact” (rated 0.40 or higher) being the most important designation for shed floors. Use this rating for any wood touching or within 6 inches of the ground—like your rim joists and skid boards. For joists suspended above ground level, “Above Ground” rated lumber works fine and costs less.
Here’s a real-world tip from experienced builders: even with pressure-treated lumber, proper ventilation underneath your shed makes a huge difference. One DIY enthusiast shared how adding lattice vents around his shed’s perimeter doubled the lifespan of his floor framing by reducing trapped moisture.
While pressure-treated lumber costs more upfront than standard pine, it’s worth every penny for floor framing. Pair it with proper techniques like waterproofing your shed floor, and you’ll have a foundation that stands strong for decades, not just years.
Standard Dimensional Lumber: When It Works and When It Doesn’t
Standard dimensional lumber—typically pine, spruce, or fir—is what you’ll find stacked at your local home center, and it’s often the go-to choice for shed floor framing. These boards work perfectly fine for smaller sheds (8×10 or less) with proper joist spacing and adequate support. Many DIYers have successfully built sturdy shed floors using standard 2×6 or 2×8 lumber without issues.
However, standard lumber does have limitations. It’s more prone to warping, twisting, and moisture damage compared to pressure-treated alternatives, which becomes problematic since your floor frame sits close to the ground. If you’re building in a humid climate or your shed will store heavier items like lawn tractors or workshop equipment, standard lumber may not hold up long-term.
The sweet spot for using standard dimensional lumber? Interior components like blocking between joists or rim boards that won’t contact moisture directly. One experienced builder shared: “I use pressure-treated for anything touching the skids or ground, but switch to regular lumber for interior bracing—saves money without compromising durability.”
For floor joists themselves, investing in pressure-treated or engineered lumber typically proves worthwhile for lasting performance.
Engineered Lumber Options for Long Spans
When you’re building a larger shed—say 12×16 feet or bigger—and want to avoid cluttering your interior space with support posts, engineered lumber becomes your best friend. These modern materials offer impressive strength across longer distances than traditional dimensional lumber can handle.
**I-joists** are engineered beams shaped like the letter “I,” combining a solid top and bottom flange with a sturdy web in between. They’re incredibly strong for their weight and resist warping, making them ideal for spans up to 20 feet. Many DIYers appreciate that I-joists come in consistent dimensions, so you don’t need to worry about crowning or sorting through boards at the lumberyard. They’re perfect for workshop sheds where you need uninterrupted floor space for machinery.
**Laminated Veneer Lumber (LVL)** takes things even further. Made from multiple thin wood layers bonded together, LVL beams can span extraordinary distances while supporting heavy loads. One homeowner I know used LVL joists for their 14×20 storage shed, creating a rock-solid floor that handles a riding mower and snowblower without any bounce.
The trade-off? Engineered lumber costs more upfront than standard joists. However, you’ll save on labor, avoid installing mid-span supports, and gain valuable interior space—making it worthwhile for larger projects.
Cedar and Naturally Rot-Resistant Woods
If you’re building a shed that’ll last for decades with minimal maintenance, cedar and other naturally rot-resistant woods deserve serious consideration. Cedar contains natural oils that repel moisture and insects, making it an excellent choice for floor framing in humid climates or areas with poor drainage. Redwood and cypress offer similar benefits.
The trade-off? Premium woods cost 2-3 times more than pressure-treated lumber. For most DIYers, this investment makes sense primarily for sill plates—the bottom boards that touch your foundation—where moisture exposure is highest. One homeowner in coastal Oregon shared that using cedar sill plates while framing the rest with pressure-treated lumber gave him “the best of both worlds without breaking the bank.”
Consider your local climate and how long you plan to keep the shed. In consistently dry environments, the extra cost may not justify the benefits.
Selecting the Right Lumber Size for Your Shed Floor
Common Joist Sizes and Spacing Guidelines
Choosing the right joist size and spacing doesn’t have to be complicated! For most backyard sheds, a few proven combinations will give you a sturdy, long-lasting floor.
**For sheds up to 8×10 feet:** 2×6 joists spaced 16 inches on center work beautifully. This is the sweet spot for smaller storage sheds—strong enough to handle your lawn equipment and seasonal items without overbuilding.
**For sheds 10×12 to 12×16 feet:** Step up to 2×8 joists at 16 inches on center. The extra depth provides the strength needed for larger spans and heavier storage loads. Many DIYers find this size perfect for workshop sheds or spaces storing heavier tools.
**For sheds larger than 12×16 feet:** Consider 2×10 joists at 16 inches on center, or consult local building codes for specific requirements in your area.
**Quick rule of thumb:** When in doubt, 16-inch spacing is your friend. It’s standard in construction, makes installing plywood flooring easier (sheets align perfectly), and provides excellent support without unnecessary expense.
One homeowner shared that upgrading from 24-inch to 16-inch spacing eliminated the “bouncy floor” feeling in his 10×12 workshop—a small investment that made a huge difference in daily use. Remember, a slightly overbuilt floor is far better than one that feels unstable underfoot!
When to Upsize Your Floor Joists
Sometimes going bigger with your floor joists is the smartest decision you’ll make for your shed project. If you’re planning to store a riding mower, motorcycle, or heavy workshop equipment, upgrading from 2×6 to 2×8 joists provides crucial extra support that prevents sagging and structural issues down the road.
Consider upsizing when your shed will house anything requiring wheeled access—the added strength handles dynamic loads better as you roll equipment in and out. Homeowners who’ve experienced floor bounce often wish they’d invested the extra $50-75 upfront rather than dealing with repairs later.
Larger joists also let you space them further apart (16″ instead of 12″), which can actually balance your lumber costs while delivering superior stability. Think about your shed’s future uses too—that garden storage today might become tomorrow’s home gym or workshop, and the foundation should grow with your needs.
What to Look for When Buying Floor Framing Lumber
Avoiding Warped, Twisted, and Damaged Boards
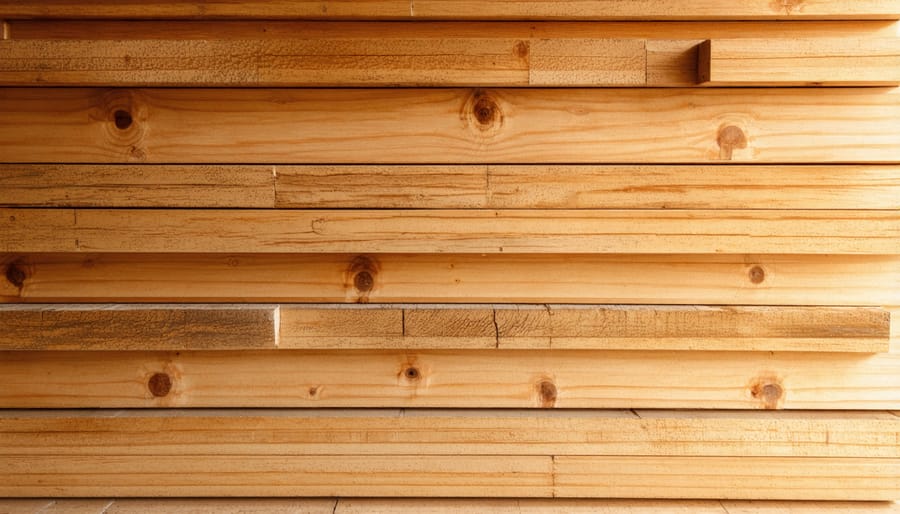
Spending a few extra minutes inspecting lumber before you buy can save you major headaches down the road. At the store, sight down the length of each board from one end—you’ll immediately spot any twists, bows, or curves. Run your hand along the surface to feel for warping that might not be obvious to the eye. Check for large knots, splits, or cracks, especially near the ends where boards will bear the most weight in your floor frame.
Don’t feel rushed or embarrassed to sort through the stack for the straightest pieces—it’s expected, and you’re investing your time and money. One DIYer shared that taking just ten minutes to hand-select quality boards meant his shed floor went together smoothly without any frustrating adjustments. If you’re ordering lumber for delivery, ask if you can inspect it upon arrival and reject any damaged pieces. A straight, solid frame starts with straight, solid lumber.
Understanding Lumber Grades and What They Mean
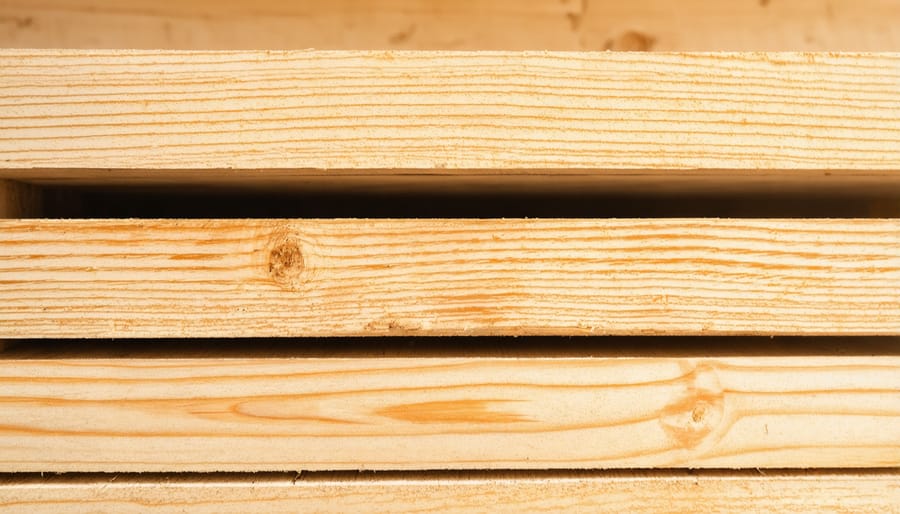
Lumber grades might seem confusing at first, but they’re actually pretty straightforward once you know what to look for. The grading system tells you about the quality and appearance of the wood—not its strength.
For shed floor framing, **#2 grade lumber** is your sweet spot. It’s budget-friendly and perfectly strong enough for structural work hidden beneath your floor. You’ll see some knots and minor imperfections, but that won’t affect performance where it counts. Many experienced DIYers actually prefer #2 for framing projects because it delivers excellent value.
**#1 grade** costs more and looks cleaner with fewer knots, but you’re paying extra for aesthetics you won’t even see once your floor is finished. Save that premium lumber for visible projects.
Avoid **utility grade** or lower—these boards may have large knots or defects that could compromise your floor’s integrity over time. When selecting boards at the lumberyard, always sight down each piece to check for excessive warping or twisting, regardless of grade. A straight #2 board beats a twisted #1 every time for framing work.
Budget-Smart Strategies for Floor Framing Lumber
Smart shopping starts with buying only what you need—measure twice and calculate carefully to avoid waste. Purchase pressure-treated lumber for ground-contact components like rim joists and skids, but consider using less expensive untreated lumber for interior joists that won’t touch the ground. Many homeowners save 20-30% by choosing standard-grade lumber and hand-selecting straight boards at the lumberyard rather than paying premium prices for #1 grade throughout.
Timing matters too. Shop during off-season months when demand drops, and don’t overlook local sawmills or smaller suppliers who often beat big-box pricing. One DIYer shared how buying from a nearby mill saved her $150 on a 10×12 shed floor without sacrificing quality.
Consider exploring various DIY shed floor options that might reduce lumber needs altogether. For example, using wider joist spacing with thicker decking can sometimes lower overall material costs while maintaining strength.
Finally, build relationships with suppliers—ask about cull lumber or slight seconds that work perfectly for shed projects at significant discounts. Remember, smart budgeting means investing wisely in structural components while finding creative savings elsewhere.
Choosing the right lumber for your shed floor framing sets the foundation for years of reliable use. By selecting pressure-treated wood for ground contact areas, sizing your joists appropriately for your shed’s dimensions, and investing in quality materials upfront, you’re building a structure that will protect your belongings and withstand the elements season after season.
Remember, cutting corners on floor framing materials might save a few dollars today, but it often leads to costly repairs and headaches down the road. A well-framed floor means your doors will open smoothly, your walls will stay square, and moisture damage won’t compromise your storage space.
Whether you’re framing your own shed or want to skip the hassle entirely, understanding these fundamentals helps you make informed decisions. If you’re ready to explore pre-built options that already incorporate these quality construction principles, check out the selection at Storage Sheds Outlet. You’ll find sheds built with proper floor framing so you can enjoy your new storage space without the guesswork. And if you’re continuing your DIY journey, browse our other helpful guides to ensure every step of your project is done right.
Looking for a storage sheds?
Browse our full range of storage sheds from authorized dealer brands. Free shipping to the continental US.