10 Easy DIY Patio Accessories to Transform Your Outdoor Space

Transform your patio into a stylish oasis with these DIY accessory projects that combine functionality and flair. From cozy seating to ambient lighting, discover creative ways to upgrade your outdoor space on a budget. With step-by-step instructions and supply lists, you’ll be inspired to tackle these easy projects and enjoy a beautifully personalized patio all summer long.
Planter Boxes

Materials Needed
To create these DIY patio accessories, you’ll need a variety of materials and tools. For wood, consider using cedar, pressure-treated lumber, or reclaimed wood for a rustic touch. Essential tools include a saw, drill, sander, hammer, screwdriver, and measuring tape. Hardware items like screws, nails, hinges, and handles will also be necessary depending on the project. Other materials may include outdoor fabric, cushion foam, paint or stain, and decorative elements like rope or mosaic tiles. Be sure to check each project’s specific material list and gather all supplies before starting your DIY patio accessory adventure.
Step-by-Step Instructions
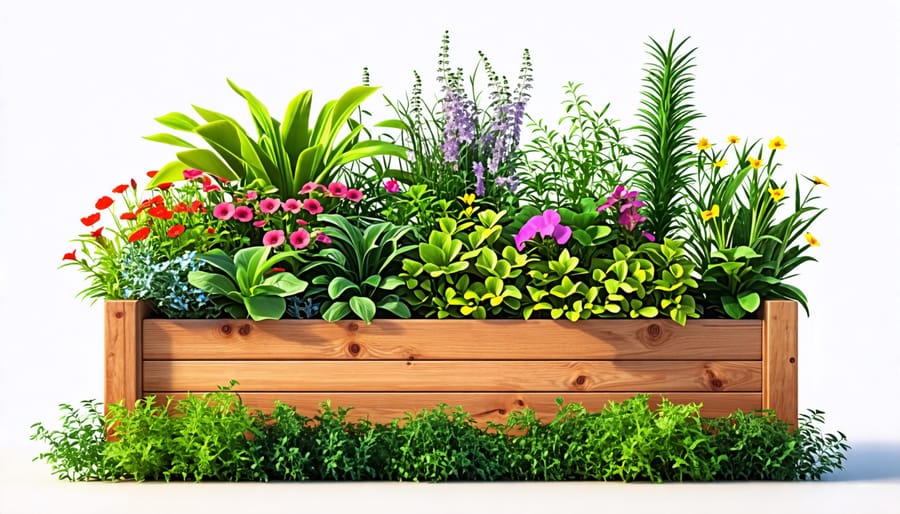
Here’s a step-by-step guide to building your own wooden planter box for your patio:
1. Cut four pieces of treated lumber to the desired height of your planter box, such as 18 inches. These will form the sides.
2. Cut two pieces of treated lumber to the desired width and depth of your planter box, such as 24 inches wide by 12 inches deep. These will form the bottom and one of the short sides.
3. Assemble the box by attaching the side pieces to the bottom piece using exterior wood screws. Pre-drill holes to prevent splitting.
4. Attach the remaining short side piece to complete the box frame.
5. Cut a piece of exterior-grade plywood to fit the bottom of the box. Consider waterproofing plywood for added durability.
6. Secure the plywood bottom to the box frame with exterior wood screws.
7. Optionally, you can add trim pieces around the top edge for a finished look. Miter the corners at 45-degree angles.
8. Sand any rough edges and apply an exterior wood sealant or paint to protect the wood from the elements.
9. Allow the sealant or paint to dry completely, then fill your new planter box with potting soil and your favorite plants or herbs. Position it on your patio and enjoy the fruits of your labor!
With some basic tools and lumber, you can craft a custom wooden planter to beautify your outdoor space. Feel free to modify the dimensions to suit your patio layout and planting needs.

Outdoor Curtains
Fabric and Supplies
When selecting fabric for outdoor patio accessories, look for materials that are weather-resistant, fade-proof, and easy to clean. Canvas, Sunbrella, and outdoor-grade polyester are excellent choices that withstand the elements. Gather supplies such as a sewing machine, scissors, measuring tape, and matching thread. For projects involving wood, you’ll need tools like a saw, drill, and sandpaper. Don’t forget to pick up any necessary hardware, like grommets, zippers, or velcro, depending on your specific DIY project. With the right fabric and supplies on hand, you’ll be ready to create stunning and durable patio accessories that elevate your outdoor space.
Hanging the Curtains
When it comes to hanging curtains on your patio, you have several options to choose from. Tension rods are a simple and cost-effective solution, as they can be easily installed inside the frame of your patio opening without requiring any drilling or damage to the walls. Alternatively, you can install hooks or brackets along the top of the patio frame and use curtain rings to hang your curtains. This method allows for more customization and can handle heavier fabrics. For a more modern look, consider using curtain wire, which can be stretched taut between two points and used with clips to hang the curtains. Whichever method you choose, be sure to measure your patio opening carefully and select curtains that are the appropriate length and width for a perfect fit. With the right hanging solution, your patio curtains will provide both style and functionality to your outdoor space.
Pallet Furniture
Sourcing and Prepping Pallets
Sourcing pallets for your DIY patio accessories is easier than you might think. Many businesses receive shipments on pallets and are happy to give them away for free. Check with local hardware stores, nurseries, and industrial areas to find unwanted pallets. Be sure to ask permission before taking any pallets. Once you have your pallets, inspect them for damage and remove any broken boards. If the pallets are dirty, give them a good cleaning with a power washer or scrub brush. Sand down any rough spots and remove protruding nails or staples. Consider applying a wood sealant or paint to protect the pallets from the elements and enhance their appearance. With a little effort, you can repurpose wooden pallets into beautiful and functional patio accessories that will add character to your outdoor space.
Pallet Coffee Table
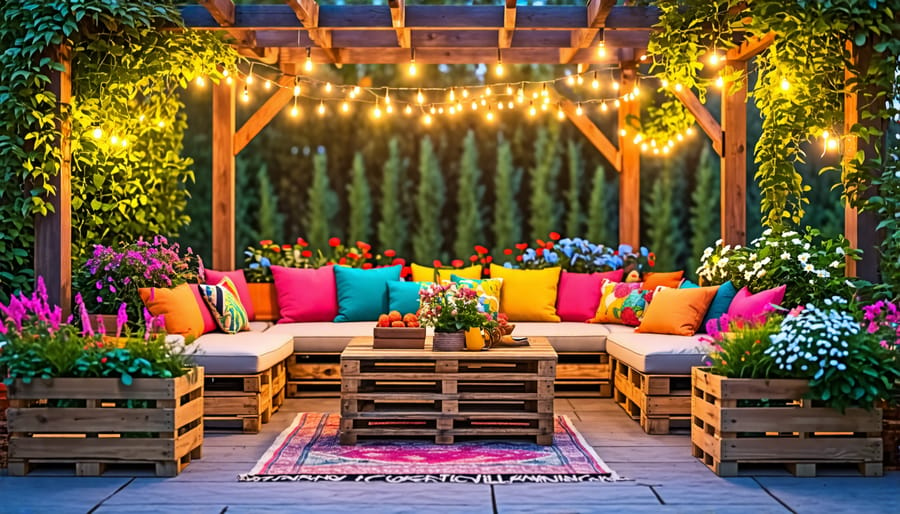
Building a rustic pallet coffee table is a fantastic way to add a functional and charming piece to your patio. To get started, you’ll need a few supplies: a pallet (look for one in good condition), sandpaper, wood stain, paintbrush, four caster wheels, drill, and screws.
First, sand down the pallet to create a smooth surface and remove any splinters. Next, apply the wood stain of your choice using a paintbrush, making sure to cover all sides evenly. Allow the stain to dry completely according to the manufacturer’s instructions.
Once the stain is dry, flip the pallet over and attach the caster wheels to each corner using a drill and screws. This will make your coffee table easy to move around your patio as needed.
With the wheels attached, flip your pallet right-side up, and voila! You now have a stunning, one-of-a-kind pallet coffee table that’s perfect for holding drinks, snacks, or even propping up your feet after a long day.
The best part about this DIY project is that it’s incredibly versatile. You can customize the look by choosing a stain color that complements your existing patio decor, or even paint a design on top for added personality. Plus, the caster wheels make it a breeze to roll the table out of the way when you need extra space for entertaining.
So embrace your inner craftiness and create a pallet coffee table that will be the talk of your next outdoor gathering. Your guests will be impressed by your handiwork, and you’ll love having a functional and stylish addition to your patio space.
String Lights
Light Pole Materials
When creating DIY light poles for your patio, sturdy materials are essential. PVC pipe is a popular choice due to its durability and affordability. For a 6-foot pole, use 1.5-inch diameter PVC pipe. To anchor the pole securely, drive a piece of rebar about 2 feet into the ground, leaving enough exposed to insert into the PVC pipe. Alternatively, you can use a wooden 4×4 post for a more rustic look. Make sure to treat the wood to withstand outdoor conditions. Other supplies you’ll need include pipe brackets, screws, and spray paint if you want to customize the color of your light poles.
Light Fixture Ideas
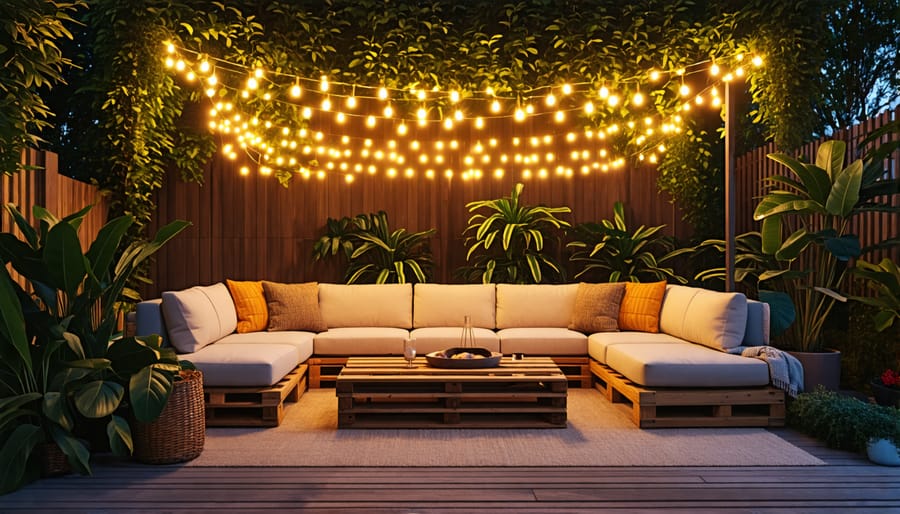
Illuminate your patio with the enchanting glow of string lights! Get creative by wrapping them around trees, pergolas, or deck railings for a magical ambiance. Hang strands overhead in a zigzag or crisscross pattern using cup hooks or guide wires for a starry night effect. For a whimsical touch, place string lights inside mason jars or lanterns and suspend them from shepherd’s hooks or branches. Use weatherproof, outdoor-rated lights and secure them properly to prevent sagging or tangling.
Consider solar-powered options for energy efficiency and convenience. Experiment with different light colors and bulb shapes to suit your style – warm white for a cozy feel, multicolor for festive fun, or vintage-style Edison bulbs for a trendy look. With a little imagination, you can transform your patio into an enchanting oasis that invites lingering long after the sun sets. So gather friends and family, and bask in the warm, inviting glow of your very own patio light display!

Outdoor Rug
Choosing a Design
When choosing a design for your DIY patio rug, consider creating a stencil or going freehand. For a stenciled design, draw or trace your pattern onto a piece of cardboard, then carefully cut it out with a craft knife. This allows you to spray paint the design onto your rug material for a crisp, repeatable pattern. If you prefer a more organic look, try freehand painting. Sketch your design lightly with chalk, then fill it in with brush strokes or sponge daubers. Opt for simple shapes and patterns that are easy to replicate if you’re a beginner. Let your creativity shine and choose colors that complement your outdoor décor for a personalized touch.
Painting Techniques
When applying outdoor paint to drop cloth material for patio accessories, proper technique is key for durability and an even finish. Begin by thoroughly washing and drying the fabric to remove any dirt or debris. If desired, iron the cloth to eliminate wrinkles before painting. Secure the drop cloth to a flat surface using painter’s tape or weights to prevent shifting. Apply a thin, even coat of outdoor fabric paint using a foam brush or roller, working in long, smooth strokes. Allow the first coat to dry completely before applying a second coat for optimal coverage and color vibrancy. For added dimension, consider using stencils or freehand designs to create patterns or motifs. Once the paint is fully dry, heat-set it according to the manufacturer’s instructions to ensure long-lasting adherence. With proper preparation and application, your painted drop cloth patio accessories will withstand the elements and provide a pop of personalized style to your outdoor space.
With a little creativity and some DIY spirit, you can transform your patio into an inviting oasis that reflects your personal style. By tackling these projects yourself, you’ll not only save money but also take pride in the unique space you’ve created. So grab your tools, gather your supplies, and get ready to refresh your patio with these DIY accessories. Whether you start with a simple throw pillow or dive into building a custom table, each project will bring you one step closer to the patio of your dreams. Enjoy the process, and happy crafting!

