
Build Your Dream Storage Space: Modular Shed Systems That Snap Together Like Legos
Transform your backyard into a functional workspace by building a custom outdoor shed – a project that combines practical storage with lasting value for your property. Whether you’re seeking extra space for tools, garden equipment, or a dedicated workshop, constructing your own shed offers complete control over size, design, and features while potentially saving thousands compared to pre-built options.
Modern shed construction has evolved beyond basic wooden boxes. Today’s modular systems and innovative materials make it possible for DIY enthusiasts to create professional-quality structures using straightforward assembly methods. From traditional timber frames to contemporary metal-and-composite designs, the right shed can enhance your property’s aesthetics while solving critical storage challenges.
Before breaking ground, consider three essential factors: local building codes and permits, foundation requirements, and material selection based on your climate. A well-planned shed project typically takes 2-4 weekends to complete and requires basic carpentry skills, proper tools, and attention to detail. With careful preparation and the right approach, you’ll create a durable, weather-resistant structure that serves your needs for decades to come.
Expert Tip: Start with a detailed site assessment and accurate measurements – the success of your shed project depends more on thorough planning than on construction complexity.
Why Modular Shed Construction Makes Perfect Sense
Time and Cost Benefits
Building an outdoor shed using modern construction methods can significantly reduce both time and expenses compared to traditional building approaches. Most homeowners find they can complete their shed project in just a weekend or two, rather than spending weeks on construction. This time efficiency translates directly into cost savings, especially if you’re hiring help for the installation.
Pre-cut materials and ready-to-assemble components eliminate the need for complex measurements and cuts, reducing material waste and associated costs. Many manufacturers provide detailed instructions and labeled parts, making the assembly process straightforward and reducing the likelihood of costly mistakes.
Labor costs typically represent 40-60% of traditional construction expenses. By choosing a modular or kit-based shed system, you can substantially reduce or eliminate these costs through DIY installation. Even if you opt for professional installation, the streamlined process means fewer labor hours and lower overall expenses.
Another often-overlooked benefit is the reduced need for specialized tools. Most shed kits come with basic hardware and require only common household tools, saving you from investing in expensive equipment you might only use once.
Flexibility and Customization Options
One of the biggest advantages of modern outdoor shed construction is the incredible flexibility offered by modular systems. These versatile designs allow you to start with a basic structure and expand or modify it as your needs change. Whether you need to add an extra bay for garden equipment or create a dedicated potting area, modular components make it simple to grow your space without starting from scratch.
Most modular shed systems come with interchangeable panels and sections that can be easily added or removed. Want to incorporate more natural light? Simply swap solid panels for windows. Need extra ventilation? Add roof vents or wall-mounted fans wherever needed. You can even personalize your shed’s appearance with different siding options, door styles, and trim colors to match your home’s exterior.
The beauty of modular construction lies in its adaptability. Many homeowners start with a standard 8×10 shed and later expand it with additional storage spaces, workbenches, or even a covered porch area. The pre-engineered components ensure that modifications maintain structural integrity while giving you the freedom to create a truly customized storage solution that grows with your needs.
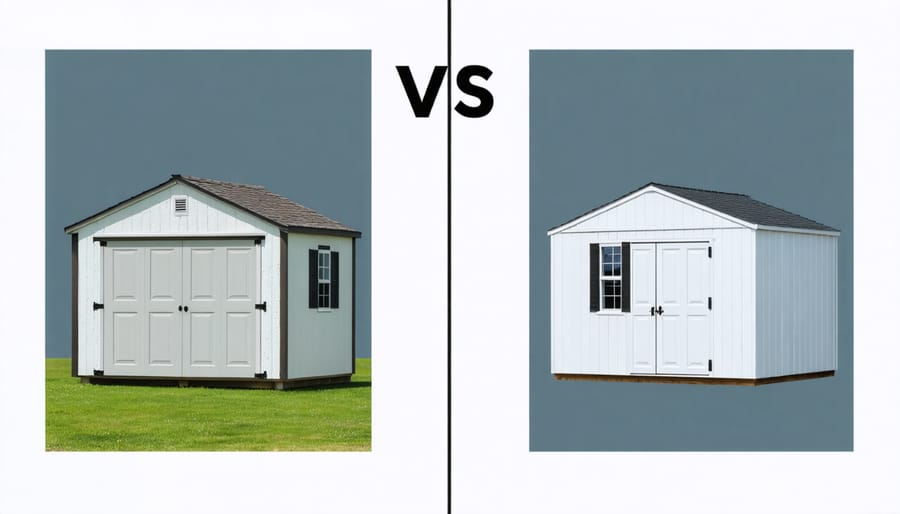
Popular Modular Shed Systems Explained
Panel-Based Systems
Panel-based systems offer a streamlined approach to shed construction that’s perfect for DIY enthusiasts looking to choose the right storage shed. These pre-fabricated components consist of ready-made wall and roof panels that come pre-insulated and weather-sealed, making assembly much simpler than traditional stick-built methods.
Each panel typically includes the exterior siding, structural framework, and interior wall surface all in one piece. This integrated design means you’ll spend less time measuring, cutting, and assembling individual components. The panels connect using a tongue-and-groove system or specialized clips, creating tight seals that enhance weather resistance and structural integrity.
One of the biggest advantages of panel systems is their quick installation time – many homeowners report completing their shed assembly in just one or two days. The panels are engineered for perfect fits, reducing the likelihood of gaps or misalignments that could lead to future problems.
While panel systems might cost more initially than traditional building materials, they often prove more cost-effective in the long run. They require minimal tools for assembly, reduce construction waste, and typically include better insulation properties. Plus, their factory-controlled manufacturing ensures consistent quality and durability, giving you peace of mind that your shed will stand the test of time.
Frame and Insert Systems
Modern frame and insert systems have revolutionized outdoor shed construction, making it easier than ever for homeowners to build sturdy, customizable storage spaces. These innovative systems consist of pre-made frames that work like a puzzle, with panels that slide or snap into place. The beauty of this approach lies in its simplicity – you won’t need extensive construction experience to achieve professional-looking results.
The typical system includes aluminum or steel frame posts with specially designed channels that accept various panel types. These panels can be made from materials like vinyl, metal, or composite boards, giving you flexibility in both appearance and function. Many homeowners appreciate that they can mix and match panels to create windows, doors, or solid walls exactly where they need them.
One of the biggest advantages of frame and insert systems is their adaptability. Need to add a window later? Simply remove the solid panel and replace it with a window insert. This modular approach also makes repairs much simpler – if a panel gets damaged, you can replace just that section instead of rebuilding an entire wall.
Installation typically follows a straightforward process: set up the base frame, install corner posts, add horizontal supports, and slide in your chosen panels. Most systems come with detailed instructions and require only basic tools. Many DIY enthusiasts find they can complete their shed in a weekend, especially with help from a friend or family member.
Component-Based Systems
Component-based shed construction offers a smart, manageable approach to building your outdoor storage solution. Think of it as putting together a life-sized puzzle, where each piece serves a specific purpose and fits perfectly with its neighbors. The main components typically include pre-cut wall panels, roof trusses, floor sections, and door assemblies.
Start by laying out your foundation components, ensuring they’re level and properly aligned. Wall panels usually connect through a system of channels or brackets, making assembly straightforward even for DIY beginners. Many modern systems feature snap-together or slide-in connections that eliminate the need for specialized tools.
The roof system often comes in pre-assembled trusses that attach to the wall panels using metal brackets or specially designed connectors. These components are engineered to support your local snow load requirements while maintaining structural integrity. Door frames typically integrate directly into the wall panels, featuring pre-drilled holes for hardware installation.
One of the biggest advantages of component-based systems is their flexibility. Need to modify a panel for utilities or ventilation? Most systems allow for customization while maintaining structural integrity. Plus, if a component gets damaged years down the road, you can often replace just that piece rather than rebuilding entire sections.
Remember to check all component connections during assembly and annually thereafter. A well-assembled component system can provide decades of reliable service with minimal maintenance.
Setting Up Your Modular Shed
Foundation Preparation
A solid foundation is crucial for the longevity and stability of your outdoor shed. Before starting construction, it’s essential to determine the best foundation for a shed based on your specific site conditions and local building codes.
Start by clearing the designated area of vegetation, rocks, and debris. The ground should be level and compacted to prevent future settling. Use a transit level or laser level to ensure the surface is perfectly flat, with a slight grade away from the planned shed location for proper drainage.
For most residential sheds, a concrete slab or gravel pad foundation works well. If choosing concrete, install a 4-inch thick reinforced slab on a properly compacted sub-base. For gravel foundations, excavate 4-6 inches deep, lay landscape fabric to prevent weed growth, and fill with crushed stone or gravel.
Consider installing pressure-treated wooden skids or concrete blocks around the perimeter to elevate the shed slightly off the ground. This helps prevent moisture damage and promotes airflow underneath the structure.
Remember to check local building codes regarding foundation requirements, as some areas may have specific guidelines about frost depth or moisture barriers. Taking time to prepare a proper foundation will ensure your shed remains stable and level for years to come.

Assembly Tips and Tricks
Success in shed assembly often comes down to proper preparation and knowing a few key tricks of the trade. Start by organizing all your components and hardware before beginning – this simple step can save hours of frustration later. Create a dedicated workspace near your foundation that’s level and clear of debris, with enough room to lay out all materials.
A helping hand can make a world of difference, especially when lifting wall panels or securing roof trusses. If working solo, use temporary support braces to hold panels in place while you secure them. Keep your drill charged and ready with spare batteries – you’ll be using it frequently throughout the build.
Weather can significantly impact your assembly process. Choose a calm, dry day for construction, particularly when handling large panels or roofing materials. If you need to pause construction, ensure partially completed sections are properly secured and protected from the elements.
Consider marking your foundation layout with chalk lines before starting – this provides clear reference points for wall placement. Keep a level handy and check frequently as you build; small adjustments early on prevent major headaches later. When installing doors, use shims to ensure proper alignment and operation.
Pro tip: Take photos of each major step completed. These can be invaluable for future reference if you need to make repairs or modifications to your shed down the line.
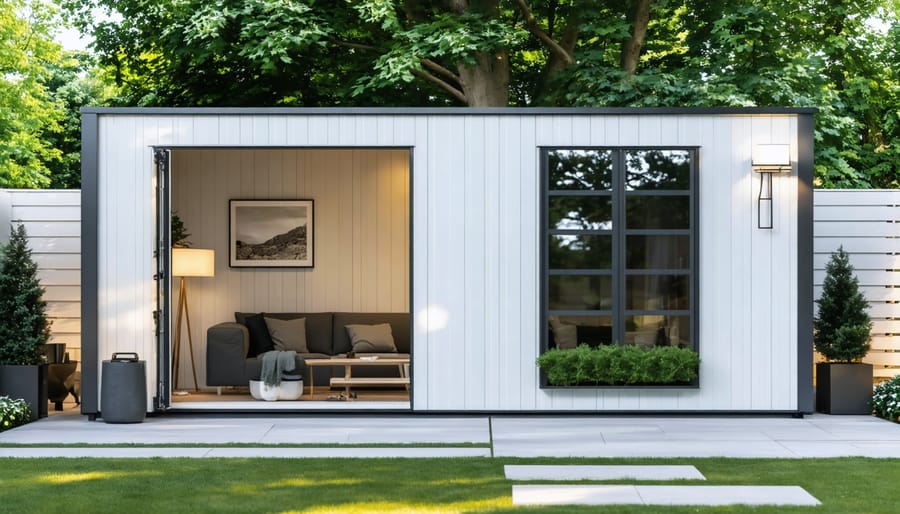
Customization and Finishing Touches
Once your shed’s basic structure is complete, it’s time to add those personal touches that transform it from a simple storage space into a truly functional and attractive addition to your property. Start by considering how to waterproof your shed materials to ensure long-lasting protection against the elements.
Paint or stain selection is crucial for both protection and aesthetics. Choose colors that complement your home’s exterior while providing adequate UV protection. Consider adding trim work around windows and doors for a polished look, and don’t forget decorative hardware like handles and hinges that can elevate the overall appearance.
Proper ventilation is essential for maintaining a healthy environment inside your shed. Install vents or windows that can be opened to promote air circulation. If you’re planning to use the shed year-round, consider insulating your modular shed for temperature control.
Organization systems like pegboards, shelving units, and tool racks can maximize your storage space. Adding exterior features such as window boxes, decorative shutters, or even a small covered porch can enhance both functionality and curb appeal. Finally, consider installing motion-sensor lighting and security features to protect your stored items and ensure safe access during evening hours.
As we’ve explored throughout this guide, modular shed systems offer an excellent solution for homeowners seeking additional storage space without the complexity of traditional construction methods. The benefits are clear: these systems combine convenience, durability, and style while providing significant cost savings compared to custom-built alternatives.
The versatility of modular sheds means you can choose a design that perfectly matches your home’s aesthetic while meeting your specific storage needs. Whether you’re storing garden tools, creating a workshop, or setting up a hobby space, these pre-engineered systems can be adapted to suit your purpose. The time-saving aspect cannot be overstated – what might take weeks with traditional construction can often be completed in a single weekend with a modular system.
One of the most appealing aspects of modular shed construction is its accessibility to DIY enthusiasts of all skill levels. With clear instructions, pre-cut materials, and often minimal tools required, these systems make it possible for nearly anyone to successfully complete their shed project. The sense of accomplishment that comes from building your own storage solution is truly rewarding.
Remember that proper planning is key to success. Take time to prepare your site, gather the necessary tools, and review all instructions before beginning. Consider future needs when selecting your shed size and features – many homeowners find themselves wishing they’d gone slightly larger to accommodate growing storage requirements.
We encourage you to take the next step in your shed project journey. Start by measuring your available space, checking local building codes, and researching different modular systems that match your needs. With proper preparation and the right modular system, you’ll soon have a functional, attractive, and lasting storage solution that adds value to your property.
Don’t let storage challenges hold you back any longer. The perfect modular shed solution is within reach, and the results will transform how you organize and enjoy your outdoor space.