
Beautiful Backyard Flooring That Won’t Break Your Bank
Transform your outdoor space without breaking the bank using affordable flooring solutions that combine durability with style. From repurposed wooden pallets costing under $10 each to gravel paths at $1-2 per square foot, budget-friendly options exist for every backyard vision. Create stunning patios and walkways using concrete pavers, crushed stone, or even painted concrete – all achievable for less than $5 per square foot with basic DIY skills. Whether you’re upgrading a small patio or revamping an entire backyard entertaining area, these cost-effective flooring alternatives deliver professional-looking results at a fraction of traditional decking or stone prices.
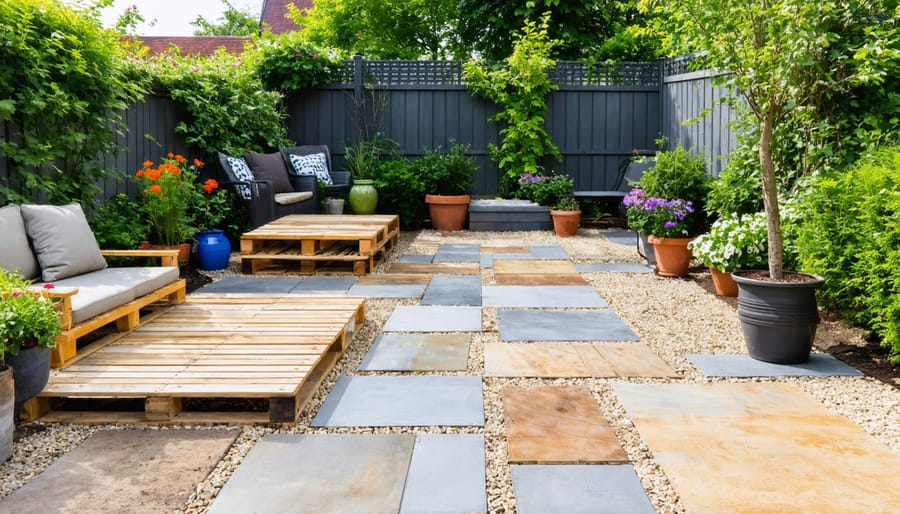
The beauty of these affordable options lies in their versatility and easy installation. Many can be completed in a weekend, require minimal tools, and offer impressive longevity when properly maintained. Plus, mixing materials like gravel with stepping stones or combining stained concrete with paver borders creates custom looks that rival expensive professional installations – while keeping your budget firmly intact.
Gravel and Stone Solutions
Pea Gravel Pathways
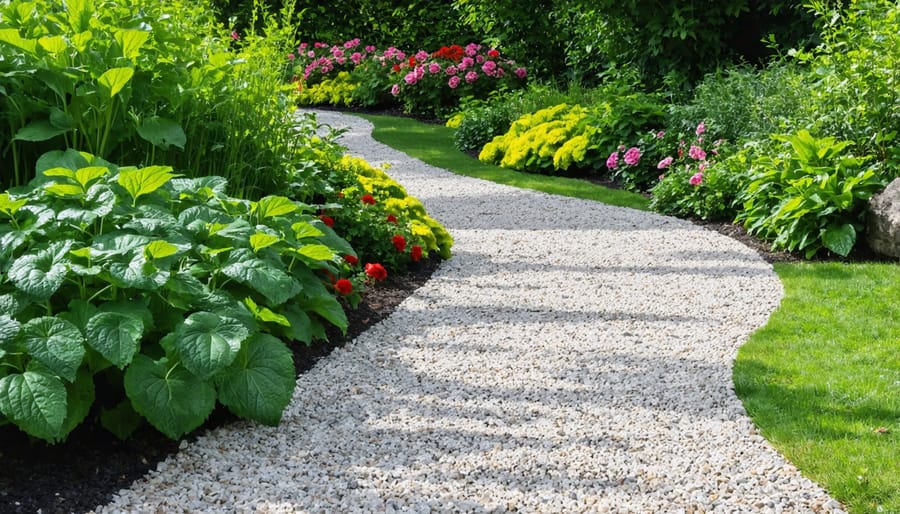
Pea gravel pathways offer an elegant yet budget-friendly solution for outdoor flooring, typically costing between $0.50 to $2.00 per square foot for materials. This natural material creates a classic, cottage-garden look while providing excellent drainage and low maintenance requirements.
To install a pea gravel pathway, start by marking your desired path and removing about 4 inches of soil. Line the area with landscape fabric to prevent weed growth and create clean borders using plastic, metal, or stone edging. Pour a 2-inch layer of crushed stone as a base, tamping it down firmly. Finally, add a 2-inch layer of pea gravel, spreading it evenly across the surface.
For a 40-foot pathway that’s 3 feet wide, expect to spend around $150-$300 on materials, including:
– Pea gravel: $75-$150
– Landscape fabric: $20-$40
– Edging: $30-$60
– Crushed stone base: $25-$50
One of the biggest advantages of pea gravel is its versatility – you can easily adjust or extend the pathway later. Regular maintenance is simple: just rake the gravel back into place occasionally and add a fresh layer every few years to maintain its appearance. Many homeowners appreciate how the gentle crunching sound adds a charming element to their garden experience.
Crushed Stone Patios
Creating a crushed stone patio is a budget-friendly way to transform your outdoor space. Start by marking your desired patio area with stakes and string, ensuring the space is level. Remove any grass or vegetation, and dig down about 4-6 inches, making sure the ground slopes slightly away from your house for proper drainage.
Line the excavated area with landscape fabric to prevent weed growth and separate the stone from the soil. Install plastic or metal edging around the perimeter to contain the stones. Next, add a 2-inch layer of coarse gravel as a base, tamping it down firmly with a plate compactor.
Pour your chosen crushed stone over the base layer. Popular options include limestone, granite, or slate chips, typically ranging from $30-50 per ton. Spread the stones evenly with a rake to a depth of about 2-3 inches. Use your plate compactor again to settle the stones into place.
For extra stability, consider adding stone dust or decomposed granite as a final layer. This helps lock the stones together while maintaining a natural look. Regular maintenance is simple – just rake the stones occasionally to keep them level and remove any debris that may accumulate.
Want to enhance your patio? Add solar lights along the edges or incorporate potted plants for a cozy, inviting atmosphere.
Wooden Deck Alternatives
Pallet Wood Decking
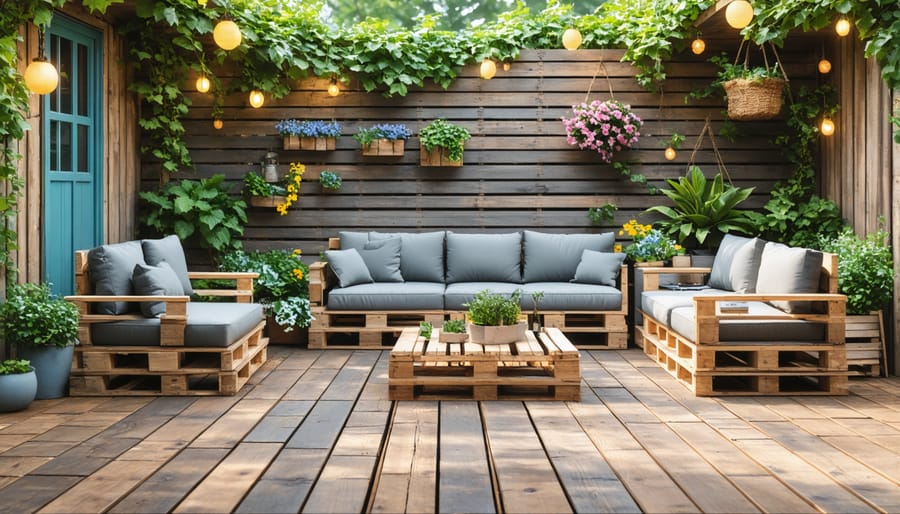
Transform your outdoor space affordably with pallet wood decking, a creative solution that pairs perfectly with upcycled outdoor furniture. This budget-friendly option has gained popularity among DIY enthusiasts for good reason – wooden pallets are often available for free from local businesses or at minimal cost from suppliers.
To create your pallet deck, start by collecting pallets marked with “HT” (heat-treated), which ensures they’re safe for outdoor use. You’ll need to dismantle them carefully, removing nails and sorting boards by condition. Sand each board thoroughly to prevent splinters and create a smooth surface. Apply multiple coats of exterior-grade wood sealer to protect against moisture and extend the life of your deck.
Installation begins with preparing a level ground surface and laying a weed barrier. Create a solid foundation using pressure-treated lumber for the frame and support beams. Arrange your pallet boards in your desired pattern, leaving small gaps between boards for water drainage. Secure each board with rust-resistant deck screws.
While pallet decking requires some elbow grease, the end result can be stunning. Regular maintenance, including annual sealing and periodic inspections for loose boards, will keep your deck looking great for years. This sustainable solution not only saves money but also gives discarded materials a second life in your outdoor space.
Pine Board Platforms
Pine board platforms offer an excellent budget-friendly solution for creating functional outdoor flooring spaces. Using pressure-treated pine boards, you can construct elevated platforms that are perfect for seating areas, container gardens, or transitional spaces between different yard levels.
To build a basic platform, start with pressure-treated 4×4 posts as ground supports, ensuring they’re set on concrete blocks or gravel beds for proper drainage. Layer 2×6 pressure-treated joists across these supports, spacing them 16 inches apart for optimal stability. Top these with 5/4 deck boards, which provide excellent durability while remaining cost-effective.
One of the greatest advantages of pine platforms is their versatility. You can create multiple smaller platforms at different heights to add visual interest to your yard, or build one large platform for a dedicated outdoor living space. The natural grain of pine adds warmth and character to your outdoor area, and when properly sealed, these platforms can last for many years.
For best results, seal your pine platform with an exterior-grade waterproof sealant immediately after construction. To extend its lifespan, reseal annually and ensure proper drainage by leaving small gaps between boards during installation. A well-built pine platform typically costs between $3-5 per square foot, making it one of the most economical outdoor flooring options available.
Remember to check local building codes before starting your project, as some areas require permits for raised platforms above certain heights.
Concrete-Based Solutions
Stamped Concrete Patterns
Stamped concrete offers an affordable way to mimic the look of expensive materials like natural stone, brick, or slate. With some basic DIY skills and the right tools, you can create stunning patterns that transform your outdoor space. Start by preparing a smooth concrete surface and choosing your desired pattern stamp. Popular options include herringbone, cobblestone, and wood plank designs.
To achieve professional-looking results, apply a color hardener to the concrete surface while it’s still wet. Then, use release agent powder to prevent the stamps from sticking. Position your stamps carefully, ensuring they align properly for a seamless pattern. Press the stamps firmly into the concrete using a tamping tool or by walking on them with special stamping shoes.
For best results, work in small sections and maintain consistent pressure. After the concrete has partially set, remove the stamps and clean off excess release agent. Once fully cured, seal the surface to protect your design and enhance its appearance.
Pro tip: Practice your stamping technique on a small test area first. This helps you get comfortable with the process and ensures you’re happy with the pattern before tackling the main area. While the initial cost of stamps and materials might seem high, it’s still significantly cheaper than installing natural stone or pavers, and the results can last for decades with proper maintenance.
Painted Concrete Surfaces
Transforming your existing concrete surfaces with paint or stains is one of the most cost-effective ways to refresh your outdoor space. This method works particularly well for patios, walkways, and pool decks, creating a custom look without the expense of new flooring materials.
Start by thoroughly cleaning the concrete surface with a pressure washer and allowing it to dry completely. Repair any cracks or damage with concrete patch compound before beginning your paint project. For best results, use concrete-specific paint or stain that’s designed to withstand outdoor conditions.
Consider creating patterns using stencils or tape for a more sophisticated look. Popular design choices include tile patterns, geometric shapes, or even faux stone effects. When combined with budget-friendly outdoor lighting, these painted patterns can create stunning visual interest, especially during evening gatherings.
To ensure longevity, apply a clear sealer after the paint has fully cured. This extra step protects your design from weather damage and foot traffic. With proper preparation and maintenance, painted concrete can last several years before needing a refresh.
Pro tip: Test your chosen colors in a small, inconspicuous area first to ensure you’re happy with the result. Remember that concrete paint tends to appear slightly darker when sealed, so consider going a shade lighter than your desired final color.
Recycled Material Options
Broken Concrete (Urbanite)
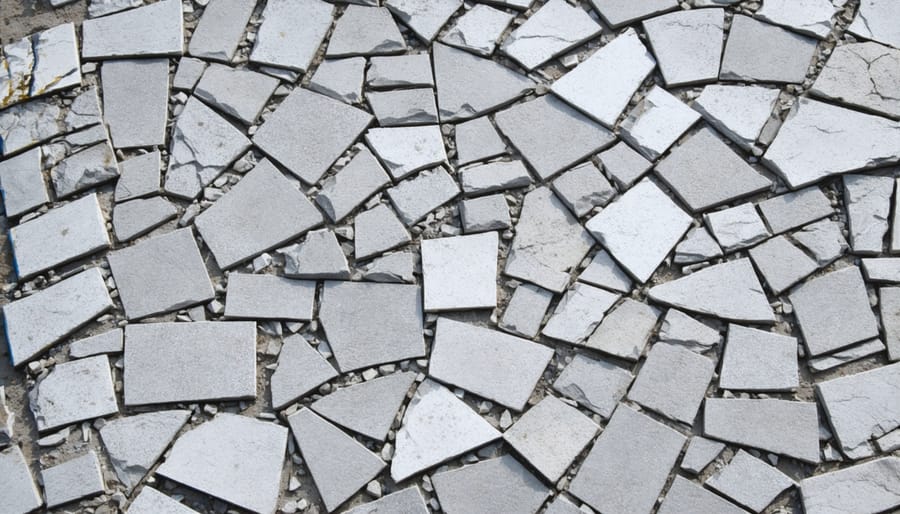
Transform your outdoor space with a unique and eco-friendly flooring solution using broken concrete, also known as urbanite. As one of the most innovative repurposed materials, broken concrete pieces can create stunning mosaic-style pathways and patios that combine durability with artistic flair.
Start by collecting broken concrete slabs from construction sites, renovation projects, or your own demolition work (always ask for permission first). Look for pieces ranging from 4 to 12 inches in size, with varying shapes to create interesting patterns. Clean the pieces thoroughly and remove any loose debris or metal components.
Prepare your installation area by excavating 4-6 inches of soil, then add a layer of compacted gravel for drainage. Arrange the concrete pieces like a puzzle, leaving about 1-2 inches between each piece. For a natural look, vary the heights slightly while ensuring the surfaces remain level enough for comfortable walking.
Fill the gaps between pieces with decomposed granite, sand, or plant ground covers for added visual interest. These fillers also help stabilize the pieces and prevent shifting. Consider mixing in recycled brick or natural stone pieces to add color variations and texture to your design.
This budget-friendly option not only saves money but also prevents construction waste from entering landfills. With proper installation, your urbanite pathway can last for decades while adding character to your outdoor space.
Recycled Brick Patterns
Recycled bricks offer a charming, time-worn aesthetic that can transform your outdoor space while keeping costs remarkably low. Salvaged bricks typically cost 50-75% less than new ones, making them an excellent choice for budget-conscious homeowners. You can source these materials from demolition sites, salvage yards, or online marketplaces.
Before installation, clean the bricks thoroughly and inspect each one for damage. Create a firm foundation by laying a 4-inch base of compacted gravel, followed by a 1-inch layer of sand. This preparation ensures your brick surface will remain level and stable for years to come.
For a classic look, try the running bond pattern, where bricks are laid in overlapping rows. The herringbone pattern offers a more intricate design and provides better structural integrity for driveways. For a simpler installation, the basket weave pattern works well for patios and walkways.
To prevent weeds and maintain stability, fill the joints between bricks with polymeric sand. This special sand hardens when wet, keeping your bricks firmly in place. For added character, mix and match different colored bricks or create borders with contrasting shades.
Remember to slope your brick surface slightly away from your house (about 1 inch per 8 feet) to ensure proper drainage. Regular maintenance involves occasional sweeping and periodic reapplication of polymeric sand to keep your recycled brick flooring looking beautiful for years.
Maintenance and Care Tips
Proper maintenance is key to extending the life of your outdoor flooring, making your budget-friendly choice an even smarter investment. For gravel paths, regular raking helps maintain an even surface and prevents weed growth. Consider installing landscape fabric underneath as part of your backyard storage solutions to minimize maintenance needs.
For painted concrete, apply a fresh coat of sealer annually to protect against weather damage and fading. Clean the surface monthly with a mild detergent solution and soft brush to prevent dirt buildup. Pallet decking requires annual wood sealer application and regular checks for loose boards or protruding nails.
Rubber mulch needs occasional raking to maintain its even distribution, while artificial grass should be brushed weekly to keep fibers upright. For stone pavers, sweep regularly and refill joint sand as needed. Address any shifting or settling promptly to prevent tripping hazards.
DIY concrete pavers benefit from quarterly pressure washing and annual sealing. Remove any weeds that grow between pavers immediately. For all outdoor flooring types, address spills and stains quickly, and keep surrounding drainage clear to prevent water damage.
Remember to inspect your outdoor flooring each spring for winter damage and make necessary repairs before issues worsen. This proactive approach helps maintain both safety and appearance while protecting your investment.
Creating an inviting outdoor space doesn’t have to break the bank. From versatile gravel and mulch solutions to creative pallet decking and painted concrete, there are numerous budget-friendly options to transform your outdoor flooring. Remember to consider your climate, maintenance requirements, and intended use when selecting materials. Whether you choose recycled materials, natural solutions, or DIY alternatives, proper installation and regular maintenance will ensure your chosen flooring lasts longer and maintains its appeal. By implementing these affordable ideas, you can create a beautiful outdoor living space that’s both functional and budget-conscious. Start with a smaller area to test your chosen solution, and don’t hesitate to mix different materials to create unique, personalized designs that reflect your style while keeping costs down.