
Build a Shed Foundation That Lasts (Using Earth-Friendly Methods)
Building a solid shed foundation transforms your backyard project from a potential headache into a lasting success story. Choose between three proven foundation types: gravel on grade, concrete blocks, or a permanent concrete slab – each offering unique benefits for different budgets and terrain types. Start by assessing your site’s drainage patterns and soil composition, as proper water management prevents costly structural issues down the line. A well-constructed foundation not only protects your investment but also ensures your shed remains level, dry, and stable for decades while meeting local building codes and environmental standards.
Create a foundation that works harmoniously with your landscape by selecting eco-friendly materials like recycled concrete aggregate or permeable gravel bases. This thoughtful approach manages water runoff naturally while providing the robust support your shed needs. Whether you’re storing garden tools or creating a workshop space, your foundation’s quality determines the ultimate success of your entire shed project.
Eco-Friendly Foundation Options
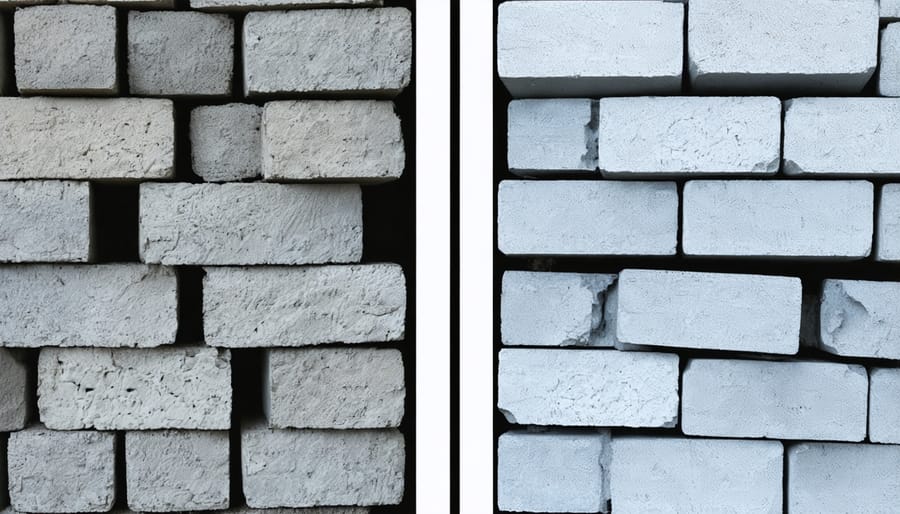
Recycled Concrete Block Foundations
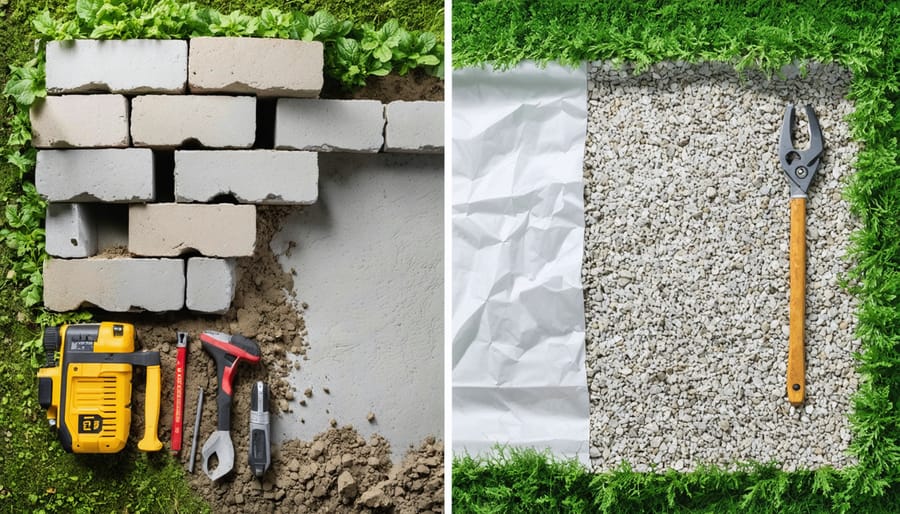
Repurposing concrete blocks for your shed foundation is both cost-effective and environmentally conscious. As one of the most versatile eco-friendly building materials, reclaimed concrete blocks offer excellent stability and durability. Start by sourcing blocks from local construction sites, demolition projects, or recycling centers – many contractors are happy to give these away.
Choose blocks that are still in good condition, without major cracks or crumbling edges. Standard sizes (8x8x16 inches) work best for most shed foundations. Place the blocks at each corner and at 4-6 foot intervals along the perimeter, ensuring they’re level with each other. Use a laser level or string line to maintain proper alignment.
Stack blocks two high if needed, using construction adhesive between layers for added stability. Remember to add gravel beneath each block for proper drainage and to prevent settling. This method not only saves money but also gives these materials a second life while providing a solid foundation for your shed.
Permeable Gravel Pad Foundations
A permeable gravel pad foundation offers an eco-friendly and cost-effective solution for your shed while promoting excellent drainage. Start by marking your shed’s footprint, adding an extra 12 inches on all sides for proper water dispersal. Remove topsoil to a depth of 4-6 inches, ensuring the ground is level and firmly compacted.
Line the excavated area with landscape fabric to prevent weed growth and soil mixing. Create a border using pressure-treated lumber or metal edging to contain the gravel. Pour a 2-inch layer of coarse gravel (#57 stone) and compact it thoroughly. Follow with a 2-inch layer of finer gravel (#8 or #9) for a smooth, stable surface.
This foundation type works particularly well in areas with good natural drainage and allows rainwater to filter naturally into the ground. As a bonus, you can often source materials locally, reducing transportation costs and environmental impact. For areas with frost concerns, consider digging deeper and adding a layer of crushed stone beneath the gravel for extra stability.
Remember to check local building codes, as some areas require specific gravel grades or installation methods for shed foundations.
Site Preparation and Planning
Natural Drainage Solutions
Proper water management around your shed foundation is crucial for its longevity. By implementing natural drainage solutions, you can work with your land’s natural contours to direct water away from your structure effectively.
Start by observing how water flows across your property during rainfall. Look for natural slopes and existing drainage patterns. Your shed foundation should be positioned to take advantage of these natural features while ensuring water moves away from the building.
Consider creating a gentle slope around the foundation that drops about one inch for every foot extending from the shed. This grade helps water naturally flow away from the structure. For areas with heavy rainfall, installing a French drain – a gravel-filled trench with a perforated pipe – can provide additional protection.
Don’t forget to plan for roof runoff. Installing gutters and downspouts that direct water at least 4-6 feet away from the foundation will prevent soil erosion and water pooling. You might also consider adding a layer of crushed stone around the perimeter to create a splash block area that helps disperse water more evenly.
If your property has areas where water naturally collects, consider incorporating these spots into your drainage plan by creating a rain garden or swale that can handle excess water while adding visual appeal to your landscape.
Soil Testing and Stabilization
Before laying your shed foundation, it’s crucial to understand what you’re building on. Start by conducting a simple soil test by digging a small hole about 12 inches deep in your planned location. After a rainstorm, check how quickly the water drains. If water remains for more than 24 hours, you’ll need to consider additional drainage solutions.
Clay soil typically requires more stabilization than sandy or loamy soil. To test your soil composition, take a handful of damp soil and try to form it into a ball. Sandy soil will crumble easily, while clay soil holds its shape. For an accurate assessment, you can also purchase an affordable soil testing kit from your local garden center.
Natural stabilization methods can help create a more solid base. Adding crushed stone or gravel helps with drainage and stability. For clay-heavy soils, mixing in some sand and organic matter can improve drainage. If you’re dealing with sandy soil, adding some clay-based material can help it hold together better.
Consider the slope of your land as well. A gentle slope away from the shed location (about 1 inch per 8 feet) is ideal for proper drainage. If needed, you can create this slope by adding or removing soil, ensuring water flows away from your foundation.
Remember to check local building codes, as some areas require specific soil compaction rates or professional soil testing before construction begins.
Step-by-Step Foundation Installation
Layout and Excavation
Before breaking ground, proper layout and marking are essential for your shed foundation’s success. Start by measuring and marking your shed’s footprint, adding an extra 12 inches on all sides to allow for proper drainage and maintenance access. Use brightly colored marking paint or string lines to create a clear outline of your work area.
For accurate corners, use the 3-4-5 triangle method: measure 3 feet along one side, 4 feet along the perpendicular side, and ensure the diagonal measures exactly 5 feet. This simple technique guarantees square corners for a professional result.
When it comes to excavation, less is often more. Remove only the necessary amount of topsoil – typically 4 to 6 inches – to reach stable ground. If you encounter soft spots, remove and replace them with compacted gravel. Save the removed topsoil for landscaping around your completed foundation.
Consider using ground protection mats during excavation to minimize damage to your yard. Keep excavated soil on a tarp to prevent grass damage and make cleanup easier. If working in wet conditions, create temporary drainage channels to direct water away from your work area.
For sloped sites, resist the urge to dig into the hillside. Instead, build up the low side with properly compacted fill material. This approach reduces soil disturbance and prevents potential erosion issues down the line.
Material Installation
Begin by laying a level bed of gravel across your marked area, ensuring even distribution for proper drainage. Spread the gravel to a depth of about 4 inches, using a rake to create a uniform surface. When selecting materials, consider using sustainable materials like recycled concrete aggregate or locally sourced stone to minimize environmental impact.
Next, place your concrete blocks or pavers at each corner and along the perimeter, spacing them approximately 4 feet apart. Use a level to check that each block sits perfectly flat, adjusting the gravel beneath as needed. For extra stability in softer ground, consider placing flat stones or paver bases underneath each block.
If you’re using treated lumber for your foundation frame, position the beams across your blocks in a grid pattern, ensuring they’re level and square. Secure the frame to the blocks using appropriate hardware or masonry anchors. For areas prone to moisture, install a vapor barrier between the ground and your foundation materials to prevent water damage and extend the life of your shed.
Remember to slope the foundation slightly away from the intended shed location (about 1 inch per 8 feet) to ensure proper water runoff and prevent pooling around your structure. This careful attention to drainage will protect both your shed and the surrounding environment.
Leveling and Final Checks
After setting your foundation blocks or piers, proper leveling is crucial for your shed’s long-term stability. Start by placing a long level across multiple blocks to check for any height variations. Adjust individual blocks by adding or removing gravel underneath until they’re perfectly level with each other. For maximum precision, use a laser level if you have access to one.
Check your measurements diagonally from corner to corner to ensure your foundation is perfectly square. Both diagonal measurements should be identical – if they’re not, adjust your blocks slightly until they match. This step is vital for preventing future structural issues and ensuring your shed doors will operate smoothly.
Once leveled, perform a final stability test by applying pressure to each foundation point. There should be no wobbling or sinking. If you notice any movement, compact the ground underneath further or add more gravel as needed. For eco-conscious builders, consider using recycled concrete aggregate instead of new gravel for adjustments.
Before proceeding with shed construction, verify that all foundation components are at least 6 inches above ground level to prevent moisture damage. Install a water-resistant barrier between your foundation blocks and the shed frame for added protection. During rainy weather, observe how water flows around your foundation to ensure proper drainage and make adjustments to the surrounding grade if necessary.
Remember to document your final measurements and take photos for future reference. This documentation will be invaluable if you need to make adjustments or repairs later.
Maintenance and Long-Term Care
Regular maintenance of your shed foundation is crucial for its longevity and environmental impact. Start by conducting seasonal inspections, particularly after heavy rains or extreme weather conditions. Check for signs of settling, cracking, or water pooling around the foundation – these early warning signs can prevent costly repairs down the line.
To protect your investment while staying environmentally conscious, consider implementing eco-friendly shed maintenance practices. Install proper drainage systems and maintain gutters to direct water away from the foundation. Consider adding native plants around the foundation’s perimeter to prevent soil erosion and manage water runoff naturally.
Keep the foundation area clear of debris, leaves, and vegetation that could trap moisture. If you notice small cracks, address them promptly using environmentally safe sealants. For gravel foundations, redistribute the stones annually to maintain proper leveling and drainage. Concrete foundations benefit from periodic resealing every 2-3 years to prevent moisture penetration.
Monitor the ground around your foundation for signs of animal burrowing, which can compromise structural integrity. Install environmentally safe deterrents if needed. During winter months, avoid using harsh de-icing chemicals near the foundation; instead, opt for sand or pet-safe alternatives.
Document all maintenance activities and create a regular schedule for inspections. This proactive approach not only extends the life of your foundation but also helps maintain the surrounding ecosystem. Remember that a well-maintained foundation contributes to both the longevity of your shed and the health of your local environment.
Building a proper shed foundation is not just about creating a stable base for your storage solution – it’s about making a lasting investment in your property while being mindful of environmental impact. By following the steps outlined in this guide, you’ll create a foundation that protects your shed from moisture damage, ensures proper drainage, and maintains structural integrity for years to come.
Remember that choosing the right materials and site preparation are crucial steps that shouldn’t be rushed. Whether you’ve opted for a concrete slab, gravel pad, or block foundation, each method has its own environmental benefits when properly executed. Using recycled materials, implementing proper drainage systems, and selecting locally sourced materials all contribute to a more sustainable approach.
The effort you put into building a solid foundation will pay off through reduced maintenance needs, extended shed life, and improved property value. Plus, by incorporating eco-friendly materials and proper water management, you’re not just building a foundation – you’re contributing to environmental stewardship while creating a practical storage solution that will serve you well for decades.