
Build A Shed That Laughs at Hurricanes: Smart Design Features That Actually Work
When hurricane-force winds threaten your property, a properly built hurricane-resistant shed becomes your frontline defense against nature’s fury. Built with reinforced trusses, impact-resistant materials, and strategic engineering, these specialized storage structures can withstand winds up to 160 mph while protecting valuable equipment and belongings from devastating storms.\n\nUnlike standard sheds, hurricane-resistant models incorporate critical features like enhanced foundation anchoring, heavy-duty steel strapping, and reinforced door systems that work together to create a fortress-like structure. Recent advancements in building materials and design techniques have made it possible to construct sheds that not only meet strict coastal building codes but also maintain their aesthetic appeal and functionality.\n\nThe investment in a hurricane-resistant shed pays dividends beyond storm protection. These structures typically last longer than conventional sheds, require less maintenance, and can significantly reduce insurance costs in storm-prone regions. Whether you’re protecting expensive lawn equipment, storing emergency supplies, or safeguarding family heirlooms, a hurricane-resistant shed provides peace of mind when severe weather approaches.\n\nThis comprehensive guide will explore the essential elements of hurricane-resistant shed construction, from foundation requirements to roofing specifications, helping you make informed decisions about protecting your outdoor storage investment.\n\n\n
Foundation and Anchoring Systems
\n\n
Concrete Slab vs. Elevated Foundations
\n\nWhen it comes to hurricane-resistant sheds, your foundation choice plays a crucial role in protecting your investment. Proper ground preparation and foundation selection can mean the difference between a shed that stays put during storms and one that becomes a hazard.\n\nConcrete slabs offer exceptional stability and are often preferred in hurricane-prone areas. They provide a solid, level base that’s nearly impossible to lift during high winds. The weight of the concrete helps anchor your shed, while the smooth surface ensures proper drainage. However, concrete slabs can be more expensive initially and require professional installation in most cases.\n\nElevated foundations, typically using concrete blocks or post-and-beam construction, have their own advantages. They allow for better airflow underneath the shed, reducing moisture-related issues and rot. This design also makes it easier to level the shed on uneven terrain and can help prevent flooding damage. The main drawback is that elevated foundations may require additional anchoring systems to achieve the same wind resistance as concrete slabs.\n\nFor maximum hurricane resistance, consider combining your chosen foundation with hurricane straps and ground anchors. Remember that local building codes often specify minimum requirements for shed foundations in storm-prone areas, so always check with your municipality before making a final decision.\n\n
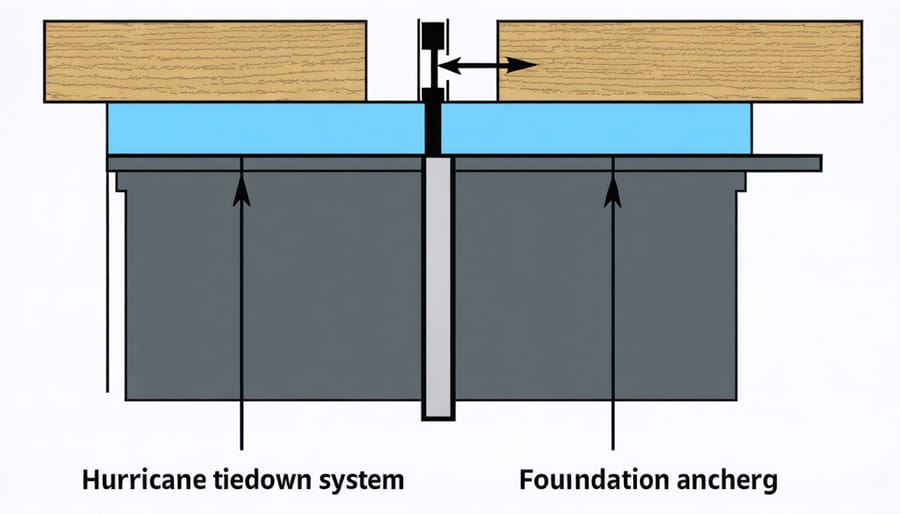
Advanced Anchoring Techniques
\n\nProper anchoring is your shed’s first line of defense against hurricane-force winds. Start with heavy-duty anchor brackets at each corner, using galvanized steel brackets rated for high wind conditions. Install additional brackets at 4-foot intervals along the base of your shed for maximum stability.\n\nFor concrete foundations, use 1/2-inch wedge anchors that penetrate at least 3.5 inches into the concrete. If you’re anchoring to the ground, opt for auger-style anchors that extend at least 30 inches deep, with a minimum diameter of 4 inches. For added security, install cross-bracing between anchors underneath your shed floor.\n\nConsider using hurricane tie-down straps that connect your roof trusses to the wall studs, creating a continuous load path from roof to foundation. These straps should be rated for at least 1,000 pounds of uplift resistance each. Install them on both sides of each truss for optimal protection.\n\nPro tip: Don’t forget about the threshold! Install L-shaped brackets where your shed’s floor frame meets the foundation, spacing them every 16 inches. This prevents the entire structure from lifting during strong wind events.\n\nRemember to inspect all anchoring points annually and before any forecasted storms. Replace any hardware showing signs of rust or wear, as compromised anchors can fail when you need them most.\n\n
 \n
\n\n\n\n
Structural Reinforcement Strategies
\n\n
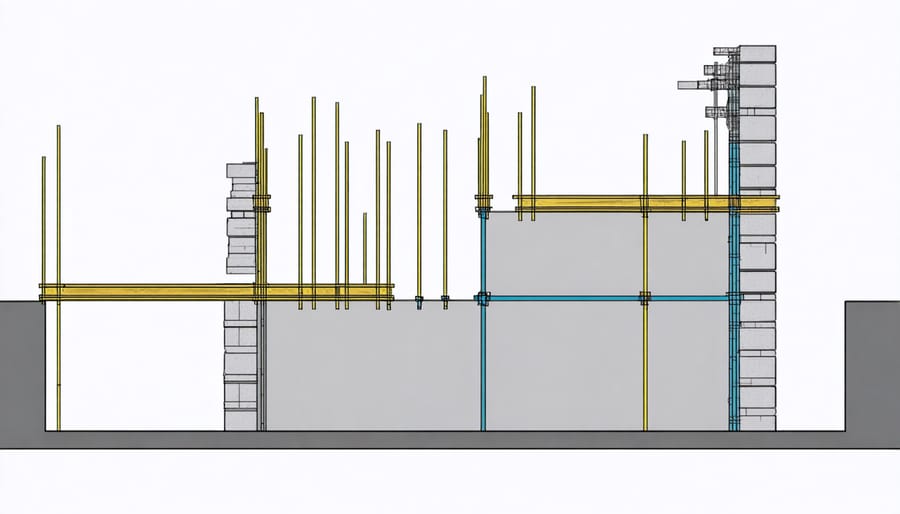
Wall Construction and Bracing
\n\nStrong walls are your shed’s first line of defense against hurricane-force winds. Start with pressure-treated 2×4 studs spaced 16 inches on center, creating a robust frame that resists both wind and moisture damage. Double up your top plates and use hurricane clips or straps to connect wall studs to both the bottom plate and roof structure, creating a continuous load path from roof to foundation.\n\nExterior wall sheathing should be at least 7/16-inch thick oriented strand board (OSB) or plywood, installed with 8d nails spaced 6 inches apart at panel edges and 12 inches in the field. Consider using impact-resistant fiber cement siding over the sheathing for added protection against flying debris.\n\nDiagonal bracing is crucial for lateral stability. Install metal strapping or 1×4 wooden braces at 45-degree angles in each corner of your walls. For extra reinforcement, use structural sheathing panels with built-in bracing capabilities. Remember to seal all joints and connections with quality construction adhesive for added strength.\n\nWindows and doors represent potential weak points, so frame these openings with double studs (king studs and trimmer studs) and install proper headers. Use metal hurricane ties at each connection point between framing members.\n\nFor interior wall covering, consider using 1/2-inch plywood instead of drywall. This provides additional structural support and creates a solid surface for mounting storage solutions. Apply a moisture-resistant barrier between your exterior sheathing and siding to prevent water infiltration during storms.\n\nOne homeowner in Florida reported their shed withstanding 120 mph winds after implementing these wall construction techniques during a recent hurricane season.\n\n
 \n
\n\n\n
Roof Design and Support
\n\nA robust roof is your shed’s first line of defense against hurricane-force winds. Start with a weather-resistant roofing design that features a hip or multiple-slope configuration, as these shapes better deflect wind forces compared to traditional gable roofs. Aim for a roof pitch between 4:12 and 6:12 to balance wind resistance with proper water drainage.\n\nHurricane straps and ties are essential components that secure your roof to the walls. Install heavy-duty galvanized steel hurricane clips at each rafter-to-wall connection, and use additional straps to reinforce the connections between trusses or rafters. Double up on these connections in corner areas where wind forces are typically strongest.\n\nFor roofing materials, consider impact-resistant shingles rated for high-wind zones or metal roofing with concealed fasteners. These materials should be installed with extra fasteners at the edges and corners where uplift forces are greatest. Remember to use ring-shank nails rather than smooth nails for better holding power.\n\nDon’t forget about proper roof ventilation – it helps equalize pressure during storms and prevents moisture buildup. Install storm-resistant vents that include internal baffles to block water intrusion while maintaining airflow. For added protection, consider installing a secondary water barrier beneath your primary roofing material.\n\nComplete your roof system with sturdy fascia boards and properly installed gutters designed to handle heavy rainfall. Use gutter straps every two feet to ensure they stay in place during high winds, and consider installing gutter guards to prevent debris buildup that could lead to water damage during storms.\n\n\n
Door and Window Protection
\n\n
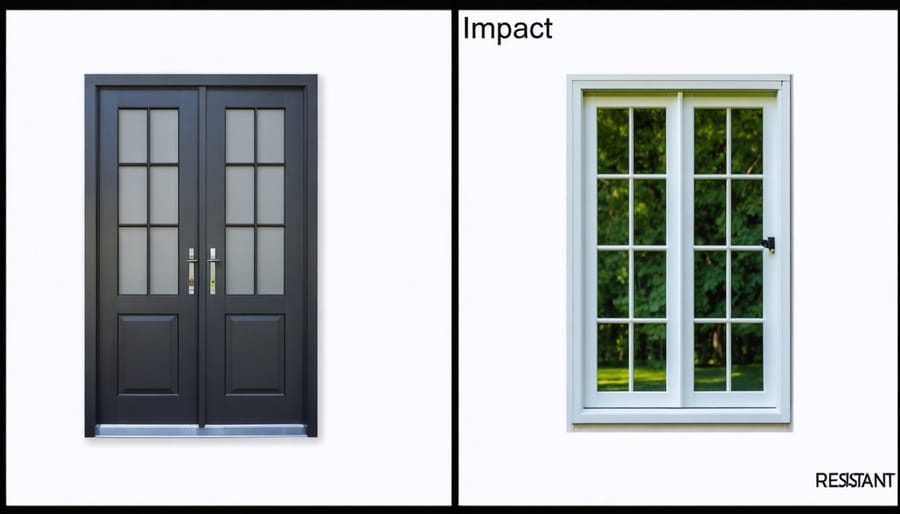
Impact-Resistant Features
\n\nWhen it comes to protecting your shed from hurricane-force winds, storm-proof doors and windows are essential weatherproofing techniques. Start with impact-resistant doors made from heavy-duty steel or reinforced fiberglass, featuring at least three heavy-duty hinges and a multi-point locking system. These doors should be rated for wind speeds of up to 150 mph and include weatherstripping to prevent water infiltration.\n\nFor windows, opt for impact-resistant glass or polycarbonate panels that meet local building codes for hurricane zones. These windows typically feature a layer of shatter-resistant film between two panes of tempered glass, preventing breakthrough even when struck by flying debris. Consider installing removable storm shutters or permanent hurricane panels for additional protection.\n\nDon’t forget about door and window frames – they should be reinforced with steel channels and secured with corrosion-resistant fasteners. Installing door braces and window mullions adds extra stability during extreme weather conditions. Remember to regularly check and maintain these features, ensuring all hardware remains tight and weatherstripping stays intact.\n\n
 \n
\n\n\n
Additional Protection Systems
\n\nBeyond the basic structural elements, adding protective systems can significantly enhance your shed’s hurricane resistance. Storm shutters are a crucial addition, offering an extra layer of defense for windows and doors. Consider installing rolling shutters or removable storm panels that you can quickly deploy when severe weather approaches.\n\nDoor reinforcement systems, such as heavy-duty deadbolts and multi-point locking mechanisms, help prevent wind from forcing entry points open. Installing impact-resistant window films or protective screens provides year-round protection without the need for deployment before storms.\n\nFor added security, consider installing roof straps or hurricane clips that wrap over the roof edge and connect to the walls, creating a continuous load path. Storm-rated braces for garage-style doors are also worth considering if your shed has larger openings.\n\nDon’t overlook smaller details like weather stripping around doors and windows to prevent water intrusion. Finally, ensure all vents have proper covers that can be easily secured before a storm while still allowing adequate ventilation during normal conditions.\n\n\n
Material Selection Guide
\n\n
Weather-Resistant Materials
\n\nWhen building a hurricane-resistant shed, choosing the right materials is crucial for long-term durability and protection. Start with pressure-treated lumber that’s been specially processed to resist moisture, rot, and insect damage. This type of wood is particularly effective for the frame and foundation, offering superior strength against high winds and heavy rain.\n\nFor the exterior walls, consider fiber cement siding, which combines the aesthetic appeal of wood with exceptional durability. This material stands up remarkably well to flying debris and doesn’t warp or crack under extreme weather conditions. Metal siding is another excellent choice, particularly corrugated steel panels that can withstand intense wind pressure while providing durable waterproofing solutions.\n\nThe roofing material deserves special attention, as it’s your shed’s first line of defense against storms. Impact-resistant metal roofing or specialized hurricane shingles rated for high winds are your best options. These materials are designed to interlock securely, reducing the risk of blow-offs during severe weather.\n\nDon’t forget about hardware and fasteners – use hot-dipped galvanized or stainless steel components that resist rust and corrosion. Hurricane ties, straps, and clips should be similarly corrosion-resistant to maintain their strength over time. For added protection, consider using water-resistant sealants and barriers around all joints and connections.\n\n
Hardware and Fasteners
\n\nWhen it comes to making your shed hurricane-resistant, the right hardware and fasteners are absolutely crucial. Start with heavy-duty hinges that feature a minimum thickness of 1/8 inch and at least four mounting holes per side. For doors, install three hinges per door panel and use hurricane-rated door latches with multiple locking points.\n\nAll fasteners should be corrosion-resistant, with hot-dipped galvanized or stainless steel being the best choices. Use ring-shank nails rather than smooth nails, as they provide superior withdrawal resistance. For critical connections, particularly in the roof and wall joints, install hurricane ties and structural screws rated for high-wind areas.\n\nWhen securing your roof panels, opt for #10 screws with neoprene washers, placing them every 4 inches along the edges and 6 inches in the field. Double up on washers to prevent water intrusion. For wall connections, use 3/8-inch lag screws or bolts to anchor the structure to its foundation, spacing them no more than 16 inches apart.\n\nDon’t forget about the small details – install metal straps at all rafter-to-wall connections and use joist hangers wherever beams meet. Remember to check and tighten all hardware annually, especially before hurricane season begins, as loose connections can compromise your shed’s structural integrity during a storm.\n\n\nBuilding a hurricane-resistant shed is an investment in peace of mind and property protection that pays dividends during severe weather events. By implementing the construction techniques and material choices we’ve discussed, you can create a storage solution that stands strong against nature’s fury while protecting your valuable belongings.\n\nRemember that success lies in the details – from choosing the right foundation and reinforced framing to selecting appropriate roofing materials and proper anchoring systems. Each element works together to create a robust structure that can withstand high winds and flying debris. Don’t overlook the importance of regular maintenance and pre-storm preparations, as these practices help ensure your shed performs as intended when severe weather strikes.\n\nWhile the initial cost of building a hurricane-resistant shed may be higher than standard construction, consider it an essential investment in protecting your property and possessions. The peace of mind knowing your storage solution can weather the storm is invaluable, especially in hurricane-prone regions.\n\nTake time to carefully plan your project, obtain necessary permits, and consider working with experienced professionals if you’re unsure about any aspect of the construction. By following these guidelines and best practices, you’ll create a durable, reliable storage space that serves your needs while standing strong against hurricane-force winds and rain.\n\nStay proactive in your maintenance routine and always be prepared for storm season. Your hurricane-resistant shed will be ready when you need it most.