
How to Install Metal Roofing on a Shed
Metal roofing is popular for sheds due to its durability, longevity, and low maintenance requirements. Whether constructing a new shed or replacing the existing roof, installing a metal roof can enhance the shed’s aesthetics and protect it from the elements.
This article will guide you through installing metal roofing on a shed, ensuring a successful and professional-looking outcome.
Materials and Tools
To install metal roofing panels on a shed, gather these necessary materials and tools: metal roofing panels, roofing screws, drill with a screwdriver bit, metal snips, tape measure, chalk line, safety goggles, gloves, and a ladder. It’s crucial to have accurate measurements of your shed’s roof to purchase the appropriate amount of metal roof panels.
With these essentials, you’ll be well-prepared to install durable and stylish metal roofing on your shed, ensuring long-lasting protection and enhanced aesthetics.
Preparing the Shed Roof
Properly preparing the roof deck is essential before installing a metal roof on your shed. Follow these steps to ensure a smooth and successful installation:
Remove Existing Roofing Material
When installing a metal roof on your shed, removing any existing roofing material, such as shingles or asphalt, is essential. Carefully dismantle and dispose of the old roof, ensuring proper debris disposal. Removing the previous roofing material creates a clean and stable surface for installing your new metal roof.
Whether you have a gable roof or any other roof style, starting with a clean slate will contribute to a successful and long-lasting metal roof installation on your shed.
Clean and Inspect
Before installing a metal roof on your shed, it’s crucial to clean the roof surface thoroughly. Remove any dirt, moss, or debris that may be present. Take the time to inspect the roof for any damaged or rotten sections. If you find any such areas, replacing or repairing them before proceeding with the installation is essential.
Cleaning and inspecting the roof ensures a solid foundation for your metal roof, promoting longevity and durability. By addressing any existing issues, you can avoid future problems and enjoy the benefits of a well-maintained metal roof on your shed.
Check for Protrusions
Before installing a metal roof on your shed, it’s essential to identify any vents, skylights, or other protrusions on the roof. These areas require special attention during installation to ensure a proper fit and a watertight seal. Please take note of these protrusions and plan accordingly, making necessary adjustments to accommodate them.
By addressing these areas carefully, you can ensure seamless integration of the metal roof, preventing any potential leaks or damage. Paying attention to these details will result in a secure and professional installation of your metal roof on the shed.
Secure the Roof Deck
Before you install the metal panels, it is crucial to ensure the roof deck is secure. Take the time to inspect the deck for any loose boards or fasteners. Tighten them securely to provide a stable and solid foundation for the new roof. A secure roof deck is essential for the metal panels’ proper installation and long-term durability. By addressing any potential issues and securing the deck beforehand, you can have peace of mind knowing that your new metal roof anchors securely to a reliable structure.
You can install your metal roof once the roof deck is clean, dry, and in good condition. Remember to follow the manufacturer’s instructions and use appropriate materials, such as self-tapping screws with rubber washers. It helps to attach the roofing metal panels to the roof deck securely. With proper preparation, your tin roof or metal panel installation will be smooth and effective, providing long-lasting protection and durability for your shed.
Installing Underlayment
To ensure optimal protection and insulation, installing underlayment is crucial before placing a metal roof directly on your shed’s roof. Follow these steps:
Choose the Right Underlayment
Select a suitable underlayment material depending on your shed’s needs and local climate. Options include a moisture barrier or felt paper.
Prepare the Roof Surface
If your shed has existing asphalt shingles, remove them carefully. Clean the roof surface, removing any debris and ensuring it is dry.
Install the Underlayment
Roll out the underlayment across the entire roof surface, starting at the bottom edge of the gable roof. Secure it with roofing nails or staples, making sure to overlap each row appropriately.
Prevent Water Infiltration
Ensure that the underlayment overlaps correctly to eliminate any gaps or seams. Further, this will prevent water from infiltrating and damaging the roofing materials. Use a rubber washer with roofing nails for added protection against moisture.
Properly installing underlayment creates a reliable barrier that guards against moisture buildup and enhances insulation. This crucial step sets the foundation for successfully installing a metal roof on your shed.
Measuring and Cutting the Metal Roofing Panels
Accurate measurements and precise cutting are vital for seamlessly installing metal roofing panels on your shed. Follow these steps:
Measure the Roof
Use a tape measure to determine the dimensions of your shed’s metal roofs. Measure the length and width to ensure the metal roofing panels fit correctly.
Mark the Panels
Mark the panels according to the measurements using a chalk line, accounting for the required overlap between panels. Moreover, this ensures a watertight seal and proper alignment.
Cut the Panels
Carefully cut the panels to the desired length with metal snips or a cutting blade. Ensure the edges are clean and straight for a professional finish.
You can achieve a precise fit and seamless appearance by accurately measuring and cutting the metal roofing panels. Taking the time to measure carefully and use the appropriate tools for cutting will result in a well-installed metal roof that enhances the durability and aesthetics of your shed.
Installing the Metal Roofing Panels
To install metal roofing panels on your shed, follow these steps:
Start at a Corner
Begin at one corner of the roof and position the first metal roofing panel, ensuring it aligns with the edge.
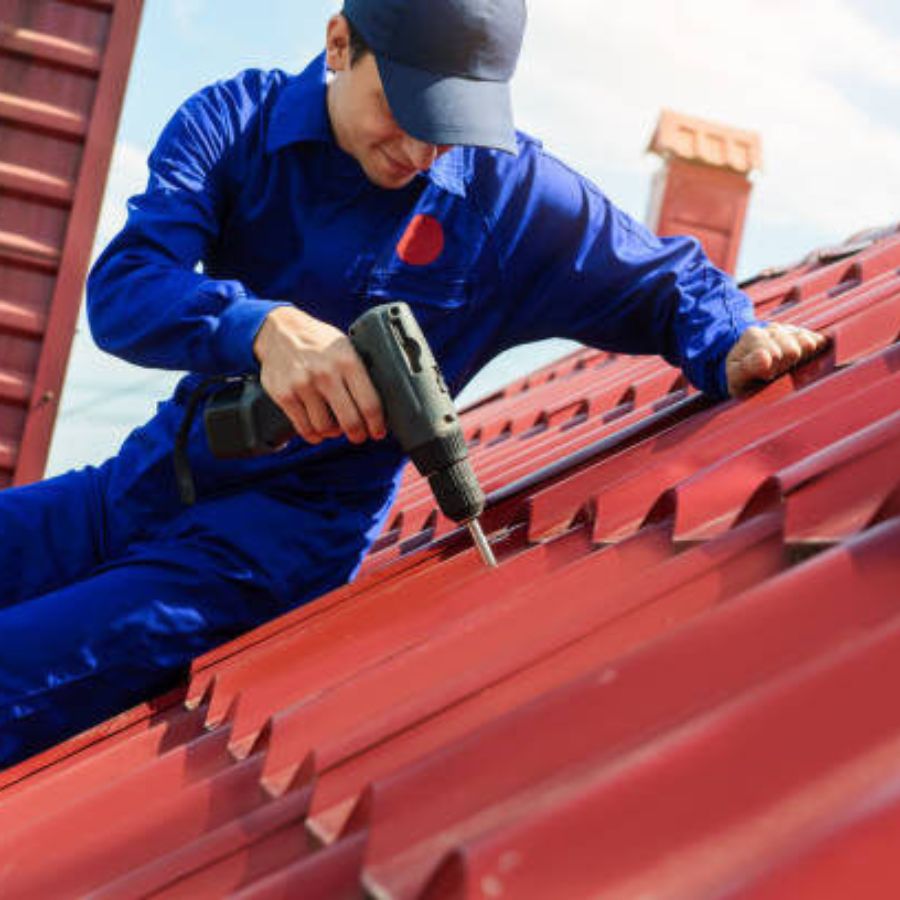
Secure the Panel
Use roofing screws to secure the panel in place. Place the screws in the flat section of the panel to maintain a smooth surface and avoid the raised ridges.
Continue Installation
Proceed to install the remaining panels, overlapping each per the manufacturer’s instructions. Besides, this ensures proper water drainage and prevents leaks.
You can confidently install the metal roofing panels on your shed by starting from a corner, aligning the panels, and securely fastening them with roofing screws. Follow the manufacturer’s guidelines for proper overlapping, resulting in a sturdy, attractive metal roof that provides long-lasting protection.
Cutting and Installing Flashing
To safeguard the junctions of your shed’s metal roof with walls or structures:
- install flashing
- cut the flashing material to fit the edges and corners of the shed precisely
- secure it using screws or nails, ensuring it overlaps the metal roofing panels for a watertight seal
This step is crucial in preventing water infiltration and maintaining the integrity of your metal roof.
Properly installing flashing protects your shed’s metal roof, enhancing its durability and longevity. Follow these steps to ensure a secure and weather-resistant metal roofing installation on your shed.
Finishing Touches and Safety Precautions
After installing the metal roofing panels and flashing on your shed, performing some finishing touches and safety checks is crucial. Take the following steps:
Tighten Screws
Check for any loose screws on the metal roofing panels or flashing. Tighten them securely to ensure the stability of your roof.
Inspect the Roof
Inspect the entire roof thoroughly to ensure a professional and secure installation. Look for gaps, misalignments, or potential issues requiring attention.
Prioritize Safety
Throughout the installation process, prioritize safety by using a stable ladder and wearing safety goggles and gloves. These precautions protect you from potential hazards.
By performing these finishing touches and safety checks, you ensure a well-installed and secure metal roof for your shed. Take the time to tighten screws, inspect the roof, and prioritize your safety to enjoy the benefits of a durable and long-lasting metal roof.
Conclusion
Installing metal roofing on a shed is a straightforward process that can significantly enhance its appearance and protection. Following the step-by-step instructions outlined in this article, you can complete the installation and enjoy the benefits of a durable and long-lasting metal roof. Whether you are a DIY enthusiast or a homeowner looking to improve your shed, metal roofing is an excellent choice that combines functionality and aesthetics. With suitable materials, tools, and careful execution, your shed will have a stylish and weather-resistant roof for years.
Looking for a storage sheds?
Browse our full range of storage sheds from authorized dealer brands. Free shipping to the continental US.