Perfect Your Shed Door Hinges: Pro Installation Tips That Last

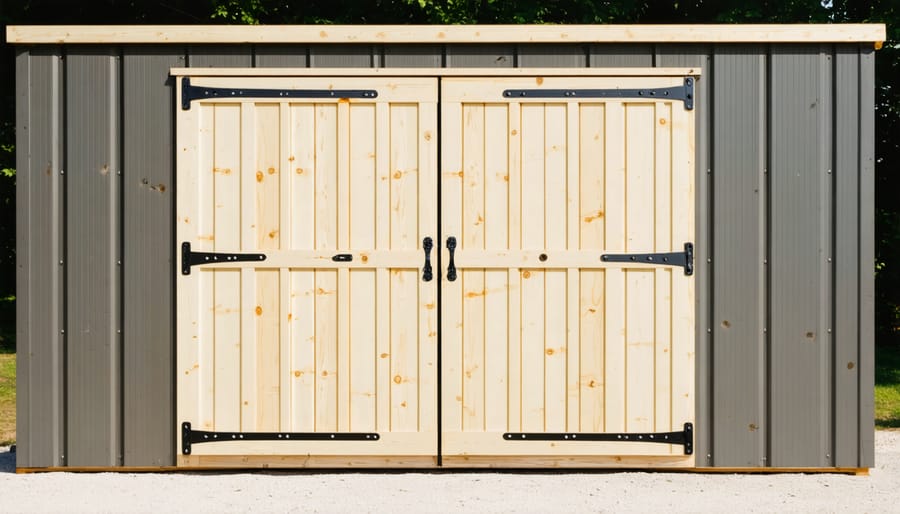
Transform your shed’s security and functionality with precision-engineered hinge installation that stands the test of time. Starting with strong door framing, select heavy-duty exterior hinges rated for your door’s weight and size. Position three hinges per door – top, middle, and bottom – to distribute weight evenly and prevent sagging over time. Pre-drill pilot holes at precise measurements to ensure perfect alignment and prevent wood splitting during installation.
Modern shed security demands more than just basic hardware – strategic hinge placement combined with proper installation technique creates a fortress-like entry point that protects valuable tools and equipment. Whether you’re upgrading existing hardware or installing new doors, proper hinge installation forms the foundation of smooth operation and lasting durability. Follow manufacturer-specified mounting patterns and use corrosion-resistant fasteners to guarantee years of trouble-free access while maintaining your shed’s structural integrity.
Choosing the Right Hinges for Your Shed Door
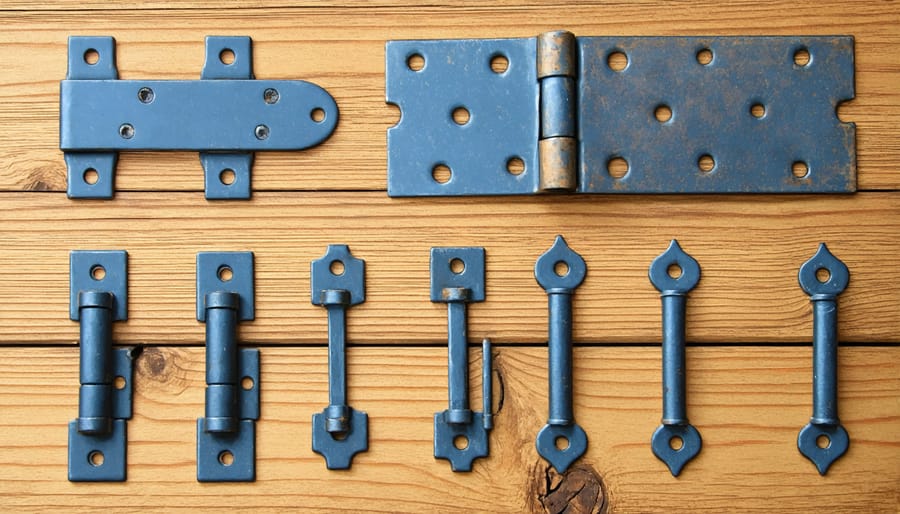
Types of Shed Door Hinges
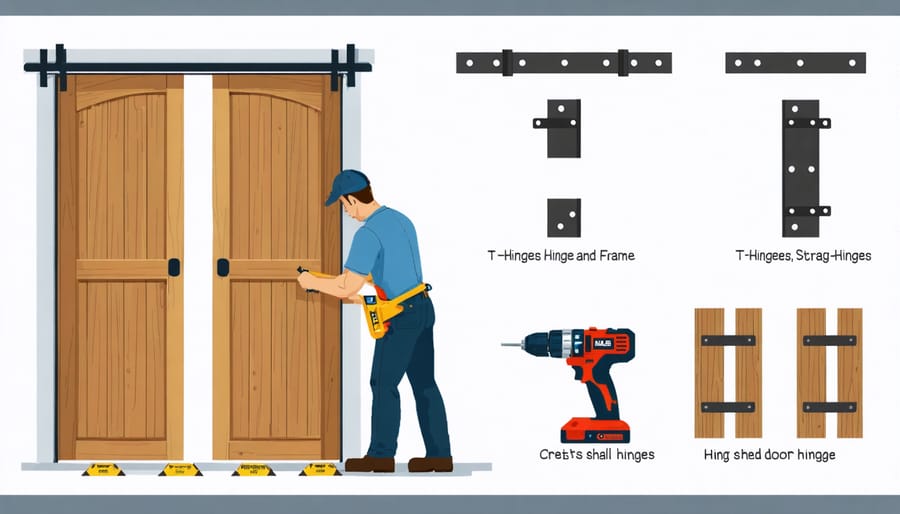
When selecting hinges for your shed door, you’ll encounter several common types, each with its own advantages. T-hinges are among the most popular choices, offering excellent support and a classic barn-door look. These hinges feature a long strap that extends across the door’s width, providing robust support for heavier doors.
Strap hinges are similar to T-hinges but come in various decorative styles, making them perfect if you’re aiming for a more rustic or ornamental appearance. They’re particularly effective for wider doors, as the long strap helps distribute weight evenly across the door’s surface.
Butt hinges, which are commonly used in residential doors, can work well for lighter shed doors. They’re less visible than other options and provide a clean, modern look. However, they typically offer less support than T-hinges or strap hinges.
For larger or heavier doors, consider heavy-duty hinges designed specifically for outdoor use. These hinges often feature thicker metal construction and weather-resistant finishes, ensuring your shed door operates smoothly for years to come. Many heavy-duty options also include ball bearings for smoother operation and reduced wear.

Material Considerations
When selecting hinges for your shed door, material choice plays a crucial role in ensuring longevity and performance. Galvanized steel hinges are a popular choice, offering excellent durability and the ability to protect against moisture damage. These hinges feature a protective zinc coating that prevents rust and corrosion, making them ideal for outdoor use in most climates.
For coastal areas or regions with high humidity, stainless steel hinges provide superior rust resistance and maintain their appearance over time. While they come at a higher price point, their exceptional durability and minimal maintenance requirements often justify the investment.
Zinc-plated hinges offer a budget-friendly alternative, suitable for areas with moderate weather conditions. While they provide decent protection against the elements, they may require more frequent maintenance and eventual replacement compared to galvanized or stainless steel options.
When choosing your hinge material, consider your local climate, budget, and how frequently you’ll use the shed door. Remember that investing in quality hardware initially can save you time and money on replacements down the road.
Essential Tools and Materials
Before starting your shed door hinge installation project, gather all the necessary tools and materials. Having everything ready will make the process smoother and help you avoid interruptions.
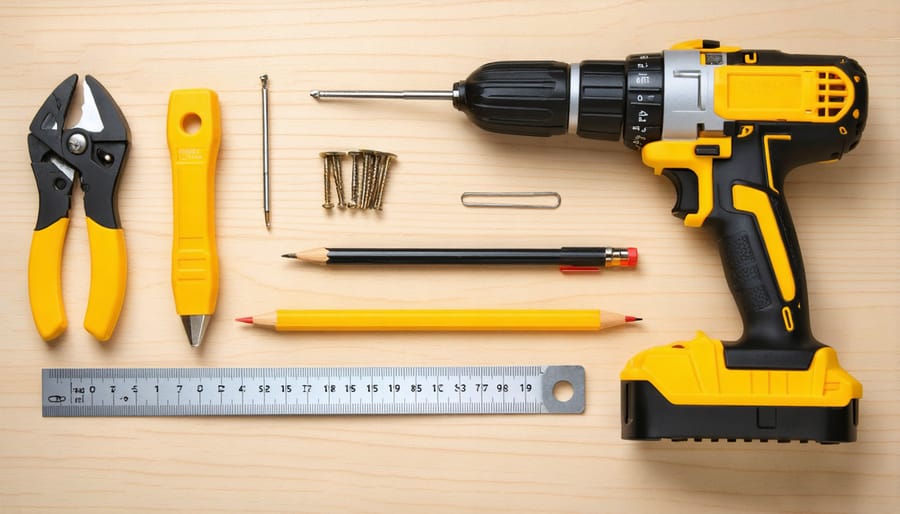
Essential Tools:
– Cordless drill or screwdriver
– Drill bits (appropriate for your screw size)
– Measuring tape
– Pencil
– Level
– Square
– Utility knife
– Safety glasses
– Work gloves
– Chisel (if mortising is needed)
– Hammer
– Center punch or nail set
– Wood shims
Required Materials:
– Door hinges (2-3 pairs depending on door size and weight)
– Mounting screws (typically included with hinges)
– Weather stripping (optional but recommended)
– Wood filler (if needed for repairs)
– Exterior-grade wood screws (backup option)
– Paint or wood finish (to match your shed)
Pro Tips:
– Choose exterior-grade hinges rated for your door’s weight
– Buy an extra hinge set as backup
– Select stainless steel or galvanized hardware for rust resistance
– Keep spare mounting screws handy
– Have a small brush ready for cleanup
Optional but Helpful:
– Door lift/support tool
– Pilot hole guide
– Cardboard template for marking screw holes
– Assistant to help hold the door during installation
Having these tools and materials organized before you begin will ensure a successful installation and save you time-consuming trips to the hardware store.

Step-by-Step Installation Process
Marking and Measuring
Begin by placing your hinge against the door frame and marking the top and bottom positions where the hinges will sit. For most shed doors, you’ll want to position the top hinge about 7 inches from the top edge and the bottom hinge 7 inches from the bottom. If using three hinges, place the middle one exactly halfway between the other two.
Using a carpenter’s square and pencil, draw horizontal lines at your marked positions across both the door and frame. These lines ensure your hinges will be perfectly level. Next, hold each hinge in place and trace around its outline. Mark the screw hole positions carefully – this is crucial for proper alignment.
For extra precision, use a combination square to measure the distance from the door edge to where each hinge will sit. Make these measurements identical for all hinges to ensure your door hangs straight. Double-check all measurements before moving on to drilling, as accurate marking is the foundation of a properly functioning door.
Pro tip: Use a utility knife to score your pencil lines lightly. This prevents wood splintering when you start drilling and creates cleaner mortises if you’re recessing the hinges.

Mounting the Hinges
Before securing your hinges, double-check that your door fits properly in the frame with even gaps on all sides. Start by marking your hinge positions on both the door and frame, typically placing three hinges with equal spacing for optimal weight distribution. Just as with secure corner installation, precision is key here.
Begin by creating pilot holes using a drill bit slightly smaller than your hinge screws. This prevents wood splitting and ensures proper alignment. Hold each hinge in position and mark your screw locations with a pencil. For the door side, place the hinge leaf flush with the door edge, ensuring it doesn’t protrude.
Start with the middle hinge, securing it to the door first with just two screws. This allows for minor adjustments if needed. Once satisfied with the alignment, add the remaining screws. Follow the same process for the top and bottom hinges, checking that the door swings freely after each step.
When mounting to the frame, use a temporary support block under the door to maintain proper height. Secure each frame-side hinge leaf using the same pilot hole method. Test the door’s movement frequently during installation, making any necessary adjustments before driving in all screws completely. Remember to avoid overtightening, as this can bind the hinges and affect door operation.
Final Adjustments
After installing your shed door hinges, take time to make these crucial final adjustments to ensure optimal performance. Start by testing the door’s swing – it should move smoothly without scraping or sticking. If you notice any resistance, loosen the hinge screws slightly, adjust the door position, and retighten.
Check that your door sits level using a spirit level. If it’s slightly off, insert thin shims behind the appropriate hinge plates. For doors that don’t properly latch, adjust the strike plate position or add an extra washer behind the problematic hinge to shift the door’s alignment.
Listen for any squeaking and apply a drop of penetrating oil to each hinge pin. If the door sags over time, tighten all screws and ensure they’re gripping solid wood. For heavier doors, consider adding a third hinge in the middle for extra support.
Finally, open and close the door several times to confirm smooth operation. Make small adjustments as needed until you achieve perfect alignment. Remember to periodically check and tighten the hinge screws as part of your regular shed maintenance routine.
Maintenance and Troubleshooting
Regular maintenance and prompt attention to issues will ensure your shed door hinges perform optimally for years to come. Start by inspecting your hinges every six months, checking for signs of rust, loose screws, or squeaking. A quick preventive cleaning with a dry cloth, followed by applying a light coat of silicone-based lubricant, can prevent most common problems.
If you notice squeaking, don’t reach for WD-40 right away. While it provides temporary relief, it can actually attract dust and create more issues long-term. Instead, use a dry lubricant or white lithium grease, which offers lasting protection without attracting debris.
Loose hinges are another common issue that’s easy to fix. First, check if the screws simply need tightening. If the screw holes have become stripped or enlarged, try inserting wooden golf tees or dowels with wood glue into the holes, let them dry completely, then reinstall the screws.
For rusty hinges, remove surface rust with fine-grit sandpaper and apply a rust converter before repainting. In coastal areas or regions with high humidity, consider using a rust-inhibiting spray every few months to protect your hinges.
If your door starts dragging or doesn’t close properly, check the hinge alignment. Sometimes, seasonal changes can cause wood to expand or contract, affecting the door’s fit. Adjusting the hinge screws slightly can often resolve these alignment issues.
Remember, prevention is better than cure. Keep your shed’s gutters clean and ensure proper drainage around the structure to minimize moisture exposure to your door and hinges. For added protection, consider installing a small awning or weather strip above the door.
Installing shed door hinges properly is crucial for the long-term functionality and security of your storage space. By following the correct installation steps, selecting appropriate hinges, and using the right tools, you can ensure your shed doors operate smoothly for years to come. Remember to always pre-drill your holes, use appropriate screws, and take time to align your hinges correctly. Regular maintenance, including periodic tightening of screws and lubricating moving parts, will extend the life of your hinges and prevent future issues. With proper installation and care, your shed doors will provide reliable access while keeping your belongings secure. Whether you’re building a new shed or upgrading an existing one, taking the time to install your door hinges correctly is an investment in your shed’s functionality and durability.

