
Protect Your Wood Shed Floor: The Best Coatings That Actually Last
Transform your wood shed floor from a vulnerable surface into a durable, long-lasting foundation with the right protective coating. Modern floor coatings offer exceptional protection against moisture, heavy equipment, and daily wear while enhancing your shed’s appearance and functionality. Whether you’re building a new shed or revitalizing an existing structure, selecting the appropriate floor coating represents a crucial investment in your storage space’s longevity. From epoxy solutions that create an impermeable barrier to penetrating sealers that preserve wood’s natural beauty, today’s coating options deliver professional-grade protection for every budget and need. This guide will walk you through the essential considerations for choosing and applying the perfect wood shed floor coating, ensuring your storage space remains protected and functional for years to come.
Why Your Wood Shed Floor Needs Protection
Common Problems with Unprotected Floors
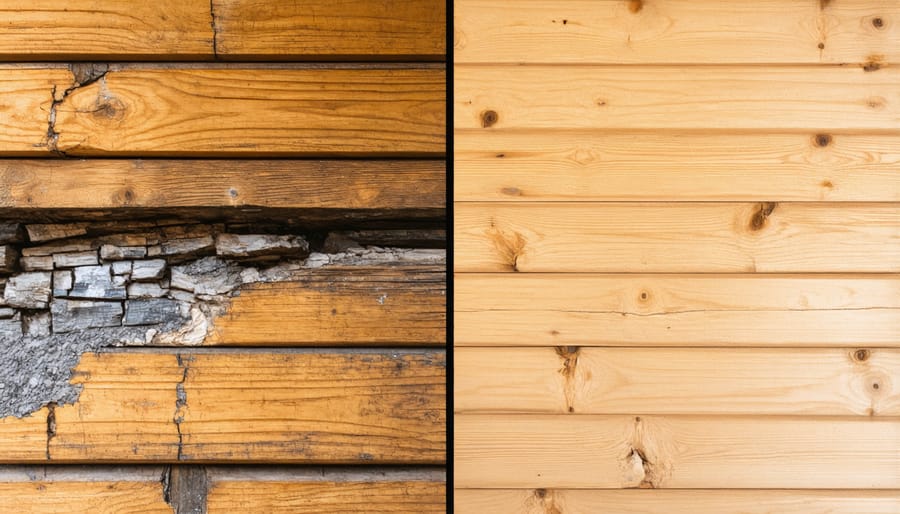
Unprotected wood shed floors face several challenging issues that can significantly reduce their lifespan and functionality. The most common problem is moisture damage, which occurs when you don’t properly waterproof your shed floor. This can lead to serious wood rot, especially in areas where the floor meets the walls or near door thresholds. As moisture seeps into unprotected wood, it causes warping and buckling, creating uneven surfaces that can be hazardous and make storing items difficult.
Pest infestation is another significant concern. Untreated wood becomes an attractive target for termites, carpenter ants, and other wood-boring insects that can compromise your floor’s structural integrity. Additionally, small rodents may find their way through gaps created by warped boards, potentially damaging both the floor and your stored items.
These issues not only affect your shed’s functionality but can also lead to costly repairs or complete floor replacement if left unaddressed. Regular inspection and proper protective coating can prevent these problems and extend your shed floor’s life significantly.
The Cost of Neglect
The financial impact of neglecting your wood shed floor can be substantial. A complete floor replacement can cost anywhere from $500 to $2,000, depending on the shed’s size and materials needed. This doesn’t include the potential damage to stored items from moisture or pest infiltration, which could add hundreds or even thousands to your losses.
In contrast, a quality floor coating typically costs between $50 to $150 for materials, and the application process takes just a weekend of your time. This small investment can extend your shed floor’s life by 10-15 years when properly maintained. Even if you choose to hire a professional for the coating application, you’re still looking at a fraction of the replacement cost.
Consider this: protecting your shed floor now means avoiding costly repairs, preventing damage to stored equipment, and maintaining your property’s value. It’s a classic case of “an ounce of prevention is worth a pound of cure.”
Best Floor Coating Options for Wood Sheds
Epoxy Coatings
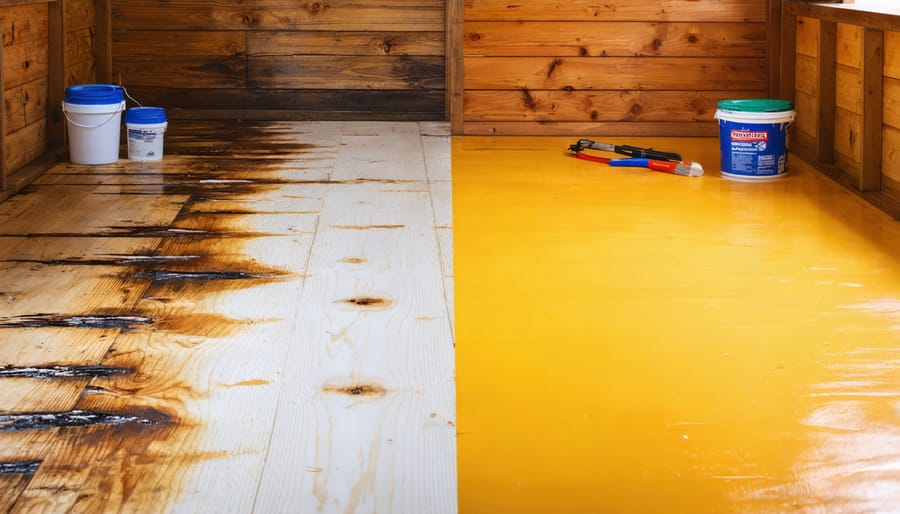
Epoxy coatings offer exceptional durability and protection for wood shed floors, creating a seamless, glossy finish that’s both attractive and functional. This two-part chemical coating forms a tough, waterproof barrier that shields your floor from moisture, chemicals, and heavy foot traffic. The coating is particularly effective at filling small cracks and imperfections, resulting in a smooth, easy-to-clean surface.
Application requires careful preparation, including thorough cleaning and light sanding of the wood surface. While the initial cost is higher than traditional sealers, epoxy’s long-lasting protection typically provides better value over time. Many homeowners appreciate the professional-looking results and the wide range of color options available. For best results, choose a product specifically formulated for wood surfaces and apply in moderate temperatures with good ventilation.
Polyurethane Sealers
Polyurethane sealers offer exceptional durability and moisture protection for wood shed floors, making them a popular choice among homeowners. These sealers create a tough, clear coating that prevents water damage while allowing the natural beauty of the wood to shine through. Available in both oil-based and water-based formulations, polyurethane provides a hard-wearing surface that resists scratches, scuffs, and daily wear. Oil-based varieties offer superior water resistance and a deeper amber glow, while water-based options dry faster and maintain the wood’s natural color. For best results, apply 2-3 coats, allowing proper drying time between applications. Many DIY enthusiasts appreciate that polyurethane sealers are relatively easy to apply and can last several years before needing reapplication.
Oil-Based Treatments
Oil-based treatments offer a natural way to protect your wood shed floor while enhancing its natural beauty. Popular options include linseed oil, tung oil, and Danish oil, which penetrate deep into the wood fibers to provide lasting protection. These treatments are particularly effective at preventing moisture damage and adding water resistance to your floor.
For best results, apply two to three thin coats, allowing each layer to fully dry between applications. While these treatments may need more frequent reapplication compared to synthetic options, they’re environmentally friendly and won’t peel or crack over time. Many homeowners appreciate how oil treatments darken and enhance the wood’s natural grain pattern while providing reliable protection against everyday wear and tear.
Keep in mind that oil-based treatments may take longer to cure initially, but their natural properties make them an excellent choice for those seeking an eco-friendly solution that’s easy to maintain and touch up as needed.
Paint-Based Solutions
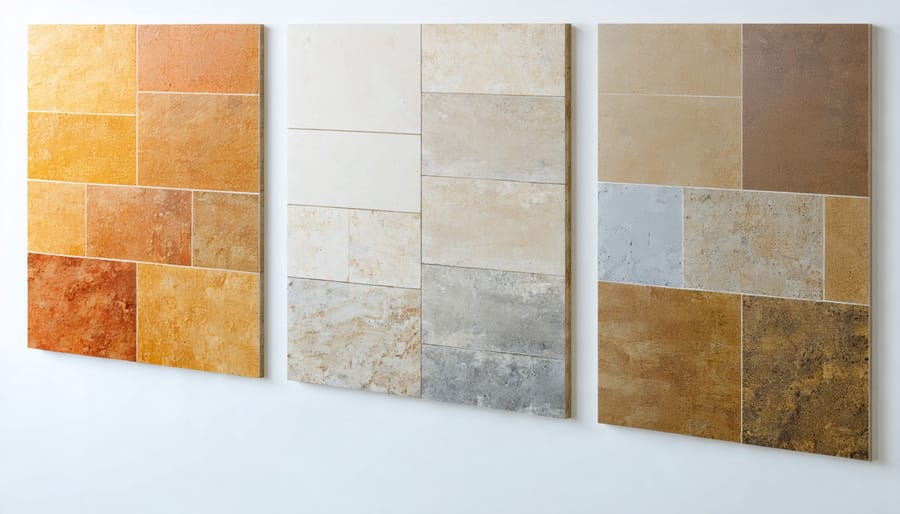
Specialized floor paints offer an excellent solution for protecting your wood shed floor while adding visual appeal. Look for paints specifically formulated for wooden surfaces and high-traffic areas, such as porch and floor enamel or heavy-duty deck paint. These paints typically contain advanced polymers that resist scuffing and provide superior adhesion to wood surfaces. Many modern formulations also include anti-slip additives for enhanced safety, particularly important in areas that might get wet from stored garden equipment or seasonal items. Choose oil-based paints for maximum durability or water-based options for easier cleanup and faster drying times. Popular color choices include neutral grays and tans, which hide dirt well and maintain a clean appearance longer than lighter shades.
Application Process Made Simple
Surface Preparation
Proper surface preparation is crucial for ensuring your wood shed floor coating adheres correctly and lasts longer. Start by thoroughly sweeping the floor to remove all dirt, debris, and sawdust. Next, inspect the floor for any loose boards, protruding nails, or damaged areas that need repair before coating.
If your shed floor has existing paint or coating, sand the surface lightly to create a better bonding surface. For bare wood, sand any rough spots until smooth. Use a vacuum to remove all sanding dust, followed by a tack cloth to pick up any remaining particles.
Check for oil, grease, or other stains that might affect coating adhesion. Clean these areas with an appropriate degreaser and allow the floor to dry completely. For general cleaning, use a mixture of warm water and mild detergent, scrubbing gently with a stiff brush. Rinse thoroughly with clean water.
Before applying any coating, ensure the wood is completely dry – typically 24-48 hours after cleaning, depending on ventilation and weather conditions. Test the moisture content by taping down a small piece of plastic sheeting; if condensation forms underneath after 24 hours, more drying time is needed.
Application Tips and Techniques
Start by thoroughly cleaning the floor surface, removing all dirt, dust, and debris with a broom and vacuum. If there are any grease spots, clean them with a degreaser and allow the surface to dry completely. For the best results, sand any rough spots or splinters smooth before coating.
When you’re ready to apply the coating, ensure the temperature is between 50-90°F and humidity is below 85%. Start at the far corner of the shed and work your way toward the door to avoid painting yourself into a corner. Use a high-quality roller with a medium nap for large areas and a brush for edges and corners.
Apply thin, even coats rather than one thick layer. This prevents bubbling and ensures proper curing. Most coatings require two coats – wait for the first coat to dry completely according to the manufacturer’s instructions before applying the second. For extra durability, consider adding non-slip additives to the final coat.
After application, allow at least 24 hours before light foot traffic and a full 72 hours before moving heavy items back into the shed. This patience will reward you with a long-lasting, durable finish.
Common Mistakes to Avoid
Avoid applying floor coating during high humidity or extremely cold conditions, as this can prevent proper curing and adhesion. Never skip surface preparation – failing to clean, sand, or repair damaged areas will lead to coating failure. Don’t rush the drying time between coats; patience ensures a lasting finish. Steer clear of mixing different coating types or brands, as this can cause compatibility issues. Using too much coating in one application can create bubbles and uneven surfaces, while too little won’t provide adequate protection. Remember not to store heavy items on freshly coated floors – wait at least 72 hours for full cure. Finally, don’t forget to provide adequate ventilation during application, as proper airflow is crucial for both safety and optimal results.
Maintenance and Long-Term Care
Regular maintenance is key to ensuring your wood shed floor coating stays effective and beautiful for years to come. To properly maintain your shed floor, establish a routine cleaning schedule using a soft-bristled broom or vacuum to remove dirt and debris. Avoid using harsh chemical cleaners; instead, opt for mild soap and water solution when needed.
Inspect the coating every six months for signs of wear, paying special attention to high-traffic areas and spots near the entrance. Address any scratches or minor damage promptly with touch-up applications to prevent moisture from penetrating the wood underneath.
Keep the shed well-ventilated to prevent moisture buildup, which can compromise the coating’s effectiveness. Consider using dehumidifiers during humid seasons, and ensure proper drainage around your shed to minimize water exposure.
For long-term protection, apply a maintenance coat every 2-3 years, depending on usage and exposure. Before recoating, lightly sand the surface and clean thoroughly. This refreshes the protective layer and extends the life of your original coating investment.
Store heavy items on platforms or dollies to distribute weight evenly and prevent coating damage. Place protective pads under frequently moved items, and avoid dragging equipment across the floor.
Protecting your wood shed floor with the right coating is a crucial investment that pays dividends in longevity and functionality. By choosing the appropriate coating, following proper preparation steps, and maintaining your floor regularly, you can ensure your shed remains a reliable storage space for years to come. Whether you opt for epoxy, polyurethane, or traditional paint, remember that success lies in thorough preparation and careful application. Don’t wait until you notice wear and tear – take action now to protect your shed floor. With the right tools and materials, this weekend project can save you significant repair costs down the line while providing peace of mind about your stored belongings’ safety. Start planning your shed floor coating project today and enjoy the benefits of a durable, attractive, and well-protected storage space.