
Transform Your 8×10 Shed into an Organized Storage Paradise
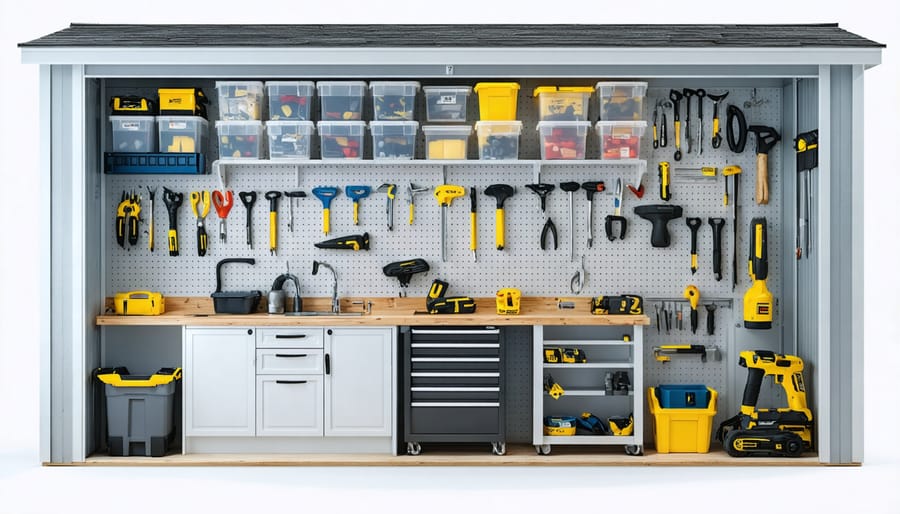
Transform your 8×10 shed from a cluttered catch-all into an efficient storage powerhouse. Start by organizing your shed into dedicated zones: garden tools along one wall, seasonal items overhead, and frequently used equipment near the entrance. Install floor-to-ceiling pegboard panels on both side walls to maximize vertical storage capacity while keeping tools visible and accessible. Mount adjustable shelving units along the back wall, utilizing clear plastic bins with labels to protect stored items from dust and moisture. Add a fold-down workbench that doubles as additional storage space when not in use, creating a versatile solution for both storage and workspace needs. This systematic approach transforms your standard 8×10 shed into a highly organized storage solution that maximizes every square inch while maintaining easy access to all your belongings.\n\n\n
Vertical Storage Solutions That Maximize Every Inch
\n\n
Wall-Mounted Organization Systems
\n\nTransform your vertical wall space into a highly efficient storage system with well-planned wall-mounted solutions. Pegboards are a classic choice, offering incredible versatility for hanging tools, gardening implements, and small containers. Install clear plastic holders or metal hooks to create a customized arrangement that suits your specific needs. To protect your tools from rust and maintain organization, consider adding small labels beneath each hook.\n\nSlatwall panels provide a modern alternative to pegboards, featuring horizontal grooves that accommodate various attachments. These panels can support heavier items and offer a cleaner, more contemporary look. The tracking system allows for easy reconfiguration as your storage needs change throughout the seasons.\n\nHanging tool organizers are perfect for maximizing narrow wall sections. Look for options with multiple pockets of varying sizes to store everything from hand tools to garden sprayers. Many feature clear pockets, making it simple to identify contents at a glance. Install these organizers near your workbench or entrance for quick access to frequently used items.\n\nFor optimal organization, group similar items together and position them at appropriate heights – frequently used tools at eye level, heavier items closer to the ground, and seasonal equipment higher up. Remember to leave some space between items for easy access and consider installing a small shelf above your wall organization system for additional storage boxes or bins.\n\n
 \n
\n\n\n
Ceiling Storage Opportunities
\n\nDon’t let valuable ceiling space go to waste in your 8×10 shed! Overhead storage solutions can effectively double your storage capacity while keeping frequently used items easily accessible at ground level. Installing sturdy overhead racks is a game-changer – these systems typically mount directly to your shed’s ceiling joists and can hold seasonal items, holiday decorations, or camping gear.\n\nConsider installing adjustable pulley systems for items you need to access occasionally. These clever mechanisms allow you to lower and raise storage containers with minimal effort, making it easy to retrieve holiday decorations or seasonal sporting equipment. Many homeowners successfully store bicycles, kayaks, and long gardening tools using ceiling-mounted hooks and pulleys.\n\nFor lighter items, mesh storage hammocks can be suspended from the ceiling, creating flexible storage space that’s perfect for storing pool toys, empty pots, or bagged mulch. When installing any ceiling storage, always check your shed’s structural integrity and ensure you’re not exceeding weight limits. A good rule of thumb is to keep heavier items closer to the walls where the structure is typically strongest.\n\nPro tip: Install battery-operated LED lighting beneath your ceiling storage to maintain visibility of items stored below. This simple addition makes a huge difference in functionality and prevents the overhead storage from creating dark spots in your shed.\n\n\n
Smart Floor Storage Strategies
\n\n
Mobile Storage Solutions
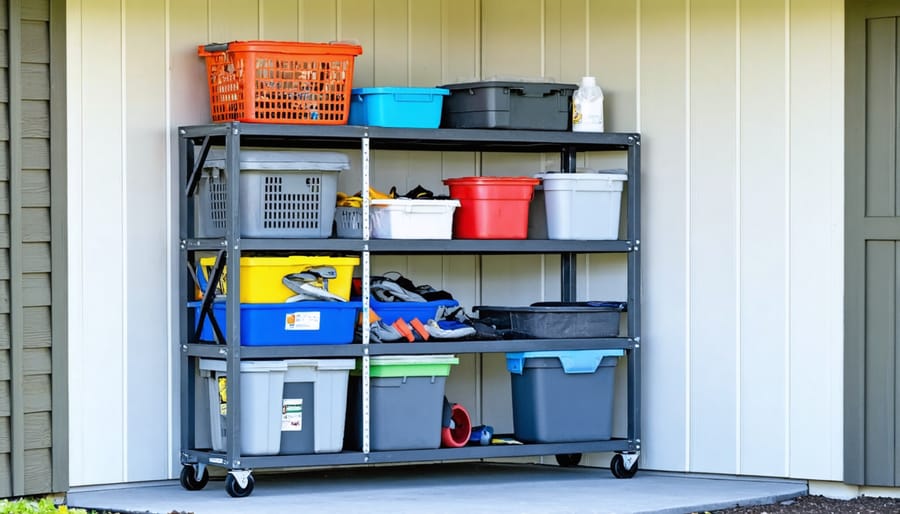
\n\nOne of the most versatile ways to maximize your shed’s storage potential is through mobile solutions that adapt to your changing needs. The benefits of proper shed storage become even more apparent when you can easily reorganize your space as needed.\n\nRolling utility carts are game-changers for tool storage and organization. Look for multi-tiered options with built-in compartments and a sturdy top surface that can double as a mobile workstation. These carts can be easily wheeled out when you need them and tucked away when you don’t.\n\nClear plastic bins on wheels are perfect for seasonal items and smaller tools. Label them clearly and stack them efficiently – you’ll appreciate being able to roll out entire categories of items at once. Consider investing in heavy-duty bins with secure locking lids for moisture-sensitive items.\n\nA mobile tool chest is worth its weight in gold for any DIY enthusiast. Choose one with smooth-rolling casters and varying drawer sizes to accommodate different tools. Many modern options include features like drawer liners and built-in power strips for charging cordless tools.\n\nDon’t forget about fold-away solutions – collapsible utility carts and stackable containers with wheels can be compressed when not in use, saving valuable floor space. This flexibility allows you to reconfigure your storage setup as your needs change throughout the year.\n\n
 \n
\n\n\n
Corner Optimization Techniques
\n\nCorners in your 8×10 shed often become dead spaces where items get forgotten or lost, but with smart planning, these areas can become storage powerhouses. Start by installing corner shelving units that fan out in a triangular shape, maximizing every inch while maintaining easy access to your items. These shelves work perfectly for storing smaller garden tools, paint cans, and potting supplies.\n\nConsider adding a rotating corner carousel system, similar to those found in kitchen cabinets, but scaled for shed use. These units can hold long-handled tools like rakes and shovels while allowing you to spin the carousel to access items stored behind others. For added functionality, mount pegboards on both walls that form the corner, creating an L-shaped tool organization system that keeps frequently used items within arm’s reach.\n\nAnother clever corner solution is to install a floor-to-ceiling pole system with adjustable brackets. This setup lets you customize the height of shelves and hooks based on your changing storage needs. Don’t forget about overhead corner spaces – installing diagonal overhead storage racks can create perfect spots for storing seasonal items or rarely-used equipment.\n\nFor a budget-friendly option, try placing a five-gallon bucket in each corner, perfect for storing smaller tools upright while utilizing minimal floor space. Add labels to the buckets for easy identification and organization.\n\n\n
Door and Window Space Utilization
\n\nDon’t overlook the valuable storage potential of your shed’s doors and windows! The back of your shed door offers prime real estate for hanging storage solutions. Install an over-the-door organizer with clear pockets to store smaller items like gardening gloves, seed packets, and hand tools. Alternatively, mount a pegboard or magnetic strip to keep frequently used tools within easy reach whenever you open the door.\n\nFor double doors, consider installing slim wire baskets or shelving units that won’t interfere with the door’s operation. These can hold spray bottles, small containers, or even rolled-up garden hose accessories. Just make sure to measure the door’s clearance carefully to prevent any interference with closing.\n\nWindow areas often go unused, but they can become efficient storage zones with the right approach. Install adjustable tension rods beneath windows to hang spray bottles or create a simple drying rack for garden tools. Window sills can support small potted plants or serve as a convenient shelf for items you need quick access to.\n\nIf your shed has deep window wells, consider adding narrow floating shelves on either side. These make perfect spots for storing lightweight items while maintaining natural light flow. You might also install small hooks beneath window frames to hang lightweight tools or organize extension cords.\n\nRemember to keep window areas accessible for ventilation and natural light. Use clear storage solutions when possible to maintain brightness in your shed. For privacy and security, consider adding frosted window film that still allows light through while concealing your storage from outside view.\n\nWhen utilizing door and window spaces, always ensure your storage solutions don’t compromise the functionality of these openings or create safety hazards. Keep heavier items at lower levels and make sure nothing interferes with emergency exits or ventilation.\n\n\n
 \n
\n\n\n
Seasonal Storage Rotation System
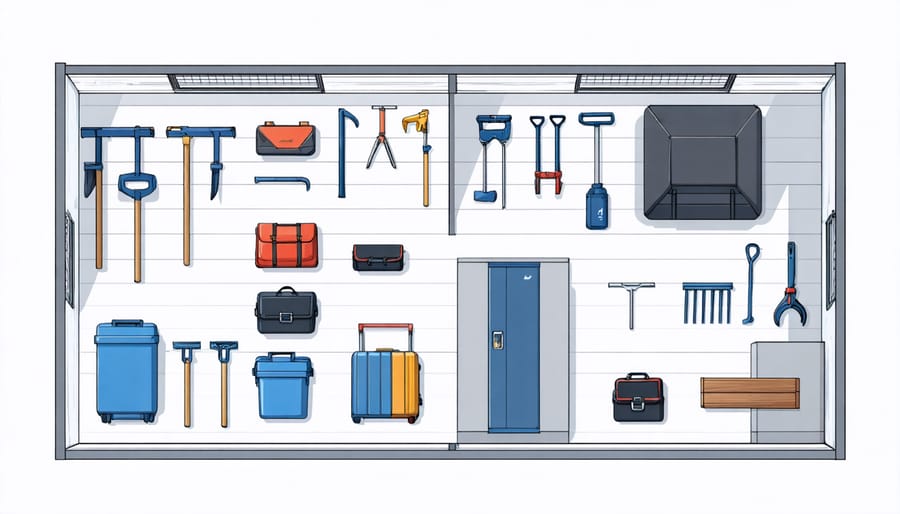
\n\nA well-organized seasonal rotation system transforms your 8×10 shed into a dynamic storage space that adapts to your needs throughout the year. The key is to position items based on when you’ll need them, creating zones that shift with the seasons.\n\nStart by dividing your shed into three main zones: current season, next season, and long-term storage. Place current seasonal items at eye level and near the entrance for easy access. For example, during summer, keep gardening tools, lawn care equipment, and outdoor furniture cushions within arm’s reach. Store fall items like leaf rakes and Halloween decorations in the middle zone, ready for their upcoming use.\n\nCreate a simple labeling system using color-coded tags or stickers: green for spring, yellow for summer, orange for fall, and blue for winter. This visual system makes it easier to identify and rotate items as seasons change. Consider using clear plastic bins for seasonal decorations and smaller items, stacking them with the next season’s boxes toward the front as the current season winds down.\n\nImplement a quarterly rotation schedule that aligns with the changing seasons. Two weeks before each season ends, begin moving the current season’s items to long-term storage while bringing next season’s equipment forward. This proactive approach prevents last-minute scrambling and ensures you’re always prepared.\n\nFor items used year-round, designate a “permanent zone” that remains unchanged. This area might include basic tools, cleaning supplies, or emergency equipment. Use the upper shelves or back corners for rarely-used items that don’t require frequent rotation.\n\nRemember to maintain a clear path to all zones, even during transition periods. Keep a basic inventory list posted inside the shed door to track seasonal items’ locations and prevent items from getting lost in the rotation cycle. This system not only maximizes your storage space but also helps maintain organization throughout the year.\n\n\n
Safety and Accessibility Considerations
\n\nWhen choosing the right storage solution, safety should always be your top priority. Start by installing adequate lighting, either battery-operated or wired, to ensure clear visibility when accessing your items. Position heavier items at ground level and lighter ones on upper shelves to maintain proper weight distribution and prevent tipping hazards.\n\nCreate clear pathways of at least 24 inches wide throughout your shed, allowing safe movement and easy access to all storage areas. Consider installing non-slip floor mats or textured paint in high-traffic areas, especially near the entrance, to prevent accidents during wet weather.\n\nWhen using wall-mounted storage, ensure all brackets and supports are properly anchored into studs, not just the shed’s wall panels. Check weight limits for shelving units and never exceed manufacturer recommendations. For frequently accessed items, position them at waist height to reduce strain from repeated bending or reaching.\n\nKeep a small step stool or ladder stored nearby for safely reaching upper storage areas, and regularly inspect all mounting hardware and storage solutions for signs of wear or damage.\n\n\nTransforming your 8×10 shed from a cluttered space into an organized storage haven is easier than you might think. By implementing vertical storage solutions, utilizing wall space efficiently, and making smart choices about shelving and overhead storage, you can double or even triple your usable space. Remember to start with a solid organization plan, invest in appropriate storage solutions that match your needs, and always prioritize safety when installing overhead systems. Whether you’re storing gardening tools, seasonal decorations, or workshop equipment, these storage ideas can help you create a more functional and enjoyable space. Take it one step at a time, and don’t be afraid to customize these solutions to fit your specific needs. With proper planning and implementation, your 8×10 shed can become the organized, efficient storage space you’ve always wanted.