
Transform Your 8×8 Shed into a Storage Powerhouse (Free Plans Inside)
Transform your backyard into a functional storage space with a perfectly-sized 8×8 storage shed – the ideal dimensions for most suburban properties. These free DIY plans enable you to build a robust, weather-resistant structure capable of storing everything from garden tools to seasonal decorations while maintaining a modest footprint. Whether you’re a weekend warrior or an experienced craftsperson, these detailed plans break down the construction process into manageable steps, requiring basic carpentry skills and common tools found in most home workshops. Save thousands on pre-built options by constructing your own 64-square-foot storage solution, complete with customizable shelving options and organized space management features. Our comprehensive plans include a materials list, cut sheets, and step-by-step assembly instructions, ensuring your project stays on track from foundation to final trim work.
Smart Design Features of Our Free 8×8 Shed Plans
Vertical Storage Solutions
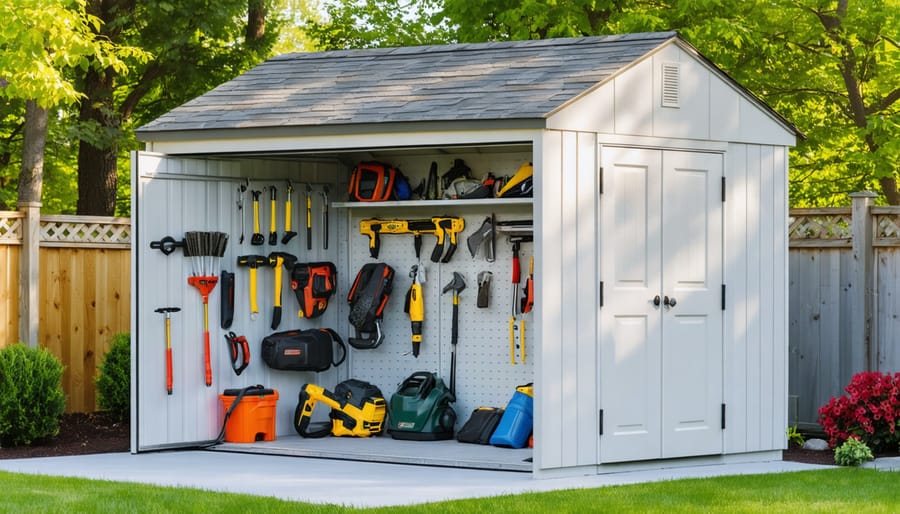
Maximize your 8×8 shed’s storage potential by utilizing vertical space effectively. Install sturdy wall-mounted shelving units and pegboards to keep tools organized and easily accessible. Consider incorporating adjustable track systems that allow for flexible storage configurations as your needs change. For eco-friendly storage solutions, repurpose wooden pallets into vertical garden tool holders or create custom shelving from reclaimed materials.
Don’t forget about overhead storage opportunities! Install heavy-duty ceiling-mounted racks for seasonal items and bulky equipment. Use strong hooks and pulleys for bicycles or larger garden tools, keeping them safely elevated while maintaining floor space. Add wire baskets or mesh storage nets near the ceiling for lighter items like empty pots and pool accessories. Remember to properly anchor all mounting hardware to wall studs or ceiling joists for maximum safety and durability.
Strategic Door Placement
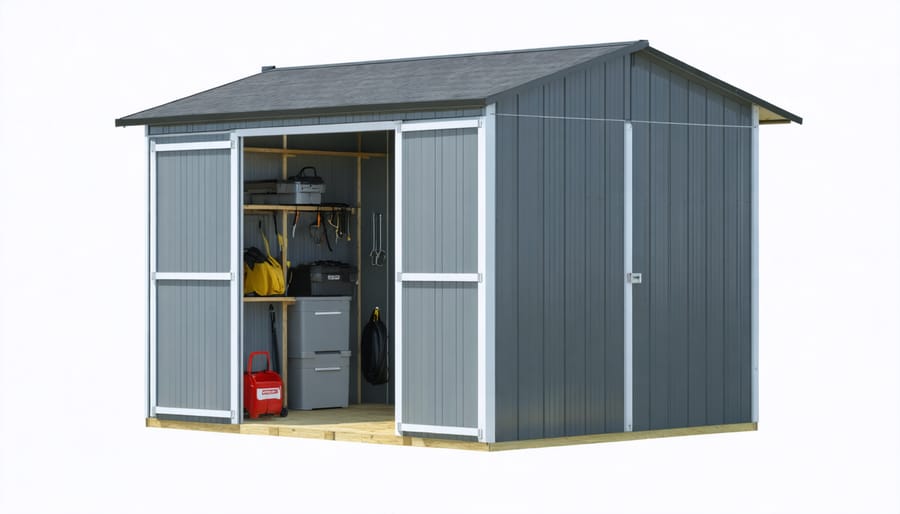
The placement of your shed door can make or break the functionality of your 8×8 storage space. For maximum accessibility, position the door in the center of either the 8-foot wall, allowing for a generous 4-foot opening. This central placement creates equal storage zones on both sides and makes it easier to maneuver larger items like lawn mowers or bicycles.
Consider the path leading to your shed when deciding on door placement. You’ll want a clear, straight approach that doesn’t require awkward turns or navigation around obstacles. If your shed will be near your house, align the door to face your home for convenience and better security monitoring.
For corner installations, positioning the door on the diagonal wall section can maximize interior wall space while maintaining easy access. Remember to account for door swing clearance both inside and outside the shed – you’ll need about 4-5 feet of clear space for comfortable entry and exit with larger items.
Space-Saving Storage Zones
Tool Wall Organization
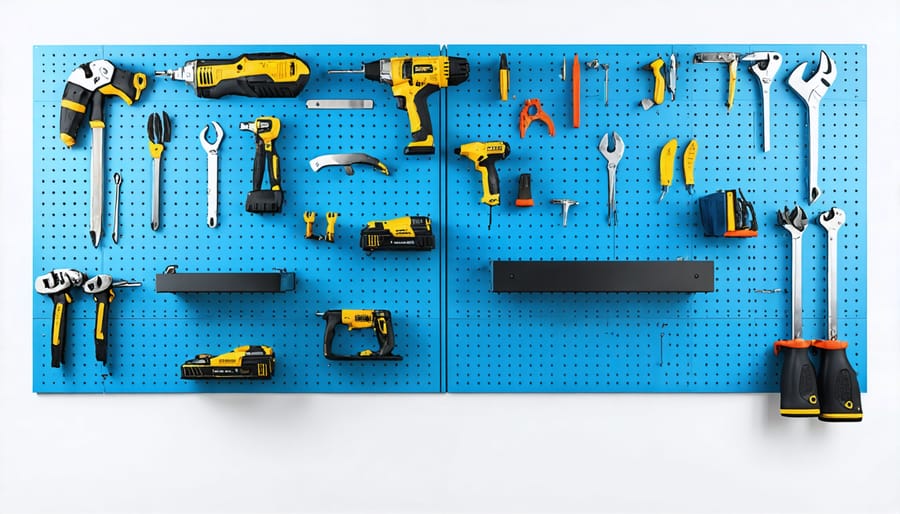
Maximizing your wall space is crucial in an 8×8 shed, and a well-organized tool wall can transform your storage capabilities. Start by installing pegboard panels or slatwall systems on the most accessible walls, leaving space for larger equipment below. Create designated zones for different tool categories – hand tools, power tools, and gardening implements.
Install strong hooks at varying heights to accommodate tools of different sizes. Consider using magnetic strips for metal tools and custom-made holders for oddly-shaped items. Tool outlines drawn or painted on the wall behind each item make it easy to return tools to their proper spots and quickly identify missing items.
For frequently used tools, position them at eye level for easy access. Store heavier items at waist height to prevent strain, and place seasonal tools higher up. Incorporate small bins or baskets for storing smaller items like screws, nails, and drill bits. Remember to leave some open wall space for future additions to your tool collection.
This systematic approach not only keeps your tools organized but also protects them from damage and extends their lifespan.
Floor Space Optimization
Maximize every square inch of your 8×8 shed with smart storage solutions that transform your space from cluttered to organized. Start by implementing a garden-friendly storage layout that keeps frequently used items easily accessible. Install adjustable wall-mounted shelving systems along both sides, leaving the back wall free for longer items like rakes and shovels. Consider adding overhead storage racks to utilize ceiling space for seasonal items and rarely-used equipment.
Create zones within your shed by designating specific areas for different categories: gardening tools, power equipment, and general storage. Install pegboards between wall studs to hang smaller tools and accessories without sacrificing floor space. Use corner spaces efficiently by adding triangular shelves or rotating storage units.
For maximum flexibility, incorporate mobile storage solutions like rolling tool carts that can be moved as needed. Double-duty furniture, such as fold-down workbenches with built-in storage, helps maintain clear pathways while providing functionality. Remember to leave a 3-foot walkway for easy access to all areas of your shed.
Building Materials and Cost Considerations
Building an 8×8 storage shed requires careful consideration of materials and budget planning. For a standard build, you’ll need pressure-treated lumber for the foundation, exterior-grade plywood for the floor and walls, and weather-resistant roofing materials. Following sustainable shed design principles can help you make environmentally conscious material choices while potentially saving money in the long run.
The basic material list typically includes:
– Pressure-treated 4x4s for skids: $40-60
– 2×6 floor joists: $100-150
– 3/4″ plywood flooring: $50-75
– 2x4s for wall framing: $150-200
– T1-11 siding or similar: $200-300
– Roofing materials (shingles, underlayment): $150-200
– Hardware (nails, screws, brackets): $75-100
– Door and window materials: $150-250
Total material costs usually range from $900-1,300, depending on your location and material quality choices. You can reduce costs by watching for lumber yard sales or using reclaimed materials where appropriate. However, don’t compromise on essential elements like pressure-treated wood for ground contact or quality roofing materials – these protect your investment long-term.
Consider upgrading to metal roofing or composite siding for better durability, though this will increase initial costs. Adding extras like vapor barriers or insulation might push the budget higher but can prevent moisture issues and extend your shed’s lifespan. Remember to factor in tool rental costs if you don’t own all the necessary equipment.
Construction Tips for Maximum Storage
Reinforcement Points
When building your 8×8 storage shed, proper reinforcement is crucial for long-term durability and safety. Focus on strengthening the floor joists by spacing them 12 inches apart and using pressure-treated lumber to prevent rot. Add diagonal bracing between floor joists for extra stability. The roof trusses require special attention – install hurricane ties and ensure proper spacing at 16 inches on center.
For wall reinforcement, double up the studs at corners and openings, and install a header above doors and windows. Consider adding extra support where you plan to mount shelving or heavy items. The foundation corners need additional bracing, especially if you’re planning to store heavy equipment or tools.
Don’t forget to reinforce the door frame area, as this sees frequent movement and stress. Install metal strapping at crucial connection points and use galvanized hardware throughout to prevent rust and ensure lasting strength. These reinforcements will help your shed withstand heavy storage loads and weather conditions for years to come.
Shelf and Hook Installation
Maximize your shed’s storage potential by strategically installing shelves and hooks. Start with heavy-duty wall-mounted shelving along the back wall, leaving enough clearance for larger items below. Install adjustable shelf brackets at 16-inch intervals to accommodate different storage needs throughout the seasons.
For tools and garden equipment, add a pegboard system on one side wall. This versatile solution allows you to rearrange hooks as needed. Consider installing a combination of straight hooks for hanging tools and J-hooks for coiled items like garden hoses and extension cords.
Don’t forget the ceiling space! Install sturdy overhead storage racks for seasonal items and rarely-used equipment. For safety, ensure all mounting hardware matches your shed’s construction material and weight requirements. Add corner shelves to maximize otherwise unused space, perfect for storing smaller items like garden supplies and paint cans.
Pro tip: Label your storage zones and keep frequently used items at eye level for easy access.
Building an 8×8 storage shed is an achievable DIY project that can significantly enhance your property’s storage capabilities while adding value to your home. By following the free plans and guidelines we’ve discussed, you can create a sturdy, functional storage space that meets your specific needs. Remember to start with proper planning, secure necessary permits, and prepare a level foundation before beginning construction. Take time to review all materials and tools needed, and don’t hesitate to reach out to local experts if you need guidance along the way.
As you move forward with your shed project, keep in mind the importance of proper ventilation, weatherproofing, and regular maintenance to ensure your shed’s longevity. Consider implementing the storage optimization tips we’ve shared to maximize your space efficiency. Whether you’re storing garden tools, seasonal decorations, or workshop equipment, your new 8×8 shed will provide the perfect solution for your storage needs.
Ready to start building? Download your free plans, gather your materials, and begin creating the organized storage space you’ve been dreaming of.