
Transform Your Backyard Shed into a Cozy Living Space: A Complete Makeover Guide
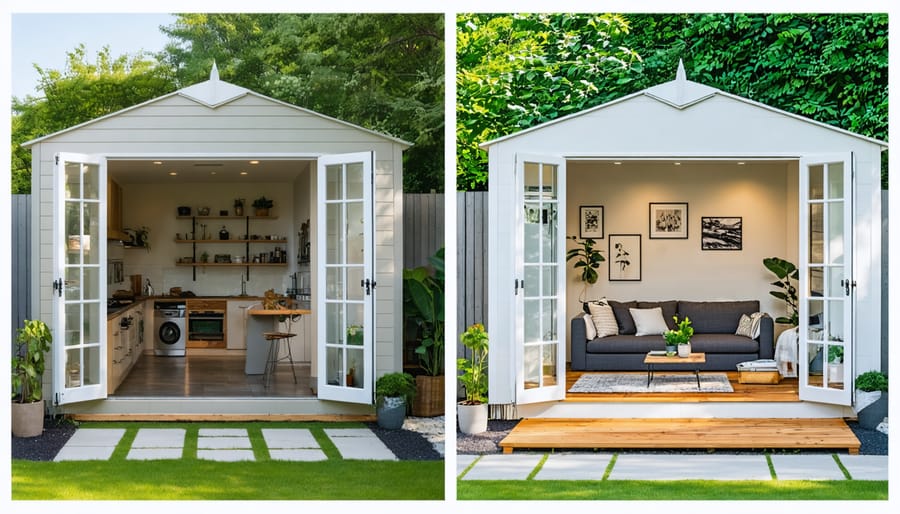
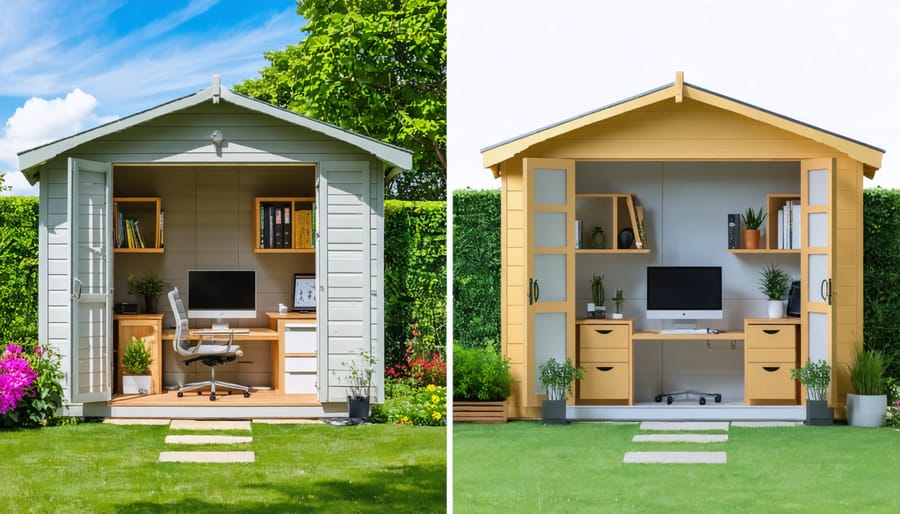
Transform your backyard shed into a versatile living space that adds both value and functionality to your property. Converting an existing shed into a home office, guest suite, or creative studio offers a cost-effective alternative to traditional home additions – typically saving 40-60% compared to new construction costs. Modern shed conversions blend seamless design with practical amenities, creating comfortable spaces that maintain the charming aesthetic of outdoor structures while delivering full-featured living areas.
Before starting your conversion project, assess three critical factors: local zoning requirements for accessory dwelling units, the structural integrity of your existing shed, and utility access points for water, electricity, and climate control. Smart planning in these areas prevents costly modifications later and ensures your converted space meets both building codes and daily living needs. With proper implementation, a shed conversion project can be completed in 4-8 weeks, providing an additional 100-200 square feet of climate-controlled living space perfect for today’s flexible lifestyle needs.
Planning Your Shed Conversion Project
Legal Requirements and Permits
Before starting your shed conversion project, it’s crucial to understand and comply with local building regulations and permit requirements. Most municipalities require permits for converting outbuildings into living spaces, as this typically changes the structure’s intended use. Contact your local planning department to learn about specific requirements, which often include building permits, zoning clearances, and occupancy permits.
Key considerations include minimum ceiling heights, proper insulation, ventilation, and emergency exits. Many areas require the converted space to meet the same building codes as traditional living areas, including proper electrical wiring, plumbing installations, and structural integrity standards.
Be prepared to submit detailed plans showing the proposed changes, including electrical layouts, plumbing diagrams, and ventilation systems. Some localities may also require inspections at various stages of the conversion process. Working with a licensed contractor familiar with local regulations can help ensure compliance and smooth the permit process.
Remember that unpermitted conversions can lead to fines, forced restoration, and complications when selling your property. It’s always better to invest time in proper permits upfront rather than face issues later.
Budget Planning and Cost Analysis
Converting a shed into living space typically costs between $6,000 and $25,000, with the final price depending on size, materials, and local requirements. The basic conversion costs usually break down into several key categories: structural modifications ($2,000-$5,000), insulation and weatherproofing ($1,500-$3,000), electrical work ($1,000-$4,000), and plumbing if required ($2,500-$8,000).
To keep your budget in check, start by getting multiple contractor quotes and consider which tasks you can DIY safely. Creating a detailed project plan helps prevent unexpected costs. Some money-saving tips include: choosing standard-sized windows and doors, opting for budget-friendly but durable flooring options, and purchasing materials during seasonal sales.
Remember to set aside 10-15% of your total budget for contingencies. Additional costs might include permit fees ($500-$1,500), HVAC installation ($1,500-$3,500), and finishing touches like paint and fixtures ($500-$2,000). Planning your conversion in phases can help manage costs while ensuring quality isn’t compromised. Many homeowners find that tackling one aspect at a time makes the project more financially manageable while allowing for better control over the final result.
Essential Renovation Steps
Insulation and Weatherproofing
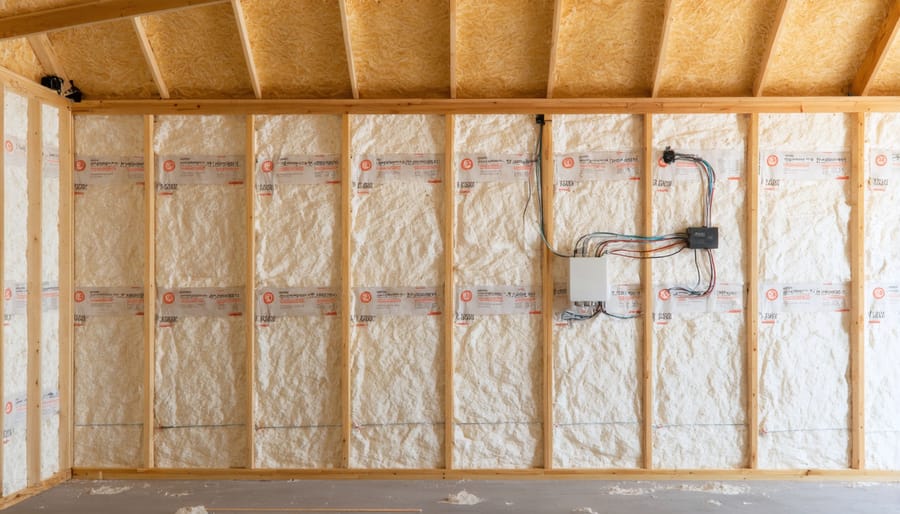
Proper insulation and weatherproofing are crucial steps in transforming your shed into a comfortable living space that can be enjoyed year-round. To insulate your shed properly, start with the walls, ceiling, and floor using high-quality materials like fiberglass batts or rigid foam insulation. A vapor barrier is essential to prevent moisture buildup and protect your insulation’s effectiveness.
For the walls, consider installing a combination of insulation and moisture-resistant drywall. The ceiling requires special attention, as heat rises and can escape quickly without adequate coverage. Floor insulation should include a moisture barrier underneath to prevent dampness from seeping up through the foundation.
Weather stripping around doors and windows helps maintain temperature control and prevents drafts. High-quality caulking should be applied to seal any gaps or cracks where air might leak. Consider installing double-pane windows to improve energy efficiency and reduce outside noise.
Don’t forget about proper ventilation – install vents or a small exhaust fan to manage humidity levels and prevent condensation. Adding gutters and ensuring proper drainage around the shed’s foundation will protect against water damage and maintain the integrity of your insulation system.
These weatherproofing measures not only make your converted space more comfortable but also help reduce energy costs and extend the life of your renovation investment.
Electric and Plumbing Installation
Transforming your shed into a living space requires careful planning for utilities, particularly electrical and plumbing systems. Begin by consulting a licensed electrician for installing electrical wiring safely, as this ensures compliance with local building codes and prevents potential hazards. You’ll need to plan for adequate electrical circuits to support lighting, heating, cooling, and various appliances you might want to include.
For plumbing installation, consider connecting to your home’s existing water supply line if possible. This typically involves trenching a path from your house to the shed and installing frost-proof pipes at an appropriate depth based on your climate. You’ll need to plan for both water supply and drainage systems, including proper venting and connection to the main sewer line or septic system.
Don’t forget to include these essential components in your plumbing setup:
– Hot water heater (tankless models work well in small spaces)
– Water pressure regulator
– Shut-off valves
– Proper pipe insulation
– Drainage vents
For both electrical and plumbing work, always obtain necessary permits and inspections before beginning construction. While some minor preparations can be DIY projects, it’s strongly recommended to work with licensed professionals for the final installations to ensure safety and code compliance. This investment in proper utility setup will pay dividends in comfort and functionality for years to come.
Flooring and Wall Finishing
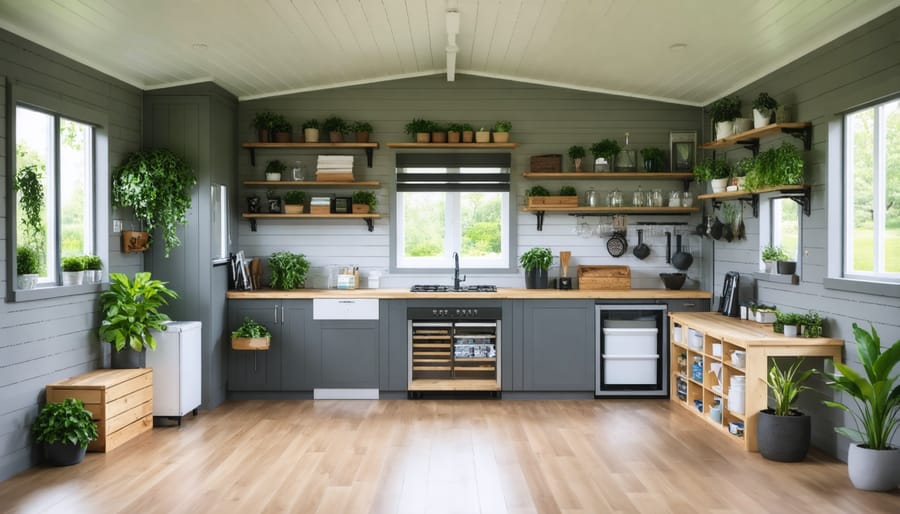
Transforming your shed’s interior starts from the ground up, and selecting the right flooring is crucial for both comfort and durability. Start by ensuring your subfloor is level and properly insulated. Popular flooring options include luxury vinyl planks (LVP), which offer excellent water resistance and easy installation, or engineered hardwood for a more upscale look. For a budget-friendly approach, consider laminate flooring, which can mimic the appearance of hardwood while providing good durability.
For walls, drywall is the most common choice, creating a smooth, finished look that’s easy to paint or wallpaper. Before installation, make sure to properly insulate the walls and install a vapor barrier to prevent moisture issues. If you’re aiming for a more rustic or industrial feel, consider leaving some exposed wood beams or installing shiplap paneling.
Don’t forget about the ceiling! While standard drywall works well, beadboard or tongue-and-groove planks can add character to your space. For a modern touch, paint your ceiling the same color as your walls to create an illusion of height and space.
When selecting paint colors, lighter shades can help make your converted shed feel more spacious and bright. Consider using semi-gloss or satin finishes in high-traffic areas for easier cleaning and maintenance. Adding textural elements like wainscoting or decorative trim can elevate the overall design while helping to define different areas within your space.
Windows and Doors
Natural light and proper access are essential elements of any living space conversion. When installing windows in your shed, consider both functionality and energy efficiency. Double-pane windows are recommended for better insulation and temperature control. For optimal natural lighting, aim to install windows on at least two different walls, creating cross-ventilation and a more open feel.
The size and placement of windows matter significantly. Standard sizes work well for most conversions, but custom options might better suit your specific needs. South-facing windows can maximize natural light while helping with passive solar heating during colder months.
Your entry door choice is equally important. Consider replacing the existing shed door with a proper exterior door that’s well-insulated and secure. A standard 36-inch door typically works well, providing easy access for furniture and daily use. French doors or sliding glass doors can create an attractive indoor-outdoor connection while bringing in additional natural light.
Don’t forget about proper weatherstripping and flashing around all openings. These details are crucial for preventing water damage and maintaining energy efficiency. Adding window treatments like blinds or curtains will provide privacy and help control light levels throughout the day.
Interior Design and Space Optimization
Furniture Selection and Layout
When furnishing your converted shed, smart space utilization is crucial. Start by measuring your space carefully and creating a layout plan that maximizes every square foot while maintaining comfortable traffic flow. Multi-functional furniture pieces are your best friends in these cozy spaces – consider ottomans with storage, fold-down tables, or murphy beds that can be tucked away when not in use.
Choose furniture that’s proportionate to your space; oversized pieces can quickly overwhelm a small room. Opt for slim-profile sofas, compact armchairs, and narrow tables that provide functionality without consuming too much floor space. Wall-mounted furniture, like floating desks or shelves, helps keep floor space open while providing essential surfaces for work or storage.
Consider furniture with legs rather than pieces that sit directly on the floor – this creates a sense of airiness and makes the space feel larger. Light-colored furniture can also help brighten the room and create an illusion of more space. For dining areas, look into drop-leaf tables or bar-height counters with stools that can be tucked underneath.
Storage is paramount in small spaces, so select pieces that offer hidden compartments or dual purposes. A coffee table with drawers, bed frames with built-in storage, or modular shelving systems can help keep your space organized without sacrificing style. Remember to leave some breathing room between furniture pieces to prevent the space from feeling cramped.
Storage Solutions
When converting a shed into living space, clever storage solutions become essential to maintain a clutter-free environment. The key is to maximize your storage space through multi-functional furniture and vertical storage options.
Consider installing built-in shelving units along the walls, utilizing the often-overlooked vertical space from floor to ceiling. Wall-mounted cabinets and floating shelves keep belongings organized while preserving valuable floor space. Under-furniture storage, such as ottomans with hidden compartments or beds with built-in drawers, offers dual functionality without compromising the room’s aesthetics.
Don’t forget about corner spaces – these can be transformed into cozy reading nooks with storage benches or custom-built corner shelving units. Over-door organizers and hooks provide additional storage for everyday items, while decorative baskets and bins can be tucked away under tables or stacked in corners.
For smaller converted sheds, consider furniture that folds away when not in use, such as Murphy beds or drop-leaf tables. Install pegboards or slat walls for adaptable storage that can be easily modified as your needs change. Remember to incorporate weather-resistant storage solutions for items that might be sensitive to temperature fluctuations, especially if your shed conversion includes minimal climate control.
Transforming your shed into a living space is an exciting journey that can add significant value to your property while creating a unique and personalized retreat. As we’ve explored throughout this guide, successful shed conversions require careful planning, attention to local regulations, and thoughtful consideration of utilities and insulation needs.
Remember that the key to a successful conversion lies in thorough preparation. Start by securing necessary permits, assessing your shed’s structural integrity, and planning your utility connections. Whether you envision a cozy home office, a peaceful studio, or a guest retreat, ensure your design choices align with both functionality and comfort.
While the process may seem daunting at first, taking it step by step makes it manageable. Consider starting with the essential elements like insulation and weatherproofing before moving on to interior finishing touches. Don’t be afraid to seek professional help for complex aspects like electrical work or plumbing installations.
The investment of time and resources into your shed conversion will pay off in the form of additional living space that’s tailored to your specific needs. With proper planning and execution, your converted shed can become a cherished part of your home that serves you well for years to come.
Ready to begin your shed conversion journey? Start by assessing your existing structure and mapping out your vision. With dedication and attention to detail, you’ll soon have a beautiful new living space to enjoy.
Looking for a wood shed kits?
Browse our full range of wood shed kits from authorized dealer brands. Free shipping to the continental US.