
Transform Your Backyard Shed Into a Winter-Ready Haven
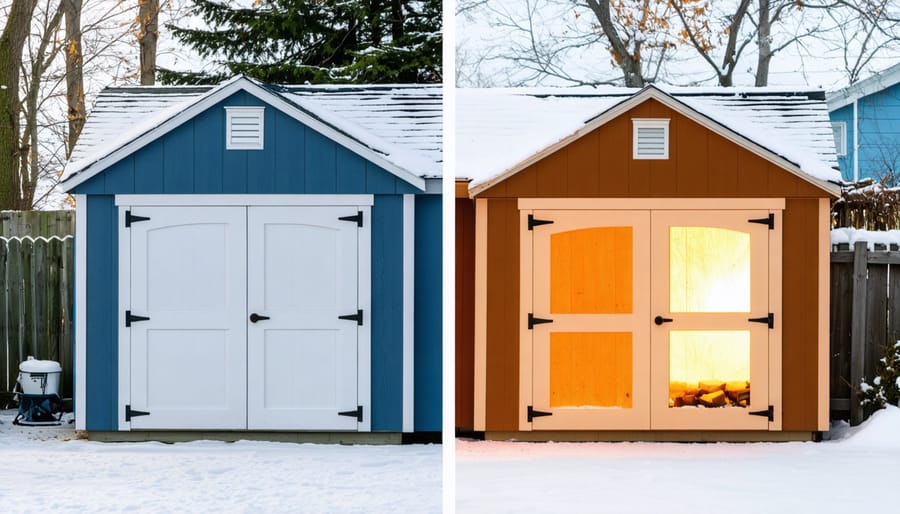
Transform your storage shed into a winter-ready sanctuary with proper insulation, weatherproofing, and strategic modifications. Winter shelter building demands careful attention to heat retention and moisture control – skills that separate basic storage from true four-season functionality. Expert shed winterization not only protects valuable tools and equipment but creates a comfortable workspace even in the harshest conditions.
Whether you’re retrofitting an existing structure or planning a new build, understanding critical factors like vapor barriers, thermal bridging, and ventilation requirements ensures your winter shelter project succeeds. From basic foam board installation to advanced heating solutions, the right preparation transforms a simple shed into a reliable cold-weather haven.
This comprehensive guide breaks down essential techniques, material selections, and step-by-step processes to create a winter-worthy shelter that stands up to snow loads, prevents heat loss, and maintains optimal interior conditions throughout the coldest months.
Essential Winter Shelter Modifications
Insulation Techniques That Work
Proper insulation is crucial for maintaining warmth in your winter shelter. Start with the floor by laying down a thick bed of dry leaves or pine needles, followed by a tarp or heavy-duty plastic sheeting to create a moisture barrier. For added protection, place foam camping pads or thick cardboard on top.
Wall insulation begins with stuffing any gaps or cracks with natural materials like moss or dry grass. Create a double-wall effect by hanging blankets or tarps on the inside of your shelter, leaving a small air gap between the outer wall and the insulating layer. This trapped air serves as additional insulation.
The roof requires special attention as heat rises. Layer branches densely, followed by leaves and pine needles. Add an additional tarp layer sloping downward to direct rain and snow away from your shelter. For extra warmth, create a low ceiling by suspending a tarp or blanket inside, reducing the space you need to heat.
Remember to insulate your entrance too. A heavy blanket or multiple flaps of material can serve as an effective door, keeping warm air in and cold drafts out.

Weatherproofing Solutions
Effective weatherproofing starts with a thorough inspection of your shelter’s exterior and interior surfaces. Begin by sealing any visible gaps or cracks with waterproof caulk, paying special attention to corners and joints where moisture typically infiltrates. Weather stripping around doors and windows creates an essential barrier against drafts and helps maintain interior warmth.
For superior moisture protection, apply a waterproof membrane or tarp over the shelter’s exterior, ensuring it extends slightly beyond the edges to create proper water runoff. Secure the covering tightly to prevent wind from catching underneath. Inside, line the walls and ceiling with a vapor barrier to prevent condensation from forming and potentially damaging your stored items.
Don’t overlook the importance of proper ventilation despite weatherproofing efforts. Install small vents near the roof to allow moisture to escape while maintaining warmth. Create a raised floor using pallets or pressure-treated lumber to keep items off the potentially damp ground, and add rubber door sweeps to block drafts from entering underneath.
For added protection, consider applying spray foam insulation in particularly vulnerable areas, but remember to wear appropriate safety gear during application.
Smart Ventilation Systems
Winter Ventilation Strategies
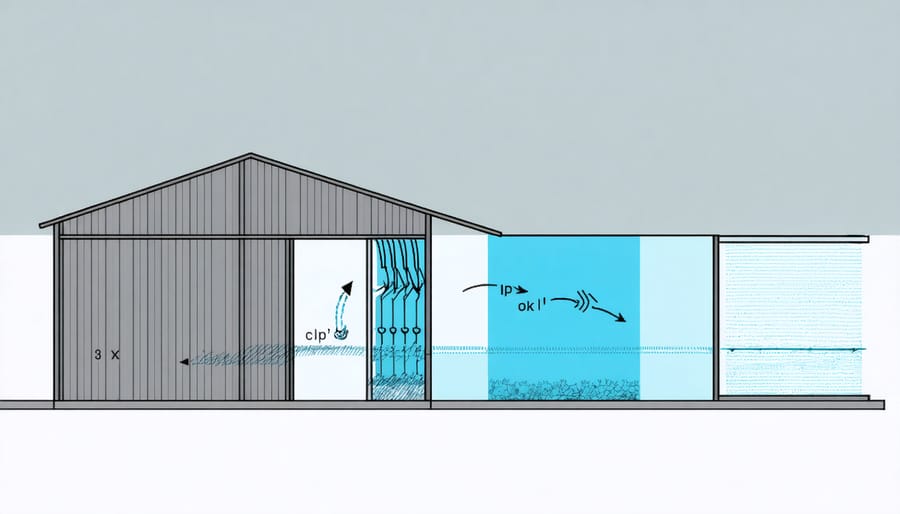
Proper ventilation in your winter shelter is crucial for maintaining a healthy environment while preserving warmth. Install adjustable vents near the roof peak and just above floor level to create a natural chimney effect. This setup allows stale air to escape through the top while drawing fresh air in through the bottom. Modern temperature-controlled ventilation systems can automate this process, maintaining optimal air quality without excessive heat loss.
Consider installing mesh screens over vents to prevent snow and debris from entering while allowing air flow. During severe weather, partially close the lower vents while keeping upper vents open to minimize heat loss. A good rule of thumb is to maintain a vent area equal to 1/300th of your shelter’s floor space. Using adjustable vent covers gives you control over airflow based on weather conditions, helping you strike the perfect balance between fresh air and warmth retention.
Moisture Control Solutions
Controlling moisture in your winter shelter is crucial for preventing mold, rust, and structural damage. Start by installing a vapor barrier along the walls and floor, using 6-mil polyethylene sheeting to block ground moisture. Strategic ventilation is key – install vents near the roof peak and base to create airflow that carries moisture out while maintaining warmth.
Place moisture-absorbing materials like silica gel packets or calcium chloride containers in corners and near stored items. For added protection, consider using a small dehumidifier during particularly damp periods. Keep stored items elevated on pallets or shelves to prevent direct contact with potentially damp floors.
Regularly check for leaks or areas where snow might melt and seep in. Seal any gaps around windows, doors, and utility entries with weather-stripping or caulk. If you notice condensation forming on windows or metal surfaces, increase ventilation immediately to prevent water damage and maintain a healthy environment inside your shelter.
Structural Reinforcement Tips
Roof Support Enhancement
When it comes to seasonal roof protection, reinforcing your shelter’s roof is crucial for winter survival. Start by installing diagonal braces at each corner, extending from the walls to the roof’s peak. These supports distribute snow weight evenly across the structure. Add horizontal support beams every 2-3 feet along the roof’s span, ensuring they’re securely fastened to the existing rafters.
For additional strength, consider installing a center beam running the length of your shelter’s peak. This beam should be slightly higher than your roof line, creating a subtle peak that helps shed snow naturally. Use pressure-treated 2x4s or 2x6s depending on your roof’s size and expected snow load.
Don’t forget to reinforce joints with metal brackets and galvanized screws. Add extra support posts beneath heavy-load areas, ensuring they’re firmly anchored to the ground. For longer-term durability, treat all wooden supports with waterproof sealant to prevent moisture damage and rot. Remember to check and tighten all connections periodically throughout the winter season.

Wall and Foundation Protection
Protecting your shelter’s walls and foundation from winter damage is crucial for long-term durability. Start by creating a moisture barrier around the foundation using heavy-duty plastic sheeting, extending it at least 12 inches below ground level. This prevents frost heave, which can seriously damage your structure’s foundation.
Add rigid foam insulation boards against the foundation walls, securing them with appropriate fasteners. These boards should extend 4-6 inches above ground level for maximum protection. Fill any gaps between the foundation and walls with expanding foam sealant to prevent cold air infiltration.
Install proper drainage channels around the shelter by grading the soil away from the foundation at a slope of at least 1 inch per foot. Place gravel or crushed stone in a 6-inch band around the perimeter to facilitate water drainage. This helps prevent water accumulation that could freeze and cause structural damage.
Consider adding snow barriers or deflectors on the walls to prevent snow buildup against the structure. These can be simple wooden boards installed at an angle to direct snow away from the foundation area. Regular inspection of these protective measures throughout winter ensures they remain effective.
Winter-Ready Storage Solutions
Equipment Protection Strategies
Protecting your tools and equipment during winter is crucial for their longevity and performance. Start by thoroughly cleaning all items before storage, removing any dirt, moisture, or debris that could cause rust or deterioration. To maximize storage efficiency, use wall-mounted pegboards and overhead racks to keep tools off the ground and organized.
Create designated zones for different types of equipment, using moisture-resistant storage containers for smaller items. For power tools, remove batteries and store them separately in a temperature-controlled environment. Apply a light coat of protective oil to metal tools to prevent rust, and wrap wooden handles in cloth to protect against moisture damage.
Consider using silica gel packets in toolboxes and storage containers to absorb excess moisture. Install hooks or brackets to keep long-handled tools upright and easily accessible. For electrical equipment, use waterproof covers and store them on elevated shelves away from potential floor moisture.
Remember to check your stored equipment periodically throughout winter, ensuring proper ventilation and addressing any moisture issues promptly. This regular maintenance helps prevent unwanted surprises when spring arrives and you need your tools again.
Accessibility Features
Ensuring safe and easy access to your winter shelter is crucial during snowy conditions. Start by creating a clear, level pathway to your shed door, ideally with a slight slope away from the entrance to prevent water pooling. Installing motion-sensor lights along the path provides visibility during shorter winter days and nighttime emergencies.
Consider adding non-slip materials to your pathway and entrance area. Rubber mats or grip tape on steps and ramps offer secure footing when conditions are icy. If your shed sits at ground level, build a small landing platform with railings to prevent slips and falls while entering or exiting.
Keep essential snow removal tools near the entrance, including a compact shovel and ice melt, to maintain clear access throughout winter. Installing a small awning or extended roof overhang above the door helps prevent snow and ice buildup directly in front of the entrance.
For areas with heavy snowfall, consider creating windbreaks using temporary snow fencing or strategic placement of snow barriers. This reduces drift accumulation near access points. Remember to regularly check and maintain your access features throughout the winter season, ensuring your shelter remains easily accessible when you need it most.
Building a winter shelter doesn’t have to be an overwhelming task. By following the guidelines we’ve covered, you can create a safe, warm, and durable structure that will protect you and your belongings throughout the cold season. Remember to start with a solid foundation, ensure proper insulation, and maintain adequate ventilation to prevent moisture buildup. Weather-stripping and sealing are crucial steps that will significantly impact your shelter’s effectiveness.
Don’t wait until the first snowfall to begin your winterization project. Start early in the fall to give yourself plenty of time to gather materials and complete the work without rushing. Regular maintenance checks throughout the winter will help identify and address any issues before they become major problems.
Whether you’re protecting garden equipment, creating a workshop space, or safeguarding valuable items, a well-built winter shelter is an investment in peace of mind. Take action now to prepare your structure for the challenges ahead, and you’ll enjoy a worry-free winter season with the confidence that your belongings are properly protected.