
Transform Your Cluttered Shed into a Custom Workspace (DIY Storage Ideas That Work)
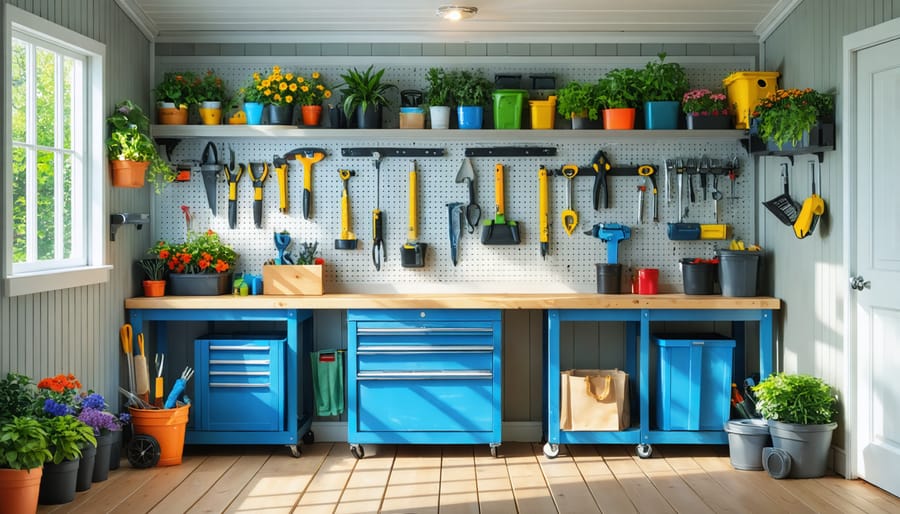
Transform your basic storage shed into a functional workspace by maximizing every square inch with smart DIY solutions. Start by installing affordable pegboard walls to organize a shed effectively, creating endless possibilities for tool storage and customization. Mount fold-down workbenches along the walls to establish instant workspace without sacrificing valuable floor area, and incorporate overhead ceiling storage racks for seasonal items and less-frequently used equipment. Strategic lighting placement, including battery-operated LED strips and solar-powered windows, turns your shed into a bright, inviting space perfect for any DIY project. Whether you’re creating a workshop, garden center, or multi-purpose storage solution, these practical interior modifications maximize functionality while maintaining accessibility to all your essential items.
Smart Wall Organization Systems
Pegboard Paradise
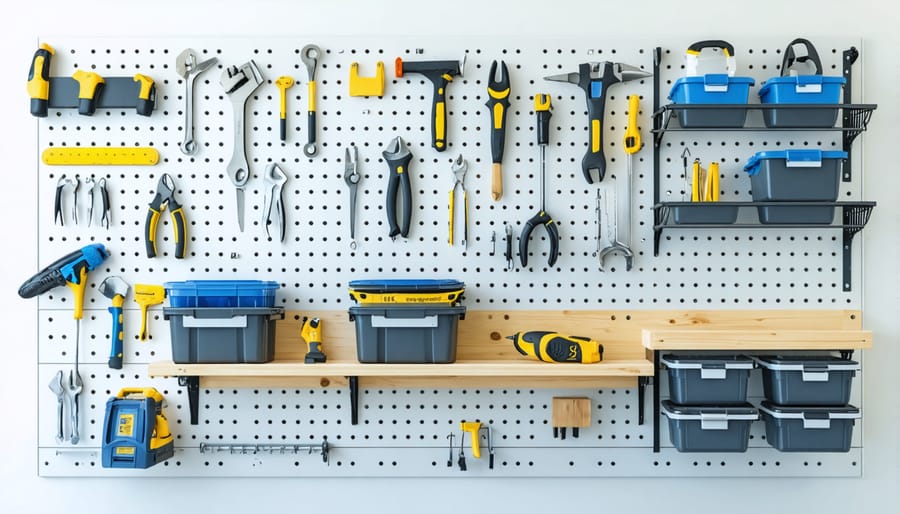
Transform your shed’s walls into an organizational masterpiece with a well-planned pegboard system. Pegboards offer incredible versatility and can turn a cluttered space into a DIY enthusiast’s dream workshop. Start by mounting sturdy pegboard panels directly to your shed’s wall studs, making sure to use spacers behind the board to allow room for hooks and accessories.
The beauty of pegboard organization lies in its adaptability. Arrange your tools in logical groupings – keep gardening implements together, power tools in their own section, and frequently used items at eye level. Consider using a combination of standard pegboard hooks, specially designed tool holders, and small bins to create a custom storage solution that fits your exact needs.
Pro tip: Before hanging your tools, trace their outlines on the pegboard with a marker. This simple step creates a visual guide that makes it easy to return items to their designated spots and quickly spot missing tools. For added functionality, install a small shelf beneath the pegboard to hold containers for smaller items like nails, screws, and other hardware.
Don’t forget to think vertically – pegboards can extend from floor to ceiling, maximizing every inch of wall space. Paint your pegboard in a light color to improve visibility and add a clean, professional look to your shed’s interior. For the best results, leave some empty space for future additions to your tool collection.
Adjustable Shelving Solutions
Transform your shed’s storage potential with adjustable shelving, one of the most versatile and genius storage solutions available. Start with adjustable track systems, which allow you to modify shelf heights as your storage needs change. These systems typically consist of vertical rails mounted to wall studs, with brackets that can be easily moved up or down.
For a budget-friendly option, consider installing wire shelving units that can be customized to fit your space. These lightweight shelves are perfect for storing garden supplies, paint cans, and seasonal decorations. Plus, their open design prevents dust accumulation and promotes air circulation.
Heavy-duty adjustable bracket shelves are ideal for storing weightier items like power tools and building materials. Install these by securing sturdy brackets to wall studs at various heights, then placing solid wood planks or metal shelves on top. For maximum flexibility, drill multiple mounting holes at different heights.
Pro tip: Before installation, map out your shelving layout using painter’s tape on the walls. This helps visualize the final setup and ensures proper spacing between shelves. Remember to leave enough clearance for taller items and consider installing different shelf depths – deeper ones near the floor for large items and narrower ones at eye level for smaller tools and supplies.
Don’t forget to include a mix of fixed and mobile shelving units. Rolling shelf carts can be particularly useful for frequently accessed items and can be tucked away when not in use.
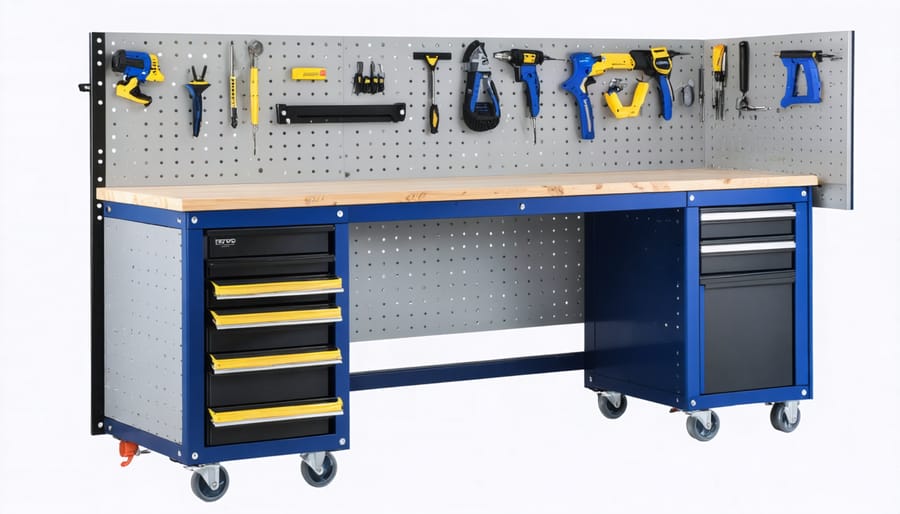
Workbench and Counter Space Ideas
Fold-Down Workbenches
A fold-down workbench is the perfect solution for small sheds where space is at a premium. By installing a hinged workbench along your shed wall, you can enjoy a sturdy workspace when needed and fold it away when you’re done. The key is mounting a solid piece of 3/4-inch plywood to heavy-duty wall brackets using robust hinges.
To create your fold-down workbench, start by determining your ideal working height (typically 36-38 inches from the floor). Install a 2×4 support board horizontally along your wall studs at this height. Mount your brackets 16-24 inches apart, ensuring they’re properly leveled. Attach your plywood work surface to the brackets using hinges rated for at least 100 pounds.
For added stability, install folding brackets underneath that lock into place when extended. When selecting your work surface dimensions, consider leaving enough clearance for stored items below when folded up. A typical depth of 24 inches works well for most projects while allowing easy storage.
Pro tip: Add a small lip along the front edge to prevent tools from rolling off, and consider installing a pegboard above your workbench for additional tool storage when the surface is folded down.
Custom Corner Stations
Corner spaces in sheds often become dead zones, but with creative planning, these awkward angles can transform into highly functional workstations. Start by measuring your corners carefully and consider installing triangular shelving units that fit snugly into these spaces. For gardening enthusiasts, create a potting station by adding a corner workbench with built-in storage underneath for soil, pots, and tools.
A popular solution is the L-shaped corner desk setup, perfect for maintaining garden records or pursuing hobby projects. Install pegboards on both walls of the corner to maximize vertical storage while keeping frequently used tools within arm’s reach. Add task lighting underneath upper shelves to illuminate your workspace effectively.
For those who enjoy woodworking, consider building a rotating corner cabinet that pivots out when needed, providing access to power tools and supplies while saving space when not in use. Another smart option is creating a folding workstation that can be tucked away when extra floor space is needed.
Remember to incorporate electrical outlets in your corner stations if you plan to use power tools or need charging stations. Weather-resistant power strips mounted at workbench height can make your corner station more versatile and user-friendly.
Overhead Storage Solutions
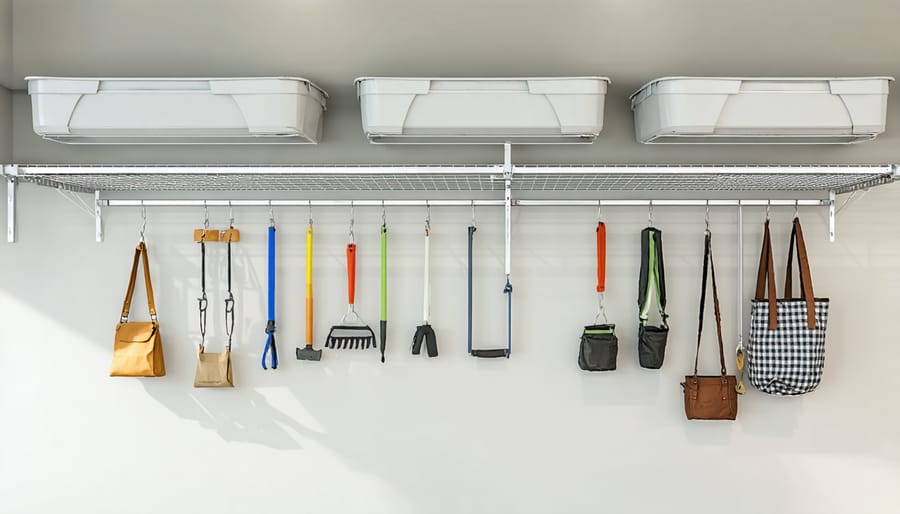
Ceiling-Mounted Racks
Looking to maximize your storage space? One of the most effective ways to transform your shed space is by utilizing the often-overlooked ceiling area. Ceiling-mounted racks offer an ingenious solution for storing seasonal items, sports equipment, and other less-frequently used belongings.
Installing overhead storage is surprisingly straightforward. Start by locating the ceiling joists using a stud finder, then secure heavy-duty mounting brackets at regular intervals. Choose adjustable hanging systems that can support different weights and sizes of items. Most DIY ceiling rack kits come with all necessary hardware and can hold up to 250 pounds when properly installed.
For added versatility, consider combining different types of overhead storage. Pull-down racks work great for accessing items without a ladder, while stationary platforms are perfect for long-term storage. Install hooks between racks for hanging bicycles, ladders, or garden tools. Remember to keep heavier items closer to the walls where the structure is most sturdy, and always leave enough headroom for comfortable movement below.
Pulley Systems
Make the most of your vertical space with an ingenious pulley system that lets you easily store and access seasonal items. By installing simple pulleys on your shed’s ceiling, you can hoist bikes, kayaks, or storage containers up and out of the way when not in use. This clever solution is particularly useful for storing holiday decorations, camping gear, or gardening equipment during their off-seasons.
To create a basic pulley system, mount sturdy brackets to your shed’s ceiling joists and install pulleys with strong rope or cable. Add hooks or storage platforms to safely secure your items. The beauty of this system is that it allows you to lower items whenever needed without heavy lifting or climbing on ladders.
For added convenience, consider using a locking mechanism or cleat to secure the rope once items are raised. This prevents accidental lowering and ensures your stored items stay safely suspended. Remember to regularly check the ropes and pulleys for wear and tear, and never exceed the weight capacity of your system or ceiling structure.
Pro tip: Label your storage containers and create a simple pulley system map to track what’s stored where, making seasonal transitions smoother and more organized.
Organizing by Zones
Garden Tool Station
Transform your shed into an efficient garden tool station by creating dedicated zones for different equipment types. Start with a pegboard wall system, which offers flexible storage for frequently used tools like hand trowels, pruners, and garden shears. Install hooks at varying heights to accommodate tools of different sizes, keeping them visible and within easy reach.
For long-handled tools like rakes, shovels, and hoes, consider a simple DIY tool rack made from PVC pipes cut lengthwise and mounted horizontally on the wall. This keeps tools organized and prevents them from falling over. Alternatively, repurpose wooden pallets by mounting them vertically – the slats create perfect slots for tool storage.
Make use of corners by installing triangular shelving units for storing garden supplies like seed packets, gloves, and small pots. Add clear plastic bins labeled with contents for seasonal items and less frequently used supplies. A potting station with built-in storage underneath maximizes vertical space while providing a dedicated work surface.
Don’t forget about small tool organization – magnetic strips mounted at eye level work perfectly for metal tools, while mesh baskets can contain collections of hand tools. For safety and convenience, position heavier equipment at waist height and lighter items above or below. Remember to leave enough floor space for larger equipment like wheelbarrows and lawn mowers.
Project Materials Storage
Keeping your building materials and project supplies organized is crucial for efficient DIY work. Start by installing adjustable wall-mounted shelving units that can accommodate different-sized materials. Use heavy-duty plastic bins or metal containers to store smaller items like nails, screws, and hardware – clear containers make it easy to spot what you need at a glance.
For lumber storage, consider building a vertical rack system along one wall. This keeps boards off the floor and prevents warping. Install hooks or brackets at different heights to store various lengths of wood. A simple DIY solution is to create a PVC pipe storage system for storing long, thin materials like dowels and trim pieces.
Designate specific zones for different types of materials: one area for wood, another for metal, and a separate space for paints and finishes. Use pegboards or slatwall panels to hang frequently used tools and create custom storage solutions. Label everything clearly to maintain organization over time.
For project-specific materials, consider using mobile storage carts that you can easily move around your shed. These are perfect for keeping all supplies for a current project together and accessible. Remember to store heavy materials at waist height to prevent strain, and keep hazardous materials like paints and chemicals in sealed containers on lower shelves for safety.
Lighting and Power Solutions
Natural and Artificial Lighting
Proper lighting can transform your shed from a dark storage space into a functional workspace. Natural light is ideal, and installing shed windows is a great first step. Consider adding windows on multiple walls for cross-ventilation and maximum daylight. For artificial lighting, start with a central LED ceiling fixture for overall illumination. Add task lighting where you need it most – above workbenches or storage areas. Battery-operated puck lights are perfect for dark corners and shelves, while motion-sensor lights near the entrance provide convenience and safety. Solar-powered options can help keep electricity costs down, and strip lighting under shelves creates a professional look while illuminating your workspace. Remember to include at least one exterior light near the door for evening access.
Power Distribution
A well-planned power setup is essential for making your shed a functional workspace. Start by installing a main power box with a circuit breaker for safety, and run weather-resistant wiring along the walls in protective conduits. Install outlets at waist height every 4-6 feet, ensuring you have enough power points for all your tools and equipment. Consider adding dedicated 220V outlets if you plan to use heavy machinery like table saws or air compressors.
Create a central charging station with a power strip mounted to the wall, perfect for keeping batteries for cordless tools ready to go. Use labeled hooks or a pegboard system above the charging station to organize your tools while they charge. For better visibility, install LED strip lighting under shelves and mount task lights above workbenches.
Don’t forget to include exterior outlets for outdoor power tools and proper grounding for all electrical installations. Always consult a qualified electrician if you’re unsure about any electrical work.
Transforming your shed’s interior doesn’t have to be an overwhelming project. With the ideas and tips we’ve explored, you can create a functional, organized space that meets your unique needs. Whether you’ve opted for wall-mounted storage solutions, installed creative shelving systems, or incorporated multi-purpose workstations, remember that the key to success lies in planning and maximizing every inch of available space.
Start small by implementing one or two ideas that resonate most with your immediate needs. As you become more comfortable with the transformation process, you can gradually add more features and organizational elements. Don’t forget that lighting, proper ventilation, and regular maintenance will help preserve your newly organized space for years to come.
Your shed has the potential to be much more than just a storage box in your backyard. With some creativity, basic DIY skills, and the right materials, you can turn it into a highly functional space that adds value to your daily life. So grab your tools, make a plan, and start your shed interior transformation today – you’ll be amazed at what you can achieve!
Looking for a shed accessories?
Browse our full range of shed accessories from authorized dealer brands. Free shipping to the continental US.