
Transform Your Outdoor Workshop With Perfect Lighting (That Actually Works)

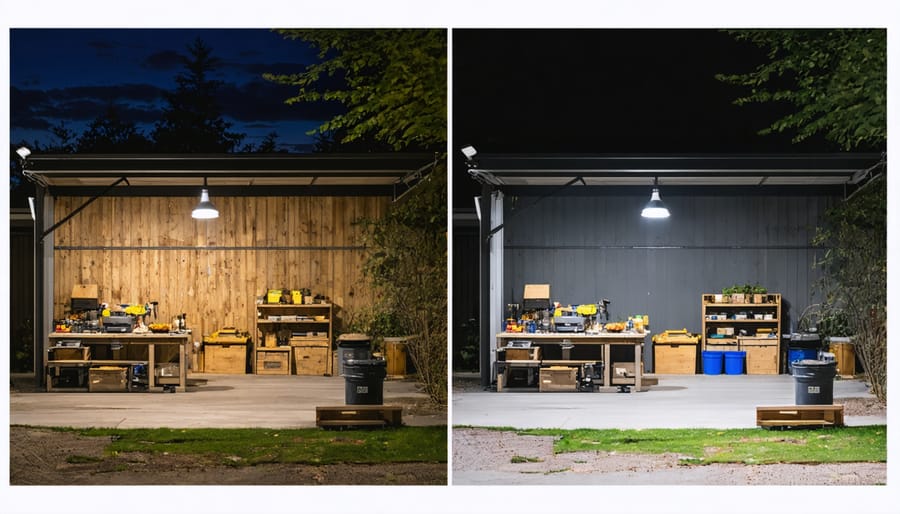
Transform your outdoor workshop into a productive powerhouse with strategic lighting that maximizes visibility and safety in any condition. Professional-grade LED flood lights mounted at 45-degree angles eliminate harsh shadows while consuming 75% less energy than traditional halogen systems. Position motion-activated security lights near entry points and tool storage areas to create all-weather workspace solutions that enhance both functionality and security. Install weather-resistant task lighting under shelving and above workbenches, selecting fixtures rated IP65 or higher to ensure reliable performance through rain, snow, and humidity.
Modern outdoor workshop lighting combines practical illumination with smart features like programmable timers and daylight sensors, letting you focus on projects rather than managing lights. Whether you’re crafting furniture at dawn or completing repairs after sunset, proper lighting transforms your outdoor workshop from a seasonal space into a year-round creative haven. Strategic placement of both ambient and focused lighting creates layers of illumination that reduce eye strain and improve precision, making every project safer and more enjoyable.
Essential Types of Outdoor Workshop Lighting
Task Lighting Solutions
Task lighting is essential for detailed work in your outdoor workshop, ensuring precision and safety in specific areas. Consider installing adjustable LED work lights on swing arms or clamp-on spotlights that you can position exactly where needed. These focused lighting solutions are perfect for workbenches, power tools, and detailed projects requiring extra illumination.
For maximum flexibility, magnetic-base LED work lights are excellent choices, as you can easily move them around metal surfaces in your workshop. Under-cabinet LED strips also work wonderfully when mounted beneath shelving units, providing focused illumination for workbench activities without creating shadows.
When selecting task lights, look for options with adjustable brightness levels and color temperatures. Cooler, whiter light (5000-6500K) is ideal for detailed work, while warmer tones (2700-3000K) are better for general task lighting. Many modern task lights come with both options, allowing you to switch based on your needs.
Remember to position task lights slightly off to the side rather than directly overhead to prevent glare and shadows from interfering with your work. This simple adjustment can significantly improve visibility and reduce eye strain during prolonged projects.
Ambient Lighting Options
Ambient lighting creates a comfortable and safe working environment in your outdoor workshop by providing even, general illumination. LED strip lights mounted along rafters or under shelving offer excellent coverage while consuming minimal energy. Consider installing motion-activated flood lights that automatically illuminate larger areas when you enter your workspace, particularly useful during evening hours.
Battery-powered lanterns strategically placed around your workshop provide flexible lighting solutions and serve as backup options during power outages. Solar-powered path lights around the workshop’s exterior help safely guide you to and from your workspace while adding a decorative touch.
For consistent coverage, mount weatherproof LED panels on the ceiling at regular intervals. These fixtures typically provide 4000-5000 lumens of bright, natural-looking light that reduces eye strain during detailed work. When selecting ambient lighting, opt for fixtures with at least IP65 weather resistance rating to ensure long-term durability in outdoor conditions.
A combination of these lighting solutions allows you to create layers of illumination that can be adjusted according to your needs and the time of day. Remember to position lights to minimize shadows and glare on your work surfaces.
Security Lighting Integration
Enhance your workshop’s functionality by integrating security features into your lighting setup. Motion sensor lights serve double duty, providing illumination when you’re working late and deterring potential intruders when you’re away. Consider installing flood lights at strategic corners, combining them with softer task lighting for a comprehensive security solution. Timer-controlled lights can create the impression of activity during your absence, while smart lighting systems allow remote monitoring and control through your smartphone. For maximum effectiveness, position lights to eliminate dark spots and shadows where intruders might hide. Remember to angle security lights downward to avoid disturbing neighbors while maintaining effective coverage of your workspace area.
Weather-Resistant Lighting Features
IP Ratings Explained
When choosing outdoor workshop lights, understanding IP ratings is crucial for ensuring your lighting can withstand the elements. These ratings consist of two numbers: the first indicates protection against solid objects and dust, while the second shows water resistance. For outdoor lighting, look for ratings of at least IP65.
Common IP ratings you’ll encounter include:
– IP44: Protected against water splashes; suitable for covered areas
– IP65: Dust-tight and protected against water jets; ideal for most outdoor workshops
– IP67: Dust-tight and can handle temporary submersion; perfect for areas prone to flooding
The higher the numbers, the better the protection. For example, an IP65-rated light will keep working even during heavy rain, while an IP44 light should be installed under shelter. When mounting lights near your workbench or in areas exposed to weather, choosing the right IP rating can mean the difference between reliable lighting and frequent replacements.
Consider your local climate and workshop layout when selecting IP ratings. Coastal areas or regions with heavy rainfall might benefit from higher protection levels.
All-Season Performance
When selecting outdoor workshop lights, it’s crucial to understand how different options perform throughout the year. Just as you need to weather-proof your workspace, your lighting needs to withstand various environmental challenges.
LED fixtures are particularly resilient in extreme temperatures, maintaining consistent performance from scorching summers to frigid winters. Unlike traditional halogen lights, they don’t generate excessive heat, making them safer and more reliable during hot weather. Their sealed construction also prevents moisture intrusion, essential for rainy seasons.
Metal halide lights offer excellent visibility in cold conditions but require warm-up time, which can be inconvenient during winter months. Solar-powered options work wonderfully during summer but may need backup power sources during shorter winter days or extended cloudy periods.
For coastal areas, look for marine-grade fixtures with corrosion-resistant finishes to combat salt air exposure. In regions with heavy snowfall, opt for lights with steep-angled housings that prevent snow accumulation. Areas prone to strong winds benefit from sturdy mounting systems and impact-resistant materials.
Consider motion sensors and timers that function reliably in all weather conditions. These features not only enhance security but also ensure your lights work efficiently year-round. Remember to check IP ratings – aim for IP65 or higher for comprehensive weather protection in outdoor settings.
Smart Installation Tips
Positioning and Coverage
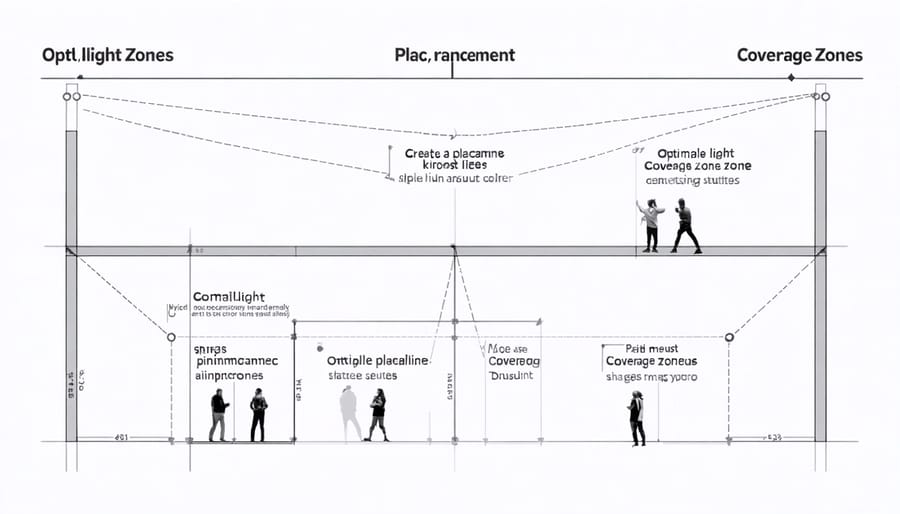
Strategic placement of outdoor workshop lights is crucial for creating an efficient and ergonomic workspace design. Start by identifying your primary work areas and common paths to ensure comprehensive coverage. Position lights at a height of 8-10 feet for optimal spread, angling them slightly downward to minimize glare and shadows.
For workbenches and detailed task areas, install lights directly above at about 4-5 feet from the work surface. This prevents your body from casting shadows on your project. Consider mounting lights on both sides of your workspace to eliminate shadowing when working with tools.
Place motion-sensor lights near entrances and walkways for safety and convenience. These should illuminate at least 15 feet in front of the entrance area. For general area lighting, space fixtures approximately 8-12 feet apart to create even illumination without dark spots.
Remember to account for existing natural light sources and obstacles. Position lights to complement rather than compete with daylight, and avoid mounting them behind large equipment or storage units. Install weather-resistant junction boxes at strategic points to facilitate future lighting additions or modifications.
For maximum efficiency, angle corner-mounted lights at 45 degrees to provide overlapping coverage. This creates a more uniform lighting pattern and ensures no dead zones in your workspace.
Power Source Options
When it comes to powering your outdoor workshop lights, you have several reliable options to choose from. The most common approach is connecting to your home’s electrical system through properly installed outdoor-rated wiring and weatherproof outlets. This provides consistent power and allows for the installation of permanent lighting fixtures.
For areas where running electrical lines isn’t practical, solar-powered lighting systems offer an excellent alternative. Modern solar lights come with improved battery technology and brighter LED bulbs, making them increasingly popular for workshop spaces. Many systems include backup battery storage, ensuring your workspace stays illuminated even during cloudy periods.
Battery-powered lights provide another flexible solution, especially for temporary setups or remote areas. Look for rechargeable options with long-lasting lithium-ion batteries to reduce ongoing costs. Some newer models even offer hybrid functionality, allowing you to switch between battery power and direct electrical connection.
For those concerned about energy efficiency, consider smart power management systems that automatically adjust brightness based on natural light levels or motion detection. These systems can significantly reduce your energy consumption while ensuring your workshop remains well-lit when needed.
Remember to always follow local electrical codes and consider consulting a licensed electrician for permanent installations, particularly when running new power lines to your workshop space.
Energy Efficiency and Cost Management
LED vs. Traditional Options
When comparing lighting options for your outdoor workshop, LED technology stands out as the clear frontrunner against traditional lighting solutions. LEDs offer remarkable energy efficiency, using up to 75% less electricity than traditional incandescent bulbs while providing the same or better illumination. This translates to significant savings on your energy bills over time.
LED lights also boast an impressive lifespan of up to 50,000 hours, compared to just 1,000 hours for traditional bulbs. This means less frequent replacements and lower maintenance costs for your workshop lighting. Plus, LED lights reach full brightness instantly, unlike fluorescent lights that need time to warm up – a crucial feature when you need immediate visibility in your workspace.
Another advantage of LED lighting is its durability. These lights are resistant to shock, vibrations, and temperature fluctuations, making them perfect for outdoor workshop environments. Traditional bulbs, with their fragile filaments, are more prone to breaking from accidental bumps or environmental stress.
Color accuracy is another area where LEDs excel. Modern LED lights offer excellent color rendering, helping you see true colors in your work pieces – essential for detailed projects. They also come in various color temperatures, from warm white to daylight, allowing you to customize your workshop’s lighting atmosphere.
While the initial cost of LED lighting might be higher than traditional options, the long-term benefits – including reduced energy consumption, longer lifespan, and minimal maintenance – make them a smart investment for your outdoor workshop. Many DIY enthusiasts report that switching to LEDs has improved both their work efficiency and comfort level during extended projects.
Smart Controls and Automation
Modern technology has revolutionized how we control outdoor workshop lighting, making it both energy-efficient and convenient. Smart controls allow you to manage your lighting system through smartphone apps or voice commands, perfect for those focused on outdoor workspace optimization.
Motion sensors are a game-changer for workshop lighting, automatically illuminating areas when you enter and turning off when you leave. This not only saves energy but also provides hands-free convenience when carrying tools or materials. Many systems now offer customizable sensitivity settings to prevent false triggers from wildlife or wind-blown debris.
Timer functions let you schedule lights to match your work patterns, ensuring your workshop is well-lit when you need it. Some smart systems even adjust to sunset and sunrise times automatically, adapting throughout the year without manual intervention.
Dimming capabilities help create the perfect lighting level for different tasks while reducing energy consumption. Many modern LED systems can be grouped into zones, allowing you to control different areas independently. This means you can keep your workbench brightly lit while maintaining softer lighting in storage areas.
For maximum efficiency, consider systems with daylight sensors that automatically adjust artificial lighting based on available natural light. Some advanced setups even learn your usage patterns over time, anticipating your needs and adjusting accordingly. These smart features not only enhance convenience but can significantly reduce your energy bills while maintaining optimal lighting conditions.
Selecting the right outdoor workshop lighting is crucial for creating a safe, functional, and enjoyable workspace. Throughout this guide, we’ve explored various lighting options that can transform your outdoor workshop into a well-lit haven for your projects. From powerful LED flood lights for general illumination to targeted task lighting for detailed work, each type serves a specific purpose in your workshop setup.
Remember to prioritize weather resistance when choosing fixtures, ensuring they’re rated for outdoor use and can withstand your local climate conditions. Strategic placement of lights, combining different types for optimal coverage, and incorporating motion sensors can significantly enhance both functionality and security.
While budget considerations are important, investing in quality lighting fixtures often pays off through improved durability, better energy efficiency, and enhanced workspace safety. Consider starting with essential lighting in key work areas and gradually expanding your setup as needed.
For the best results, create a lighting plan that includes both overhead and task-specific lighting, and don’t forget to factor in natural light when positioning your fixtures. Regular maintenance, including cleaning and prompt replacement of failed bulbs, will help ensure your workshop remains well-lit and ready for any project.
By following these guidelines and recommendations, you’ll create an outdoor workshop that’s properly illuminated for both day and night use, making your DIY projects more enjoyable and productive year-round.