
Why Concrete Modular Systems Are Changing How Sheds Get Built
Picture this: you’ve finally decided to build that backyard shed, but now you’re staring at your sloped, uneven yard wondering how to create a level, stable foundation without mixing concrete or hiring a contractor. Concrete modular systems solve exactly this problem. These innovative foundation blocks snap or stack together like oversized building blocks, letting you create a perfectly level base in hours instead of days—no mixing, no curing time, and no expensive equipment rentals.
Think of them as the LEGO blocks of shed foundations. Each interlocking unit distributes your shed’s weight evenly across the ground while allowing for natural drainage and ground movement. Unlike traditional poured concrete slabs that crack with soil shifts, these systems flex slightly with your yard’s seasonal changes. They’re particularly brilliant for DIY homeowners because they’re adjustable—if you miscalculate by an inch or two during installation, you can simply reposition blocks rather than starting over.
The real beauty? You can install a complete foundation for a standard 10×12 shed in a single weekend, often for less than half the cost of a concrete slab, and if you ever move or want to relocate your shed, you can disassemble and reuse every single block.
What Are Concrete Modular Systems for Sheds?
The Main Components
Concrete modular systems are surprisingly straightforward once you understand the basic pieces. At the heart of the system are individual concrete blocks or pads, typically measuring between 18 to 24 inches square. These serve as your foundation’s building blocks, literally. Each piece is designed to sit on level ground and support a specific weight load, making them incredibly versatile for different shed sizes.
What makes these systems truly modular is how the pieces work together. Many brands include corner pieces or edge blocks with special grooves or connection points that help align everything perfectly. Some homeowners I’ve spoken with appreciate that these corner pieces take the guesswork out of squaring up your foundation—they simply lock into place.
The interconnection methods vary by manufacturer. Some blocks feature interlocking tabs that snap together, while others rely on precise placement and gravity to stay put. Higher-end systems might include metal brackets or pins that connect the blocks for added stability. The beauty is that you can typically add or remove blocks to accommodate different shed dimensions. Most systems also include adjustable feet or shims, letting you level individual blocks on slightly uneven terrain—a real problem-solver when your yard isn’t perfectly flat.
How They Differ From Traditional Foundations
Unlike traditional foundation methods, concrete modular systems offer a refreshingly simple approach. Poured concrete slabs require extensive site preparation, mixing, pouring, and several days of curing time before you can build. Gravel foundations need careful leveling and compacting, which can shift over time. Modular systems arrive pre-formed and ready to install, typically taking just a few hours to set up rather than days or weeks. They’re also adjustable, so you can easily level them on uneven ground without excavation. While poured slabs are permanent and difficult to modify, modular blocks can be rearranged or relocated if your needs change. The cost difference is notable too—modular systems generally run less than professional concrete installation and don’t require special equipment or skills. For homeowners wanting a solid foundation without the commitment or complexity of traditional methods, these systems hit the sweet spot.
The Real Benefits for Homeowners
No Waiting for Concrete to Cure
One of the biggest advantages of concrete modular systems is the instant usability factor. Traditional poured concrete foundations require anywhere from 3 to 7 days of curing time before you can begin building on them. During this waiting period, you’ll need to keep the concrete protected from the elements and foot traffic, which can be frustrating when you’re eager to start your project.
With modular systems, you simply position the blocks or pads according to your shed’s specifications, level them properly, and you’re ready to build immediately. No mixing cement, no waiting around, and no worrying about weather conditions disrupting the curing process. This means you can realistically complete your entire shed installation in a single weekend rather than stretching it across multiple weeks. For busy homeowners juggling work and family commitments, this time savings can be the difference between a finished project and one that stalls indefinitely.
DIY-Friendly Installation
One of the biggest advantages of concrete modular systems is that they’re designed with DIY homeowners in mind. Unlike traditional concrete pours that require professional crews, mixing trucks, and specialized tools, modular systems arrive ready to use right out of the delivery truck. You simply position the blocks or panels on leveled ground and stack them according to your shed’s dimensions. Most homeowners complete installation in just a few hours using basic tools you probably already own—a level, tape measure, and rubber mallet are typically all you need.
Sarah from Tennessee shared her experience: “I was nervous about tackling the foundation myself, but the modular blocks were so straightforward. I had my 10×12 shed base ready in one Saturday morning, and I’m definitely not a construction expert.” The interlocking design eliminates guesswork, and because each piece is manageable in weight, you won’t need heavy equipment or extra helpers for most shed sizes.
Adjustable and Movable
One of the standout advantages of concrete modular systems is their incredible adaptability to real-world conditions. If your yard has a slight slope or uneven terrain, these blocks can be individually adjusted to create a perfectly level foundation without expensive excavation or grading work. Simply stack or shim the blocks as needed until your shed base is completely level—no specialized skills required.
Even better, these systems aren’t permanent. Life changes, and your storage needs might too. Planning to expand your shed in a few years? Relocating to a new property? Concrete modular blocks can be disassembled, moved, and reassembled elsewhere. Many homeowners love this flexibility, especially renters or those who aren’t ready to commit to a permanent foundation. One DIY enthusiast shared how she successfully moved her entire shed and foundation when she landscaped her backyard, something that would’ve been impossible with a poured concrete slab. This adaptability makes modular systems a smart, future-proof investment for your outdoor storage needs.
Cost Comparison
Modular concrete systems typically cost between $4 and $8 per square foot, making them competitive with traditional options. For an average 10×12 shed, expect to spend $480 to $960 on materials. Compare this to a poured concrete slab at $6 to $12 per square foot (including labor), or gravel foundations at $3 to $5 per square foot.
While gravel appears cheaper initially, modular systems offer better value long-term. They provide superior stability, won’t shift or settle like gravel, and often last decades without maintenance. Traditional concrete slabs require professional installation, adding $300 to $800 in labor costs. Modular systems are DIY-friendly, saving you that expense entirely.
Sarah from Ohio shared her experience: “I installed my modular foundation in four hours solo. A concrete pour would’ve cost me triple when factoring in contractor fees and site prep.”
Common Types of Concrete Modular Systems
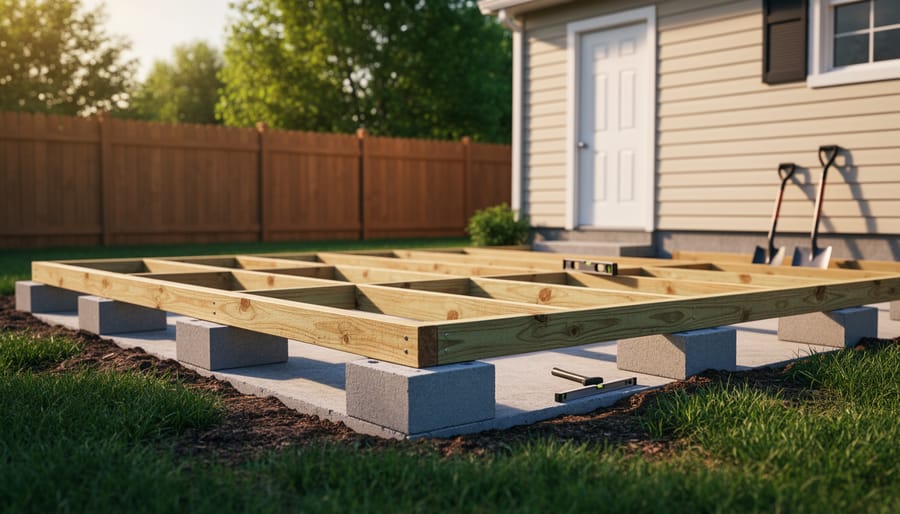
Concrete Deck Blocks
Concrete deck blocks are the simplest modular foundation option you’ll find at your local hardware store. These precast blocks typically measure 8×8 inches or larger and feature a recessed top designed to cradle 4×4 posts or wooden beams. Most standard blocks handle between 1,800 to 8,000 pounds depending on their size and design, making them perfectly adequate for smaller sheds up to 8×12 feet.
They’re incredibly popular with DIYers because there’s virtually no setup required. Just level the ground, place your blocks in a grid pattern, and you’re ready to build. No mixing concrete or waiting for anything to cure. One homeowner shared that she had her entire 6×8 tool shed foundation ready in under two hours using twelve blocks.
However, deck blocks do have limitations. They work best on firm, stable ground and aren’t recommended for sloped yards or areas with soft soil. They can also shift over time with freeze-thaw cycles, so regular leveling checks are important. For temporary structures or situations where you might relocate your shed later, though, they’re an excellent choice that balances convenience with reasonable stability.
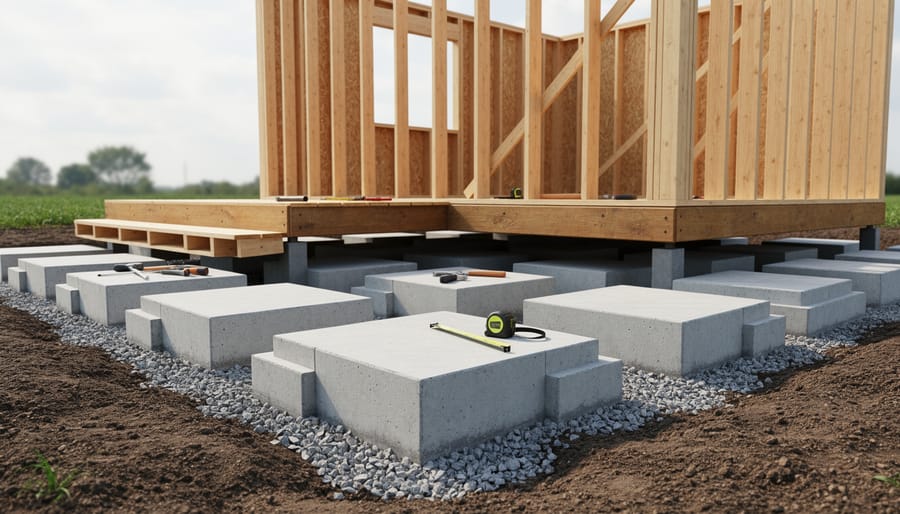
Modular Concrete Pads
For larger sheds, modular concrete pads offer a robust foundation solution that’s both permanent and DIY-friendly. These pre-cast slabs typically measure 2×2 feet or 3×3 feet and are specifically engineered to support the weight of sheds and their contents. Many varieties feature interlocking edges that snap together like puzzle pieces, creating a stable, unified surface without needing mortar or adhesive.
The beauty of these pads lies in their flexibility. You can arrange them to match your shed’s exact footprint, and if you decide to relocate or expand your shed down the road, you can simply reconfigure the layout. Installation is straightforward: level the ground, add a thin gravel base for drainage, and position the pads. The interlocking design helps prevent shifting over time, which is especially helpful in areas with freeze-thaw cycles.
One homeowner shared how she created a 10×12 shed foundation in a single weekend using interlocking pads, something she never thought possible without hiring contractors. The key is ensuring your base layer is properly leveled from the start, as correcting mistakes becomes harder once multiple pads are in place.
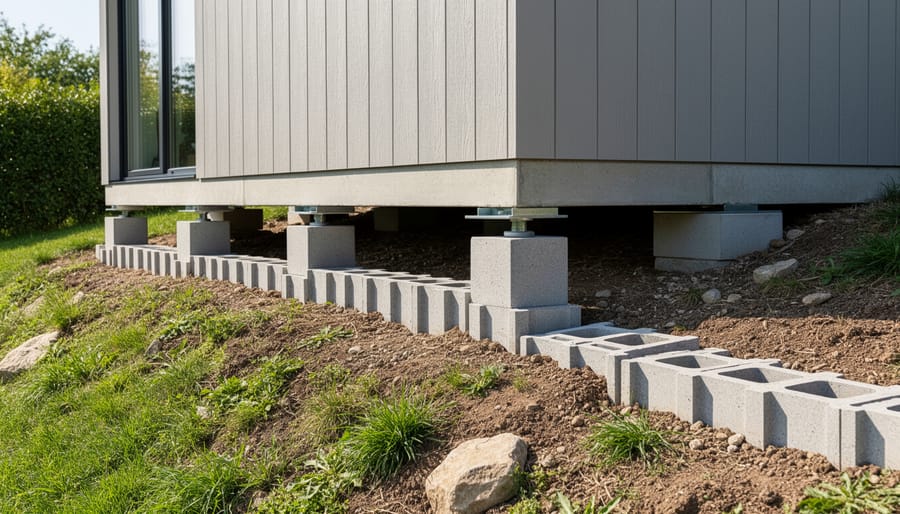
Pier and Block Systems
Pier and block systems offer a smart, budget-friendly foundation option that’s particularly popular among DIY shed builders. These systems use individual concrete blocks or precast piers strategically placed around the perimeter and center of your shed footprint, creating an elevated platform that keeps your structure off the ground.
The real beauty of this approach lies in its simplicity and effectiveness. By lifting your shed several inches above ground level, pier and block systems provide better drainage and ventilation underneath, which significantly reduces moisture problems that can lead to rot and structural damage over time.
One homeowner from Oregon shared that her pier foundation “saved my garden shed from the constant dampness we get here. No more musty smell or warped floorboards!” This elevated design also makes it easier to spot and address pest issues before they become major headaches.
The installation process is straightforward enough for most DIYers. You’ll dig shallow holes, level each pier carefully, and place them according to your shed’s specifications. The key is ensuring each support point sits level with the others, which takes patience but doesn’t require professional expertise or expensive equipment.
Step-by-Step: Installing a Concrete Modular Foundation
Preparing Your Site
Getting your site ready is the first step toward creating a stable shed foundation with concrete modular systems. Start by measuring your shed’s footprint and marking the area with stakes and string. Clear away grass, rocks, and debris from the entire space, extending about six inches beyond your marked perimeter. Check for level using a long board and carpenter’s level, working in multiple directions. Don’t worry if your ground isn’t perfectly flat—small variations are normal. The goal is identifying any major slopes or dips that need attention. Remove high spots with a shovel and fill low areas with compacted gravel or sand. This basic preparation ensures your concrete blocks will sit evenly and support your shed properly for years to come.
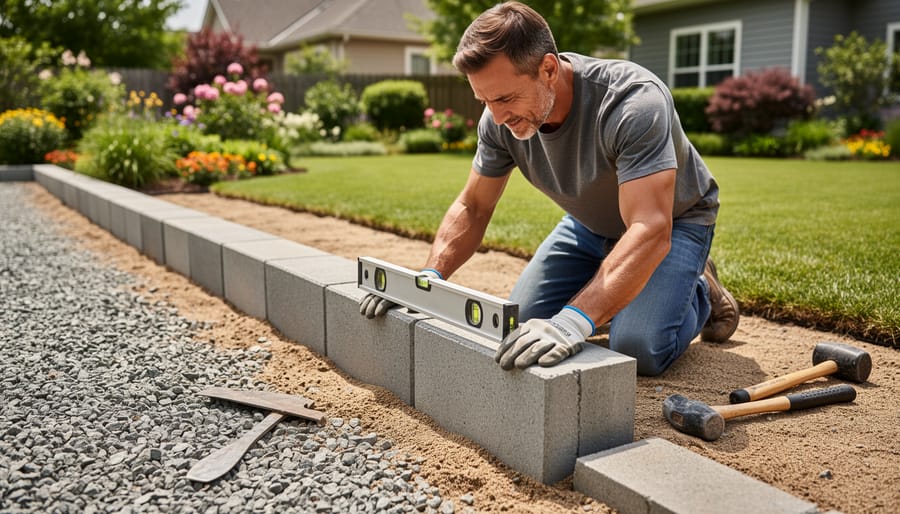
Placing and Leveling the Blocks
Getting your concrete blocks positioned correctly is easier than you might think, and it sets the stage for a rock-solid shed foundation. Start by placing your modular blocks according to your layout plan, spacing them appropriately to support the shed’s floor joists or frame.
The most important tool you’ll need is a quality level—both a torpedo level for individual blocks and a longer 4-foot level for checking across multiple blocks. You’ll also want some crushed stone or sand on hand for making adjustments.
Place each block in position and check it in multiple directions. If a block sits too high, remove some base material beneath it. If it’s too low, add more crushed stone and tamp it down firmly. Work slowly and check often—taking an extra 20 minutes now saves headaches later.
Here’s a helpful tip from experienced DIYers: start with your corner blocks first, get them perfectly level with each other, then use a string line stretched between corners as a guide for the blocks in between. This visual reference makes the job much faster and ensures everything lines up beautifully. Remember, patience during this step pays off with a shed that sits straight and true for years to come.
Securing and Stabilizing
Once your concrete modular system is in place, taking a few extra steps ensures long-term stability and peace of mind. Start by double-checking that all blocks are level with each other—even small variations can create stress points over time. If you notice any wobbling, slip shims underneath to create a perfectly stable surface before placing your shed.
Ground settling is a natural concern, especially in the first year after installation. The good news is that concrete blocks distribute weight evenly, which minimizes settling issues. However, it’s smart to inspect your foundation every few months during the first year. Walk around your shed and look for gaps between the structure and blocks, or check if doors and windows stick—these are telltale signs of movement.
If you do notice settling, don’t panic. Minor adjustments are usually straightforward. You can carefully lift the affected corner using a jack and add gravel or adjust shims to restore level. For clay-heavy or particularly soft soil, consider digging down a few extra inches and adding a compacted gravel base before placing blocks—this simple step prevents most settling problems before they start and gives you a rock-solid foundation for years to come.
Real Problems These Systems Solve
When Your Yard Isn’t Perfectly Level
Here’s where concrete modular systems really shine. If you’ve got a yard that’s not perfectly flat, these systems adapt beautifully to sloped or uneven terrain without the headache of extensive excavation. Instead of digging out and leveling large areas like you would for a traditional concrete slab, you can adjust individual blocks to create a level foundation surface. This means less grading work, lower costs, and far less disruption to your yard’s existing landscape. Simply add or remove gravel beneath specific blocks to compensate for elevation changes. Many homeowners love this flexibility because it lets them work with their yard’s natural contours rather than fighting against them, making installation faster and more forgiving for DIY projects.
Avoiding Permit Headaches
One of the lesser-known advantages of concrete modular systems is that they may help you sidestep some of the permitting requirements that come with permanent foundations. In many jurisdictions, structures on temporary or non-permanent foundations don’t trigger the same permit processes as those with poured concrete slabs or footings. Since modular concrete blocks simply sit on top of prepared ground without being anchored permanently into it, your project might fall into a simpler approval category.
This can mean faster project timelines, lower costs, and less paperwork headaches. For homeowners eager to get their shed up and running, this flexibility is incredibly appealing. However, it’s absolutely essential to check with your local building department before assuming you’re in the clear. Building codes vary widely from one municipality to another, and what’s considered non-permanent in one area might require permits in another.
Some areas have size restrictions where sheds under a certain square footage don’t need permits regardless of foundation type. Others focus on whether utilities are involved. The bottom line? A quick call to your local code enforcement office can save you from costly surprises down the road and ensure your project stays completely above board.
What to Watch Out For
Size and Weight Limitations
Concrete modular systems work beautifully for most residential shed projects, but understanding the size and weight parameters helps ensure success. These systems typically handle sheds ranging from small 6×8-foot garden storage units up to larger 12×16-foot workshops without issue. The key is matching the number and arrangement of blocks to your shed’s footprint and weight.
For standard wooden sheds weighing between 1,000 and 3,000 pounds, a properly spaced grid of blocks provides excellent support. Most manufacturers recommend placing blocks every 3-4 feet along the perimeter and adding interior supports for wider structures. If you’re planning a particularly heavy shed with metal roofing, extra equipment storage, or thick walls, you’ll simply need more blocks distributed evenly across the base.
One real advantage for DIYers: these systems grow with your needs. Sarah from Oregon shared that she started with a basic 8×10 storage shed on modular blocks, then added a matching 8×8 workshop alongside it years later using the same foundation method. The flexibility makes future expansion straightforward without major groundwork. Just remember that extremely large structures over 200 square feet may benefit from professional consultation to ensure optimal block placement and long-term stability.
Ground Conditions That Matter
Not all ground is created equal, and understanding what’s beneath your shed site can save you headaches down the road. Concrete modular systems work beautifully on most terrain, but certain conditions call for a bit of extra attention.
Clay-heavy soils pose the biggest challenge since they expand when wet and contract during dry spells. This movement can shift your foundation over time, so consider adding a gravel base layer for drainage and stability. Sandy soil, on the other hand, drains well but may need compacting to prevent settling.
If your yard tends to puddle after rain or sits in a low-lying area, drainage becomes crucial. Water pooling around your foundation can undermine stability and lead to moisture problems. In these situations, you might need to grade the area slightly or install a French drain to redirect water away from your shed.
Sloped sites need leveling before placing modular blocks. A gentle slope might only require some gravel fill, but steeper grades may need more extensive terracing or retaining work. The good news? Once you’ve addressed these conditions properly, concrete modular systems adapt remarkably well, giving you that solid, level foundation your shed deserves.
Concrete modular systems offer an impressive combination of simplicity, durability, and flexibility that makes them an outstanding choice for most shed foundation projects. Whether you’re a first-time DIYer or an experienced builder, these systems eliminate much of the guesswork and heavy lifting associated with traditional foundation methods. You’ll appreciate how they adapt to slightly uneven terrain, require minimal tools, and can be installed in just a few hours—often in a single afternoon.
The real beauty of modular systems lies in their problem-solving nature. They provide excellent drainage, won’t rot or deteriorate like wood, and can be easily adjusted or relocated if your needs change down the road. For homeowners seeking a reliable foundation that balances cost, performance, and ease of installation, concrete modular systems consistently deliver.
That said, take a moment to honestly assess your shed size and site conditions before making your final decision. Larger structures or challenging terrain might benefit from a more robust foundation approach. But for most typical backyard sheds, you’ll find these systems offer everything you need to create a stable, long-lasting base. Trust your preparation, follow the installation steps carefully, and you’ll have a foundation you can feel confident about for years to come.