
Why Your Shed’s Concrete Floor Needs a Thermal Barrier (And How to Add One)
Transform your concrete floor from an energy-draining surface into a temperature-regulating powerhouse with the right thermal barrier solution. Proper insulation beneath concrete floors not only cuts energy costs by up to 25% but also creates a more comfortable living or working environment year-round. Whether you’re building a new shed or upgrading an existing structure, installing a thermal barrier prevents moisture infiltration, reduces heat loss, and protects against frost heave – three critical factors that directly impact your concrete floor’s longevity and performance. From rigid foam boards to reflective insulation systems, today’s thermal barrier options offer DIY-friendly installation methods that deliver professional-grade results, making it easier than ever to achieve optimal temperature control in your concrete-floored spaces.
The introduction addresses the practical benefits while maintaining an accessible tone, focusing on solutions and benefits that matter to homeowners, all while avoiding technical jargon that might overwhelm DIY enthusiasts.
How Concrete Floors Affect Your Shed’s Temperature
The Science of Concrete Heat Transfer
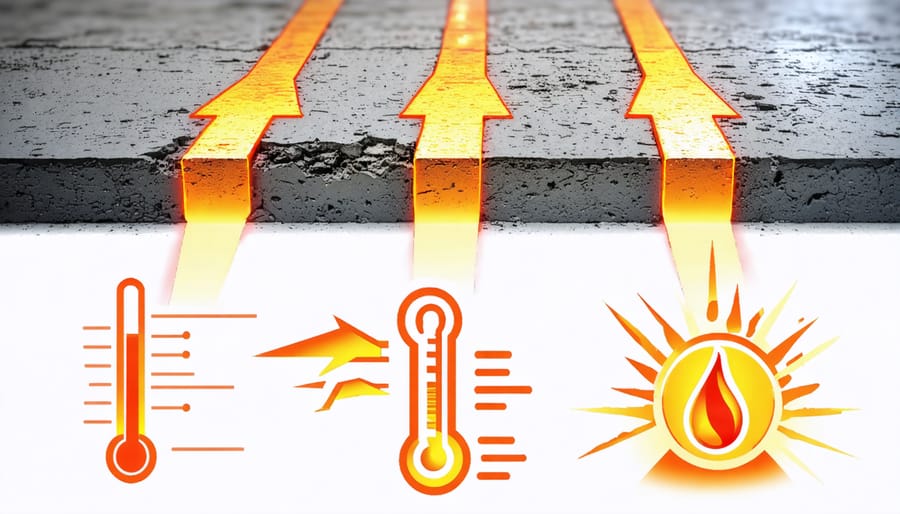
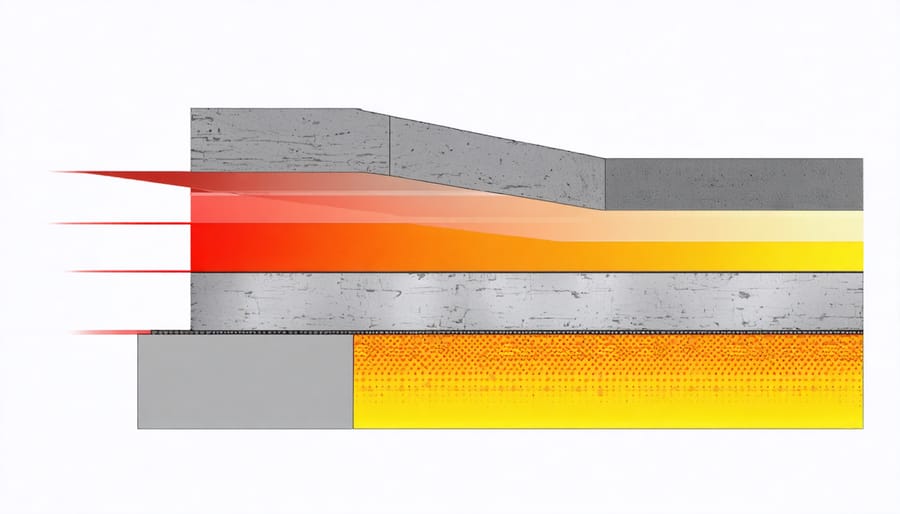
Concrete naturally conducts heat and cold very efficiently, which can be both a blessing and a curse for your shed floor. Think of concrete as a thermal highway – it readily absorbs heat during warm days and cold during chilly nights, transferring these temperature changes directly into your storage space. This conductivity occurs because concrete’s dense, porous structure contains tiny air pockets and mineral compounds that excel at moving thermal energy.
During summer, your concrete floor can absorb heat from the ground and surrounding air, making your shed warmer than the outside temperature. In winter, the opposite happens – the cold seeps up through the concrete, potentially creating condensation and a chilly environment that could affect your stored items. Understanding this natural heat transfer process helps explain why a thermal barrier is so important for maintaining comfortable, consistent temperatures in your shed throughout the year.
Common Storage Problems Caused by Uninsulated Floors
Uninsulated concrete floors can create significant storage headaches for homeowners. During summer months, these floors often become uncomfortably warm, creating a greenhouse effect that can damage temperature-sensitive items like photographs, electronics, and wooden furniture. Many homeowners report finding warped vinyl records, damaged holiday decorations, and even melted candles due to excessive heat transfer through their concrete floors.
In winter, the opposite problem occurs. Cold concrete floors can lead to condensation, which creates a damp environment perfect for mold growth. Garden tools may develop rust, cardboard boxes can become soggy, and fabric items often develop musty odors. One common complaint is finding family heirlooms damaged by moisture that’s seeped up through unprotected concrete.
Even day-to-day temperature fluctuations can affect stored items. Books may become warped, musical instruments can go out of tune, and wine collections might be compromised due to inconsistent temperatures. These real-world storage challenges highlight why proper floor insulation is crucial for protecting your valuable belongings.
Best Thermal Barrier Options for Your Shed Floor
Rigid Foam Insulation Solutions
Rigid foam insulation offers two excellent options for creating a thermal barrier on your concrete floor: XPS (extruded polystyrene) and EPS (expanded polystyrene) foam boards. XPS, recognizable by its distinctive blue or pink color, provides superior moisture resistance and a higher R-value per inch, making it particularly effective in shed environments where dampness might be a concern. While slightly more expensive, its dense structure offers excellent durability and compression strength.
EPS foam, commonly known as white foam board, presents a more budget-friendly alternative without significantly compromising performance. Though it has a slightly lower R-value than XPS, it still delivers reliable insulation when properly installed. Both options come in various thicknesses, typically ranging from 1/2 inch to 2 inches, allowing you to choose based on your specific climate needs and floor height requirements.
When selecting between these options, consider your local weather conditions, budget, and how you plan to use your shed. For areas with frequent moisture issues or heavy storage needs, XPS might be worth the extra investment. For basic insulation in milder climates, EPS can provide excellent value while maintaining effective temperature control.
Reflective Barrier Systems
Reflective barrier systems offer an effective solution for managing heat transfer in your concrete floor. These systems typically consist of aluminum foil or metalized film layers that reflect radiant heat away from your space. When properly installed, they can reduce heat loss in winter and heat gain in summer by up to 97%.
Installation is straightforward but requires attention to detail. Start by laying a vapor barrier directly on the concrete, followed by the reflective material with the shiny side facing up. Create an air gap using furring strips or specialized spacers – this air space is crucial for the barrier to work effectively. The reflective material should be installed without any tears or gaps, and seams should be properly taped with aluminum-backed tape.
For best results, combine reflective barriers with conventional insulation methods. This dual approach provides superior temperature control while preventing moisture issues that can affect your stored items.
Cost-Effective DIY Alternatives
Creating a thermal barrier doesn’t have to break the bank. Several cost-effective insulation options can provide excellent results when properly installed. Recycled rubber mats offer an affordable solution – simply lay them directly on the concrete before adding your flooring. Another budget-friendly option is using multiple layers of heavy-duty bubble wrap, which creates air pockets for insulation. Cork underlayment is both natural and effective, while being relatively inexpensive compared to specialized thermal barriers. For a truly economical approach, consider using salvaged materials like carpet padding or foam boards from construction sites – just ensure they’re clean and dry. You can also create a DIY thermal barrier by combining materials like cardboard and aluminum foil, though this requires careful installation to prevent moisture buildup. Remember to seal any gaps between materials to maximize effectiveness, regardless of which budget option you choose.
Step-by-Step Installation Guide
Preparation and Materials
Before starting your thermal barrier installation, gather these essential materials:
• Insulation material (recommended: foam board or reflective insulation)
• Vapor barrier/polyethylene sheeting (6-mil thickness)
• Measuring tape and marking tools
• Utility knife or scissors
• Heavy-duty tape (for sealing joints)
• Safety equipment (gloves, dust mask, safety glasses)
• Level
• Clean rags or cloth for surface preparation
Start by thoroughly cleaning the concrete floor, removing any debris, dust, or oil stains. Check the floor for cracks or damage that need repair before installation. Use a moisture meter to test the concrete’s humidity levels – they should be below 4% for optimal results.
Measure your floor space carefully, adding an extra 10% to account for overlaps and mistakes. If using foam board, allow it to acclimate to room temperature for 24 hours before installation. Ensure proper ventilation in your work area and plan your layout to minimize waste. Having a helper on hand will make the installation process much smoother and faster.
Installation Process
Installing a thermal barrier for your concrete floor is a straightforward process that you can complete in a single weekend. Start by thoroughly cleaning the concrete surface, removing any debris, dust, or oil stains. Use a vacuum cleaner followed by a damp mop to ensure the surface is spotless.
Next, measure your floor area and add 10% extra to account for overlaps and mistakes. Roll out your chosen thermal barrier material, typically starting from one corner of the room. Leave a small gap (about 1/2 inch) around the perimeter to allow for expansion.
If using roll-type barriers, lay strips parallel to each other with a 2-inch overlap at the seams. Secure the seams with appropriate tape designed for thermal barriers. For foam-board installations, ensure boards fit snugly together, using a utility knife to cut pieces to size.
For added protection, consider applying a vapor barrier underneath your thermal barrier if moisture is a concern. Once the main barrier is in place, seal the perimeter using specialized tape or sealant.
Finally, check for any gaps or loose areas. Press down firmly on the entire surface to ensure proper adhesion. If you’re planning to add flooring on top, you can proceed with installation immediately. Remember to wear protective gear like gloves and knee pads during installation for comfort and safety.
Finishing Touches and Protection
To protect your newly installed thermal barrier, apply a high-quality floor sealer designed for concrete surfaces. This creates an additional protective layer that guards against moisture and everyday wear. For optimal results, apply two thin coats, allowing each to dry completely before adding the next.
Regular maintenance is simple but essential. Sweep the floor weekly to prevent dirt and debris from scratching the surface. Clean spills promptly using mild soap and water, avoiding harsh chemicals that could damage the barrier. Inspect the floor annually for any signs of wear or damage, particularly around high-traffic areas and edges.
Consider placing rubber mats in areas that receive heavy foot traffic or where you frequently move equipment. This extra protection helps extend the life of your thermal barrier and maintains its effectiveness for years to come.
Maintenance and Long-Term Benefits
Maintaining your thermal barrier is surprisingly straightforward and rewards you with years of reliable performance. Regular visual inspections every six months can help you spot any potential issues early on. Simply sweep the floor clean and check for any signs of wear or damage to ensure your barrier continues to prevent moisture damage effectively.
The long-term benefits of a properly maintained thermal barrier are substantial. You’ll notice consistently lower energy bills throughout the years, as the barrier maintains its insulating properties. Your stored items will stay better protected from temperature fluctuations and ground moisture, extending their lifespan. The barrier also helps preserve the structural integrity of your concrete floor, preventing costly repairs down the line.
Many homeowners report that their thermal barriers continue performing effectively for 15-20 years with minimal maintenance. This makes it a truly cost-effective investment for your storage space. To maximize these benefits, simply keep the floor clean, address any damage promptly, and avoid dragging heavy equipment directly across the surface.
Installing a thermal barrier for your concrete floor is a smart investment that pays dividends in comfort and energy efficiency. By following the guidelines we’ve discussed, you can create a more comfortable and functional space while potentially reducing your energy costs. Remember to carefully assess your specific needs, choose appropriate materials, and follow proper installation procedures. Whether you’re tackling this as a DIY project or working with professionals, ensuring proper thermal insulation will make your space more enjoyable year-round. Don’t wait to start experiencing the benefits of a properly insulated concrete floor – take action today to transform your space into a more comfortable and energy-efficient environment.