
Build a Rock-Solid Truss Shed Roof That Won’t Sag or Leak
Transform your shed into a durable, long-lasting structure with a properly engineered truss roof system. Truss roofs distribute weight evenly across your shed’s walls while maximizing interior storage space, making them the go-to choice for serious DIY builders and homeowners. Whether you’re planning a compact garden shed or a spacious workshop, understanding truss roof design principles ensures your structure stands strong against weather, snow loads, and time.
A well-built truss shed roof combines triangulated support members with precise angles and connections, creating a framework that’s both lightweight and incredibly strong. Today’s pre-manufactured trusses offer convenience and engineering certainty, while custom-built options allow for unique configurations to match specific needs. From traditional Fink trusses to modern scissor designs, choosing the right truss style impacts not just structural integrity but also your shed’s functionality and appearance.
This comprehensive guide explores everything you need to know about truss shed roofs – from basic design concepts to material selection, spacing requirements, and essential installation tips that ensure your project’s success. Let’s dive into the fundamentals of creating a rock-solid roof system that protects your investment and enhances your property’s value.
Understanding Truss Shed Roof Basics
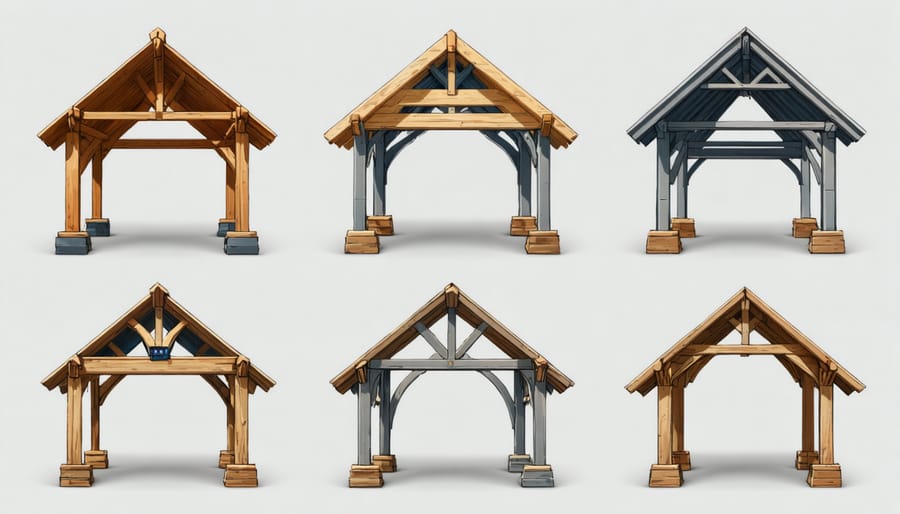
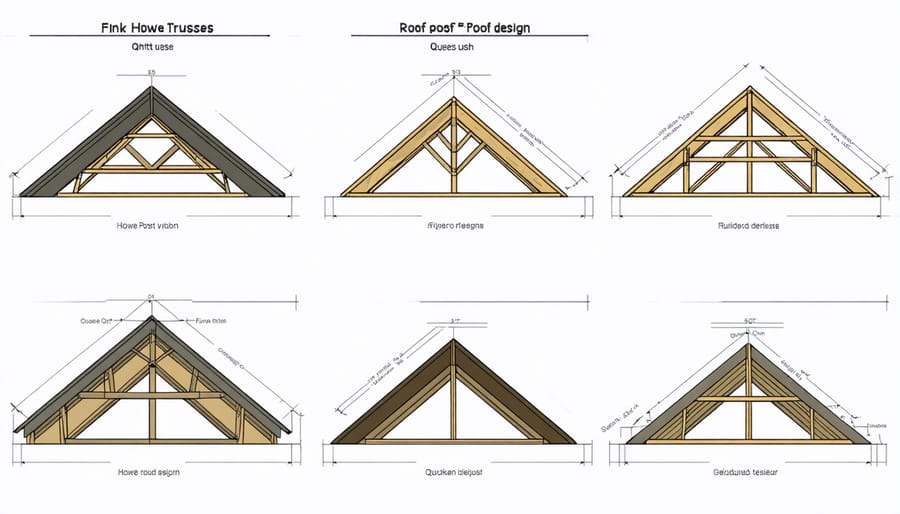
Common Truss Types for Sheds
When it comes to shed roofs, several truss styles offer reliable and practical solutions. The most popular option is the common rafter truss, featuring a simple triangular design that’s perfect for smaller sheds up to 12 feet wide. For wider spaces, the W-truss (also known as a Fink truss) provides excellent support and is particularly suitable for storage sheds that need a clear span underneath.
Gambrel trusses create that classic barn-style look while maximizing overhead storage space – ideal if you’re planning to store larger items in your shed’s upper area. For areas with heavy snow loads, scissor trusses offer steep pitches and added strength, though they’re slightly more complex to build.
The raised heel truss is gaining popularity among DIY builders because it allows for better insulation at the roof’s edge and creates more usable space near the walls. For simpler projects, the basic gable truss works well and is the easiest to construct for beginners.
Remember that your climate, local building codes, and intended use should guide your truss selection. Each style has its advantages, so choose one that best matches your specific needs and skill level.
Load Bearing Considerations
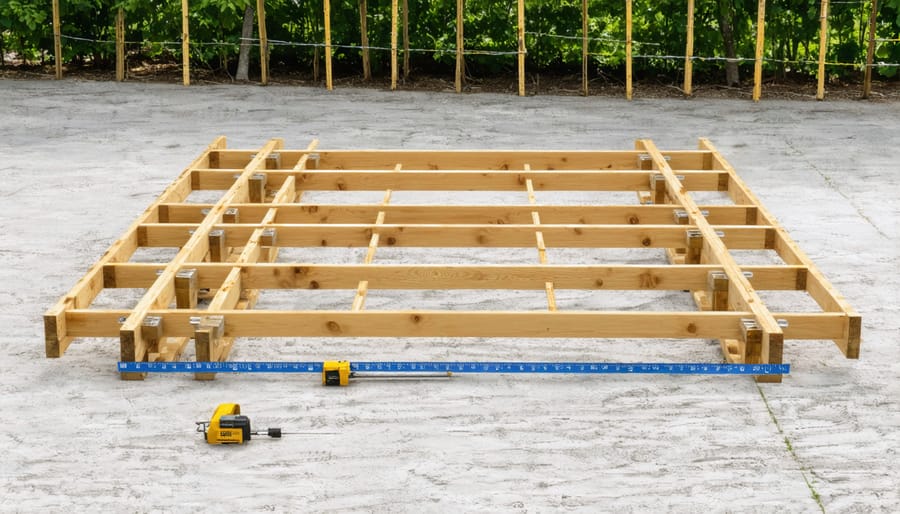
When planning your truss shed roof, proper weight distribution is crucial for long-term stability and safety. The trusses must be designed to handle both dead loads (the weight of the roof materials and structure itself) and live loads (snow, rain, and wind). For most residential sheds, trusses should be spaced 24 inches apart on center, though areas with heavy snowfall may require closer spacing of 16 inches.
The bottom chord of each truss needs adequate support from the shed’s walls, typically requiring double top plates for even weight distribution. Consider that a standard asphalt shingle roof can add approximately 2.5 to 4 pounds per square foot to your structure, while metal roofing typically weighs less at 1 to 2 pounds per square foot.
Remember to account for regional factors in your design. If you live in an area with significant snowfall, your trusses should be engineered to support an additional 20-30 pounds per square foot of snow load. Coastal areas may need reinforced designs to withstand higher wind speeds. When in doubt, it’s always better to over-engineer your truss system than risk structural failure down the line.
Support Beam Design Essentials
Beam Sizing Guidelines
Proper beam sizing is crucial for creating a sturdy and reliable truss shed roof that will stand the test of time. Just like a strong foundation, correctly sized beams ensure your shed’s structural integrity and safety.
For most residential sheds, your main support beam should be sized according to three key factors: span length, roof load, and local building codes. As a general rule, for spans up to 8 feet, use a minimum 2×6 beam. For spans between 8-12 feet, opt for a 2×8 or 2×10 beam. Anything over 12 feet typically requires a 2×12 beam or larger.
Consider your local climate when selecting beam sizes. Areas with heavy snowfall need stronger beams to handle the additional weight. For every 10 pounds per square foot of snow load, increase your beam size by one dimension.
Don’t forget about spacing between beams. Standard practice suggests placing support beams no more than 16 inches apart on center. However, if you’re planning to store heavy items in your shed’s loft area, consider reducing this spacing to 12 inches.
Remember to always check your local building codes before finalizing your beam selection, as requirements can vary by region. When in doubt, it’s better to go slightly larger than risk an undersized beam.
Spacing and Installation Tips
Proper spacing is crucial for a sturdy truss shed roof. As a general rule, trusses should be placed 24 inches on center for most residential shed applications. However, if you live in an area with heavy snow loads or plan to store heavier items in your attic space, consider reducing this spacing to 16 inches.
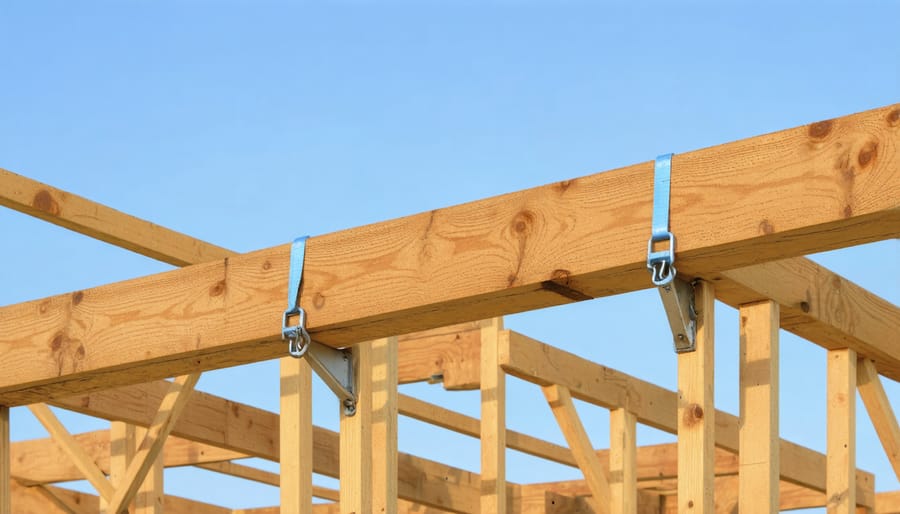
When installing your trusses, start by marking your top plates with layout lines indicating truss positions. Always use hurricane ties or framing anchors to secure each truss to the wall plates – this small investment in hardware can prevent major structural issues down the road.
A helpful tip for maintaining consistent spacing is to cut several spacer boards to your chosen measurement. These temporary guides ensure precise placement while you work. Remember to brace the first and last trusses thoroughly before installing the remaining ones, as this creates a stable framework for the entire system.
For proper alignment, use a string line along the ridge and check for plumb with a level on each truss. Don’t forget to install diagonal bracing across the top chords to prevent the trusses from leaning. When securing your trusses, use 16d nails or appropriate structural screws, and always follow your local building code requirements.
Pro tip: Pre-assemble your trusses on the ground whenever possible. This makes installation safer and allows you to check each truss for quality before it goes up.
DIY Truss Construction Made Simple
Materials and Tools Needed
To build a proper truss shed roof, you’ll need both essential materials and the right tools for the job. Here’s what you’ll need to gather:
Essential Materials:
– Lumber (typically 2x4s or 2x6s) for trusses and supports
– Plywood or OSB sheathing for roof deck
– Roofing underlayment
– Shingles or metal roofing material
– Hurricane ties and truss clips
– Galvanized nails (16d for framing, roofing nails)
– Metal connector plates
– Construction adhesive
– Roofing felt
– Drip edge flashing
Required Tools:
– Circular saw
– Level (2-foot and 4-foot)
– Framing square
– Measuring tape
– Hammer or nail gun
– Safety equipment (goggles, work gloves, dust mask)
– Ladder or scaffolding
– Chalk line
– Pencil and marking tools
– Power drill with bits
– Utility knife
– Speed square
Pro tip: Always purchase about 10% extra materials to account for waste and any mistakes. It’s better to have a little extra than to halt your project mid-construction for another supply run.
Assembly Steps
Begin by laying out all your truss components on a flat, clean surface. After ensuring your wall framing techniques are solid, start assembling the bottom chord and top chords of each truss. Connect these using gusset plates at each joint, positioning them carefully to maintain alignment.
Secure the web members (diagonal braces) between the top and bottom chords, creating triangular sections for optimal strength. When attaching gusset plates, apply construction adhesive first, then nail or screw them firmly in place. Double-check that all joints are tight and properly aligned before moving forward.
For consistency, use a template for your first truss and mark reference points for subsequent assemblies. Space your completed trusses 24 inches on center for standard builds, though this may vary based on your local building codes and roof load requirements.
When lifting trusses into position, work with at least one helper and use temporary bracing to hold them steady. Start from one end of the shed and work your way across, ensuring each truss is plumb and properly spaced. Secure trusses to the top plate using hurricane ties or appropriate metal connectors.
Finally, install lateral bracing between trusses to prevent any twisting or movement. This creates a robust framework ready for your roofing material.
Installation Best Practices
When installing trusses for your shed roof, proper placement and securing techniques are crucial for long-term stability. Start by marking your top plates at 24-inch intervals, ensuring each truss will be perfectly aligned. Always work with a partner to lift and position trusses safely – they can be unwieldy and dangerous to handle alone.
Begin installation from one end of the shed, securing the first truss with temporary bracing. Use hurricane ties or framing anchors at each truss-to-wall connection point, and don’t skimp on nails – each connector typically requires 4-6 nails for maximum strength. As you progress, install diagonal bracing across the top chords to maintain proper spacing and prevent any lateral movement.
Before you install metal roofing or other covering, double-check that all trusses are plumb (perfectly vertical) using a level. Add collar ties between trusses if specified in your plans, as these help prevent spread under heavy loads. Finally, inspect all connection points and ensure every fastener is properly driven – this attention to detail will pay off in the long run with a stable, durable roof structure.
Common Mistakes and How to Avoid Them
Design Pitfalls
When building a truss shed roof, avoiding common design pitfalls can save you time, money, and future headaches. One frequent mistake is underestimating the importance of proper spacing between trusses. Installing them too far apart can lead to sagging and potential structural failure, while placing them too close together wastes materials and adds unnecessary weight.
Another oversight is failing to account for proper roof ventilation. Without adequate airflow, moisture can accumulate, leading to mold growth and wood rot that compromises the entire structure.
Many DIY enthusiasts also make the error of selecting undersized lumber for their trusses. While it might seem cost-effective initially, using 2x4s when 2x6s are needed can result in a weakened structure that won’t stand up to heavy snow loads or strong winds.
Incorrect angle calculations are another common issue. The roof pitch must be appropriate for your climate and aesthetic preferences while ensuring water runs off effectively. A too-shallow pitch in snowy regions can lead to dangerous snow accumulation, while an overly steep pitch might make installation challenging and increase material costs.
To avoid these pitfalls, always double-check your measurements, consult local building codes, and consider having your design reviewed by an experienced builder before starting construction. Remember, a well-planned truss system is crucial for a long-lasting, reliable shed roof.
Installation Errors
When installing a truss shed roof, several common mistakes can compromise both safety and functionality. One frequent error is incorrect spacing between trusses, which should typically be 24 inches on center. Installing trusses too far apart can lead to sagging and potential collapse, while placing them too close wastes materials and adds unnecessary weight.
Another critical mistake is improper bracing during installation. Temporary bracing is essential to keep trusses stable until permanent bracing is secured. Many DIYers rush this step, resulting in misaligned or twisted trusses that are difficult to correct later.
To prevent these issues, always use a string line to ensure trusses are perfectly straight and parallel. Mark your top plates clearly before beginning installation, and have an assistant help maintain alignment while securing each truss. Don’t forget to install hurricane ties or appropriate metal connectors at every truss-to-wall connection point.
Poor nailing technique is another common pitfall. Using too few nails or placing them incorrectly can weaken the entire structure. Follow manufacturer specifications for nail size and placement, and ensure all fasteners are driven straight and flush.
Lastly, failing to account for proper ventilation during truss installation can lead to moisture problems. Include adequate roof vents and ensure soffit vents aren’t blocked by insulation or improper truss placement. Taking time to double-check measurements and following installation guidelines carefully will help avoid these common mistakes.
A well-designed truss shed roof is more than just a covering for your storage space – it’s an investment in the longevity and functionality of your entire shed structure. By understanding the key components of truss design, proper material selection, and installation requirements, you can create a reliable and durable roof system that will protect your belongings for years to come.
Remember that successful truss shed roof construction relies heavily on thorough planning and attention to detail. Take time to calculate your load requirements, choose appropriate materials, and ensure proper spacing of trusses and support beams. Don’t hesitate to consult with local building professionals or your municipality’s building department if you’re unsure about codes or specifications.
Whether you’re building a new shed or upgrading an existing one, proper execution is crucial. Double-check all measurements, ensure your foundation is level, and consider weather conditions during construction. While it may be tempting to rush through the project, taking your time during installation will pay dividends in structural integrity and durability.
For DIY enthusiasts, building a truss shed roof can be a rewarding project that adds value to your property. However, if you feel uncertain about any aspect of the construction, it’s wise to seek professional help. The small investment in expert guidance can prevent costly mistakes and ensure your shed roof stands strong for decades.
Looking for a storage sheds?
Browse our full range of storage sheds from authorized dealer brands. Free shipping to the continental US.