7 Shed Organization Hacks to Maximize Storage in a Weekend

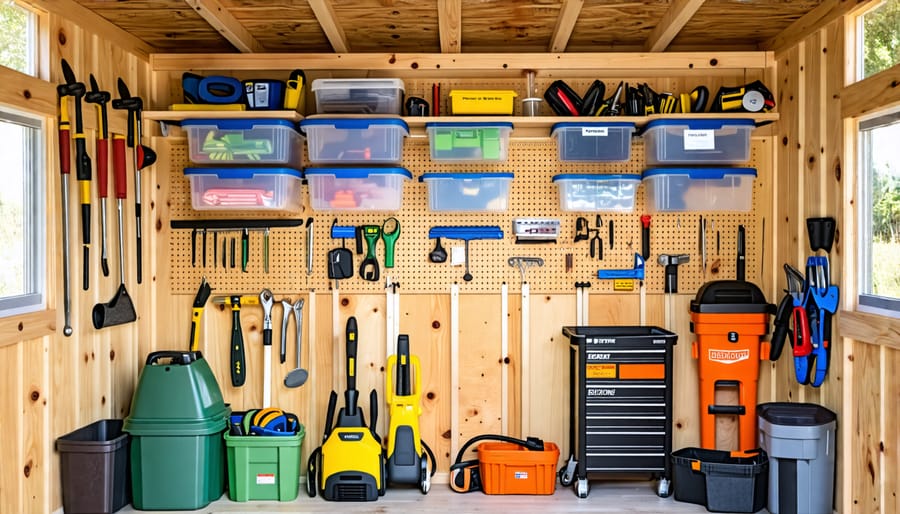
Declutter your shed by removing everything, sorting items into keep, donate, and toss piles, and discarding unused items to enjoy the benefits of an organized shed. Group like items together and designate specific storage zones for tools, seasonal decor, sporting goods, and more. Maximize vertical space with sturdy shelving units, pegboard for hanging tools, and overhead storage racks for bulky items. Invest in clear, labeled storage bins to keep items protected and easily accessible.

Declutter and Sort
Create dedicated piles
As you declutter your shed, create dedicated piles for different categories of items. This will make it easier to see what you have and decide what to keep, donate, or discard. Common categories include gardening tools, sports equipment, seasonal decorations, and rarely used items. Use labeled boxes or storage bins to keep these piles organized as you work. Consider the frequency of use for each item – keep frequently used items easily accessible, while storing rarely used items in harder-to-reach spots. Don’t forget to set aside a pile for items that need repair or cleaning before being stored. By grouping like items together, you’ll be able to create designated storage zones in your shed, making it easier to find what you need when you need it. This simple step will go a long way in keeping your shed organized and clutter-free in the long run.
Be ruthless
When it comes to organizing your shed, being ruthless is key to freeing up valuable space. Take a good, hard look at everything inside and ask yourself: “Have I used this in the past year?” If the answer is no, it’s time to let it go. Broken tools, old paint cans, and rusty gardening equipment are just taking up room that could be used for items you actually need.
Don’t be afraid to get rid of duplicates, either. If you have three hammers but only ever use one, donate the extras to someone who could put them to good use. The same goes for those half-empty boxes of nails or screws – consolidate them into one container and recycle the rest.
As you sort through your shed, create three piles: keep, donate, and toss. Be honest with yourself about what you truly need and what’s just clutter. Remember, the goal is to create a functional space that makes your life easier, not harder.
Once you’ve pared down your belongings, give everything a good cleaning before putting it back in its designated spot. This will help you start fresh and maintain a tidy shed for longer.
Organizing your shed can seem daunting at first, but by being ruthless and letting go of unused items, you’ll be amazed at how much space you can reclaim. Plus, there’s something satisfying about walking into a clutter-free shed where everything has its place. So roll up your sleeves, grab some trash bags, and get ready to transform your shed into the organized oasis you’ve always wanted.
Clean and Repair
Before you start organizing your shed, it’s important to give it a thorough cleaning and make any necessary repairs. Sweep out the entire shed, removing dirt, debris, and cobwebs. If you have a leaf blower, using it can make quick work of this task. Pay extra attention to corners and crevices where dust and grime tend to accumulate.
As you clean, inspect the shed for any signs of damage, such as cracks in the walls, leaks in the roof, or rotting wood. Make a list of repairs that need to be done and tackle them one by one. Small holes or cracks can often be filled with caulk or wood filler, while larger issues may require replacing boards or shingles.
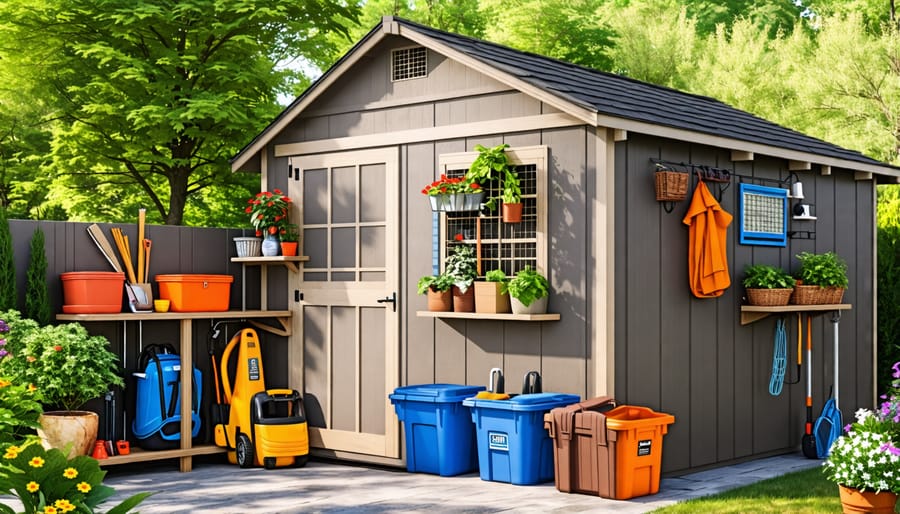
Once your shed is clean and repaired, consider giving it a fresh coat of paint. Not only will this improve its appearance, but it will also help protect the wood from the elements. Choose a color that complements your home and yard, and opt for a durable exterior paint that can withstand the weather.
Before painting, make sure to sand any rough spots and prime the surface for better paint adhesion. Apply the paint evenly, using long, smooth strokes. Don’t forget to paint the trim and door for a polished look.
By taking the time to clean, repair, and paint your shed, you’ll create a more pleasant and inviting space that you’ll enjoy using for years to come. Plus, a well-maintained shed can even add value to your property. So, roll up your sleeves and give your shed the TLC it deserves before moving on to the organization stage.
Plan Your Layout
Keep frequently used items accessible
When organizing your shed, it’s important to keep the items you use most often within easy reach. This saves time and frustration when tackling projects or yard work. Consider installing shelves or pegboards near the entrance to store frequently used hand tools, gloves, and supplies. Utilize wall space with hooks for hanging larger tools like rakes, shovels, and hoses. If you have power tools or a workbench, position them in an accessible spot with adequate lighting and outlets. Group similar items together, such as gardening tools or painting supplies, in labeled bins or on designated shelves. By strategically placing your go-to gear, you’ll streamline your workflow and make the most of your shed’s storage potential. Remember, the key is to strike a balance between accessibility and organization, so you can easily find what you need without compromising the overall tidiness of your space.
Use vertical space
When it comes to organizing your shed, one of the most effective strategies is to utilize vertical space. Instead of letting items pile up on the floor, install sturdy shelves along the walls to store smaller items like paint cans, toolboxes, and gardening supplies. For larger items such as rakes, shovels, and brooms, mount hooks or pegboards on the walls to keep them easily accessible yet out of the way. By using vertical storage solutions, you can maximize space and create a cleaner, more organized environment. Wall-mounted baskets are perfect for storing items like gloves, hats, and small hand tools, while a magnetic strip can hold screwdrivers, pliers, and wrenches. With a little creativity and some basic hardware, you can transform your shed’s walls into an efficient storage system that keeps your belongings off the floor and easy to find when you need them. Remember, the key to a well-organized shed is making the most of every available inch, and utilizing vertical space is a simple yet highly effective way to achieve this goal.

Create zones
To make the most of your shed space, create designated zones for different categories of items. This not only keeps things organized but also makes it easier to find what you need when you need it. Consider grouping gardening tools and supplies in one area, while allocating another spot for sports equipment and outdoor gear. If you have a workbench, dedicate a zone specifically for tools and hardware. Labeling each zone clearly helps maintain the organization system over time. Utilize vertical space by installing shelves or pegboards to maximize storage capacity within each zone. By assigning a home for every item and keeping similar things together, you’ll transform your shed from a cluttered catch-all to a well-organized and functional space. Regularly reassessing and adjusting your zones as your storage needs change will ensure your shed remains an efficient and valuable asset to your home.
Invest in Storage Solutions
To maximize space and keep your shed tidy, invest in a variety of storage solutions tailored to your needs. Shelving units are a must-have, allowing you to store items vertically and keep them off the floor. Choose from heavy-duty metal shelves for bulky items or adjustable plastic shelves for lighter objects. Clear plastic bins with lids are perfect for organizing small parts, tools, and supplies while protecting them from dust and moisture. Label each bin for quick identification.
A pegboard is another versatile storage solution, ideal for hanging tools, garden equipment, and other frequently used items. Pair it with hooks, baskets, and small shelves to create a customizable wall storage system. Tool chests and cabinets provide enclosed storage for delicate or expensive tools, keeping them secure and out of sight.
For long-handled tools like rakes, shovels, and brooms, consider installing a wall-mounted tool rack or a vertical corner rack to save floor space. Magnetic tool bars are great for storing small metal tools within easy reach. Overhead storage racks, suspended from the ceiling, are perfect for storing seasonal or infrequently used items, freeing up valuable floor and wall space.
By combining these various storage solutions, you can create a well-organized shed that maximizes every inch of space. Invest in quality organizers that suit your specific needs, and enjoy a clutter-free, efficient workspace for years to come.

In conclusion, organizing your shed is a worthwhile project that can save you time, reduce stress, and make your outdoor space more functional and enjoyable. By following the steps outlined in this guide – decluttering, sorting, cleaning, installing storage solutions, and labeling – you can transform your cluttered shed into a well-organized haven. Remember, the key to maintaining an organized shed is to put things back where they belong and periodically reassess your storage needs. With a little effort and dedication, you’ll be able to get started on creating a shed that works for you and your family. Enjoy the benefits of a clutter-free, efficient storage space that makes your outdoor projects and hobbies a breeze.

