
Weather-Smart Shed Roofs That Actually Last (Expert Design Guide)
Choose your shed roof design based on three critical factors: your local weather patterns, storage needs, and structural requirements. The right roof doesn’t just protect your valuables – it defines your shed’s longevity and functionality.
From the classic gable design that excels in snow-prone regions to the modern lean-to style perfect for positioning against existing structures, each roof type serves a distinct purpose. Modern shed owners increasingly opt for versatile saltbox and gambrel designs, which maximize storage space while providing superior drainage capabilities.
Consider how your choice impacts both immediate construction costs and long-term maintenance requirements. A well-designed roof system incorporating proper pitch, overhangs, and ventilation can extend your shed’s lifespan by decades while maintaining its structural integrity through seasonal changes.
Whether you’re planning a DIY project or working with professionals, understanding these fundamental roof designs ensures you’ll make an informed decision that balances aesthetics, functionality, and durability for your specific situation.
Climate-Ready Roof Styles That Work
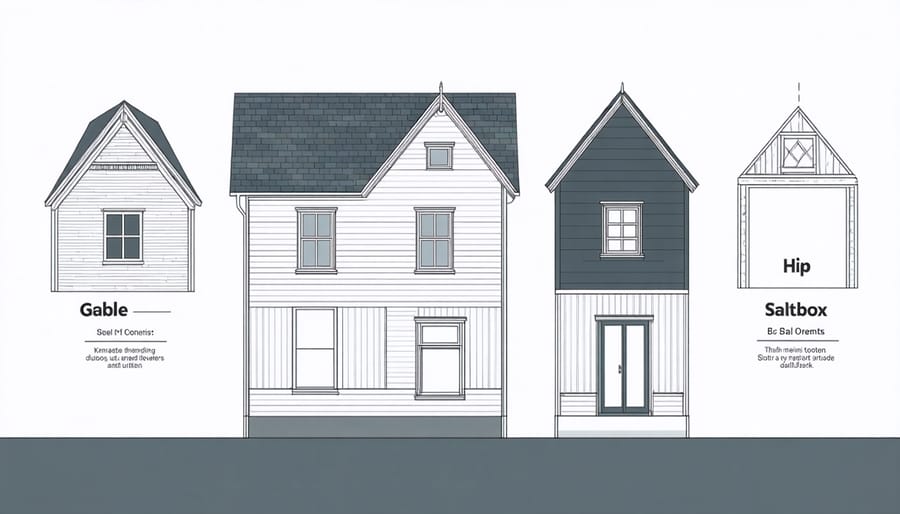
Gable Roofs for Heavy Snow and Rain
Gable roofs are the champion of snow and rain management, featuring two sloping sides that meet at a peak to form a classic triangle shape. This design naturally sheds precipitation, making it an ideal choice for areas that experience heavy snowfall or frequent rain. The steep pitch (typically between 20-45 degrees) prevents snow accumulation by allowing it to slide off easily, reducing the risk of roof collapse under heavy winter loads.
In regions with significant rainfall, the gable design efficiently channels water down and away from the shed’s foundation, helping prevent moisture damage and interior leaks. The peaked design also creates additional headroom and storage space in the shed’s upper area, which can be particularly useful for storing longer items like ladders or lumber.
For maximum effectiveness in heavy precipitation areas, consider adding extended overhangs to your gable roof. These overhangs protect the shed’s walls from water damage and help direct runoff away from the foundation. When combined with proper guttering, a gable roof creates an effective defense system against even the most challenging weather conditions while maintaining a timeless, attractive appearance.
Salt Box Designs for High Wind Areas
Salt box roof designs are a time-tested solution for sheds in high-wind areas, thanks to their asymmetrical slopes that naturally deflect strong gusts. The longer, gradual slope faces the prevailing winds, while the shorter, steeper side creates less wind resistance. This classic New England design isn’t just about looks – it’s engineering wisdom passed down through generations.
The steep pitch on one side helps shed snow and rain quickly, while the longer, gentler slope provides excellent stability against wind uplift. Many homeowners in coastal regions and open plains choose this design specifically for its wind-resistant properties. The lower roof line on one side also means less surface area for strong winds to push against.
When building a salt box shed, positioning is crucial. Orient the longer slope toward the typical wind direction in your area for maximum protection. This design also offers the bonus of extra headroom on one side, perfect for storing taller items or creating a small workspace.
Hip Roofs for Hurricane Zones
When it comes to protecting your shed in hurricane-prone areas, a hip roof design offers exceptional resistance against strong winds and severe weather. Unlike traditional gable roofs, hip roofs slope downward on all four sides, creating an aerodynamic shape that helps deflect powerful gusts. This design significantly reduces the risk of roof uplift during storms, a common concern in coastal regions.
The steep pitch of hip roofs also provides excellent water drainage, preventing pooling that could lead to leaks or structural damage. Many Florida homeowners prefer hip roofs for their sheds because they can withstand wind speeds up to 140 mph when properly constructed. The four-sided design also eliminates the vulnerable gable end walls, which are often the first to fail in extreme weather conditions.
While hip roofs require more materials and expertise to build, their durability and weather resistance make them a smart long-term investment for areas frequently affected by tropical storms and hurricanes. Consider adding hurricane straps and reinforced connections for maximum protection.
Smart Material Choices for Your Climate
Hot Climate Solutions
In hot climates, your shed’s roof design plays a crucial role in helping control interior temperature and protect your belongings. Light-colored metal roofing materials are particularly effective, as they reflect sunlight and reduce heat absorption. Consider installing a radiant barrier beneath the roofing material – this reflective layer adds another defense against intense heat.
Ventilation is key, and incorporating ridge vents along the roof’s peak allows hot air to escape naturally. Pair these with soffit vents under the eaves to create effective air circulation. A slight overhang of 12-24 inches provides welcome shade and prevents direct sunlight from hitting your shed’s walls.
For maximum heat resistance, consider a double-roof system where a secondary roof is installed a few inches above the primary one, creating an air gap that acts as natural insulation. Cool-roof coatings can also be applied to existing roofs, providing an affordable upgrade that reflects up to 85% of sunlight.
Remember to maintain proper drainage to prevent any moisture buildup, even in hot climates. Gutters and downspouts should be properly sized and positioned to direct water away from your shed’s foundation.
Cold Weather Warriors
In regions where winter shows no mercy, your shed roof needs to be built like a fortress. A steep pitch of at least 6:12 is essential for effective snow shedding, preventing dangerous accumulation that could compromise your structure. Consider incorporating a robust truss system with closer spacing – typically 16 inches on center – to handle heavy snow loads with confidence.
Metal roofing stands out as a champion against cold weather, thanks to its smooth surface that encourages snow to slide off naturally. For added protection, install snow guards near the eaves to prevent dangerous snow avalanches. Heat cables along the roof edges can prevent ice dam formation, while proper insulation and ventilation work together to maintain consistent temperatures and prevent condensation issues.
Don’t forget about the fascia and soffit details – extending these slightly beyond the walls creates a defensive barrier against wind-driven snow and ice. Using ice and water shield membrane under your roofing material, especially in the first three feet up from the eaves, provides an extra layer of protection against ice dam damage. These cold-weather considerations might seem extensive, but they’re essential investments in your shed’s longevity.
Coastal Considerations
Living near the coast presents unique challenges for shed roofs due to salt spray, high winds, and intense sun exposure. To protect your investment, opt for materials specifically designed to withstand these harsh conditions. Stainless steel or hot-dipped galvanized fasteners are essential to prevent rusting, while marine-grade metals and specially treated woods offer superior corrosion resistance.
Consider implementing a steeper roof pitch (at least 4:12) to encourage quick water runoff and minimize salt accumulation. Installing proper ventilation systems helps prevent moisture buildup and extends your roof’s lifespan. Many coastal homeowners find success with standing seam metal roofs, which provide excellent wind resistance and minimize the number of potential leak points.
For added protection, apply marine-grade sealants to all joints and consider installing drip edges to direct water away from your shed’s walls. Regular maintenance is crucial in coastal areas – plan to inspect your roof quarterly for signs of corrosion or damage, and rinse it periodically to remove salt deposits. Remember to choose light-colored roofing materials when possible, as they reflect sunlight and help keep your shed cooler in intense coastal sun.
Essential Design Features for Every Climate
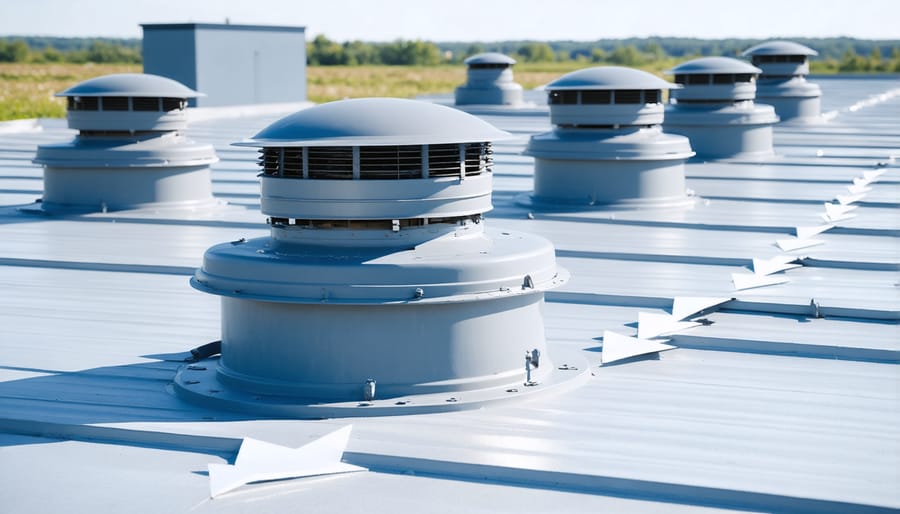
Proper Ventilation Systems
Proper ventilation is crucial for maintaining a healthy and functional shed environment. A well-ventilated shed prevents moisture buildup, reduces the risk of mold and mildew, and helps regulate temperature throughout the year. For most sheds, you’ll want to aim for a combination of intake and exhaust vents to create effective air circulation.
Ridge vents are particularly effective, running along the peak of your shed’s roof to allow warm air to escape naturally. These can be paired with soffit vents under the eaves to create a continuous airflow system. For every 150 square feet of floor space, aim to have at least one square foot of ventilation area.
Consider installing gable vents on each end of your shed for cross-ventilation. These work especially well in warmer climates where heat buildup can be a significant concern. For additional airflow, turbine vents or wind-powered spinners can be installed on the roof, providing active ventilation even on calm days.
Don’t forget about foundation vents near the base of your shed. These help prevent ground moisture from becoming trapped underneath and potentially damaging your stored items. Small mesh screens should be installed in all vents to keep out insects and debris while maintaining proper airflow.
While planning your ventilation system, remember that the size and placement of vents should be proportional to your shed’s dimensions and intended use. A workshop shed might need more ventilation than a basic storage shed due to increased activity and potential use of tools or chemicals.
Water Management Features
Proper water management is crucial for protecting your shed and its contents from moisture damage. A well-designed gutter system is your first line of defense, directing rainwater away from your shed’s foundation. Install gutters along all eaves, ensuring they’re properly sized for your roof’s surface area. For optimal performance, use seamless aluminum gutters with downspouts positioned at corners to efficiently channel water away from the structure.
Implementing effective weatherproofing techniques starts with proper flashing installation around all roof penetrations, such as vents or skylights. Use high-quality metal flashing or rubber boots to create watertight seals that prevent leaks during heavy rainfall.
Consider adding a drip edge along the roof’s perimeter to prevent water from seeping under the roofing material and into the fascia boards. For added protection, install a water-resistant membrane beneath your roofing material, particularly in areas prone to ice dams or heavy rainfall.
Don’t forget about ground-level drainage. Create a slight grade around your shed’s perimeter to ensure water flows away from the foundation. Installing a French drain or laying gravel around the base can provide additional drainage support, especially in areas with poor soil absorption. Regular maintenance of these water management features, including cleaning gutters and checking for proper drainage flow, will help ensure your shed stays dry year-round.
Installation Tips for Maximum Durability
Critical Connection Points
The success of your shed roof largely depends on how well you secure its critical connection points. These vital junctions require careful attention during installation to ensure long-term stability and effective waterproofing solutions. Start by properly securing the rafters to the top plates using hurricane ties or rafter ties, ensuring each connection is snug and level. Don’t skimp on fasteners – use galvanized nails or screws that are appropriately sized for your materials.
Pay special attention to the ridge beam connections, where rafters meet at the peak. These joints should be reinforced with metal plates on both sides. When installing roof sheathing, maintain consistent nail spacing and use H-clips between unsupported panel edges to prevent sagging. Remember to overlap your drip edge correctly at the eaves and rakes to direct water away from the fascia.
For trusses, use approved truss clips or brackets at every connection point with the wall plate. Create solid blocking between trusses at the eaves to prevent rotation and provide additional stability. Don’t forget to secure any overhangs properly – they’re particularly vulnerable to wind uplift. Double-check that all your fasteners are properly driven and sealed to prevent water infiltration. A well-connected roof structure is your best defense against weather-related damage and will significantly extend the life of your shed.
Seasonal Maintenance Checklist
Keeping your shed roof in top condition requires regular maintenance throughout the year. Here’s a season-by-season guide to help protect your investment and extend its lifespan.
Spring Maintenance:
– Clear winter debris, leaves, and branches from gutters and roof surface
– Check for winter damage, including loose shingles or damaged flashing
– Inspect interior ceiling for water stains or leaks
– Clean and repair gutters and downspouts
– Trim overhanging tree branches
Summer Tasks:
– Check ventilation to prevent heat buildup
– Look for signs of pest intrusion or nesting
– Clean skylights if present
– Inspect for moss or algae growth
– Check seals around vents and chimneys
Fall Preparations:
– Remove fallen leaves regularly
– Clean gutters thoroughly before winter
– Check roof supports and trusses
– Seal any gaps or cracks
– Install gutter guards if needed
Winter Vigilance:
– Remove heavy snow accumulation
– Watch for ice dam formation
– Check for sagging areas under snow weight
– Monitor interior for condensation
– Clear icicles from eaves and gutters
Pro Tip: Create a maintenance log to track inspections and repairs. This helps identify recurring issues and plan preventive measures. Remember, catching small problems early prevents costly repairs later. If you’re not comfortable performing these tasks yourself, consider hiring a professional for annual inspections.
Choosing the right roof design for your shed is more than just an aesthetic decision – it’s an investment in protecting your valuable belongings and ensuring your shed stands the test of time. Throughout this guide, we’ve explored various roof styles, from the classic gable to the modern saltbox, each offering unique advantages for different climate conditions and storage needs.
Remember that your local weather patterns should be the primary factor in your decision-making process. Areas with heavy snowfall benefit from steeper pitched roofs, while regions with high winds might require more robust hip roof designs. The right combination of roof style, materials, and proper installation will significantly extend your shed’s lifespan and enhance its functionality.
Don’t forget to consider factors like ventilation, drainage, and maintenance requirements when making your final choice. A well-designed shed roof not only protects your storage space but also adds value to your property while complementing your home’s architecture. By taking the time to evaluate your specific needs and local climate conditions, you’ll be able to select a roof design that provides years of reliable service and peace of mind.