
Build a Rock-Solid 8×10 Shed Base That Keeps Water Out Forever
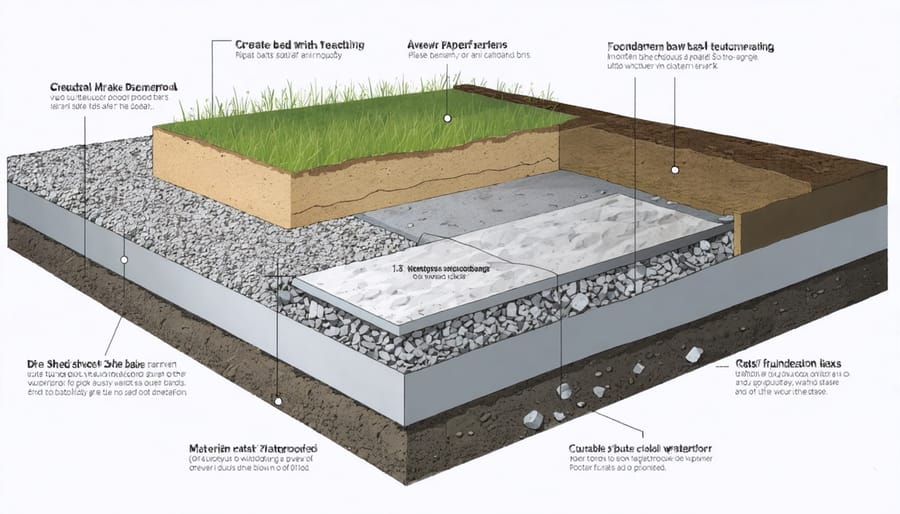
Build a rock-solid 8×10 shed base that stands the test of time with proper foundation construction. Start by excavating 6 inches below grade, removing all organic material and vegetation. Create a 4-inch slope away from the planned shed location over a 10-foot span to ensure proper drainage. Install a commercial-grade weed barrier and add 4 inches of crushed stone, compacting it thoroughly in 2-inch layers.
This critical first step in shed construction determines your structure’s longevity and stability. A well-built foundation prevents moisture damage, reduces maintenance costs, and protects your investment from settling issues. Whether you choose concrete blocks, solid concrete, or a gravel pad, the key lies in proper site preparation and water management.
Our detailed 8×10 shed base plans incorporate essential drainage solutions, precise measurements, and time-tested construction techniques that work in any climate. Follow these step-by-step instructions to create a foundation that won’t sink, crack, or shift, even under harsh weather conditions.
Essential Materials for a Waterproof 8×10 Shed Base
Foundation Materials
For your 8×10 shed base, you’ll need to choose between three reliable foundation materials, each offering unique benefits. Gravel provides excellent drainage and is budget-friendly, requiring about 2-3 tons of crushed stone for proper coverage. Ensure you use #57 gravel for the best combination of drainage and stability.
Concrete offers unmatched durability and longevity, though it’s the most expensive option. A 4-inch thick concrete pad is ideal for an 8×10 shed, requiring approximately 1 cubic yard of concrete. Remember to include wire mesh reinforcement and proper vapor barrier underneath to prevent moisture issues.
Pressure-treated lumber creates an elevated foundation that keeps your shed off the ground, providing natural airflow and moisture protection. For an 8×10 base, you’ll need 2×6 or 2×8 pressure-treated boards for the frame and joists, spaced 16 inches on center. This option works particularly well on sloped terrain and allows for easy utility access underneath.
Whichever material you choose, ensure proper site preparation and leveling before installation. This foundation will serve as the crucial first step in protecting your shed investment for years to come.
Waterproofing Components
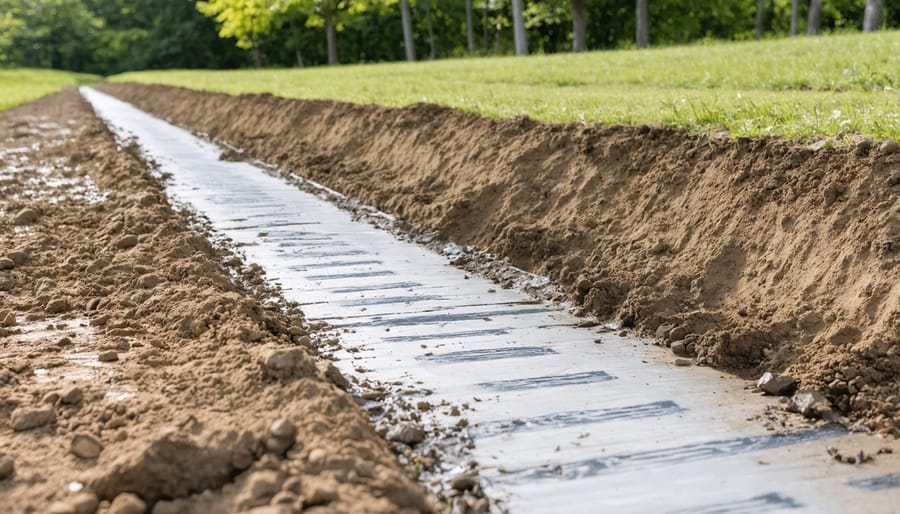
Protecting your shed from moisture damage starts with proper waterproofing of the base components. Begin by laying a high-quality 6-mil polyethylene vapor barrier across the entire foundation area, extending it about 12 inches beyond the perimeter. This creates a crucial barrier between the ground moisture and your shed’s base.
For effective drainage, lay a 4-inch layer of crushed stone or gravel before installing the vapor barrier. This creates a natural pathway for water to flow away from your shed’s foundation. Consider adding a slight slope of about 1 inch per 8 feet to direct water away from the structure.
Don’t forget to treat any wooden components with water-resistant sealant, focusing particularly on areas that might come in contact with the ground or moisture. A quality silicone-based sealant works well for filling gaps and joints where water might penetrate.
For areas where the base meets the ground, install a rubber membrane flashing to create an additional moisture barrier. This extra protection is especially important in regions with heavy rainfall or snow. Remember to check and maintain these waterproofing elements annually to ensure long-lasting protection for your shed.
Site Preparation for Maximum Water Protection
Ground Leveling and Slope Creation
Before you begin construction, it’s crucial to properly prepare your site with the correct slope for optimal drainage. Start by removing all vegetation and organic matter from the area, extending about 2 feet beyond your intended 8×10 footprint. Using a laser level or string level, determine the high and low points of your site.
Create a gentle slope away from where the shed will sit, aiming for a grade of approximately 1 inch per 8 feet. This ensures water will flow away from your structure rather than pooling underneath it. If your site is naturally level, you’ll need to build up one side slightly to create this gradient.
Use a soil tamper or plate compactor to compress the ground thoroughly, paying special attention to any areas where you’ve added fill dirt. For areas requiring elevation, add crushed stone or gravel in 2-inch layers, compacting each layer before adding the next. This gradual building process prevents future settling issues.
Test your slope by spraying water on the area and observing its flow direction. The water should consistently move away from the center of your future shed location. Address any spots where water collects immediately, as these will cause problems later. Remember, proper drainage is your foundation’s first line of defense against moisture damage.
Soil Testing and Drainage Assessment
Before laying your 8×10 shed base, it’s crucial to understand your soil conditions and drainage patterns. Start by performing a simple soil test by digging a 12-inch deep hole in the planned location. Take a handful of the soil and squeeze it – if it holds its shape when you open your hand, you likely have clay-rich soil that may require additional drainage solutions.
Next, observe your yard during and after rainfall. Look for areas where water pools or flows naturally. Your shed location should avoid these wet spots and ideally be slightly elevated from the surrounding ground. If you notice water consistently moving toward your planned shed site, you’ll need to plan for proper drainage channels.
A basic percolation test can help determine how well your soil drains. Dig a 1-foot hole, fill it with water, and time how long it takes to drain completely. If it takes more than 24 hours, you’ll need to incorporate additional drainage features like gravel beds or French drains into your base plan.
Consider seasonal changes too. Some soils expand when wet and contract when dry, which can affect your shed’s foundation over time. If you’re unsure about your soil quality or drainage needs, it’s worth consulting a local landscaper or foundation expert for advice. They can provide specific recommendations based on your area’s soil composition and typical weather patterns.
Building Your Waterproof Base
Layer-by-Layer Construction
Begin your shed base construction by marking out your 8×10-foot perimeter and removing all grass and vegetation. Level the ground, ensuring a slight slope away from the center for proper drainage. Use a plate compactor to create a firm foundation.
Start with the bottom layer by laying a 4-inch deep bed of gravel or crushed stone. Spread it evenly across the entire area, extending about 6 inches beyond your marked perimeter. Compact this layer thoroughly – you’ll know it’s ready when you can walk on it without leaving footprints.
Next, add a layer of landscape fabric over the gravel. This crucial barrier prevents weeds from growing up through your base while allowing water to drain through. Overlap the edges by at least 6 inches and secure with landscape pins.
For the framework layer, construct a rectangular frame using pressure-treated 2×6 lumber. Create a box measuring exactly 8×10 feet, using galvanized corner brackets for added stability. Level this frame using a spirit level, adjusting the height with shims where necessary.
Add internal joists spaced 16 inches on center for additional support. These run parallel to the 8-foot sides. Secure each joist with appropriate joist hangers and galvanized nails. Don’t skip this step – it prevents sagging over time.
The final layer consists of ¾-inch pressure-treated plywood sheets. Lay these perpendicular to your joists, staggering the joints for maximum strength. Secure with galvanized deck screws every 8 inches along the edges and 12 inches in the field.
Remember to leave a small ⅛-inch gap between plywood sheets for expansion and contraction with temperature changes. Once complete, your shed base will provide a solid, level foundation that resists moisture and stands the test of time.
Critical Waterproofing Points
When it comes to building a reliable 8×10 shed base, proper waterproofing is essential to protect your shed from water damage and ensure its longevity. Start by focusing on the perimeter of your foundation, where water is most likely to accumulate. Install a vapor barrier between the ground and your base material, extending it at least 6 inches beyond the shed’s footprint on all sides.
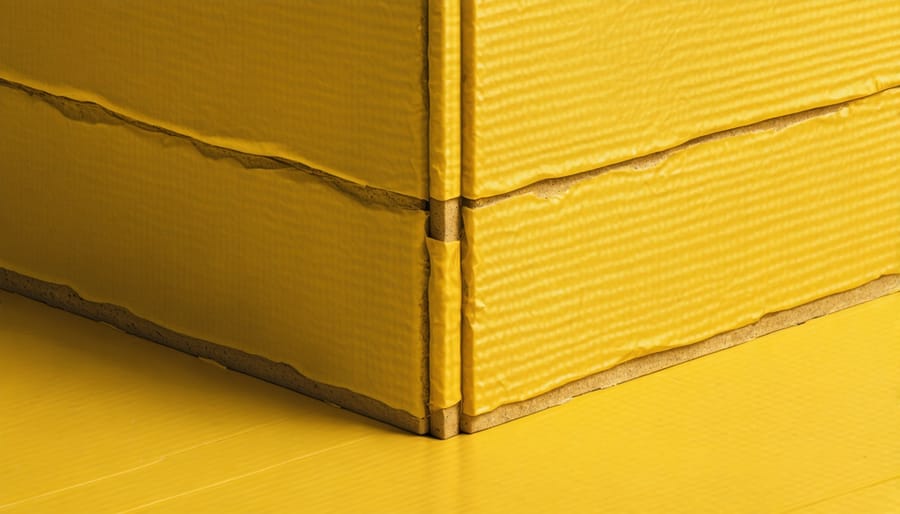
Pay special attention to the corners and edges of your foundation, as these areas are particularly vulnerable to water infiltration. Create a slight slope away from the shed’s intended location, aiming for a grade of about 1 inch per 8 feet. This gentle incline will encourage proper drainage and prevent water from pooling around your structure.
Consider installing a French drain system around the perimeter if your property experiences heavy rainfall or has poor natural drainage. This involves digging a shallow trench, filling it with gravel, and placing a perforated pipe to channel water away from the foundation.
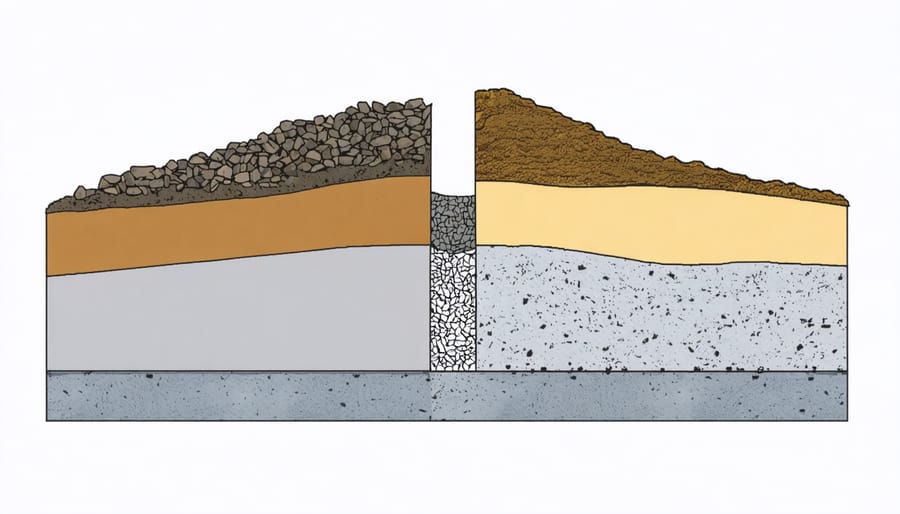
The surface of your base should be raised at least 4 inches above ground level to create a protective barrier against ground moisture. If using concrete, incorporate a waterproof sealant into your mix or apply it to the cured surface. For gravel bases, use multiple layers of different-sized stones, starting with larger rocks at the bottom and progressively smaller ones toward the top, allowing for optimal drainage.
Don’t forget to plan for roof runoff by incorporating gutters and downspouts into your design. Direct this water at least 3 feet away from the foundation using downspout extensions or splash blocks. This simple addition can prevent significant water-related issues down the line.
Remember to inspect the area during heavy rain before finalizing your base location. This will help you identify any natural water flow patterns that might affect your shed’s foundation and allow you to adjust your waterproofing strategy accordingly.
Maintenance and Long-Term Protection
Regular maintenance is crucial for ensuring your 8×10 shed base remains sturdy and water-resistant for years to come. To waterproof your shed floor and maintain its integrity, establish a routine inspection schedule every three to six months.
Start by checking the ground around your shed base for proper drainage. Clear any debris, leaves, or vegetation that might trap moisture against the foundation. Ensure your drainage slope maintains its 1-inch per foot grade away from the shed to prevent water pooling.
For gravel bases, rake and level the surface periodically to maintain even distribution. Add fresh gravel as needed to fill any low spots that could collect water. If you notice the gravel becoming compacted or mixed with soil, consider adding a fresh layer to maintain proper drainage.
Concrete pad foundations require regular sealing to prevent moisture penetration. Apply a quality concrete sealer every two to three years, or sooner if you notice signs of wear. Watch for cracks and address them promptly using appropriate concrete repair products to prevent water infiltration.
For timber foundations, inspect wooden components for signs of rot, pest infestation, or water damage. Replace any compromised boards immediately. Apply wood preservative annually to extend the life of exposed timber elements and maintain their water-resistant properties.
Keep gutters and downspouts clear if your shed has them installed. Direct water flow away from the base using splash blocks or extension pipes. During winter months, remove snow accumulation from around the base to prevent moisture problems during thaw cycles.
Consider installing a moisture barrier if you haven’t already. This can be retrofitted under existing shed floors to provide additional protection against ground moisture. Remember to maintain proper ventilation under and around your shed to prevent moisture buildup.
A properly constructed and waterproofed 8×10 shed base is essential for protecting your storage investment for years to come. Throughout this guide, we’ve covered the critical steps needed to create a solid foundation that keeps moisture at bay and ensures your shed remains stable and dry.
Remember that successful waterproofing begins with careful site selection and proper grading. The extra time spent on preparing the ground, installing adequate drainage, and selecting appropriate materials will pay dividends in preventing future water damage and structural issues.
Key takeaways include using a properly sized gravel base, installing a high-quality vapor barrier, ensuring correct slope for water runoff, and maintaining proper air circulation. Don’t skip the crucial step of treating lumber with water-resistant materials, and always verify that your concrete blocks or foundation components are rated for ground contact.
While some of these steps might seem like extra work initially, they’re far less costly and time-consuming than dealing with a damaged shed due to water infiltration. By following these waterproofing guidelines, you’ll create a lasting foundation that protects your shed and its contents from moisture-related problems.
Take your time with each phase of the project, double-check your measurements, and don’t hesitate to consult with local experts if you’re unsure about any aspect of the installation. Your dedication to proper waterproofing now will ensure your shed remains a valuable addition to your property for many years to come.
Looking for a foundation kits?
Browse our full range of foundation kits from authorized dealer brands. Free shipping to the continental US.