
Build a Rock-Solid Concrete Foundation That Makes Your Storage Shed Last Forever
Building a proper concrete foundation for your storage shed transforms a simple backyard structure into a lasting investment that protects your belongings for decades. A well-constructed concrete base prevents moisture damage, ensures structural stability, and maintains level flooring throughout seasonal changes. By choosing concrete over alternative materials, you’re creating a solid platform that resists settling, supports heavy equipment, and withstands harsh weather conditions. Whether you’re planning a compact garden shed or a larger workshop space, starting with a professional-grade concrete foundation establishes the cornerstone of a reliable, weather-resistant storage solution that adds genuine value to your property. This guide breaks down the essential steps for creating a durable concrete foundation that meets both building codes and practical storage needs, helping you avoid common pitfalls while ensuring your shed stands strong for years to come.\n\n\n
Why Your Storage Shed Needs a Concrete Foundation
\n\n
 \n
\n\n\n
Environmental Benefits
\n\nConcrete foundations offer several environmental advantages that make them a sustainable choice for storage shed construction. The durability of concrete means fewer replacements over time, reducing the overall environmental impact of construction waste. Modern concrete mixes often incorporate recycled materials like fly ash and slag, helping to minimize the use of raw resources. The thermal mass properties of concrete also contribute to better temperature regulation in your shed, potentially reducing energy needs for climate-controlled storage. Additionally, concrete’s local availability typically means shorter transportation distances compared to other materials, resulting in a lower carbon footprint. When properly maintained, a concrete foundation can last for decades, making it an environmentally responsible choice for long-term storage solutions.\n\n
Long-Term Cost Savings
\n\nInvesting in a proper concrete foundation for your storage shed pays significant dividends over time. While initial costs might be higher compared to other long-lasting foundation options, concrete foundations typically reduce maintenance expenses and extend your shed’s lifespan by 15-20 years. You’ll avoid costly repairs from moisture damage, settling issues, and structural instability that often plague sheds with inadequate foundations. Additionally, a concrete foundation helps maintain your shed’s value, potentially increasing your property’s overall worth. When you factor in the reduced need for floor repairs, pest control, and foundation adjustments, the upfront investment typically pays for itself within 5-7 years of installation. Many homeowners report spending 60% less on maintenance costs compared to sheds built on gravel or dirt bases.\n\n\n
Planning Your Eco-Friendly Concrete Foundation
\n\n
Site Selection and Preparation
\n\nChoosing the right location for your storage shed’s foundation is crucial for its longevity and functionality. Start by checking local building codes and obtaining necessary permits. Select a spot that’s relatively level and at least 10 feet away from your property lines. The area should have good drainage and be slightly elevated from the surrounding ground to prevent water pooling.\n\nBefore breaking ground, call your local utilities service to mark underground lines. Remove all vegetation, rocks, and debris from the selected area. The soil should be firm and stable – avoid areas with loose fill or organic matter. If you encounter soft spots, you’ll need to compact the soil or add gravel to create a stable base.\n\nMark your foundation dimensions, adding an extra 6 inches on all sides beyond your shed’s footprint. Use string lines and stakes to ensure perfect square corners by measuring diagonals. Level the site using a transit level or laser level, and consider a slight slope (about 1 inch per 8 feet) away from where the shed door will be located to ensure proper drainage.\n\n
 \n
\n\n\n
Sustainable Materials Selection
\n\nToday’s environmentally conscious homeowners have excellent options for creating sustainable shed foundations. By choosing eco-friendly foundation methods, you can minimize your environmental impact while building a lasting structure. Consider using recycled concrete aggregate (RCA), which repurposes old concrete and reduces landfill waste. This material performs similarly to traditional concrete while giving construction waste a second life.\n\nAnother excellent option is pervious concrete, which allows water to filter through naturally, reducing runoff and helping maintain healthy groundwater levels. For reinforcement, consider choosing bamboo or recycled steel bars instead of traditional rebar. These sustainable building materials offer comparable strength while leaving a smaller carbon footprint.\n\nLocal sourcing is also crucial – try to find concrete suppliers within a 50-mile radius to reduce transportation emissions. Many suppliers now offer low-carbon concrete mixes that use alternative binding materials like fly ash or slag cement, which significantly reduce CO2 emissions during production while maintaining structural integrity.\n\n\n
Step-by-Step Installation Process
\n\n
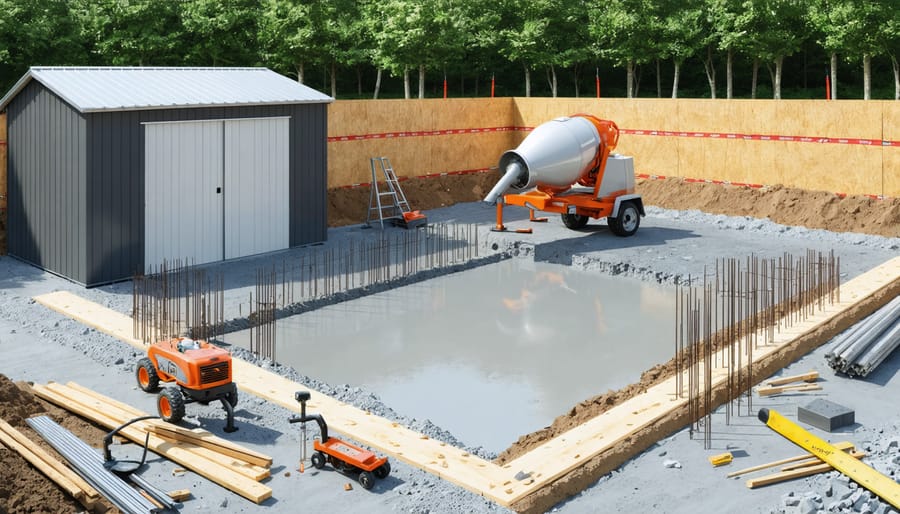
Forms and Reinforcement
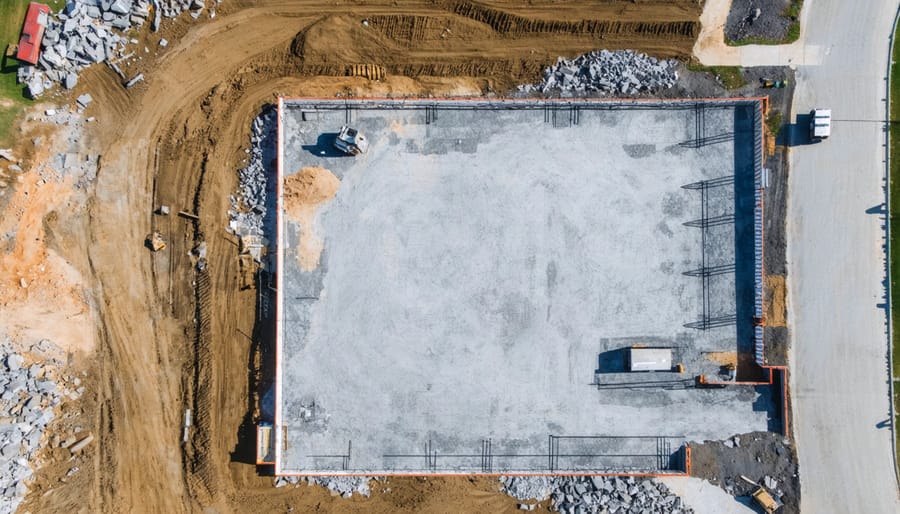
\n\nBegin by setting up your wooden forms using 2×6 or 2×8 lumber, creating a perimeter that matches your planned foundation dimensions. Ensure the forms are level and square by measuring diagonally from corner to corner – both measurements should be equal. Secure the forms with stakes driven into the ground every 2-3 feet and brace them to prevent bowing during concrete placement.\n\nFor proper reinforcement, install a grid of #3 or #4 rebar spaced 12 inches apart in both directions. The rebar should sit approximately in the middle of your concrete’s depth, supported by plastic chairs or dobies to maintain the correct height. Overlap rebar pieces by at least 12 inches at joints and tie them together securely with wire ties.\n\nAdd fiber mesh to your concrete mix for additional strength, or consider installing wire mesh as a secondary reinforcement. Place the mesh so it stays in the middle third of the slab’s thickness. Remember to install J-bolts or anchor bolts around the perimeter – these will later secure your shed’s bottom plate to the foundation.\n\nPro tip: Before pouring concrete, spray the inside of your forms with form release agent or used motor oil to make removal easier. Double-check all measurements, reinforcement positions, and form stability. A properly reinforced foundation will ensure your storage shed remains stable for years to come.\n\n
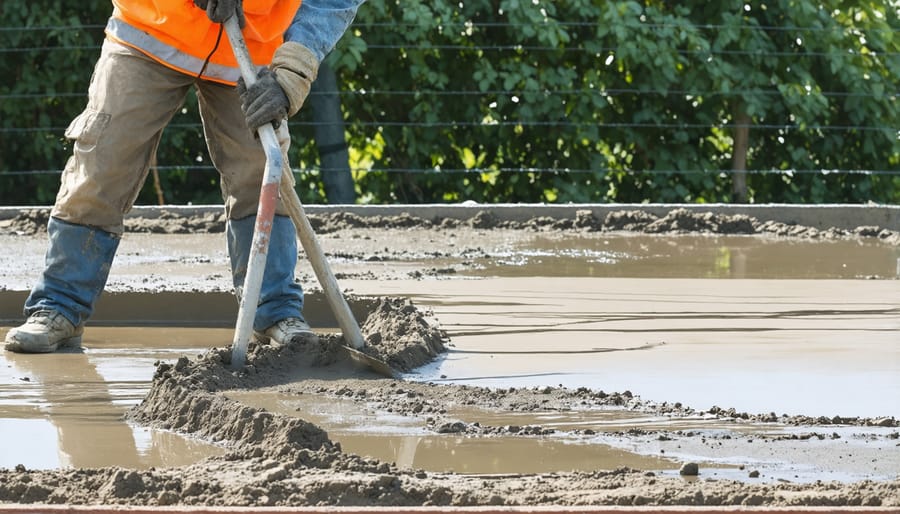
Pouring and Finishing
\n\nOnce your foundation forms are secure and the reinforcement is in place, it’s time for the exciting part – pouring the concrete. Start early in the day when temperatures are mild, and check the weather forecast to avoid rain. Mix the concrete according to the manufacturer’s specifications, aiming for a consistent, workable consistency.\n\nPour the concrete gradually, starting from one corner and working your way across. Use a screed board (a straight piece of lumber) to level the surface by moving it back and forth in a sawing motion. This ensures an even distribution of concrete across the entire foundation.\n\nAfter screeding, wait for the “bleed water” to evaporate from the surface. Then, use a bull float to smooth out any irregularities and create a flat surface. This is also when you should create a slight slope (about 1/8 inch per foot) away from the center to ensure proper drainage.\n\nOnce the concrete begins to set but is still workable, use an edging tool along the perimeter to create smooth, rounded edges. This prevents chipping and creates a professional finish. Finally, use a concrete broom to create light texture marks across the surface, which will provide better traction when the foundation is complete.\n\nAllow the concrete to cure for at least 24-48 hours before removing the forms, and keep the surface moist during this time by misting it with water or covering it with plastic sheeting. This promotes proper curing and prevents cracking.\n\n
 \n
\n\n\n\n
Maintenance and Care Tips
\n\nRegular maintenance of your storage shed’s concrete foundation is crucial for ensuring its longevity and structural integrity. Start by inspecting the foundation every spring and fall for any cracks, chips, or signs of settling. Small cracks should be filled promptly with concrete crack filler to prevent water penetration and further damage.\n\nKeep the foundation clean by sweeping debris regularly and washing it annually with a mild detergent solution. Avoid using harsh chemicals or pressure washers, as these can damage the concrete surface. Apply a concrete sealer every 2-3 years to protect against moisture and freeze-thaw cycles.\n\nEnsure proper drainage around your foundation by maintaining a slight slope away from the shed. Clean your gutters regularly and extend downspouts at least 3 feet from the foundation to prevent water pooling. In winter, avoid using salt-based ice melters near the foundation, as they can cause deterioration.\n\nWatch for signs of potential problems, such as uneven doors, gaps between the foundation and shed walls, or water accumulation. Address these issues promptly to prevent more serious damage. Consider installing moisture barriers around the foundation perimeter if you notice persistent dampness.\n\nFor regions with freeze-thaw cycles, inspect the foundation more frequently during winter months. If you notice significant damage or settling, consult a professional for assessment and repairs.\n\n\nBuilding a concrete foundation for your storage shed is more than just a construction project – it’s an investment in durability and sustainability. By following proper planning procedures, using quality materials, and implementing correct construction techniques, you’ve created a solid base that will serve you for decades to come. Remember to regularly inspect your foundation for any signs of wear or damage, and address issues promptly to maintain its integrity.\n\nConsider incorporating eco-friendly practices in your foundation work, such as using recycled concrete aggregate or locally sourced materials when possible. These sustainable choices not only benefit the environment but can also reduce your project costs. For those in frost-prone areas, ensure your foundation extends below the frost line and includes proper drainage systems to prevent future issues.\n\nAs you complete your storage shed project, take pride in knowing you’ve created a structure that combines functionality with environmental responsibility. Your careful attention to foundation details will pay dividends through enhanced stability, improved longevity, and increased property value. By choosing sustainable construction methods, you’re contributing to both your property’s future and environmental conservation.